Esri Technical Support Blog - Page 2

cancel
Showing results for 
Show  only  | Search instead for 
Did you mean: 

Latest Activity

(383 Posts)
by Anonymous User
Not applicable

Welcome to part two! In our last blog post, we looked at how to set up a proxy to work with a JavaScript application. Today, we’ll be taking a look at the workflow to set up a proxy with Web AppBuilder for ArcGIS.

Please note: This blog assumes you have already downloaded, hosted, and properly configured a proxy. Unsure if you’ve done this? No worries; just follow the instructions HERE .


Just to recap, here are some reasons to set up a proxy with a Web AppBuilder application.
  • Access secured services with token-based authentication
  • Going across domains for your resources
  • Request exceeds 2,048 characters
  • O-Auth 2.0 app logins used
  • Enables logging
  • Both resource and referer based rate limiting

To make sure we’re all on the same page, let’s clear the murky water. A marvelous application has been created inside the Developer Edition of Web AppBuilder. Go ahead and double check to make sure that the application has been downloaded and deployed on a web server.

Two things are secured:
  1. An ArcGIS Online web map shared with the organization
  2. An ArcGIS for Server map service secured using ArcGIS Server built-in with ArcGIS tokens

In this example, we’ll have two challenges when we run the application: one, authenticating the secured web map and two, securing the ArcGIS for Server map service.

When we open the developer tools and take a look at the Network tab, we can see that the response returns a 403 error when accessing the ArcGIS Online web map. This is because by default, an anonymous user doesn’t have permission to access this resource.
networkTabChallengeWebMap-1024x667.png

challenge for securing a web map


For the second challenge, we see that in the Network tab, the application fails to load the service, returning a 499 token required error. This tells us that to access the content, we need to pass a token.
challengeForSecuredService-1024x724.png

challenge for securing an ArcGIS for Server map service


Alright, now we're ready to dive in!

1. In Windows Explorer, open the application's "config.json" file. configJSONFile-1024x602.png

2. At the very bottom of the file, there is a cozy spot to add the proxy rule to the application. useProxy_WebAppBuilder_20151028.jpg

The parameter useProxy (Boolean) is set to true by default. If it is set to false, all requests will not use a proxy.

The url (String) parameter is optional, which is the URL of the proxy location. When a request must use a proxy for a Cross Domain request, or a request is larger than 2048 characters, this proxy will be used.

The alwaysUseProxy (Boolean) is also optional and set to false by default. If set to true, all requests for communication to a REST endpoint will use the proxy set in the url parameter.

The rules (Object[]) parameter is also optional and, if set, defines specific requests that will use the proxy.

3. Since we have two secured resources, we can channel the requests through the proxy to authenticate. To do this, we need to add some proxy rules to the config.json file.
rules1-1024x475.png

proxy rules


The first rule is for the web map shared to the organization, and the second rule is for the secured ArcGIS for Server service.

The urlPrefix property tells the application that when you see this prefix in the request, use the proxy to access the resource. The proxyUrl property tells the application where the proxy is located.

Web maps can be shared with the organization, or not shared at all. By using clientId and clientSecret, we can authenticate the web map or resources inside the web map. If you are working with an ArcGIS Online hosted feature service, you MUST be the owner of that hosted feature service to authenticate using an app login.


4. Set up the serverUrls in the proxy.config file. Since we have two rules, we will also have two serverUrls.

When working with content secured in ArcGIS Online (such as a secured web map or a secured hosted feature service), it is highly recommended to use a client id and client secret to authenticate. We will be using an ArcGIS for Server username and password for services hosted on ArcGIS for Server.


Need help registering an application to get a client id and client secret? There are two ways to do this! The choice is yours, and yours alone...they produce the same results; it’s just your personal preference.
serverURL-1024x450.png

serverUrl in the proxy.config


Beauty! We added the proxy rules in the config.json and configured the serverUrl in the proxy.config. Make sure to save those two files and run the application in a web browser!runApp-1024x540.png

Look at that, you’re a *S*T*A*R* ! Now you’re a pro at setting up a proxy with Web AppBuilder! Have fun creating and designing beautiful apps!starApp1-1024x607.png
Marla K. & Akshay H. - SDK Support Services

more
3 8 28.4K
by Anonymous User
Not applicable

We are proud to announce that Esri Support is now on GitHub!

octoEsri.png

Esri Support and GitHub


We recently released a Developer Support repository on GitHub that contains resources for troubleshooting, as well as proof of concept samples to support developers and those who are interested in development.

Most of us know that Esri is on GitHub. Many of our products live on GitHub, such as Esri Leaflet and the Resource Proxy. For those unacquainted with GitHub, it can be thought of as a social network for programming, which is an entirely open-source and collaborative environment. This is an amazing resource for developers to share applications, APIs, and code snippets. Anyone can download code from a repository by clicking Download ZIP or Clone in Desktop (with GitHub Desktop) in the right-hand pane. The best way to contribute is to set up a free account and install a Git client like GitHub Desktop or SourceTree.
clone_download.png

Clone or Download a Repository


A repository is the most basic element of GitHub. Imagine a repository as a project's folder. A repository contains all of the project files, including documentation, and stores each file's version history. Like "repository", there are many terms you may not be familiar with in the context of GitHub. Here is a great glossary to get you started.

The magic of GitHub is that it is an open environment; it's open to developers, open to moonlighters, and even open to teenagers or adult learners who are looking for a new challenge. To promote this idea, GitHub created a free initiative to help people learn computer science. Esri's Developer Support repository is exactly the same, welcoming any and all to take a look around and download some sample code and apps.

Another magic of GitHub is crowdsourcing; anyone can collaborate on our projects. If you find a problem or would like the repository collaborators to be aware of something, please submit an issue. This is a great way to contribute without even signing up. There are many other Esri GitHub pages that members of Esri Support often reference. The most common resource we use is the Esri Resource Proxy. It is mainly used for accessing secured services, cross-domain resources, and large requests, such as printing. Esri also has repositories that host samples for our APIs and SDKs, even including the new AppStudio.

If you would like to know more about GitHub, best practices, tips and tricks, etc., we have a slew of resources available to help you on your way. Here are links to our repository official Readme and Contributing documentation. Contribute today and make our GitHub repository yours.
Brad S. & Noah S. - SDK Support Services

more
1 0 3,999
JuliaGuard
Esri Contributor

On the weekend of August 1st, the Esri summer interns came together to participate in a hackathon hosted in the Esri café. The weekend was designed to encourage innovation through the rapid creation of applications; the event was extremely successful. One of most interesting aspects of the hackathon was watching the diversity within each team harmonize to improve the overall quality of the final products. Each team included at least one developer to write the code and several other members from Marketing, Support Services, Professional Services, and other Esri departments to help with creative design, the use of GIS, and the delivery of the final presentation.

IMG_20150805_122230-300x300.jpg

Team 'Geothinkers' took 1st place with the "Map My Friend" application


The interns may not have realized it, but they were inspirational to watch; they collaborated beautifully to find a common problem and showcased the functionality of web GIS to solve that problem.

Click the link below to see coverage of the weekend through an Esri Story Map:

Esri Intern Hackathon 2015 Story Map


To assist the interns, four analysts from different teams at Esri Support Services were tasked to answer questions, provide troubleshooting tips, and address software issues encountered along the way. We worked alongside the interns throughout the weekend and were fortunate to collectively experience the challenges and rewards of working with Esri software. We also got a first-hand look at how fearlessly the ‘millennials’ approach the use of GIS and application development. Native-based applications constructed with AppStudio for ArcGIS or the ArcGIS Runtime SDK for Android were the most popular, and the importance of aesthetic design was a highlight.
IMG_20150801_190042-300x300.jpg

Esri Support Analysts onsite as mentors


Overall, the interns reminded us of how exciting it is to stay relevant and of the value of taking a chance with new products or new ways of thinking about our work.

AppStudio for ArcGIS, which was released in Spring 2015, is just one of the Esri products teams implemented while creating their apps. The tool allows you to create cross-platform apps in literally minutes (see this video from the Esri Developer’s Summit) and without any background in coding. You can get started with a pre-created template or create your own application from scratch using QML code. In just one weekend, many of the interns went from working with AppStudio for ArcGIS and QML for the first time to mastering the application interface, terminology, and workflows. It was truly inspirational watching the excitement and dedication the interns had towards learning something totally new and presenting their amazing products.

While AppStudio is currently still in Beta 3, you can already start creating apps to showcase your own ideas, maps, and data. Click this link for documentation to help you get started.

If there is anything this weekend proved, it is that application development is changing rapidly and can be a lot of fun. Esri is working hard to make the process a whole lot easier with the release of AppStudio for ArcGIS. Like the interns, if you take a bit of time to learn something new, you too can produce some amazing results. Just take a look at the apps the interns created in under 12 hours!

And, if you need help with AppStudio for ArcGIS or any other Esri products, contact Esri Support Services through a call, chat, or email. We are all very excited about this new product and can't wait to help you get started creating exciting and beautiful new apps!Resources:

Contact Esri Technical Support, or learn more about the Esri Internship Program.
Julia G. - Server Support AnalystSupriya K. - Geodata Support Analyst

more
0 0 952
ArtemisFili
Esri Contributor

ArcGIS Runtime SDK for WPF version 10.2.5 is significant in that it is the final release of this product. While technical support will be available through July 1, 2016, maintenance of this product has been discontinued. Customers who develop with this product should begin exploring solutions that are based on ArcGIS Runtime SDK for .NET.

More information on the ArcGIS Runtime SDK for WPF lifecycle can be found here.

The Transition to ArcGIS Runtime SDK for .NET

Two years ago, we announced the creation of a new, high-performance ArcGIS Runtime SDK for .NET to support offline workflows, sync-enabled feature services, shapefiles, client-side labeling, and much more. The SDK includes three APIs that support building ArcGIS Runtime apps for Windows Desktop (WPF), Store, and Phone. The APIs share a common design and structure, which encourages sharing implementation logic across multiple Windows platforms. To prepare WPF developers for the transition from the Runtime SDK for WPF to the Runtime SDK for .NET, we published a blog post and shared a technical session on the topic. We encourage you to utilize this information today and, if necessary, contact our Support team to answer any questions as the ArcGIS Runtime SDK for WPF product moves from mature support to the retired phase.- Esri Support Services

more
0 0 514
by Anonymous User
Not applicable

A proxy page stands between a server and an application. By using a proxy, you allow an application to authenticate on your behalf, bypassing a challenge and accessing secured services inside of an application. While the token is hidden, an application can access secured services with token-based authentication; a proxy handles massive post requests over 2,048 characters. Additionally, you can use a proxy when a resource and an application are on separate domains, as well as when cross-origin resource sharing (CORS) support is unavailable.

Today, we'll walk through the steps of downloading, setting up, and hosting a proxy page on an IIS7 server. For a programming language, we use Esri's JavaScript API. In addition to setting up the proxy page, we will add a proxy rule to the Directions widget sample.

To download the Directions widget sample, click here.

Our journey begins at the glorious GitHub site.

Note: The proxy page must be located on the same server as your JavaScript application.

  1. Navigate to https://github.com/Esri/resource-proxy/releases to obtain the most recent release of the proxy.
  2. Click 'Source code(zip)' to download the .zip file to your local drive.
    DownloadProxy.jpg

    Download a proxy from GitHub.

  3. Extract the files to your server (in this case, IIS Server), and navigate to the resource proxy folder, 'C:\\inetpub\wwwroot\resource-proxy-master', where you extracted the files. There are three sub-folders inside, each containing a proxy for the respective server type:
  • DotNet - Internet Information Services (IIS) server
  • Java - Apache Tomcat server
  • PHP - Apache server
3folders.png
                              Folders under resource-proxy-master
To view additional information within each folder located in the README.md, open the file with Notepad++ or a preferred integrated development environment (IDE).
  1. Depending on the server, copy one of the three folders. In this example, we use an IIS server. Copy the DotNet folder, and place it in your wwwroot folder.
  2. Click Start. In the ‘search for programs and files’ box, type IIS, and open the IIS Manager.
  3. Expand the server name, the Sites folder, and Default Web Site.
    IIS.png

    Internet Information Services (IIS) Manager

  4. Right-click the DotNet folder in the directory, and select Convert to Application.
    convert2APP.png

    Convert proxy to an application

  5. Ensure the application pool is 4.0 or greater. In this example, we use ASP.NET v4.0. Ensure the folder icon is a globe.addApp.png
  6. In Windows Explorer, open the DotNet folder, and right-click proxy.config. Open the file in Notepad++ or a preferred IDE.
  7. Inside the proxy.config file, you see the following in XML format:
    proxyConfig.png

    proxy configuration file


    We recommend keeping the global mustMatch="true". When this is true, all requests made to the proxy can only go through specified serverUrls.

    For testing purposes, you can change the global mustMatch="false"; this allows any proxy requests to pass through.
  8. Since the direction's sample uses http://route.arcgis.com and http://traffic.arcgis.com, we add two <serverUrl> tags.

Note: When using ArcGIS Online services the recommended workflow is to use a client id and client secret. The client id and client secret are obtained from developers.arcgis.com. If secured services from ArcGIS for Server used, then we would input a username and password. For this example, we use services from ArcGIS Online serverUrls.
clientID.png

Input client id and secret inside the proxy.

  1. The following steps demonstrate how to configure the proxy in your JavaScript application. There are a couple of ways to configure the proxy inside of a JavaScript application. For this particular example, we use the proxy rule.
  • In the JavaScript application, add two proxy rules:
    esri.addProxyRule({urlPrefix: "http://route.arcgis.com", proxyUrl:"http://<yourServer>/<pathToProxy>/proxy.ashx" });

    esri.addProxyRule({   urlPrefix: "http://traffic.arcgis.com", proxyUrl: "http:// <yourServer>/<pathToProxy>/proxy.ashx" });
  • As another possibility, add the "esri/urlUtils" module in the require statement, and add the following rule:                                                                                                           urlUtils.addProxyRule(urlPrefix: "route.arcgis.com", proxyUrl: "http://<yourServer>/<pathToProxy>/proxy.ashx" });urlUtils.addProxyRule({urlPrefix: "traffic.arcgis.com", proxyUrl: "http://<yourServer>/<pathToProxy>/proxy.ashx"});  
  • Here is another way to configure the proxy.
    esriConfig.defaults.io.proxyUrl = "<url_to_proxy>"
    esriConfig.defaults.io.alwaysUseProxy = false; The proxyUrl is the path to your proxy page hosted on IIS.
  1. Run the hosted application, and open the Developer tools.
  2. Type in an origin and destination. Our journey ends with step by step directions accompanied by a map visual. 
    MapDirections.jpg

    Get Directions


Happy travels!
Marla K. and Akshay H. - SDK Support Analysts

more
4 1 20.5K
YueWu1
by Esri Regular Contributor
Esri Regular Contributor

Are you tired of implementing and managing different third-party libraries when creating your own applications? This blog shows you how to implement CocoaPods with Xcode 6.1 and use CocoaPods to download ArcGIS Runtime SDK for iOS.

CocoaPods is the dependency manager for Cocoa projects. CocoaPods has thousands of libraries and can help you elegantly scale your projects. As we all know, configuring OSX and iOS projects can be a challenging process. With CocoaPods, you can easily organize dependencies (a.k.a. pods) for the various third-party libraries used in your projects. For more information about installing CocoaPods, use this Getting Started guide as a reference. First, let’s create a new project and add a new file into your project by using the following steps. Right-click the project name, and click New File.

Select the Empty template file, and name the file "Podfile". Note: We need a file named “Podfile” because it is a specification that describes the dependencies of the targets of one or more Xcode projects. “Podfile” always creates an implicit target, which is named by default, and links to the first target of the user's project. Tip: CocoaPods provides a pod init command to create a "Podfile" with smart defaults, which you can run in a terminal as an alternative. Add the lines below into the “Podfile”, and save the file.

source 'https://github.com/CocoaPods/Specs.git' platform :ios, '8.1'  pod 'ArcGIS-Runtime-SDK-iOS', '10.2.4'

For more information about how to write a “Podfile”, please use the information listed here. After creating the "Podfile", open 'terminal.app' on the OSX machine. Navigate to the project's root folder by using the syntax below.

cd /Users/yourUsername/yourProjectFolder/

Note: As an alternative to the step above, you may also directly drag your project's main folder to the terminal. It will automatically generate the path of the folder; then, under your project folder, use the following command.

$pod setup

A successful installation displays a message similar to the screenshot below.

After the setup, we need to install the dependencies in your project. This downloads the ArcGIS framework to your machine and moves the framework into your project's Pod directory. This installation also makes the necessary changes to your project's build settings to correctly reference the ArcGIS framework.

$pod install

We can now go back to the project folder, but open the Xcode workspace instead of the project file when building your project.
The last step is to open the project workspace (*.xcworkspace file) and add the import statement '#import "<ArcGIS/ArcGIS.h>" to any Objective-C header (.h) or implementation (.m) file where you want to use the API.    
In conclusion, remember that the advantage of using CocoaPods is that you can manage dependencies easily. As a result of implementing CocoaPods, you can add additional libraries by adding other pods into the “Podfile” and run the pod install command to commit your changes to the “Podfile”.
Nathan W. & Rachel G. - SDK Support Analysts

more
0 0 1,122
by Anonymous User
Not applicable

ArcGIS Runtime SDK for Android and for iOS allows developers to consume different kinds of awesome services from ArcGIS for Server. However, when debugging a mobile application, sometimes it is difficult to determine if the issue comes from the service or from the application. Setting up the server and making it send an HTTP response for a test can be a lot of work. But what if we can stop time and make a “fake” response?

In this blog, I’ll show how to set a breakpoint and change the HTTP response while debugging a mobile application.

First, let’s get your mobile device connected and set Fiddler as a proxy. Click here to download Fiddler. To set up an Android device with Fiddler, click here for steps on how to configure Fiddler for Android. For an Apple device, click here.

Second, we need to enable the breakpoints in Fiddler. There are two ways of doing it:

  1. Navigate to Rules > Automatic Breakpoints > After Response. It will stop at any response.
  2. In the QuickExec box (the black box at the bottom), type "bpafter yourpage.svc". Fiddler will now stop at a breakpoint before all requests to any URL containing "yourpage.svc". Type "bpafter" with no parameters to clear the breakpoint.

Next, let’s run the application. It stops in Fiddler and shows:blog11.png

Let’s look at the response.

If you don’t want to change the response, click Run to Completion. It goes to the next breakpoint or runs to the end.

What’s more, if you want to change the HTTP response, change it in 'Raw'. You can modify the content in the text box and click Run to Completion; the device gets the modified response.blog2.png

Now, you can look at your device and see the modifications!

Enjoy coding!
Rachel G. - SDK Support Analyst

more
1 1 924
Noah-Sager
Esri Regular Contributor

At Esri Technical Support, we enjoy working with JavaScript to create powerful web applications. I’d like to take this opportunity to share different ways of listening for events in our JavaScript API with On Style Events, which is the recommended pattern for event handling. As a previous blog focused on different patterns of event handling, this blog will stick with the best practices, tips, and tricks.

Note: Click images to enlarge.

The modular On Style Events (which means something like à la mode in French) are a bit different than Connect Style Events. Why does this matter? Because On Style Events are the recommended way to listen for and handle events with the ArcGIS JavaScript API. See the screenshot below for snippets of event styles.

on-style-event.png

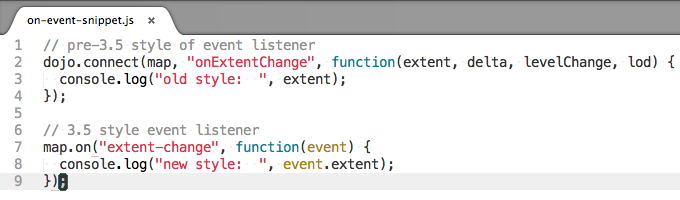
Snippets of Event Styles


Since version 3.5 of the JavaScript API, these event handling functions receive a single event object from which all the event object properties can be accessed. Typically, this object is called event or evt in our samples. Instead of juggling multiple objects like with Connect Style, we can now dig into one object to access the information we need. There are two ways to use the On Style Events - with and without Dojo. The syntax for these event styles can be found in the JavaScript API reference. Let’s look at a couple code snippets to compare On Style Events with and without Dojo:on = with Dojo (on is an alias for the dojo/on module)
on(map, ’zoom-end’, function(evt) {
     console.log(evt.extent.xmin);
     console.log(evt.zoomFactor);
     console.log(evt.anchor.x);
     console.log(evt.level);
});
map.on = without Dojo (map.on means we can do this event ourselves)
map.on(’zoom-end’, function(evt) {
     console.log(evt.extent.xmin);
     console.log(evt.zoomFactor);
     console.log(evt.anchor.x);
     console.log(evt.level);
});

By examining the above code snippets, we can see that the main difference when using On Style Events is in what the event listeners return. We can also see similarities among the new styles of event handlers, but there are important differences worth exploring.

Not bad, right?

For more better understanding, here's a real-world example. You can follow along at home with the JavaScript Events application hosted on jsfiddle.net. Use the following instructions to follow along (I used Google Chrome for this example):

1. Open the application in your browser.

2. Press F12.

3. Navigate to the Console Tab, if not open already.

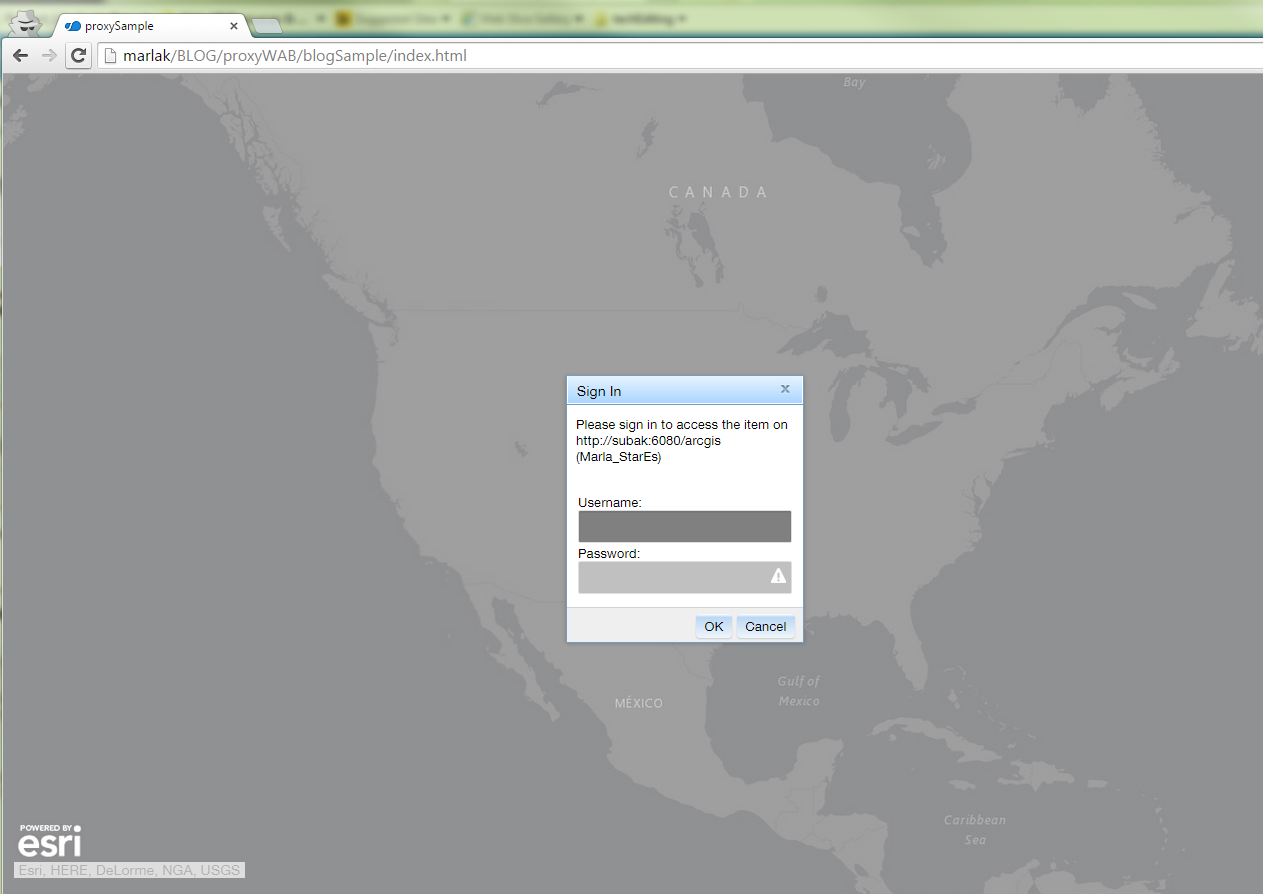
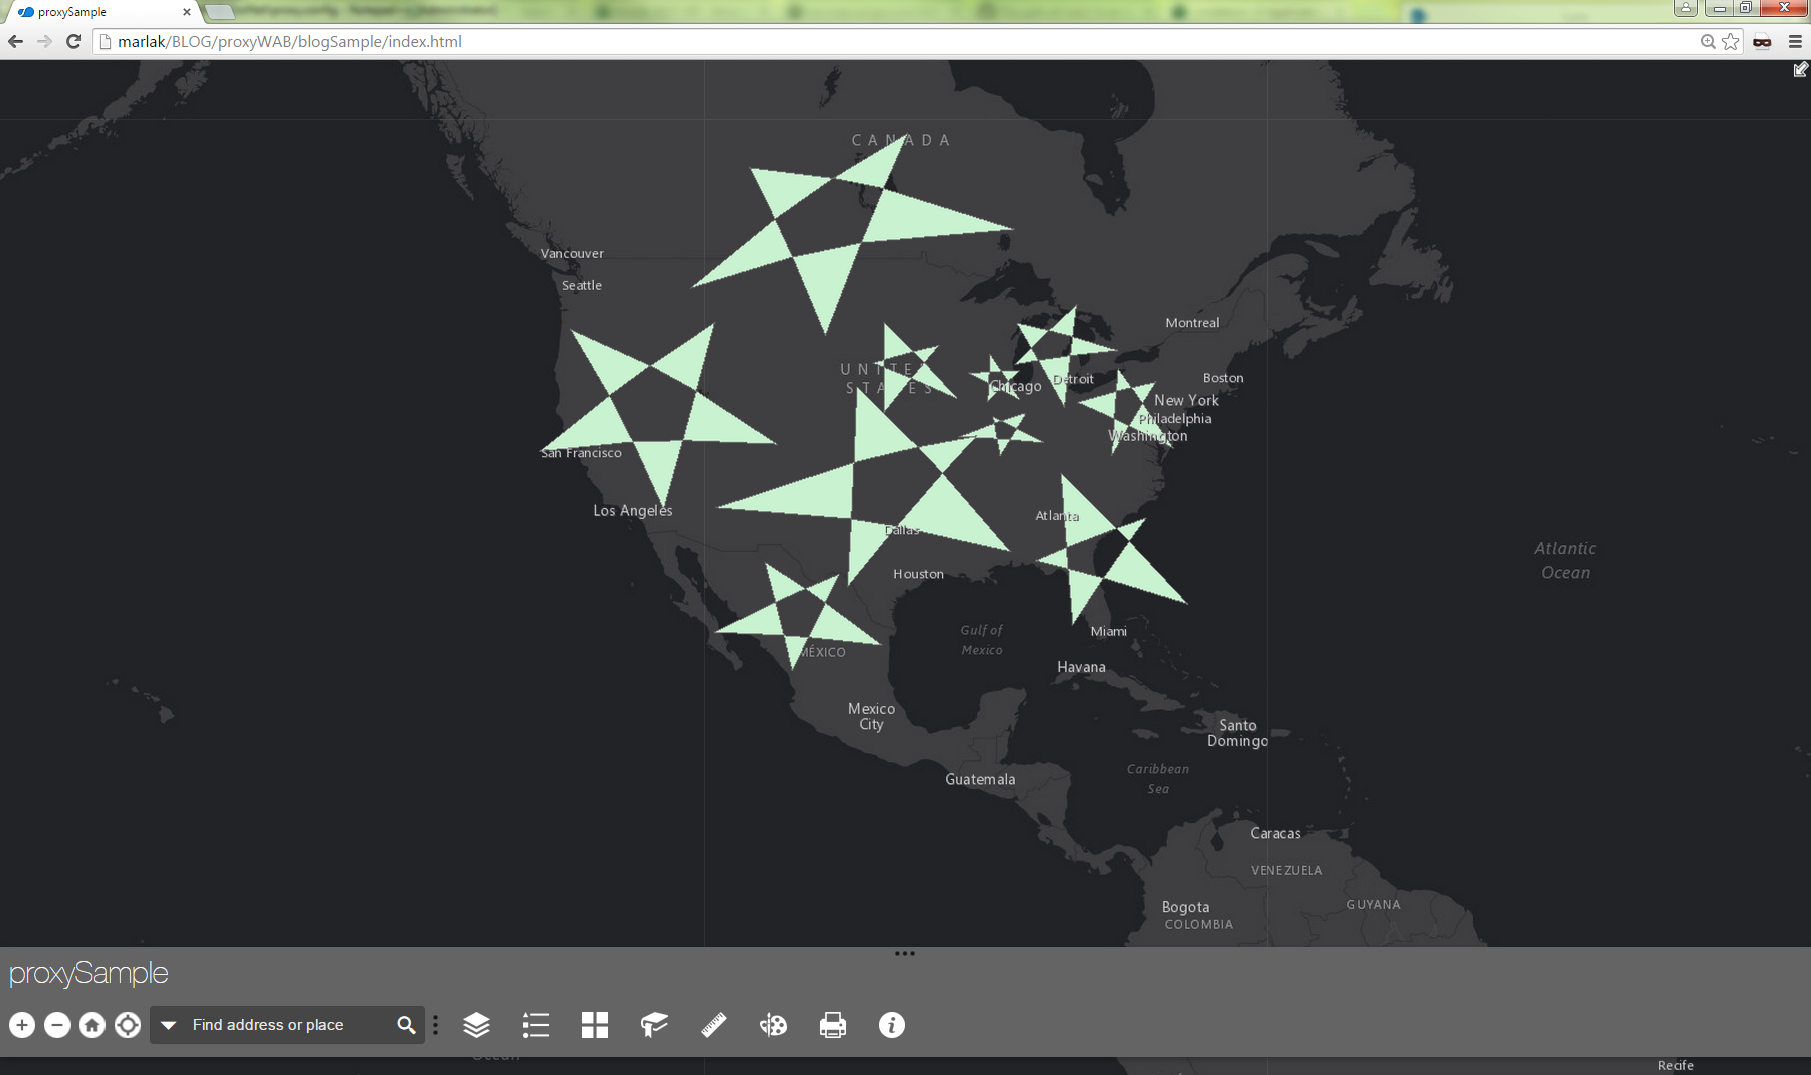
The following screen displays:
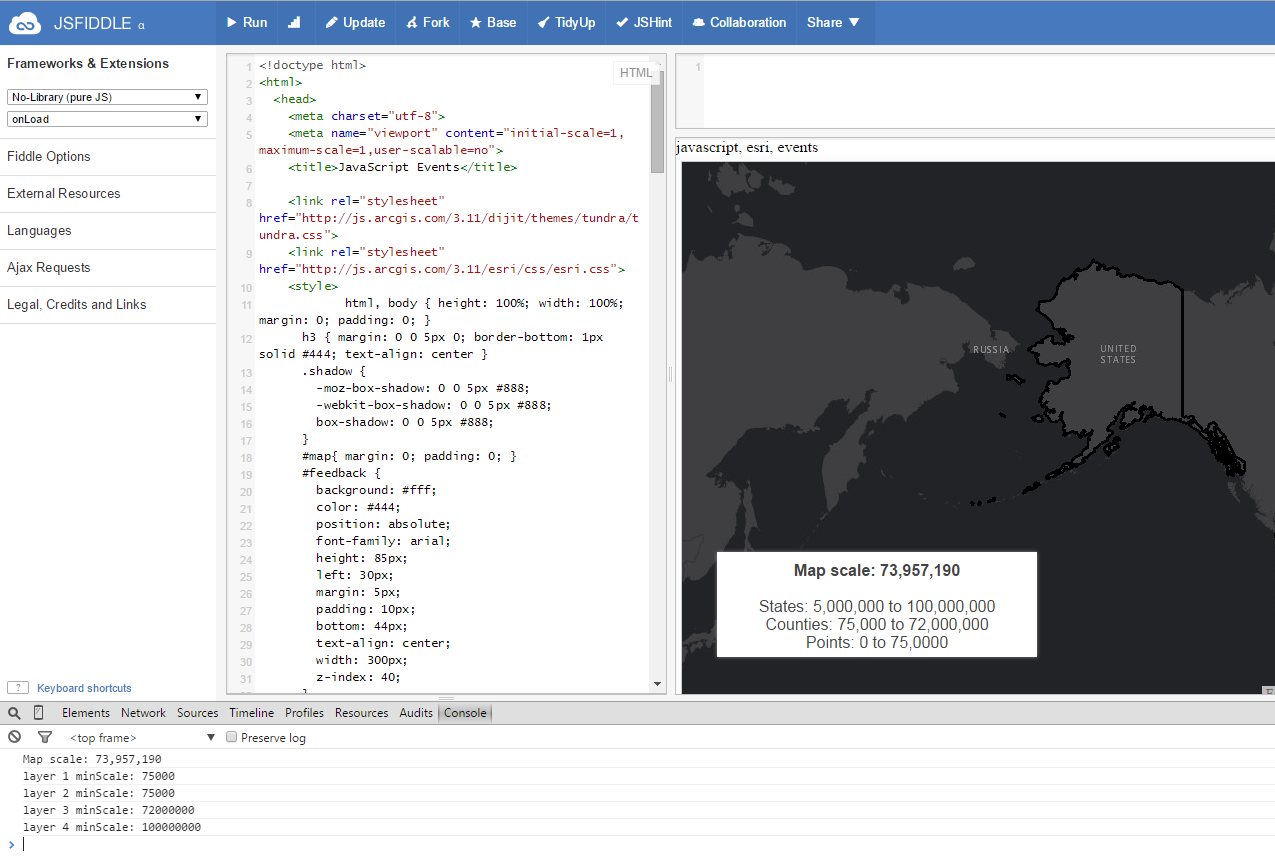
JSFiddle.png

JSFiddle


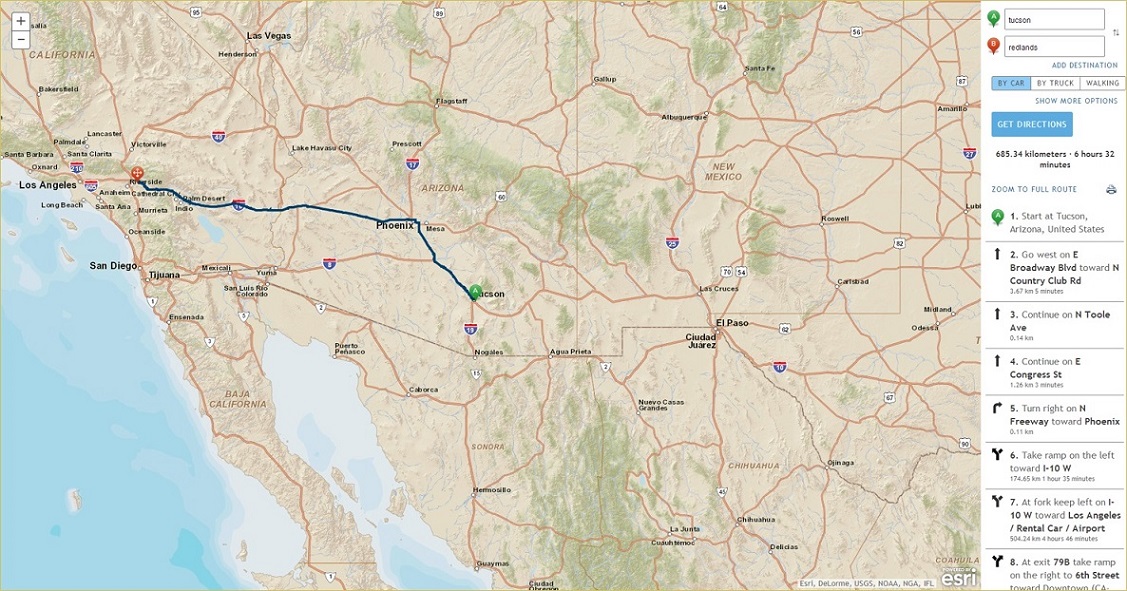
This application shows the functionality of dynamic layers and our elegant dark gray basemap tiles (you can also try the application live here: JavaScript Events application on GitHub). As you zoom in and out of the map, different layers become visible as indicated in the lower-left information box. There are six event listeners in this application. Let’s go through them one by one and see what they do.1) map.on("load", function()

When the map first loads, it immediately runs the unnamed function. This listener will only be called once while the application is running, and the listener does not take any arguments in the function. The purpose is to define the four other event listeners and to call the updateScale() function. This allows the scale to be defined in the information box without panning or zooming.2) map.on("zoom-end", updateScale)

After zooming in or out of a map, this event listener will call the updateScale() function. This function updates the map scale in the information box and in the Console tab. This listener does not take any arguments in the function, either.

See below for the event handler:
function updateScale() {
     dojo.byId("map-scale").innerHTML = 
       dojo.number.format(parseInt(map.getScale()));
     console.log("Map scale: " 
       + dojo.number.format(parseInt(map.getScale())));
}
3) map.on("pan-end", updateExtent)

When a user pans around the map, this event listener will call the updateExtent() function, which will update the map extent in the Console tab. This listener takes the generic evt argument in the function.Pro tip: There are many other attributes that you can dig out of the evt object. To see what is available, use the following steps (I used Google Chrome for this example):

1. Press F12 to open the developer's tools.

2. Navigate to the Source tab.

3. Find the section of code with this event handler (around line 170).

4. To set a breakpoint, click the line number to the left of the code.

See below for a screenshot of this process.
breakpointed.png

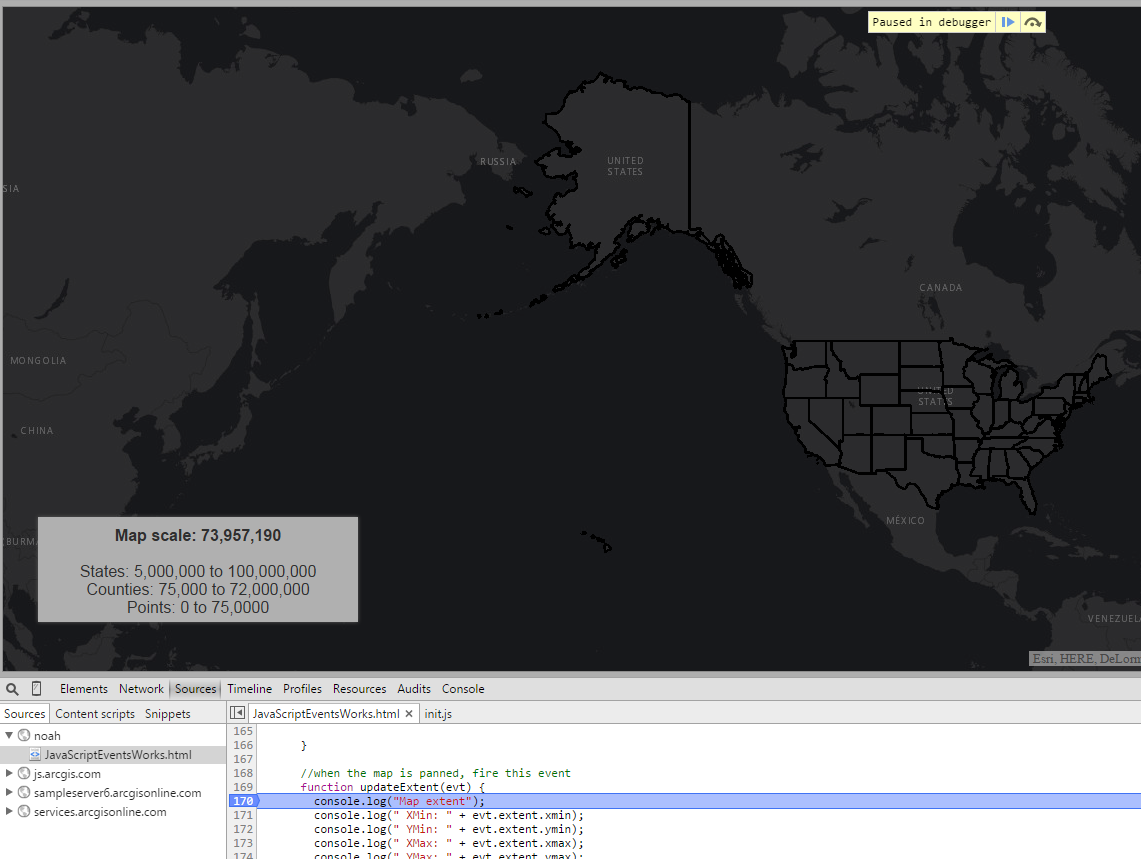
Breakpoint in Sources tab (Google Chrome)


5. Refresh the application, and when the application pauses on the breakpoint, switch to the Console tab and type “evt” into the prompt.

You can now expand the evt object to see what’s there and experiment with how to call it. View the screenshot below to see how the evt appears in the Google Chrome Console tab.
console_evt.png

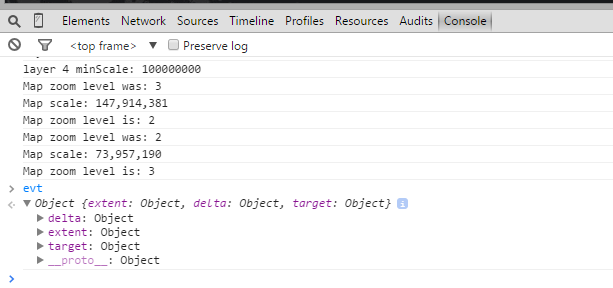
evt in Console tab with Google Chrome


See below for the event handler:
 function updateExtent(evt) {
     console.log("Map extent");
     console.log(" XMin: " + evt.extent.xmin);
     console.log(" YMin: " + evt.extent.ymin);
     console.log(" XMax: " + evt.extent.xmax);
     console.log(" YMax: " + evt.extent.ymax);
}
4) map.on("zoom-start", updateOldLevel)

When a user zooms in or out of the map, as soon as the zooming action starts, this event listener will call the updateOldLevel() function. This updates the zoom level of the map in the Console tab. Again, the listener takes the generic evt argument in the function.

Please see below for the event handler:
function updateOldLevel(evt) {
     console.log("Map zoom level was: " + evt.level);
}
5) map.on("zoom-end", updateNewLevel)

When a user zooms in or out of the map, as soon as the zooming action stops, this event listener will call the updateNewLevel() function. This updates the zoom level of the map in the Console tab. Notice that it again takes the generic evt argument in the function.

Please see below for the event handler:
function updateNewLevel(evt) {
     console.log("Map zoom level is: " + evt.level);
}
6) usaLayer.on("load", load)

When the application first loads the usaLayer map service, this event listener calls the load() function, which displays the minScale values for each layer in the Console tab. If you open the map service from REST (http://sampleserver6.arcgisonline.com/arcgis/rest/services/Census/MapServer) and compare the minScale values for each layer, you see that the dynamicLayerInfo class in the code overrides each layer, which is pretty interesting. Notice that it again takes the generic evt argument in the function.

Please see below for the event handler:
function load (evt) {
     console.log("layer 1 minScale: " 
       + evt.layer.dynamicLayerInfos[0].minScale);
     console.log("layer 2 minScale: " 
       + evt.layer.dynamicLayerInfos[1].minScale);
     console.log("layer 3 minScale: " 
       + evt.layer.dynamicLayerInfos[2].minScale);
     console.log("layer 4 minScale: " 
       + evt.layer.dynamicLayerInfos[3].minScale);
}

For most of you, this is a refresher about working with On Style Events and the JavaScript API. But also for most of you, this will be new and exciting information to take your web apps (and salaries) to the next level. Let’s take a minute to review what we learned here. On Style Events have been around for a while and are slightly different than Connect Style, but are just as easy to use. On Style Events are simple and powerful ways of listening and handling many different event patterns. You can dig into all the arguments in the Console tab by setting a breakpoint and calling the argument object "evt".

Please consider reading our Concepts documentation for more information about working with events in the JavaScript API:https://developers.arcgis.com/javascript/jshelp/inside_events.html

Stay tuned until next time, when we discuss how to make your map "pop" with the new dojo.redecorate method. Happy eventing!
Noah S. - SDK Support Analyst

more
0 0 1,055
GregoryLehner
Esri Contributor

The next release of each ArcGIS API and Viewer (for Flex and Silverlight) will be significant in that they are the last planned releases of two once-popular technologies. While technical support will be available for both APIs and viewers through June of 2016, maintenance of these products will be discontinued. Customers who develop with these products should begin exploring web solutions that are based on JavaScript or HTML5.

More information on the product lifecycle can be found in the following pages:

The Transition to JavaScript

Over the past year, Esri has focused on greatly expanding the capabilities and usability of the ArcGIS API for JavaScript, enabling developers to build powerful and expressive applications with minimal code. In addition, new JavaScript-based applications have been introduced that enable users to quickly create beautiful, responsive web applications without writing a single line of code. These include several new web application templates as well as the Web AppBuilder for ArcGIS, all available with ArcGIS Online and Portal for ArcGIS. Customers that have built applications using the ArcGIS Viewers for Flex and Silverlight can now leverage the Web AppBuilder to create fully-functional GIS apps that can be used on any device.

As the ArcGIS Flex and Silverlight products move from mature support to their end of life phase, our Support teams are available to help customers transition to JavaScript, explore the various apps and tools available for getting started, and answer any questions that may arise.

More on Esri’s Roadmap for Web Developers


- Esri Support Services

more
0 0 3,554
by Anonymous User
Not applicable

Have you ever created a web application with the ArcGIS API for JavaScript? You may have noticed there are a variety of approaches to event-driven programming: the newer On Style events, the legacy Connect Style events, and events that are plugged directly into the body of an HTML page. Unless you are faced with adopting a legacy application that mixes patterns, it is a good idea to implement one event programming style: On Style.

The On Style events follow the Dojo framework's most recent programming pattern, which I recommend to anyone using JavaScript API version 3.6 or higher. Here is a handy place to read more about working with events in the JavaScript API.


To further understand the On Style events, Figure 1 is a full example using the JavaScript API. The code below uses Dojo's dojo/on module, and as you can see, it makes programming with events easier. A developer could simply switch out the "click" for a different event action such as a "dblclick," a mouse selector, or an event from the JavaScript API.Figure 1

<html>
<head>
<title>Events</title>
<script src="http://js.arcgis.com/3.10"></script>
<script>
require(["dojo/on","dojo/domReady!"], function(on){
  var target = dojo.byId("target-id");
  on(target, "click", function(event){
    alert("test event!");
  });
});
</script>
</head>
<body>
<span id="target-id">Click me!</>
<body>
</html>

live version of Figure 1 here


To take it further, let us look at other event patterns so we can begin taking measures to refactor our applications to use On Style events. Doing so will make transitioning to Dojo 2.0 easier and help extend the shelf life of an application.

Figure 2 shows events wired up directly in the body of the HTML page, and Figure 3 shows the onClick event assigned inside the header of the application. Both of these examples are old and are not recommended (see: Why is using onClick() in HTML a bad practice?). Developers using these two patterns may incur browser compatibility issues and challenges when implementing AMD patterns.Figure 2
<html>
<head>
<title>Events</title>
<script type="text/javascript">
function demoClickEvent(evt){
     console.log(evt.id);
     alert('test event!');
}
</script>
</head>
<body>
<span id="target-id" onclick="demoClickEvent(this)">Click me!</span>
</body>
</html>

live version of Figure 2 here

Figure 3
<html>
<head>
<title>Events</title>
<script type="text/javascript">
window.onload=function(){
    var target = document.getElementById("target-id");
    target.addEventListener('click', function(){
        alert('test event!');
    }, false);
};
</script>
</head>
<body>
<span id="target-id">Click me!</span>
</body>
</html>

live version of Figure 3 here


Refactoring the above code with On Style event patterns may look a bit different until you are familiar with the syntax. However, I highly recommend using On Style events as shown in Figure 1.

Now, let us take a quick look at legacy Connect Style events. These are similar to On Style events but were not implemented with Dojo’s AMD pattern for several years. Thus, it is common to see Connect Style event code like Figure 4.Figure 4

[code language="JavaScript"]
var node = dojo.byId("target-id");
var handle = dojo.connect(node, "onclick", myFunction);


Figure 4's approach is also not recommended because Dojo 2.0 will not support the legacy Connect Style of event handling. Even the more modern Connect Style code, which uses the AMD approach, is slated for deprecation. If you want to see what the Connect Style AMD code looks like, review this Dojo Foundation Documentation.

In summary, I highly recommend that developers move to On Style event programming. Reviewing the other event style options in this post will hopefully help developers know what to look for to make upgrading to On Style Events easier.
Doug C. and Noah S. - Support SDK Team

more
0 0 727
39 Subscribers