ArcGIS Maps SDKs Native Blog - Page 18

cancel
Showing results for 
Show  only  | Search instead for 
Did you mean: 

Latest Activity

(237 Posts)
JoeHershman
MVP Alum

We needed a solution to connect to an external high accuracy GPS from an iOS application being developed in Xamarin Forms.  As it was being done through Collector I knew there there had to be a solution out there.  But I was having a hard time figuring out how the devices (non-BLE bluetooth device) connected to iOS.  I finally started to find some information on Stack Overflow that pointed me towards using  EAAccessoryManager.SharedAccessoryManager to get the connected devices.  Some other searching got me to this post How to use external gps location data which went into detail on an iOS specific solution.

In order to do in Forms and then use from a .Net Standard library a little more plumbing is required than the straight iOS solution.  First an interface is needed that will be developed in the main shared assembly.  I kept this is simple, and also thought in terms of a pure iOS implementation and not a pluigin that could be used cross platform

public interface IAccessorySessionController
{
	event EventHandler<NmeaSentenceEventArgs> OnNmeaSentenceReceived;

	IEnumerable<string> AvailableAccessories { get; }
	Task OpenSession(string protocal);
	bool CloseSession();
}‍‍‍‍‍‍‍‍‍‍‍‍‍‍‍‍‍‍‍‍‍‍‍‍‍‍‍‍‍‍‍‍

This interface was then implemented in the iOS project.

The main piece is the OpenSession method.  This is where the one connects to the device and starts getting data.  

public Task OpenSession(string protocal)
{
	try
	{
		EAAccessory connectedAccessory = null;

		/* Get list of ConnectedAccessories
		//These must be defined as UISupportedExternalAccessoryProtocols in Info.plist */
		foreach (var accessory in EAAccessoryManager.SharedAccessoryManager.ConnectedAccessories)
		{
			if (accessory.ProtocolStrings.Contains(protocal))
			{
				connectedAccessory = accessory;
				break;
			}
		}

		if ( connectedAccessory == null ) return Task.FromResult(false);

		connectedAccessory.Disconnected += ConnectedAccessoryOnDisconnected;

		if ( _session != null ) return Task.FromResult(true);

		try
		{
			//protacal here also must be UISupportedExternalAccessoryProtocols
			_session = new EASession(connectedAccessory, protocal);
		}
		catch (Exception e)
		{
			Console.WriteLine(e);
			return Task.FromResult(false);
		}

		//Set delegate for callback
		_session.InputStream.Delegate = this;
		_session.InputStream.Schedule(NSRunLoop.Current, NSRunLoopMode.Default);
		_session.InputStream.Open();  //start receiving data

		//not writing in this case but still best to open
		_session.OutputStream.Delegate = this;
		_session.OutputStream.Schedule(NSRunLoop.Current, NSRunLoopMode.Default);
		_session.OutputStream.Open();

		return Task.FromResult(true);
	}
	catch (Exception)
	{
		return Task.FromResult(false);
	}
}‍‍‍‍‍‍‍‍‍‍‍‍‍‍‍‍‍‍‍‍‍‍‍‍‍‍‍‍‍‍‍‍‍‍‍‍‍‍‍‍‍‍‍‍‍‍‍‍‍‍‍‍‍‍‍‍‍‍‍‍‍‍‍‍‍‍‍‍‍‍‍‍‍‍‍‍‍‍‍‍‍‍‍‍‍‍‍‍‍‍‍‍‍‍‍‍‍‍‍‍‍‍

Not being an iOS developer I didn't really understand the part about needing the protocols in info.plist and spent a good amount of time banging my head on the table as to why I was not seeing the devices I knew were connected

<key>UISupportedExternalAccessoryProtocols</key>
<array>
	<string>com.comany.device</string>
</array>‍‍‍‍‍‍‍‍

Then it's just a matter of handling the callback and parsing the data...

public override void HandleEvent(NSStream theStream, NSStreamEvent streamEvent)
{
	Console.WriteLine("Arrived HandleEvent");
	switch (streamEvent)
	{
		case NSStreamEvent.None:
			Console.WriteLine("StreamEventNone");
			break;
		case NSStreamEvent.HasBytesAvailable:
			Console.WriteLine("StreamEventHasBytesAvailable");
			ReadData();
			break;
		case NSStreamEvent.HasSpaceAvailable:
			Console.WriteLine("StreamEventHasSpaceAvailable");
			// Do write operations to the device here
			break;
		case NSStreamEvent.OpenCompleted:
			Console.WriteLine("StreamEventOpenCompleted");
			break;
		case NSStreamEvent.ErrorOccurred:
			Console.WriteLine("StreamEventErroOccurred");
			break;
		case NSStreamEvent.EndEncountered:
			Console.WriteLine("StreamEventEndEncountered");
			break;
		default:
			Console.WriteLine("Stream present but no event");
			break;

	}
}

private void ReadData()
{
	uint size = 128;
	byte[] bytesReceived = new byte[size];
	_result = string.Empty;

	while ( _session.InputStream.HasBytesAvailable() )
	{
		var bytes = _session.InputStream.Read(bytesReceived, size);

		_result += Encoding.ASCII.GetString(bytesReceived, 0, (int)bytes);
		if ( bytes < 10 ) continue;

		string[] lines = _result.Split(new[] { "\n" }, StringSplitOptions.RemoveEmptyEntries);

		for (var index = 0; index < lines.Length - 1; index++)
		{
			var line = lines[index];

			OnNmeaSentenceReceived(new NmeaSentenceEventArgs(line));
		}

		_result = lines.Last();
	}
}‍‍‍‍‍‍‍‍‍‍‍‍‍‍‍‍‍‍‍‍‍‍‍‍‍‍‍‍‍‍‍‍‍‍‍‍‍‍‍‍‍‍‍‍‍‍‍‍‍‍‍‍‍‍‍‍‍‍‍‍‍‍‍‍‍‍‍‍‍‍‍‍‍‍‍‍‍‍‍‍‍‍‍‍‍‍‍‍‍‍‍‍‍‍‍‍‍‍‍‍‍‍‍‍‍‍‍‍‍‍‍‍‍‍

The NmeaSentenceReceived event is used to forward on the nmea sentence back to the custom LocationDataSource.  Once all that was done it was a almost trivial matter to implement the LocationDataSource in the shared project.

public class ExternalGpsLocationDataSource : LocationDataSource
{
	private MapPoint _mapPoint;
	private double _velocity, _course, _accuracy;

	private readonly IAccessorySessionController _accessorySessionController;

	public ExternalGpsLocationDataSource (IAccessorySessionController accessorySessionController)
	{
		_accessorySessionController = accessorySessionController;
	}

	protected override Task OnStartAsync()
	{
		_accessorySessionController.NmeaSentenceReceived += OnNmeaSentenceReceived;
		return _accessorySessionController.OpenSession("com.company.protocal");
	}

	protected override Task OnStopAsync()
	{
		_accessorySessionController.CloseSession();
		return Task.FromResult(true);
	}

	private void OnNmeaSentenceReceived(object sender, NmeaSentenceEventArgs e)
	{
		var line = e.NmeaSentence;
		try
		{
			line = line.TrimEnd('\n', '\r');

			var message = NmeaMessage.Parse(line);

			ReadLocationAttributesFromMessage(message);
		}
		catch (Exception)
		{
			//
		}

		if (_mapPoint == null || double.IsNaN(_mapPoint.X) || double.IsNaN(_mapPoint.Y))
		{
			UpdateLastKnownLocation();
			return;
		}

		UpdateLocation(new Esri.ArcGISRuntime.Location.Location(_mapPoint, _accuracy, _velocity, _course, false));

	}

	private void ReadLocationAttributesFromMessage(NmeaMessage message)
	{
		switch (message)
		{
			case Gpgga gpgga:
				_mapPoint = new MapPoint(gpgga.Longitude, gpgga.Latitude, SpatialReference.Create(4326));
				break;
			case Gpgsa gpgsa:

				break;
			case Gprmc gprmc:
				_velocity = double.IsNaN(gprmc.Speed) ? 0 : gprmc.Speed * 0.5144; //knots to m\s
				_course = double.IsNaN(gprmc.Course) ? 0 : gprmc.Course;
				_mapPoint = new MapPoint(gprmc.Longitude, gprmc.Latitude, SpatialReference.Create(4326));

				break;
			case Gpgsv gpgsv:
				break;
			case Gpgst gpgst:
				double latError = gpgst.SigmaLatitudeError;
				double lonError = gpgst.SigmaLongitudeError;
                                
				_accuracy = Math.Sqrt(0.5 * (Math.Pow(latError, 2) + Math.Pow(lonError, 2)));

				break;
		}
	}

	private void UpdateLastKnownLocation()
	{
		//If latest point not valid send previous point as LastKnown
		if (_mapPoint == null)
		{
			_mapPoint = new MapPoint(double.NaN, double.NaN, SpatialReferences.Wgs84);
		}

		UpdateLocation(new Esri.ArcGISRuntime.Location.Location(_mapPoint, _accuracy, _velocity, _course, true));
	}
}‍‍‍‍‍‍‍‍‍‍‍‍‍‍‍‍‍‍‍‍‍‍‍‍‍‍‍‍‍‍‍‍‍‍‍‍‍‍‍‍‍‍‍‍‍‍‍‍‍‍‍‍‍‍‍‍‍‍‍‍‍‍‍‍‍‍‍‍‍‍‍‍‍‍‍‍‍‍‍‍‍‍‍‍‍‍‍‍‍‍‍‍‍‍‍‍‍‍‍‍‍‍‍‍‍‍‍‍‍‍‍‍‍‍‍‍‍‍‍‍‍‍‍‍‍‍‍‍‍‍‍‍‍‍‍‍‍‍‍‍‍‍‍‍‍‍‍‍‍‍‍‍‍‍‍‍‍‍‍‍‍‍‍‍‍‍‍‍‍‍‍‍‍‍‍‍‍‍‍‍‍‍‍‍‍‍‍‍‍‍‍‍‍‍‍‍‍‍‍‍‍‍‍‍‍‍‍‍‍‍‍‍‍‍‍‍‍‍‍‍‍‍‍‍‍‍‍‍‍‍‍‍‍‍‍‍‍‍‍‍‍‍‍‍‍‍‍‍‍‍‍‍‍‍‍‍‍‍‍‍‍‍‍‍‍‍‍

I use a NMEA parser that Morten Nielsen‌ wrote so no need to spend any time on the parsing GitHub - dotMorten/NmeaParser: Library for handling NMEA message in Windows Desktop, Store, Phone, U... 

Beyond that it is just replacing the DataSource property on the MapView:LocationDisplay to the custom LocationDataSource and setting Enabled = true;

Cheers!

more
2 0 1,518
Nicholas-Furness
Esri Regular Contributor

The latest release of the Runtime SDK for iOS is here (see the release notes, and the general announcement over on the ArcGIS Blog), and it introduces some significant new functionality that will be built upon over the next few releases.

Some key highlights include Utility Network and the Navigation API, both of which merely scratch the surface of what we have in store. See the announcement for more details.

Some highlights from the iOS perspective:

  • You should now migrate to using the Dynamic Framework if you had not already. We had previously deprecated the Static Framework and it is now not even included in the SDK installer. This is Apple's preferred approach and simplifies the integration of the Runtime into your projects. See the release notes for how to migrate over.
  • We've prepared the SDK for iOS 13's Dark Mode by ensuring that UI elements like pop-ups and the attribution bar adapt correctly.
  • We've improved 3D Scene interaction and included some configuration options.

The SDK also adds the foundations for leveraging ARKit experiences into your mobile location/GIS apps. We will shortly be releasing open source components as part of the Toolkit that build upon these foundations to make great AR integration into your apps even easier.

So, download Update 6, dive in, and let us know what you're building.

more
1 6 2,738
MichaelBranscomb
Esri Frequent Contributor

The Runtime .NET team is excited to announce the release of ArcGIS Runtime SDK for .NET 100.6. This release includes significant new features, performance improvements, and bug fixes you can read about here… and for our .NET community we have some even more exciting news: this release includes a preview of our support for WPF for .NET Core 3.0.


WPF for .NET Core marks a significant step for the popular WPF UI framework for desktop apps by liberating it from the system-wide .NET Framework on which it currently depends and enabling you to:

  • Build a completely self-contained executable with your application and all dependencies
  • Update your target.NET version without imposing any system-wide .NET updates on your users
  • Benefit from future enhancements and performance improvements beyond .NET Framework 4.8

To try the Preview of Support for WPF for .NET Core:

Note:- To use the .NET Core SDK 3.0 Preview with Visual Studio 2019 you must be running 16.2 or later and enable the preview through Tools > Options > Preview Features.

Starting a new app

To try a new project from scratch using the .NET Core project templates, choose the `WPF App (.NET Core)` template from the new project dialog (tip: use the search or filters to narrow the list). In the Solution Explorer window for your new project instead of `References` you’ll now see `Dependencies` > `Frameworks` under which .NET Core is listed and if you open the project properties dialog you’ll see the Target framework is `.NET Core 3.0`. To add a reference to ArcGIS Runtime, right click Dependencies and choose `Manage NuGet Packages...` then browse for `Esri.ArcGISRuntime.WPF` from NuGet.org (or your local Esri package source) and install version 100.6.

Upgrading an existing app

To try upgrading one of your existing apps we recommend following this Microsoft docs article How to: Port a WPF desktop app to .NET Core which provides detailed instructions on porting your WPF desktop apps.

To see an example of a WPF desktop app ported to .NET Core 3.0 see this PR for our public samples.

Note:- The Preview of ArcGIS Runtime SDK for .NET with support for WPF for .NET Core 3.0 cannot be used in production (which differs from the status of .NET Core 3.0 Preview 8). When building, you’ll see a friendly reminder in your Error List “.NET Core support for ArcGIS Runtime is in Preview and not fully supported”.

When will the preview become available for use in production? That depends on the progress of .NET Core SDK v3.0 and v3.1 over the next few months but we hope it could be as soon as Q4 2019 or Q1-Q2 2020.


We’re truly excited about the direction WPF is taking with the support for.NET Core and hope one day it may even allow us to deprecate support for .NET Framework…

We look forward to any feedback you have on your experience using this preview.

Thanks

The Runtime .NET Team

more
0 0 2,389
MichaelBranscomb
Esri Frequent Contributor

ArcGIS Runtime Local Server SDK Microsoft (R) Windows (R) June 2019 Security Update Compatibility Pa...

Summary


This patch resolves an issue with Local Feature Services where the returned DrawingInfo JSON is missing markerGraphics geometry information when the ServiceFeatureTable.UseAdvancedSymbology property is set to true and the local machine has the Microsoft Windows June 2019 or later security updates installed.

Description


Esri® announces the ArcGIS Runtime Local Server SDK Microsoft® Windows® June 2019 Security Update Compatibility Patch. The June 2019 security updates from Microsoft added additional checks for records included in a metafile. Publishing services from ArcGIS leverages metafiles to transport character markers to the server. The conversion of these markers uses a Microsoft GDI function which was updated with the June 2019 updates - this update caused these metafiles to fail to convert. This fix resolves that issue by imposing stricter standards on creation of these metafiles inside of ArcGIS Runtime Local Server SDK. This patch deals specifically with the issues listed below under Issues Addressed with this patch.


Issues Addressed with this patch

BUG-000123420 - Local Feature Service DrawingInfo is missing markerGraphics geometry information when the ServiceFeatureTable.UseAdvancedSymbology property is set to true and the local machine has the Microsoft Windows June 2019 or later security updates installed. This causes point data to fail to render in ArcGIS Runtime. Other service operations may return "Error performing Advanced Symbols operation".

Installing this patch on Windows

ArcGIS Runtime Local Server SDK Microsoft (R) Windows (R) June 2019 Security Update Compatibility Pa...

more
0 0 955
MichaelBranscomb
Esri Frequent Contributor

ArcGIS (Desktop, Engine, Server) Microsoft (R) Windows (R) June 2019 Security Update Compatibility P... 

Summary

This patch resolves an issue with publishing services containing character marker symbology from ArcMap to ArcGIS Server, ArcGIS Enterprise or ArcGIS Online. This issue began with Microsoft's June 2019 security updates. The patch should be applied to ArcGIS Desktop, ArcGIS Engine and ArcGIS Server machines.

Description

Esri® announces the ArcGIS (Desktop, Engine, Server) Microsoft® Windows® June 2019 Security Update Compatibility Patch. The June 2019 security updates from Microsoft added additional checks for records included in EMF files. Publishing services from ArcMap leverages EMF files to transport character markers when publishing services to ArcGIS Server and ArcGIS Online. The conversion of these markers uses a Microsoft GDI function which was updated with the June 2019 security updates which caused these metafiles to fail to convert. This patch resolves the issue by imposing stricter standards on creation of these metafiles inside of ArcGIS Desktop. Symptoms of this issue include the inability for ArcGIS Runtime-based applications to show advanced symbols. The patch must be installed on client machines running ArcGIS Engine or ArcGIS Desktop as well as server machines running ArcGIS Server. This patch deals specifically with the issues listed below under Issues Addressed with this patch.

Issues addressed with this patch

  • BUG-000123406 - Feature Service drawingInfo is missing markerGraphics information when the returnAdvancedSymbols property is true and the hosting machine has the Microsoft Windows June 2019 or later security updates installed. This causes point data to fail to render in ArcGIS Apps (Collector, Explorer, ArcGIS Runtime). Other service operations may return "Error performing Advanced Symbols operation".

Downloads and installation 

ArcGIS (Desktop, Engine, Server) Microsoft (R) Windows (R) June 2019 Security Update Compatibility P... 

more
0 0 2,864
DanCobb
Deactivated User

Beginning with Qt version 5.12.4, Qt relies on a newer version of OpenSSL. Details of this upgrade are highlighted in this Qt blog. Please build OpenSSL for your Qt application using the latest version of OpenSSL recommended by Qt. For more information, see OpenSSL.  Also note that due to the recent updates to OpenSSL, Esri will no longer be shipping the Android OpenSSL libs.

more
1 2 7,997
Nicholas-Furness
Esri Regular Contributor

This is part 3 of a 3 part series on working with Location in your Runtime applications.

In parts 1 and 2 we introduced the AGSLocationDisplay and the AGSLocationDataSource and discussed how they work together to display location on your map view as well how to configure location appearance on the map view, and how the map view behaves as the location is updated.

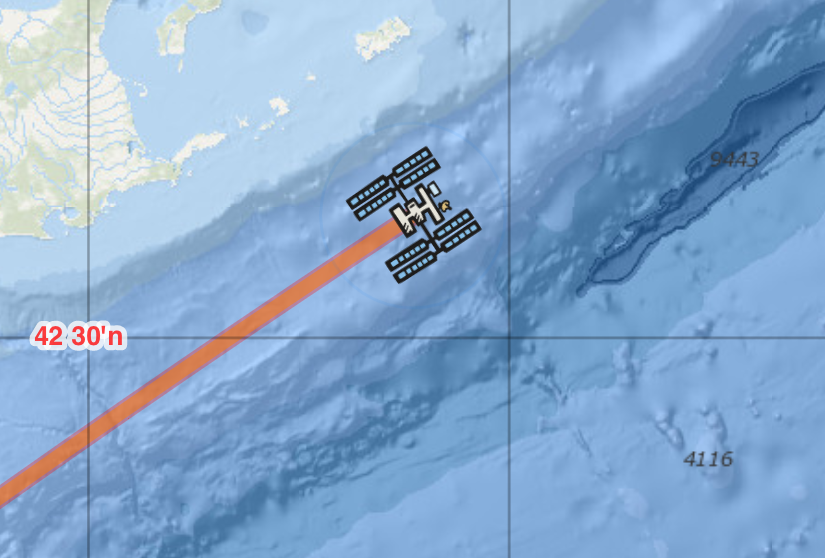
We finished off with an understanding of how AGSLocationDataSources are created. In this post we'll create a new location data source that provides realtime location of the International Space Station, and show it in use in a simple application.

ISSLocationDataSource

There exists a very cool, simple, open source API that provides realtime locations of the International Space Station. You can find out about it here, but put simply you make an HTTP request to http://api.open-notify.org/iss-now.json and get JSON back with the current location.

Let's use that API to build a custom AGSLocationDataSource that provides the ISS's current location. We'll call it ISSLocationDataSource.


Building the data source

Starting with a simple project already linked to the ArcGIS Runtime, let's create a new Swift file named ISSLocationDataSource and define our subclass of AGSLocationDataSource:


class ISSLocationDataSource: AGSLocationDataSource {
...
}


Now let's implement doStart() and doStop():


class ISSLocationDataSource: AGSLocationDataSource {
    override func doStart() {
        startRequestingLocationUpdates()

        // Let Runtime know we're good to go
        didStartOrFailWithError(nil)
    }
    
    override func doStop() {
        stopRetrievingISSLocationsFromAPI()
        
        // Let Runtime know we're done shutting down
        didStop()
    }
}


Once we've started, we'll hit the API URL every 5 seconds using an NSTimer, and parse the response into an AGSLocation object:


...
private var pollingTimer: Timer?

func startRequestingLocationUpdates() {
    // Get ISS positions every 5 seconds (as recommended on the
    // API documentation pages):
    // http://open-notify.org/Open-Notify-API/ISS-Location-Now/
    pollingTimer = Timer.scheduledTimer(withTimeInterval: 5, repeats: true) {
        [weak self] _ in
        // Request the next ISS location from the API and build an AGSLocation.
        self?.requestNextLocation { newISSLocation in
            // TO AGSLocationDisplay: new location available.
            self?.didUpdate(newISSLocation)
        }
    }
}


Reading the http://api.open-notify.org/iss-now.json URL and turning the JSON response into an AGSLocation happens in requestNextLocation() function which is called every 5 seconds using an NSTimer. Notice the call to didUpdate() on line 13. As discussed in part 2 of this series, that call will pass the new AGSLocation to the AGSLocationDisplay, which in turn will make sure location is updated on the AGSMapView as needed.

You can see a full implementation of the entire ISSLocationDataSource class here, including requestNextLocation() and the JSON Decoding logic.

Using our custom location data source

To use the new custom data source in a map view, we simply set the AGSMapView.locationDisplay.dataSource to an instance of our new class (line 8 below) and start the AGSLocationDisplay:


override func viewDidLoad() {
    super.viewDidLoad()

    // Set the Map.
    mapView.map = AGSMap(basemap: AGSBasemap.oceans())
    
    // Use our custom ISS Tracking Location Data Source.
    mapView.locationDisplay.dataSource = ISSLocationDataSource()
    
    // Start the AGSMapView's AGSLocationDisplay. This will start the
    // custom data source and begin receiving location updates from it.
    mapView.locationDisplay.start { (error) in
        guard error == nil else {
            print("Error starting up location tracking: \(error!.localizedDescription)")
            return
        }
    }
}


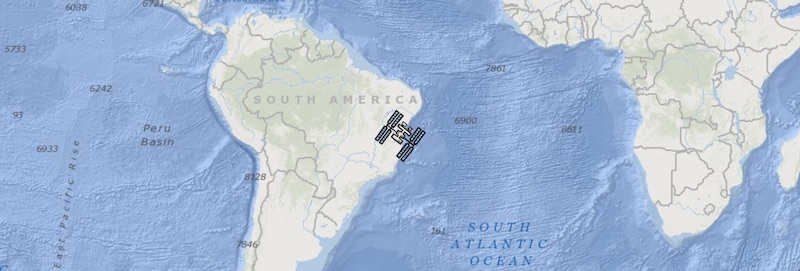
It's that easy! Now you have a map that shows the live current location of the ISS.

Of course, it's a little counter-intuitive to see the blue dot tracking the space station (we've been trained to associate it with our own location), so we use some of the AGSLocationDisplay configuration options to change the symbol to use an icon of the ISS. Find the entire Xcode project here.

Additional details about ISSLocationDataSource.requestNextLocation():

  • We use an AGSRequestOperation to get the JSON response from the API (source code).
  • We create a new AGSOperationQueue that processes 1 operation at a time. This way we don't have duplicate simultaneous calls to the API (source code).
  • For the very first location we obtain, since we don't yet have a heading or velocity, we create an AGSLocation with lastKnown = true (source code) which means it will be displayed differently in the map view (by default a grey dot rather than a blue dot, indicating that we're still acquiring a location).
  • We use AGSGeometryEngine to calculate the velocity of the ISS by comparing the new location with the previous location.

There's also a slightly more detailed version with an overview map, reference lat/lon grids, and a path-tracking geometry here.

We hope you've enjoyed this series of blog posts. The Location Display and Location Data Sources provide a powerful configurable way to integrate location into your Runtime apps, no matter what source you're using for location.

more
1 0 2,538
Nicholas-Furness
Esri Regular Contributor

This is part 2 of a series of 3 blog posts covering Location and the ArcGIS Runtime SDKs. In part 1 we introduced the AGSLocationDisplay which is responsible for working with the AGSMapView to give your app a "blue dot" experience, and we talked about customizing the behavior and appearance of the current location on your map.

In this post, we'll talk about the third component of AGSLocationDisplay, which is where that location information comes from: the location data source…

Location Data Sources

A location data source feeds location updates to the AGSLocationDisplay which in turn takes care of updating the map view according to the configuration options discussed in part 1.

It is accessed via the AGSLocationDisplay.dataSource property.

The ArcGIS Runtime SDK for iOS comes with a few location data sources out of the box:

Data Source TypePurpose
AGSCLLocationDataSourceFollow your iOS device's built-in Core Location services (the default).
AGSSimulatedLocationDataSourceFollow a sequence of simulated locations or an AGSPolyline.
AGSGPXLocationDataSourceFollow the contents of a GPX file.

Each of these location data sources inherits from the base AGSLocationDataSource class:

By default an AGSLocationDisplay automatically creates and uses an AGSCLLocationDataSource. Just call AGSMapView.locationDisplay.start(completion) to start showing your location (but see the note here about configuring your app according to Apple's requirements for enabling location).

Custom Location Data Sources

What's neat is that by inheriting from AGSLocationDataSource and implementing a few simple methods, you can create your own custom data source that Runtime integrates with in exactly the same way as the 3 out-of-the-box ones mentioned above (which are themselves built using the pattern we'll discuss).

This extensibility is very powerful if you're working with proprietary location technology, such as an external high-accuracy GPS unit, a beacon-based indoor location system, or some other location determining system whose manufacturers provide an API or SDK.

Step-by-step, here's how you build out your own custom AGSLocationDataSource:

  1. Inherit from AGSLocationDataSource.
  2. Implement doStart().
    • Called by Runtime when the app calls AGSLocationDisplay.start(completion).
    • This must call didStartOrFailWithError() to signal that your source started OK (or failed to start).
      When you call didStartOrFailWithError() you either pass in nil if your source started OK and is ready to start providing locations, or pass in an Error if it failed to start.
  3. Implement doStop().
    • Called by Runtime when the app calls AGSLocationDisplay.stop().
    • This must call didStop() to signal that your source stopped OK.

That takes care of starting and stopping the data source when instructed to, but you also need to notify Runtime when you get new locations:

  • Call didUpdate(location) whenever you get a new location you need to pass on. You construct an AGSLocation object and call didUpdate(), passing in that location.
    An AGSLocation combines an AGSPoint with a timestamp. It also includes velocity, heading, accuracy estimates, and whether this location should be considered current or is an old (or "last known") location. Some of these properties are used to determine how the location is displayed in the map view.

That's it. With that implemented, you have a functioning Location Data Source. Let's discuss the documentation available to us about this, and how it all fits together.

Understanding Location Data Sources

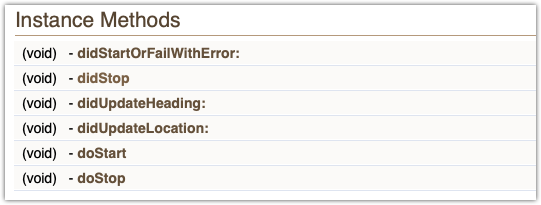
First, let's look at the AGSLocationDataSource (ForSubclassEyesOnly) API, described in the reference docs:

These methods determine how your custom location data source and the AGSLocationDisplay will communicate.

A note on naming:

  • do… Instructions from the AGSLocationDisplay to your custom AGSLocationDataSource begin with "do" (doStart() and doStop()). These indicate an imperative from the location display for your data source to do something.

  • did… Feedback from your data source to the AGSLocationDisplay is done by calling functions that begin with "did" (didUpdateLocation(), didStartOrFailWithError(), didStop() etc.). These indicate feedback from your data source to update the location display (e.g. the state changed, or a new location is available). 

The "do" methods are expected to exist in your subclass of AGSLocationDataSource, so it's up to you to implement them.

The 'did' methods are all inherited from AGSLocationDataSource, so they're already defined for use by your subclass. You don't implement them. You just call them directly.

Here's how these methods work together:

  1. When an app wants to show location updates (by calling AGSMapView.locationDisplay.start(completion)), the AGSLocationDisplay will call doStart() on its dataSource.
  2. The data source initializes itself and calls didStartOrFailWithError(nil) to show it's started OK. It starts providing location updates by calling didUpdate(location) for each location update.
  3. When the app wants to stop showing location, it calls AGSMapView.locationDisplay.stop() and the AGSLocationDisplay will call doStop() on its dataSource. The data source calls didStop() and makes sure it doesn't call didUpdate(location) any more.

That's it for the theory. In the next blog post, we'll look at creating a custom AGSLocationDataSource from scratch and show it in use in a simple iOS application.

more
0 0 2,323
Nicholas-Furness
Esri Regular Contributor

The Blue Dot

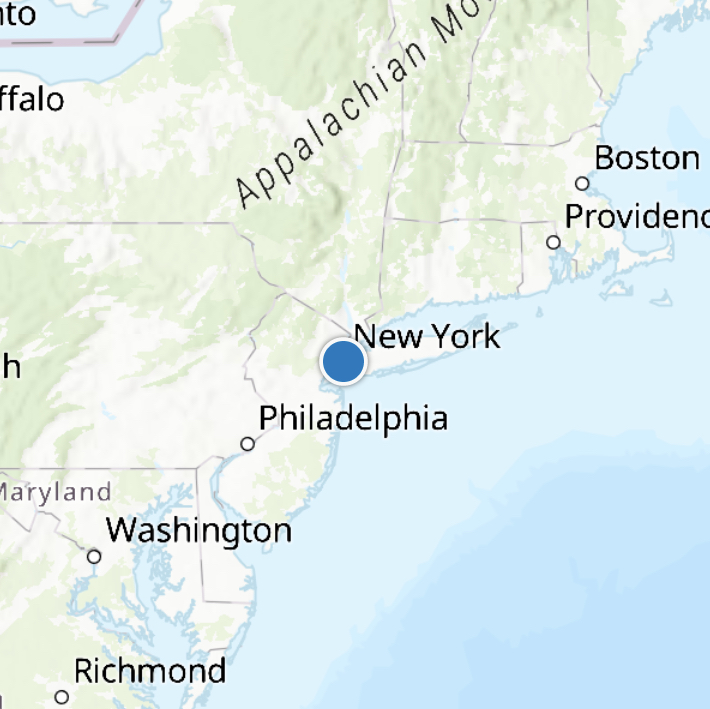
Often your app needs to show your location, or a "blue dot", on a map. Maybe it's important to know where you are, or important to know where things are in relation to you. Often that context is critical to the core functionality of the app.


Runtime provides a robust blue dot experience. Out of the box, you simply call start() or stop() and Runtime takes care of talking to your device to get the best available location.


But Runtime takes this functionality further and provides a flexible framework to provide your own location source. Perhaps you need to connect to an external GPS unit or use a proprietary indoor location beacon system.


In this, the first of 3 posts on the topic, we'll take a look at how Runtime presents location in the map view. In part 2 we'll discuss how Runtime gets location updates from various location data sources and cover what it takes to create your own location data source. Finally, in part 3, we'll take what we've learnt so far and build a custom location data source. 

Your location in the Runtime

There are 3 Runtime components that work together to put that blue dot on your map: AGSMapViewAGSLocationDisplay, and AGSLocationDataSource


  • Every AGSMapView has an AGSLocationDisplay. It is responsible for showing and updating the current location on that map view.
  • You access the AGSLocationDisplay via the AGSMapView.locationDisplay property.
  • Your app starts and stops tracking location by calling AGSLocationDisplay.start(completion) and AGSLocationDisplay.stop().


Swift Note:
Swift translates method names automatically from Objective-C, so while the API doc references, for example, startWithCompletion:(), in Swift it will be written start(completion) and that's the form I'll use in this post.


Various properties on AGSLocationDisplay determine what the location display looks like on the map view (you don't have to use a blue dot if your app needs something else) and how the map view keeps up with the current location.


If you just want to use your device's built-in GPS, that's actually all you need to know. But let's look at some ways to control and configure that location display…


AGSLocationDisplay

There are 3 key aspects of Location Display that you can change.

  1. Behavior: How does the map view update itself as the current location changes.
  2. Appearance: What does the location display look like and how does it change depending on what information is available?
  3. Data Source: Where does the location display get the current location from?


Configuring behaviour

The auto-pan mode changes how the AGSMapView keeps up with location updates, that is, how does the map view move to follow the blue dot around. Set the auto-pan mode using AGSLocationDisplay.autoPanMode.


Mode Purpose and behavior
Off This is the default. The blue dot is free to move around your map display (or beyond it) while the map view remains still.
Recenter

The map will follow the blue dot as it moves, based off the AGSLocationDisplay.wanderExtentFactor, a number between 0 and 1:

  • 0 means the map view will constantly recenter on the blue dot.
  • 1 means the map view will recenter when the blue dot reaches the edge of the map view.
  • The default is 0.5, which allows a bit of movement before the map view recenters.

Navigation

Good for driving. The map view updates for the current location, but orients to the direction of motion. Use the AGSLocationDisplay.navigationPointHeightFactor property to determine how far from the bottom of the display the location will be anchored.
Compass Navigation Good for walking. The map view updates for the current location, but orients to the direction the device is pointing.


When you manipulate the map view's area of interest either programmatically or by panning/zooming it, the auto-pan mode will be reset to off. You can monitor for changes to the auto-pan mode with the AGSLocationDisplay.autoPanModeChangeHandler.


When you switch on auto-pan (i.e. it was off, but you set it to one of the other values), the map view will pan and zoom to the next location update. You can control the scale level for this pan and zoom with AGSLocationDisplay.initialZoomScale.

In most use cases, fixing the zoom like this is sensible behavior, but if you want to just recenter without zooming the map, simply set the initialZoomScale to the current AGSMapView.mapScale before you set the autoPanMode.


Configuring appearance

By default the location symbol will be a blue dot. It's augmented with a few visual aids to indicate accuracy, direction of motion (course), direction the device is pointing (heading) and whether locations are being updated (a "ping"). See these properties on AGSLocationDisplay for more details:


The Location… Gathering the Location…


You control whether to use the courseSymbol when movement is detected with the AGSLocationDisplay.useCourseSymbolOnMovement property.


Lastly, if you don't want a visual indication that a new location was received, you can set AGSLocationDisplay.showPingAnimation to false.


Location Data Source

One other important configurable item on AGSLocationDisplay is the location data source. We'll look at that part 2 when I'll cover how data sources work, and in part 3 we'll create our own custom data source.

more
2 0 3,547
by Anonymous User
Not applicable

I'm not going to hide it, I love the ArcGIS Runtime's loadable design pattern. We find the loadable pattern across the ArcGIS runtime; no doubt you interact with it often.

In short, the pattern allows you to work with an object that might take some time figuring stuff out before it’s ready to be used. For example, it might depend on multiple (possibly remote) resources, sometimes in sequence, before it knows enough about itself to be usable. Once these resources are retrieved, the loadable object executes a callback block signaling that it's ready. An AGSMap is a good concrete example as it might need to load multiple remote layers before it knows what extent and spatial reference to use.

Some other qualities of a good loadable object include:

  • calling the completion block on a suitable thread based off the thread the load was started from (see this blog post).
  • providing an observable loadStatus and loadError, though generally you just wait for the completion block to be called.
  • handling load failure elegantly with the option to retry later if needed (perhaps the network connection was interrupted).

As an added bonus, a full implementation of <AGSLoadable> can be found in AGSLoadableBase, a class designed to be subclassed (and which saves you reinventing a lot of wheels, doing a lot of the heavy lifting of load state and callback thread considerations).

"It's only a protocol," you might say. "You can't always subclass AGSLoadablebase," you might suggest. "Try implementing AGSLoadable yourself, do you still love it?" you might pronounce.

Hot take, but of course you'd be right. As an engineer, I'm tickled by problems like this and eagerly look for solutions.

Today I'd like to share with you a delightful maneuver that allows any class to adhere to <AGSLoadable> with neither the need for a custom async implementation (yikes) nor subclassing AGSLoadableBase.

I'd like to introduce you to LoadableSurrogate & <LoadableSurrogateProxy>, a member/protocol solution that offloads the heavy lifting of async loading onto a surrogate loader.

There are two actors in this maneuver, engaged in a parent/child delegate-like relationship:

  1. LoadableSurrogate is a concrete subclass of AGSLoadableBase that routes messages to a proxy object.
  2. A proxy object that adheres to <LoadableSurrogateProxy> we'd like to make loadable with the help of a loadable surrogate.

A class can leverage this tool by creating a LoadableSurrogate member, adhering to <LoadableSurrogateProxy> and specifying the LoadableSurrogate's proxy.

In this example, I've built a simple loader that downloads an image of (my favorite muppet) Kermit the Frog hanging out on the legendary Hollywood walk of fame.

class KermitLoader: NSObject, LoadableSurrogateProxy { }

I can use the kermit loader object like any other <AGSLoadable>:

let kermitLoader = KermitLoader()  kermitLoader.load { (error) in  
   
    if let error = error {         
        print("Error: \(error.localizedDescription)")     
    }

    imageView.image = kermitLoader.kermitImage
}

The kermit loader is initialized with a LoadableSurrogate member, assigning the surrogate's proxy to self.

class KermitLoader: NSObject, LoadableSurrogateProxy {

    private let surrogate = LoadableSurrogate()          

    override init() {
        super.init()         
        surrogate.proxy = self
    }     
    /* ...

For the kermit loader to conform to <LoadableSurrogateProxy> it must also conform to <AGSLoadable>. Conveniently, all <AGSLoadable> methods can be piped through the surrogate.

    ... */
    func load(completion: ((Error?) -> Void)? = nil) {
        surrogate.load(completion: completion)     
    }          

    func retryLoad(completion: ((Error?) -> Void)? = nil) {         
        surrogate.retryLoad(completion: completion)     
    }          
 
    func cancelLoad() {         
        surrogate.cancelLoad()     
    }     
    /* ...

Following the same pattern outlined above, you might opt to compute the <AGSLoadable> properties loadStatus and loadError on the fly, getting those values from the surrogate.

Instead, I've opted to persist those properties and thus, expose them to KVO.

    ... */
    @objc var loadStatus: AGSLoadStatus = .unknown

    @objc var loadError: Error? = nil
    //
    // Proxy informs of changes to `loadStatus` and `loadError`.
    //

    func loadStatusDidChange(_ status: AGSLoadStatus) {         
        self.loadStatus = status     
    }          

    func loadErrorDidChange(_ error: Error?) {         
        self.loadError = error     
    }     
    /* ...

Everything we've seen up until this point is boilerplate and can be copied and pasted. Let's get to the good stuff.

First, in order to perform the loadable operation we'll need to set up some resources and properties. We need a URL to the image, a data task, and of course a reference to the loaded image.

    ... */
    private let kermitURL = URL(string: "https://c1.staticflickr.com/2/1033/1024297684_582bc1c05a_b.jpg")!

    private var kermitSessionDataTask: URLSessionDataTask?

    var kermitImage: UIImage? = nil
    /* ...

What comes next is the custom loadable implementation. If you have ever subclassed AGSLoadableBase directly, this should feel familiar.

The proxy object is responsible for starting the load and completing with an error or nil, depending on the success of the operation. The proxy object is also responsible for canceling any async operations as well.

    ... */
    func doStartLoading(_ retrying: Bool, completion: @escaping (Error?) -> Void) {    

        if retrying {                          
            let previousDataTask = kermitSessionDataTask             
            kermitSessionDataTask = nil
            previousDataTask?.cancel()             
            kermitImage = nil
        }                  

        kermitSessionDataTask = URLSession.shared.dataTask(with: kermitURL) { [weak self] data, response, error in

            guard let self = self else { return }                          

            if let data = data, let image = UIImage(data: data) {                 
                self.kermitImage = image             
            }                          

            if response == self.kermitSessionDataTask?.response {                 
                completion(error)             
            }         
        }                  

        kermitSessionDataTask!.resume()     
    }     
    /* ...

The proxy object is also responsible for canceling running operations. If you want the surrogate to supply a generic CancelledError, you can return true. In this example the data task reliably provides its own cancel error in the task's callback and thus we return false.

    ... */
    func doCancelLoading() -> Bool {                  
        kermitSessionDataTask?.cancel()         
        kermitSessionDataTask = nil
        kermitImage = nil
        // Returns `false` because the URLSession returns a cancel error in the completion callback.
        // Return `true` if you want the surrogate to supply a generic cancel error.
        return false
     } 
 }

Cool! Now let's take a look under the hood of the LoadableSurrogate, powering much of the kermit loader.

To start, a LoadableSurrogate is a subclass of AGSLoadableBase.

class LoadableSurrogate: AGSLoadableBase { /* ...

A LoadableSurrogate passes messages to a proxy object. As you saw in the KermitLoader.init(), the kermit loader specifies itself as the proxy.

    ... */
    weak var proxy: LoadableSurrogateProxy? {         
        didSet {             
            proxy?.loadStatusDidChange(loadStatus)             
            proxy?.loadErrorDidChange(loadError)         
        }     
    }     
    /* ...

A LoadableSurrogate observes loadError and loadStatus so that it may immediately inform the proxy of changes to either of these properties.

... */
    // Cocoa requires we hold on to observers.
    private var kvo: Set<NSKeyValueObservation> = []          

    override init() {            

        super.init()      

        let loadStatusObservation = self.observe(\.loadStatus) { [weak self] (_, _) in

            guard let self = self else { return }                          

            self.proxy?.loadStatusDidChange(self.loadStatus)         
        }                  

        kvo.insert(loadStatusObservation)                  

        let loadErrorObservation = self.observe(\.loadError) { [weak self] (_, _) in

            guard let self = self else { return }                          

            self.proxy?.loadErrorDidChange(self.loadError)         
        }                  

        kvo.insert(loadErrorObservation)     
    }     
    /* ...

And finally a LoadableSurrogate handles piping the loadable method calls to and from the proxy.

    ... */
    private let UnknownError = NSError(domain: "LoadableSurrogate.UnknownError", code: 1, userInfo: [NSLocalizedDescriptionKey: "An unknown error occurred."])          

    override func doStartLoading(_ retrying: Bool) {                  

        // We want to unwrap the delegate, if we have one.
        if let proxy = proxy {                

            // Call start loading on the delegate.
            proxy.doStartLoading(retrying) { [weak self] (error) in

                guard let self = self else { return }                                  

                // Finish loading with the reponse from the delegate.
                self.loadDidFinishWithError(error)             
            }         
        }         
        else {             
            // No delegate, finish loading.
            loadDidFinishWithError(UnknownError)         
        }     
    }

    private let CancelledError = NSError(domain: "LoadableSurrogate.CancelledError", code: NSUserCancelledError, userInfo: [NSLocalizedDescriptionKey: "User did cancel."])      

    override func doCancelLoading() {   

        // Call cancel delegate method.
        if proxy?.doCancelLoading() == true {                          

            self.loadDidFinishWithError(CancelledError)         
        }     
    } 
}

To see this maneuver in action, have a look at this playground.

Happy loading!

more
0 0 598
123 Subscribers