- Home
- :
- All Communities
- :
- Industries
- :
- Education
- :
- Education Blog
- :
- Using the Photos with Locations Tool in Education
Using the Photos with Locations Tool in Education
- Subscribe to RSS Feed
- Mark as New
- Mark as Read
- Bookmark
- Subscribe
- Printer Friendly Page
Sometimes, the simplest things in GIS are incredibly wonderful. Such is the case with the ability of creating a feature layer from a group of geotagged photographs. In plain language, this allows you to point to a folder of photographs for which you have a location attached to them (because you have taken them from a phone with location services turned on, for example), and map the entire set of photos as a set of points in ArcGIS Online. As my colleague explained in his blog here, this capability has existed since 2019, but I wanted to make sure that you, the education community, know how to teach and conduct research with these tools. My video explaining these tools is here.
To do this, first zip your photos into a zip file. Then, go to ArcGIS Online > Add Item > Add items from my computer > Photos with Locations. Supply a title and some tags. The result is stored as a feature layer, explained here, which is a powerful content item that can be brought in to ArcGIS Pro for further analysis. At the current time, the photos need to be geotagged JPG photos with standard EXIF GPS metadata. What if your photos are not geotagged? I have used GeoImgr in the past with success, and other tools exist as well both online and as apps for your phone (but use caution especially with online software tools to do this, making sure you read the reviews and that there is no malware).
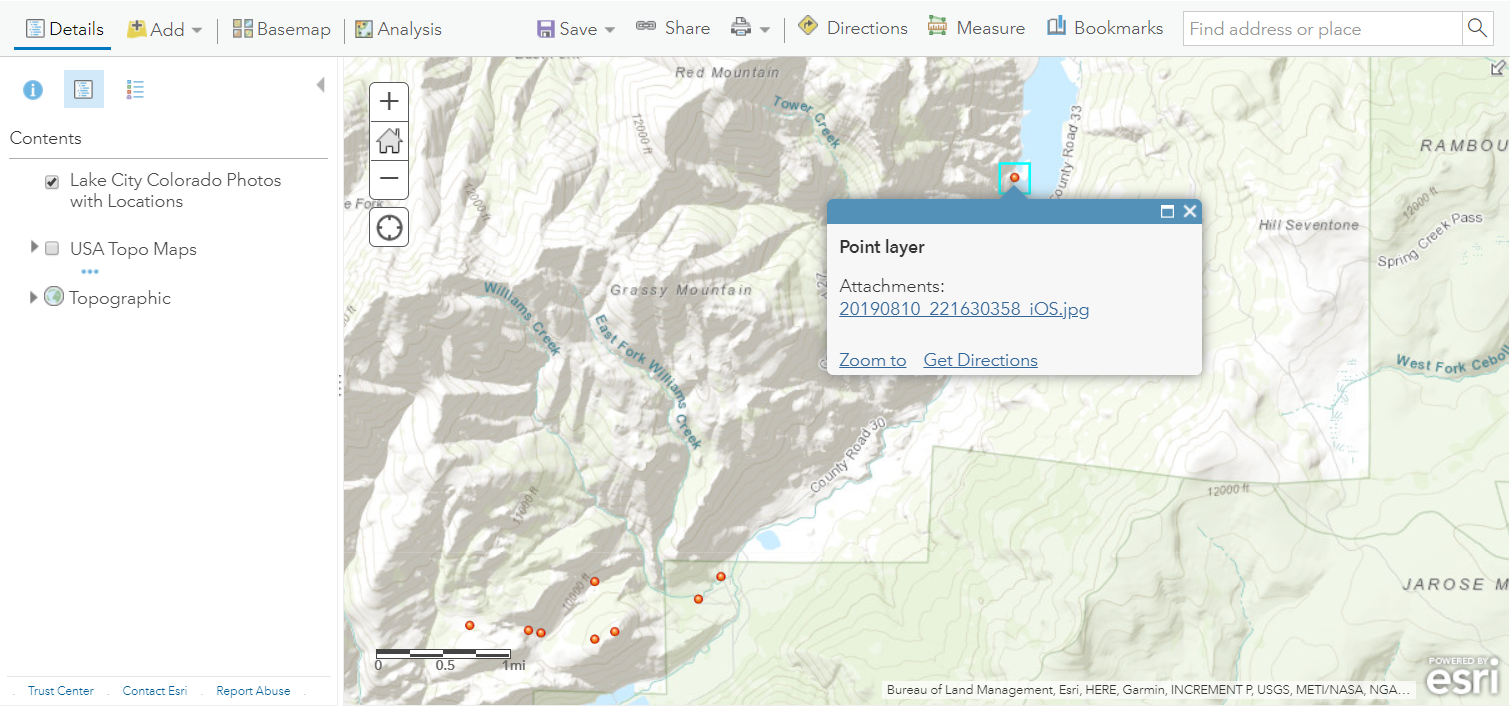
When done, your photos will be hyperlinked to each point as shown in this example below.
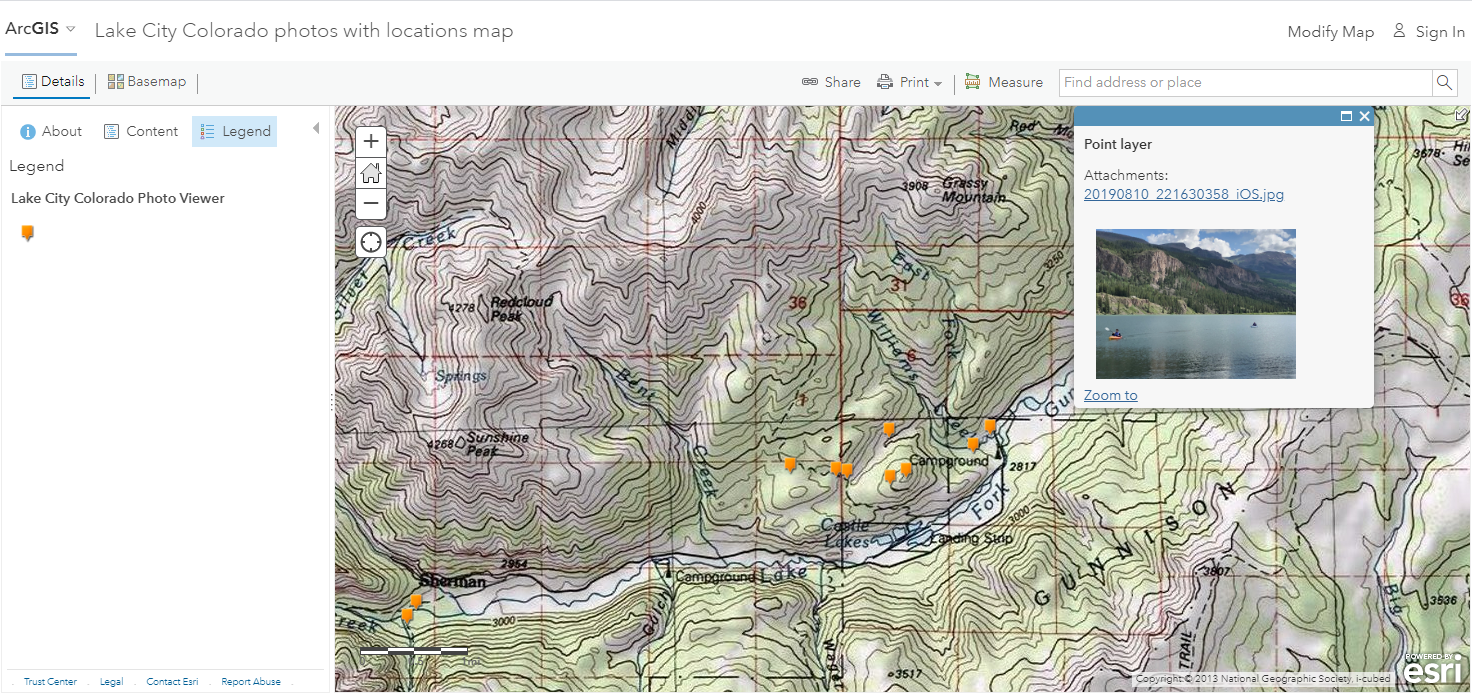
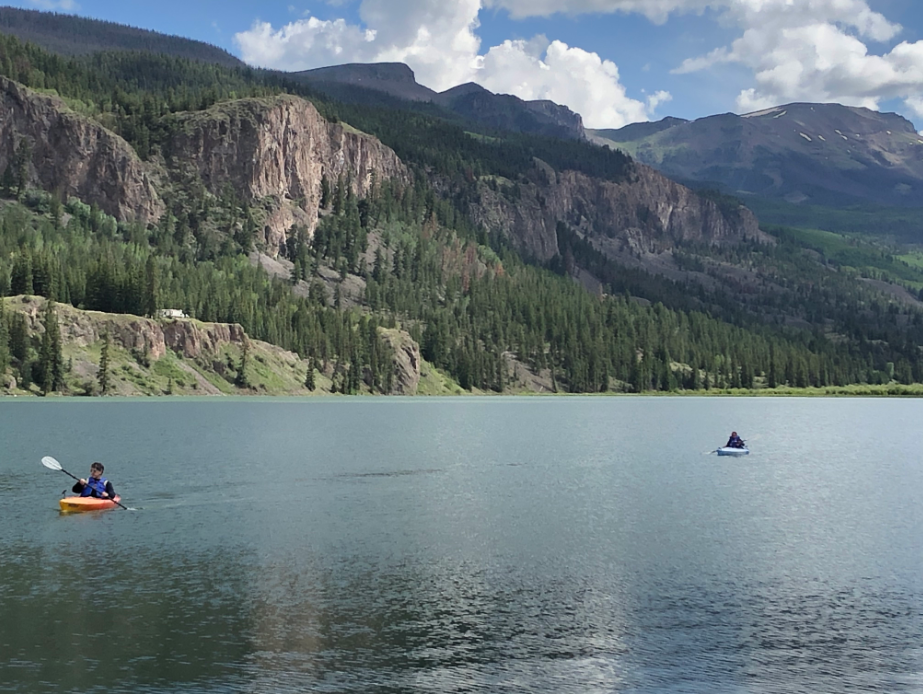
 But let's say you want the photos to appear as thumbnails inside the popups. For example, see this map and screen shot below containing photos I took on a hiking trip to beautiful southwest Colorado. I did this by (1) configuring the popup, and (2) in the attribute expressions zone of the popup configure tools, I added a few lines of Arcade expressions as explained by my colleague Jennifer Bell, here. In essence, each photo is stored as an "attachment" in ArcGIS Online, and each is stored with an ID number. The Arcade expressions (1) Calculate the attachment ID for each feature, and (2) Configure the pop-up to display the attachment URL as an image.
My expression has the following appearance:
var Part1 =
"https://services.arcgis.com/IZtlGBUe4KTzLOl4/arcgis/rest/services/lake_city_for_photo_viewer/FeatureServer/0/"
var ObjectID = $feature.OBJECTID
var Part2 = "/attachments/"
var AttachID = $feature.AttachID
When($feature.CountAttachments > 0, Part1 + ObjectID + Part2 + AttachID, null)
In the map, I have, fittingly, used the USGS topographic maps as a base map, via Modify Map > Add Data > search for and add "USA Topo Maps". I have clicked on one photo in the screenshot below, but using the map link above, you can interact with it and examine more photos on this amazing landscape. In each popup, you can click on the link for the full sized image. One of the full sized images is here, for example, and also shown at the end of this essay.
There are several advantages to the "photos with locations" method in education and beyond. First, the photos are stored in ArcGIS Online, so there is no need to use Flickr or other photo sharing tools, which, as I have documented here on GeoNet, frequently present challenges. Second, the resulting layer is a feature layer, rather than simply points being stored in a map, and so has some powerful functionality--you can bring the layer into ArcGIS Pro, ArcGIS Insights, or Community Analyst, to perform additional analysis on it. In my case, bringing the layer into a 3D scene is especially appropriate, as shown below. You can also use it in a storymap. Third, the popups are automatically configured. You can of course add additional information to the popup. Fourth, maybe the best part of all, the whole process takes mere minutes from the zipping to the mapping.
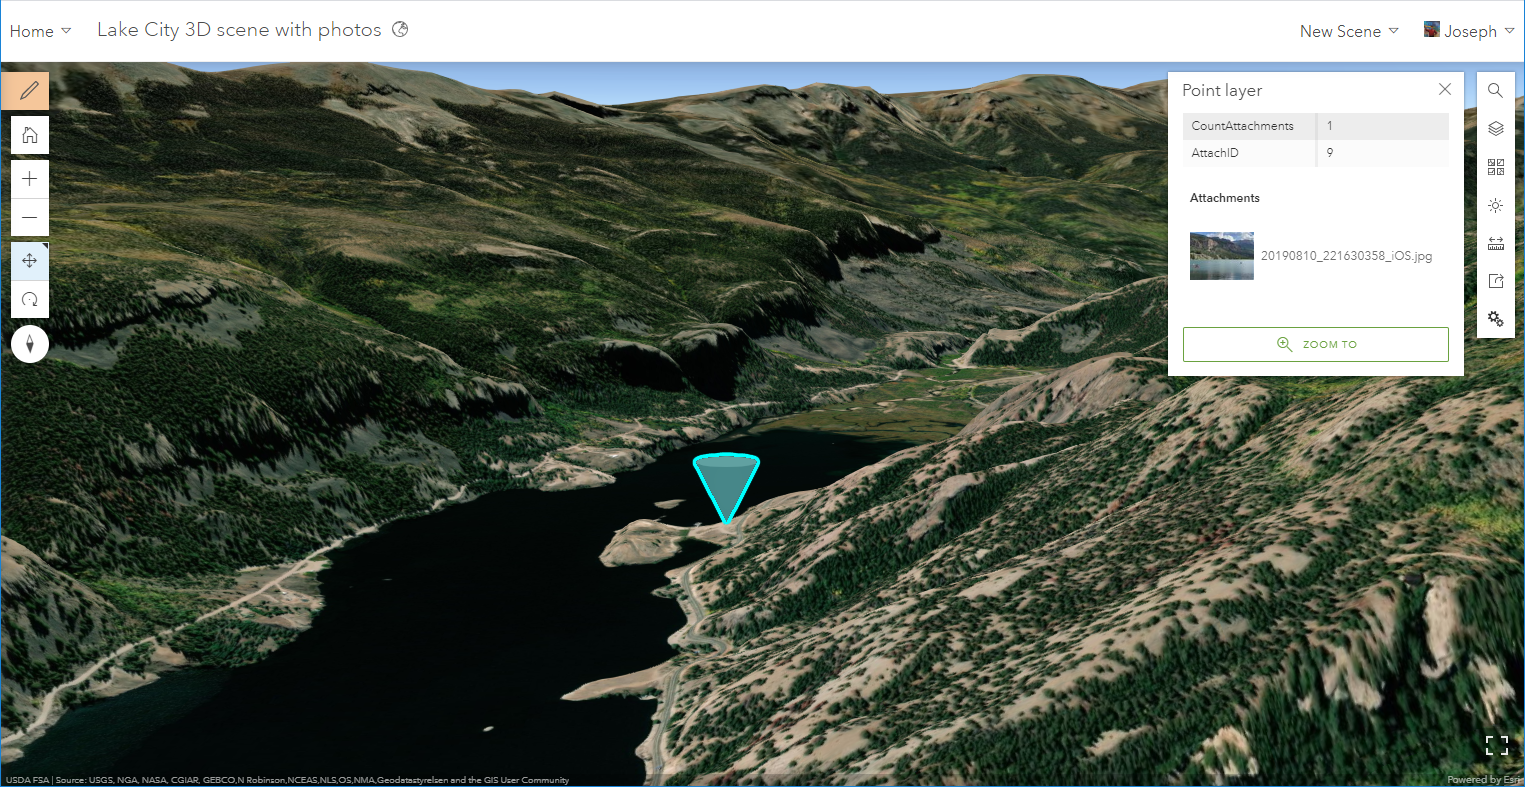
3D Scene of the photos with locations layer.
Consider using these techniques to map something of interest to you and your students. It could be places where you test water quality, litter, invasive species, types of clouds, street signs, types of cafes, recycling bins, places of concern in your community (such as broken sidewalks or dangerous intersections), or something else entirely.
And there is more to come! In the new map viewer, popups have been improved in many ways, as explained here. See the improvements already in the beta release, below, you will notice a decent sized thumbnail for every one of my points without any custom code or manual insertion of URLs. The default popup mode is "list", which shows a tiny thumbnail, but if you use attachments > and uncheck "show as list", the images convert to a "gallery" mode, shown here.
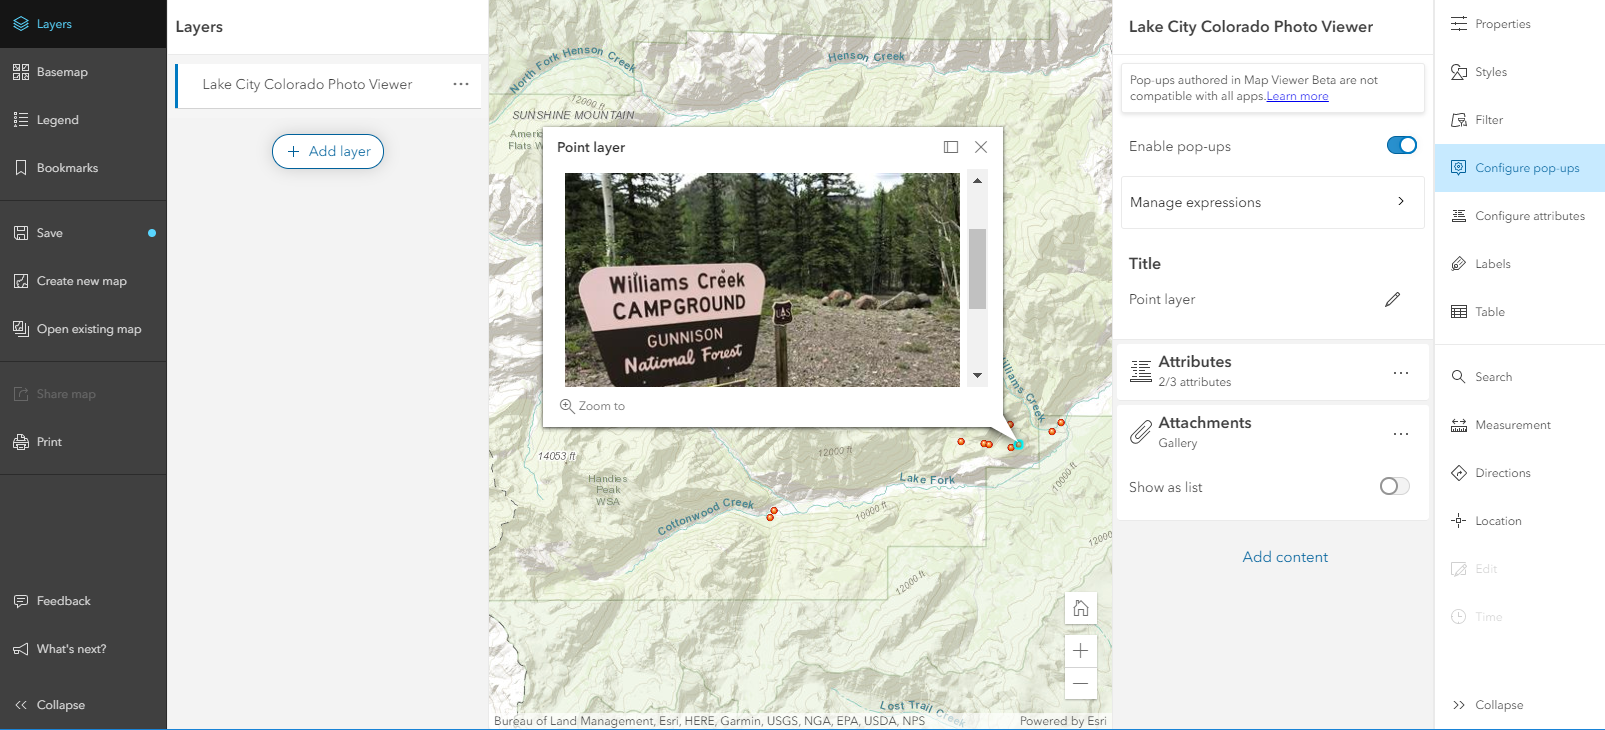
Images in popups as shown in the new ArcGIS Online Map Viewer.
Ah! Now go out there, do some fieldwork, take your own photos, and start mapping and analyzing them!
You must be a registered user to add a comment. If you've already registered, sign in. Otherwise, register and sign in.
-
Administration
80 -
Announcements
80 -
Career & Tech Ed
1 -
Curriculum-Learning Resources
259 -
Education Facilities
24 -
Events
72 -
GeoInquiries
1 -
Higher Education
598 -
Informal Education
281 -
Licensing Best Practices
93 -
National Geographic MapMaker
33 -
Pedagogy and Education Theory
226 -
Schools (K - 12)
282 -
Schools (K-12)
273 -
Spatial data
35 -
STEM
3 -
Students - Higher Education
246 -
Students - K-12 Schools
129 -
Success Stories
36 -
TeacherDesk
1 -
Tech Tips
121
- « Previous
- Next »