Turn on suggestions
Auto-suggest helps you quickly narrow down your search results by suggesting possible matches as you type.
Cancel
Adding Audio to Story Maps
Subscribe
3657
0
07-08-2016 12:00 AM
- Subscribe to RSS Feed
- Mark as New
- Mark as Read
- Bookmark
- Subscribe
- Printer Friendly Page
07-08-2016
12:00 AM
I wrote an essay about creating a story map that made extensive use of audio files, the result of which was .... Since the essay was published, I have had inquiries about the specifics of how to encode the audio links in captions of photos in Story Map tours. This essay explains how to do this.
First, save your audio files. In my case, I had a long interview as one file, and used Camtasia to cut it into individual audio files. You could use Audacity or other audio or video editor to do the same thing. Then, move your audio files to a website. Story maps need to point to online content, not content that is stored on your local computer.
Then, edit the captions section for each of your stops on your map tour. These stops can be photographs or videos. Note that my "lake" stop is a video and the rest of the stops are photographs. The HTML code that I used for one of my captions was as follows:
<audio controls="">
<source type="audio/mpeg" src="http://josephkerski.com/storymaps/lakota-sound/lake.mp3"type="audio/mpeg"></source>does not support?</audio>On this and the following: <font color="#FFFF00">click Play </font>above to hear the sounds in English and in Lakota.
That's it! The beauty of HTML 5 is that my code above helps the browser know that an audio file will be played, and the browser knows how to configure an audio player without any extra coding on my part. Here is more information on how the HTML audio tag works.
This illustrates that (1) story maps are truly multimedia, and audio can be an effective part of these maps. Think of the audio you and your students could be using in their story maps, comparing the calls of different birds, the sounds of the ocean on different days in different weather conditions, narrations of all kinds, and much more; and (2) knowing just a bit of coding, as I did with HTML in this example, allows you to extend the capabilities of story maps and ArcGIS Online in simple but powerful ways.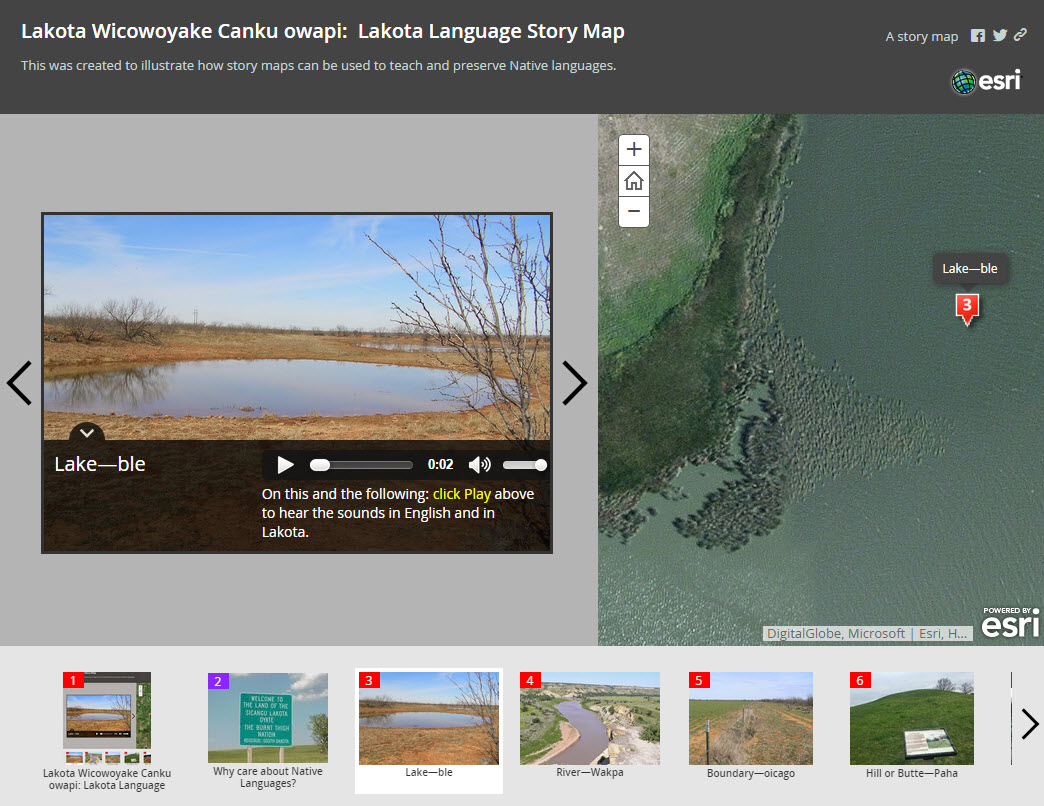
--Joseph Kerski, Education Manager, Esri.
First, save your audio files. In my case, I had a long interview as one file, and used Camtasia to cut it into individual audio files. You could use Audacity or other audio or video editor to do the same thing. Then, move your audio files to a website. Story maps need to point to online content, not content that is stored on your local computer.
Then, edit the captions section for each of your stops on your map tour. These stops can be photographs or videos. Note that my "lake" stop is a video and the rest of the stops are photographs. The HTML code that I used for one of my captions was as follows:
<audio controls="">
<source type="audio/mpeg" src="http://josephkerski.com/storymaps/lakota-sound/lake.mp3"type="audio/mpeg"></source>does not support?</audio>On this and the following: <font color="#FFFF00">click Play </font>above to hear the sounds in English and in Lakota.
That's it! The beauty of HTML 5 is that my code above helps the browser know that an audio file will be played, and the browser knows how to configure an audio player without any extra coding on my part. Here is more information on how the HTML audio tag works.
This illustrates that (1) story maps are truly multimedia, and audio can be an effective part of these maps. Think of the audio you and your students could be using in their story maps, comparing the calls of different birds, the sounds of the ocean on different days in different weather conditions, narrations of all kinds, and much more; and (2) knowing just a bit of coding, as I did with HTML in this example, allows you to extend the capabilities of story maps and ArcGIS Online in simple but powerful ways.
Adding audio to captions in a story map.
--Joseph Kerski, Education Manager, Esri.
You must be a registered user to add a comment. If you've already registered, sign in. Otherwise, register and sign in.
About the Author
I believe that spatial thinking can transform education and society through the application of Geographic Information Systems for instruction, research, administration, and policy.
I hold 3 degrees in Geography, have served at NOAA, the US Census Bureau, and USGS as a cartographer and geographer, and teach a variety of F2F (Face to Face) (including T3G) and online courses. I have authored a variety of books and textbooks about the environment, STEM, GIS, and education. These include "Interpreting Our World", "Essentials of the Environment", "Tribal GIS", "The GIS Guide to Public Domain Data", "International Perspectives on Teaching and Learning with GIS In Secondary Education", "Spatial Mathematics" and others. I write for 2 blogs, 2 monthly podcasts, and a variety of journals, and have created over 6,500 videos on my Our Earth YouTube channel.
Yet, as time passes, the more I realize my own limitations and that this is a lifelong learning endeavor: Thus I actively seek mentors and collaborators.
Labels
-
Administration
90 -
Announcements
86 -
Career & Tech Ed
1 -
Curriculum-Learning Resources
285 -
Education Facilities
24 -
Events
77 -
GeoInquiries
1 -
Higher Education
618 -
Informal Education
285 -
Licensing Best Practices
102 -
National Geographic MapMaker
41 -
Pedagogy and Education Theory
241 -
Schools (K - 12)
282 -
Schools (K-12)
306 -
Spatial data
39 -
STEM
3 -
Students - Higher Education
259 -
Students - K-12 Schools
145 -
Success Stories
44 -
TeacherDesk
1 -
Tech Tips
128
- « Previous
- Next »