Welcome to another blog post that will teach you how to automate tasks for Workforce using ArcGIS API for Python. The last blog in this series was about using Python to set up and configure a Workforce project. We covered how to import workers, create assignments based off a feature layer, and assign work based on location. You can check it out here.
This blog will teach you three different ways to monitor assignments using ArcGIS API for Python. It can be overwhelming to keep up with all of the assignments within your project, especially when you have multiple workers. The following scripts are designed to help you monitor work efficiently.
You’ll learn how to create a dashboard for your project using ArcGIS Dashboards, how to monitor the status of assignments using Slack, and how to verify a worker’s location at the time they modified an assignment.
Overview
- Scenario
- Download Workforce scripts
- Install ArcGIS API for Python
- Create a dashboard
- Monitor assignments with Slack
- Check assignment completion location
- Additional resources
Scenario
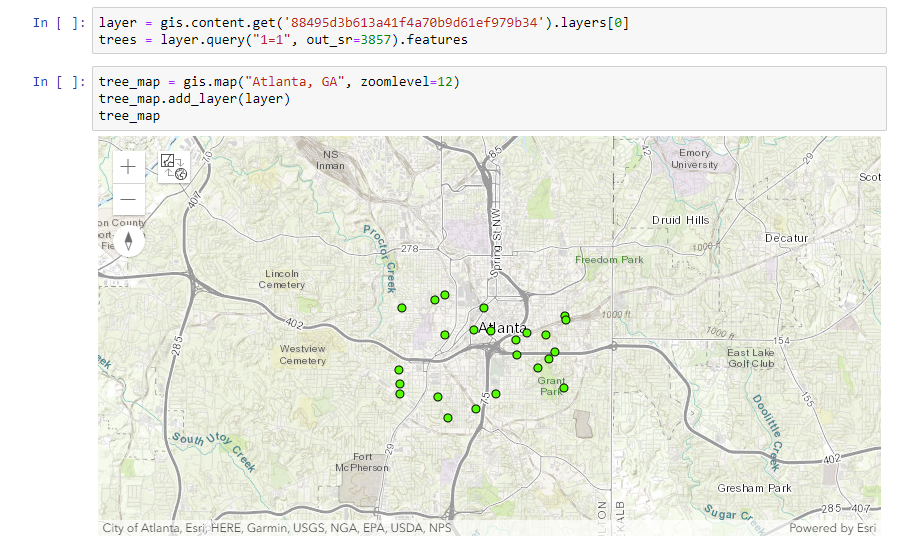
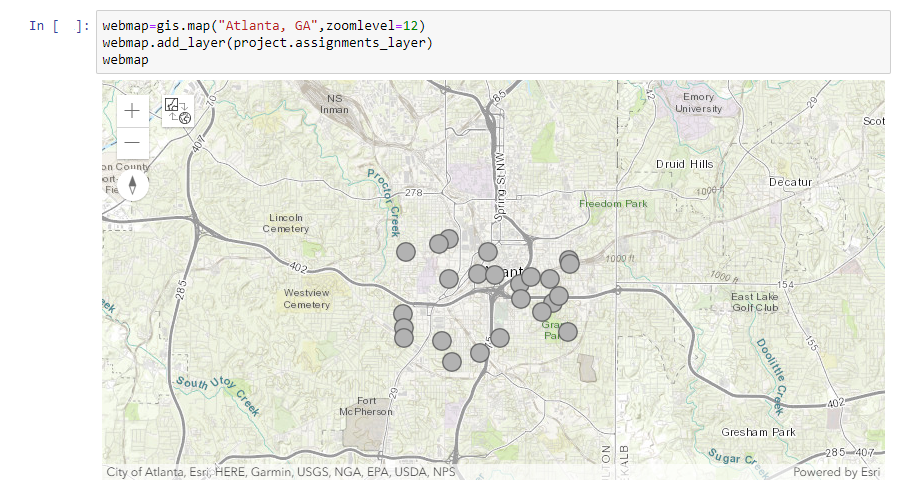
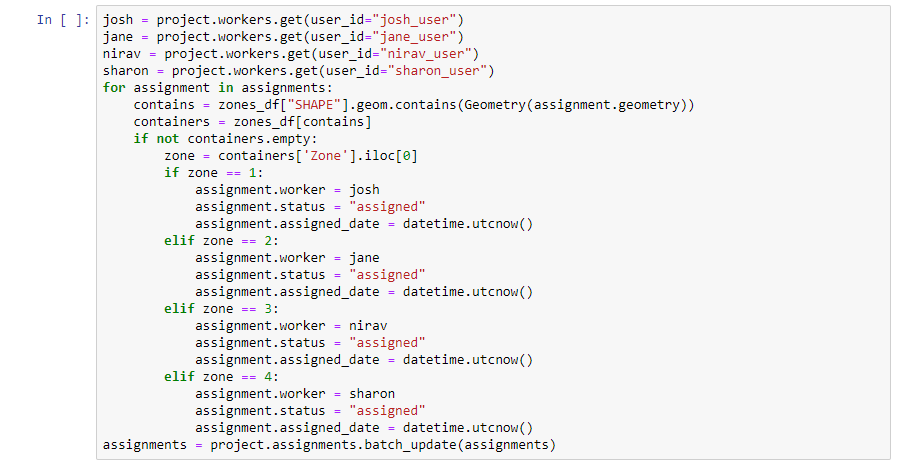
A tree inspection company is using Workforce to assign inspections to workers, and there are 24 open assignments throughout the city of Atlanta. You, as the inspection lead, want an easy way to monitor the progress of these assignments.
Note: This scenario uses the project created in the first blog; however, you can use any Workforce project that you own to follow along with these exercises.
Download Workforce scripts
First, clone or download the workforce-scripts GitHub repository This contains the Python scripts for Workforce as well as the version of the Python API needed to automate Workforce projects. Once it's downloaded, navigate to the “workforce-scripts” folder in either the terminal or the command prompt. A Windows operating system is used for this example.
cd C:\Users\user\Desktop\workforce-scripts
Install ArcGIS API for Python
To automate and script Workforce projects, you must use ArcGIS API for Python 1.8.3 or later. Version 1.8.3 is included in workforce-scripts file.
Run the following command in either a Python script or Python console to create the virtual environment with the correct dependencies and to install ArcGIS API for Python 1.8.3:
conda env create --file environment.yml
Next, activate the environment:
conda activate workforce-scripts
Once you've created and activated the environment, you are ready to use the Workforce scripts.
Create a dashboard
Note: The following section describes how to create a dashboard for Classic projects. To learn how to automate the creation of a dashboard for a project that is offline enabled and supported in ArcGIS Workforce, see Monitor assignment status in ArcGIS Dashboards using a joined Workforce layer.
ArcGIS Dashboards is a web application that allows you to monitor your operations in real-time. While the Workforce web app allows dispatchers to edit and view assignments, a dashboard provides a read-only alternative for supervisors and users. A dashboard displays key statistics, allowing you to understand the progress of your project at a glance.
You can create a dashboard for your Workforce project with just one command.
Have the following information ready to use as parameters for the script:
- Username
- Password
- Organization URL (<org>.maps.arcgis.com)
- Project ID
Note: If you are working with a Classic project (a v1 project), the Project ID is the item ID of the project item. If you are working with projects enabled for offline use (a v2 project), the Project ID is the item ID of the Workforce feature service. Regardless of what version you are working with, the Project ID can be found in the URL of your project.
For a complete list of parameters, see the readme for this script.
Run create_ops_dasbhoard.py in either the terminal or command prompt. Be sure to swap the default parameters with your own.
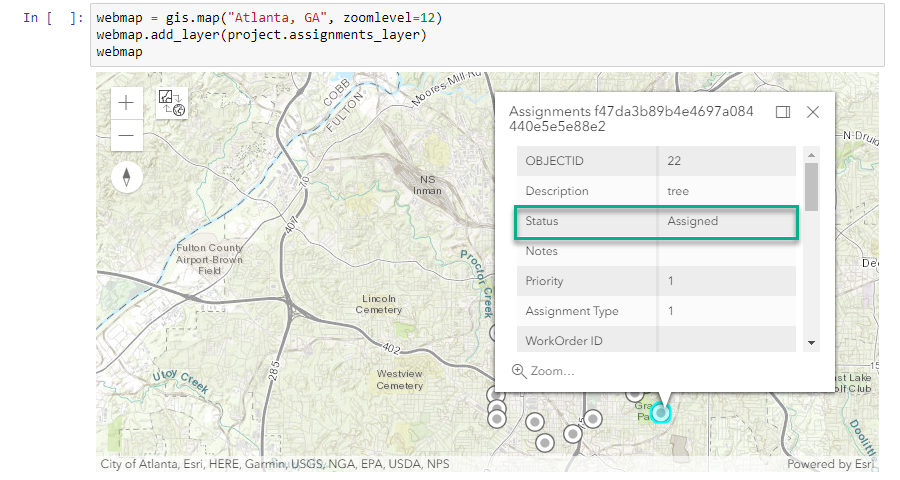
Once you run this script, you’ll see a new dashboard has been shared with the group containing your Workforce project. Here’s what the dashboard for the Tree Inspections project looks like:
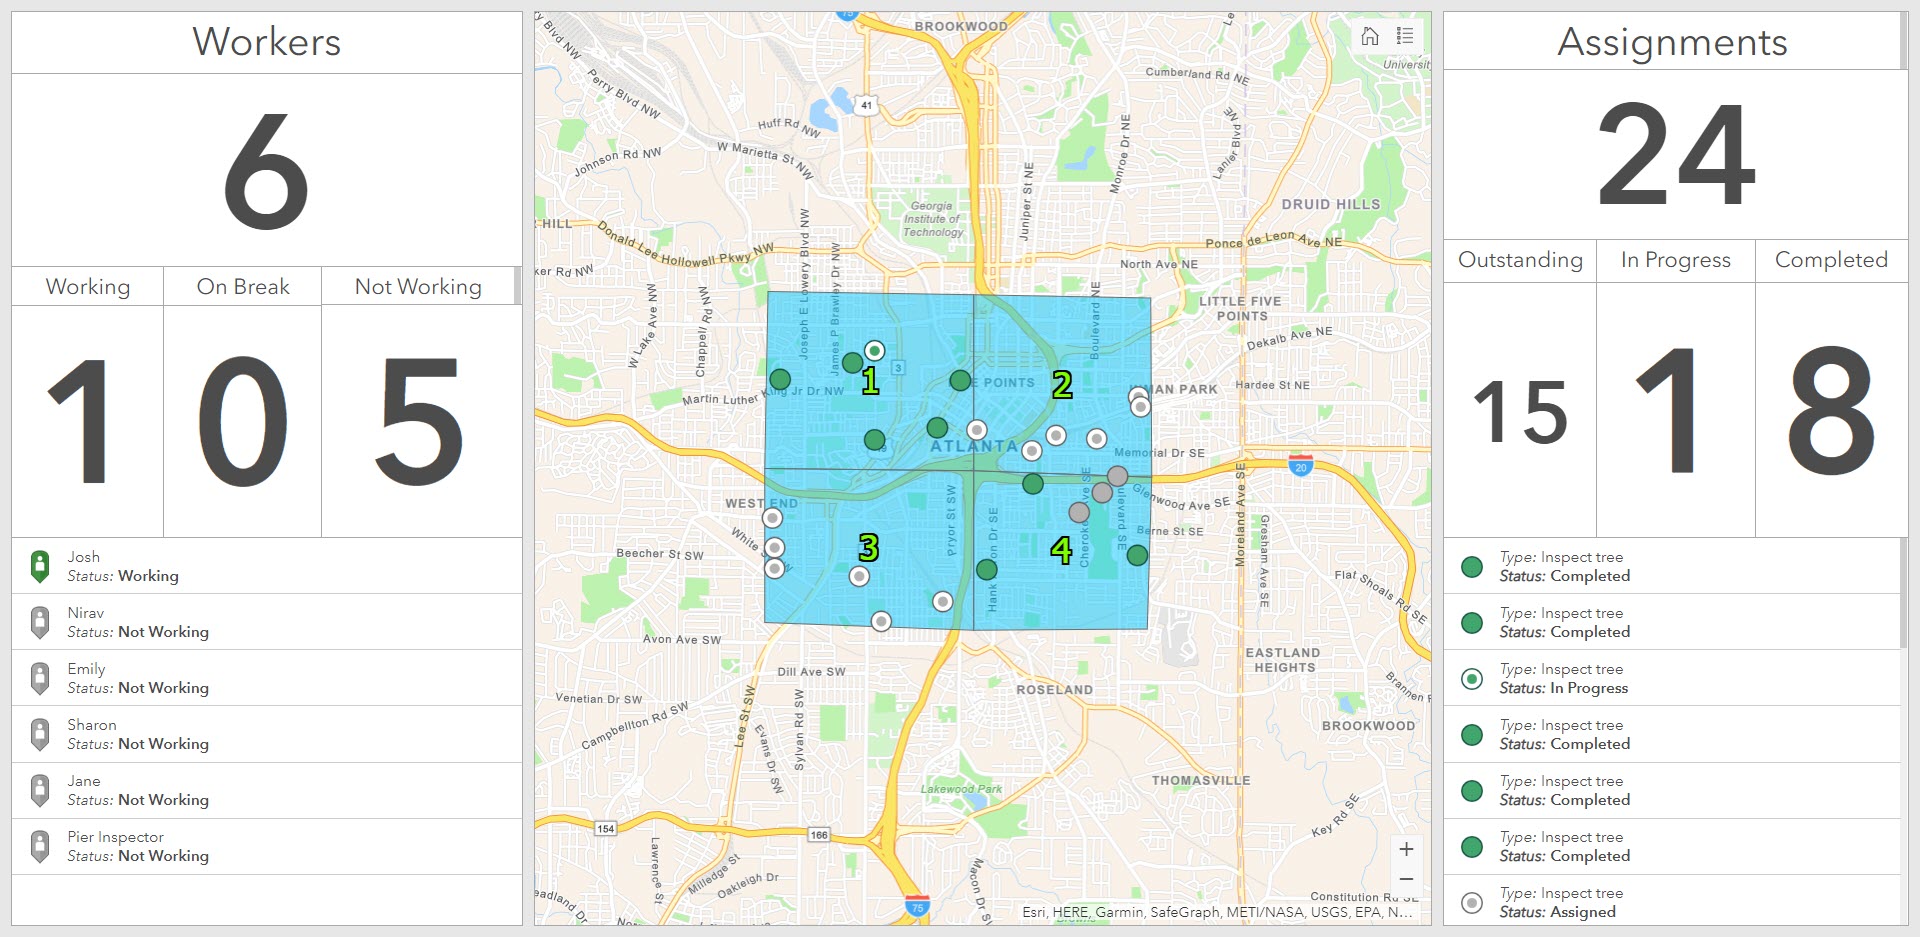
The script creates a dashboard that shows worker information, assignment information, and a copy of the Dispatcher map. The dashboard will update to reflect changes in assignment completion and worker status in real time. This is great to have displayed in the office to quickly note the progress of your operation.
Monitor assignments with Slack
Slack is an office communication tool that allows employees to stay connected with one another during the workday. By adding a webhook to a channel on Slack, you can receive information and updates from outside web sources, including Workforce.
The assignment monitor script connects your Workforce project with a webhook so that you will receive a message in Slack every time an assignment is completed. Anyone who joins the Slack channel that contains the webhook will receive these notifications.
Tip: This script can also be configured to send notifications to your email account. See the assignment_monitor readme for more information.
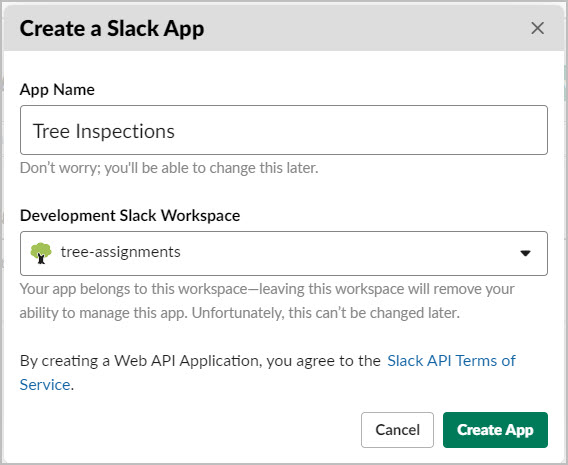
To add a webhook to a Slack channel, you’ll first need to create a new app in Slack. Visit the Your Apps page in the Slack API and click Create New App.

Give your app an appropriate title. This one is called “Tree Inspections”. You’ll also need to select the Slack Workspace you want your app to belong to.
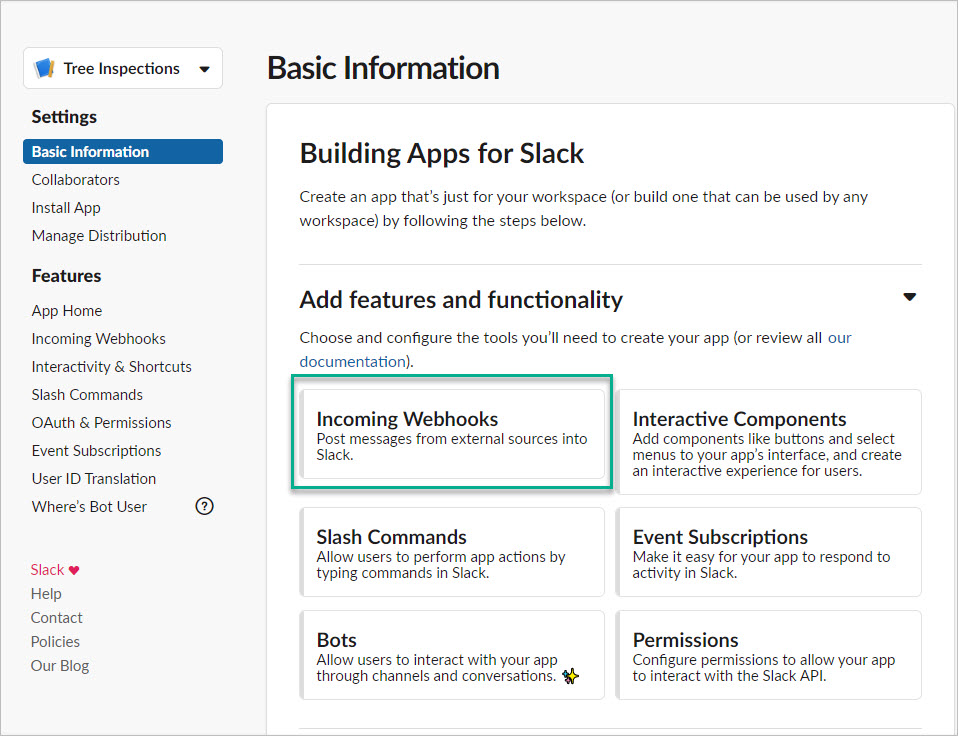
Once your app is created, you can create a webhook. Go to the Basic Information page for your app and click Incoming Webhooks.
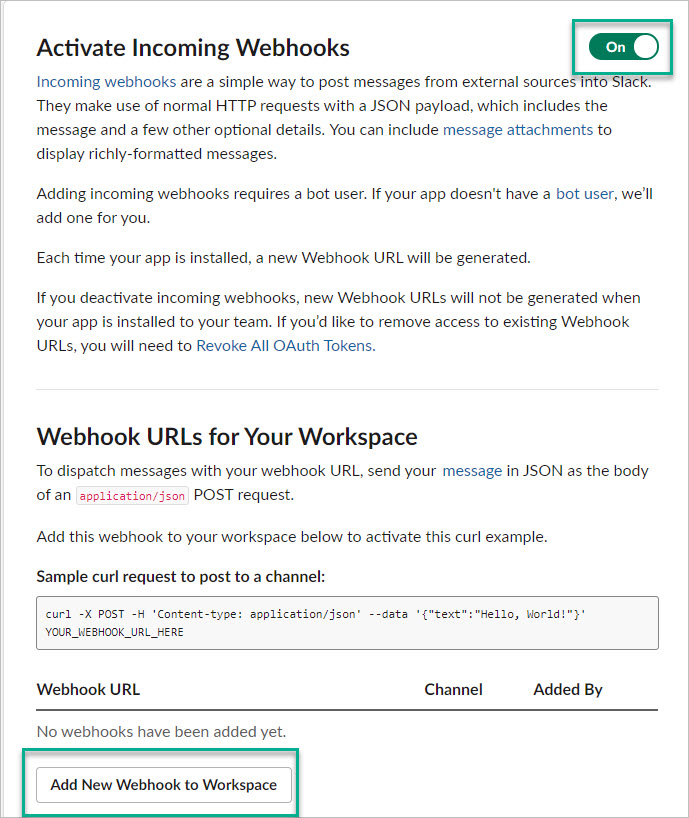
Make sure that Activate Incoming Webhooks is toggled on. Then click Add new Webhook to Workspace.
Note: If you aren’t the manager for your workspace, you will need to request permission to add a webhook.
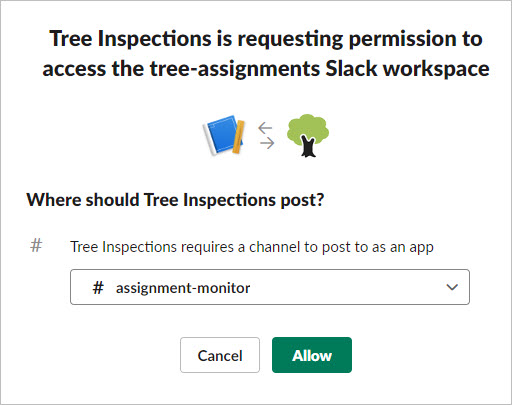
A window appears requesting permission for the app to access your workspace. Select the channel you want your app to post to and click Allow.
Tip: Since this webhook will send a message every time an assignment is completed, you may want to create a channel specifically for it.
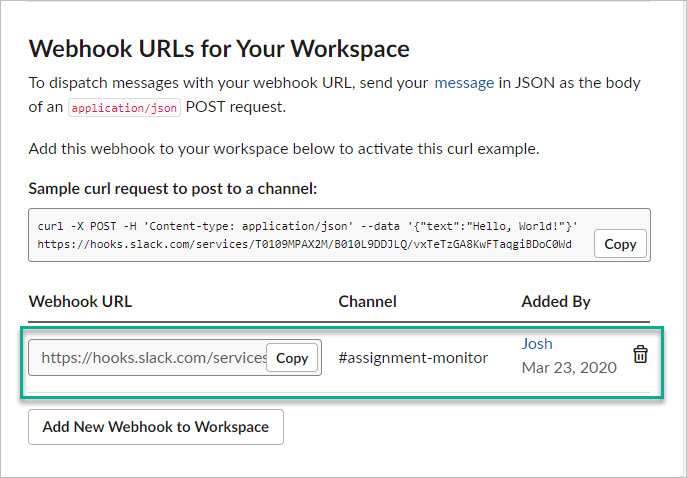
You have successfully created a new web hook. Copy the Webhook URL, shown below, and paste it somewhere you can easily access. You will need it for running the Python script.
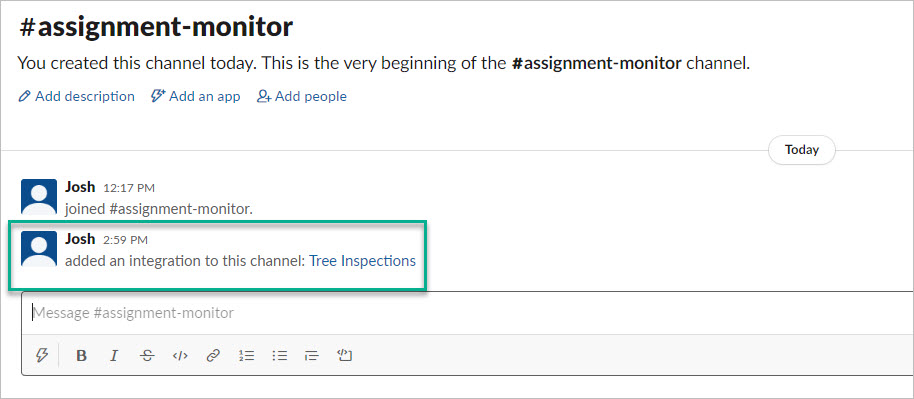
If you go to the Slack channel you connected the webhook to, there will be a message saying a new app was integrated.
Now that you have created a Slack webhook and connected it to your workspace, you are ready to run the Python script.
First, in the Assignment Monitor folder, edit the config file. Edit the file to include your project ID, slack webhook URL, organization, and log-in credentials.
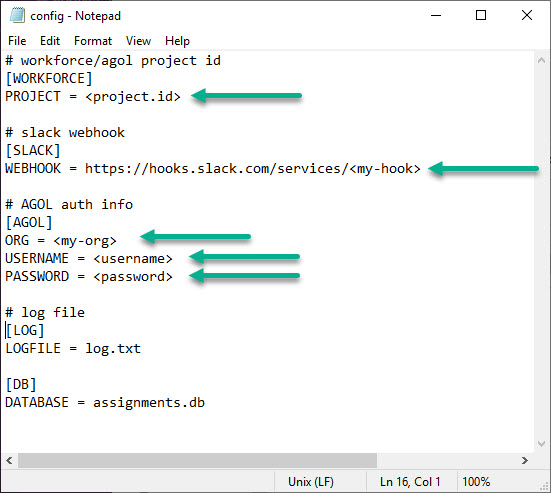
Once you’re done editing the file, save it. You are now ready to run the Python script. Open the terminal or command prompt and make sure your file path points to the scripts folder:
cd C:\Users\user\Desktop\workforce-scripts\scripts
Then run the assignment monitor script:
python assignment_monitor.py
The script will check for newly completed assignments, and a message will be sent to your assignment monitor channel on Slack when one is found. To test this, log in as one of your workers on the Workforce mobile app and complete an assignment.
A message will appear in Slack that looks like this:
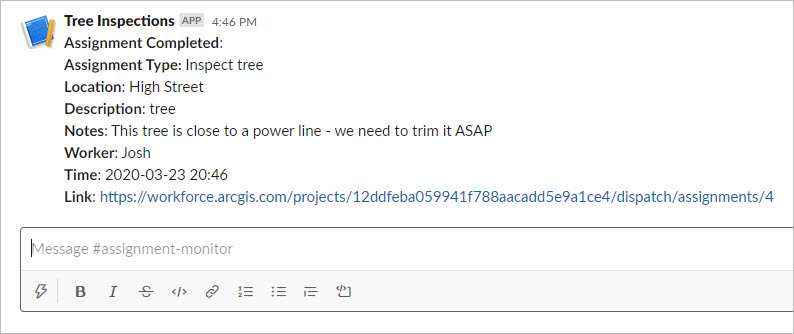
This message shows who completed what assignment and where it is located. It also shows that the worker left a note saying the assignment needs attention right away.
The script will continue checking for completed assignments every 5 seconds. To stop the script, press Ctrl+c while in the terminal or command prompt.
Tip: This script can be modified to run once as opposed to looping infinitely. It can be called every so often (i.e. once per minute) using a task scheduler such as Windows Task Scheduler or Cron.
For more information, see the assignment_monitor readme.
Check completion location
The check_edit_location script uses data from Tracker for ArcGIS to see if a worker edited a feature without visiting its location. Assignments in Workforce, features in Collector, and surveys in Survey123 can all be checked using this script.
If you want to follow along with this exercise, find a Workforce project that has workers who have enabled location tracking.
Note: Location Tracking must be enabled for your organization to use this script. You must either be an administrator or a track viewer who can view the tracks of each worker whose work you'd like to verify.
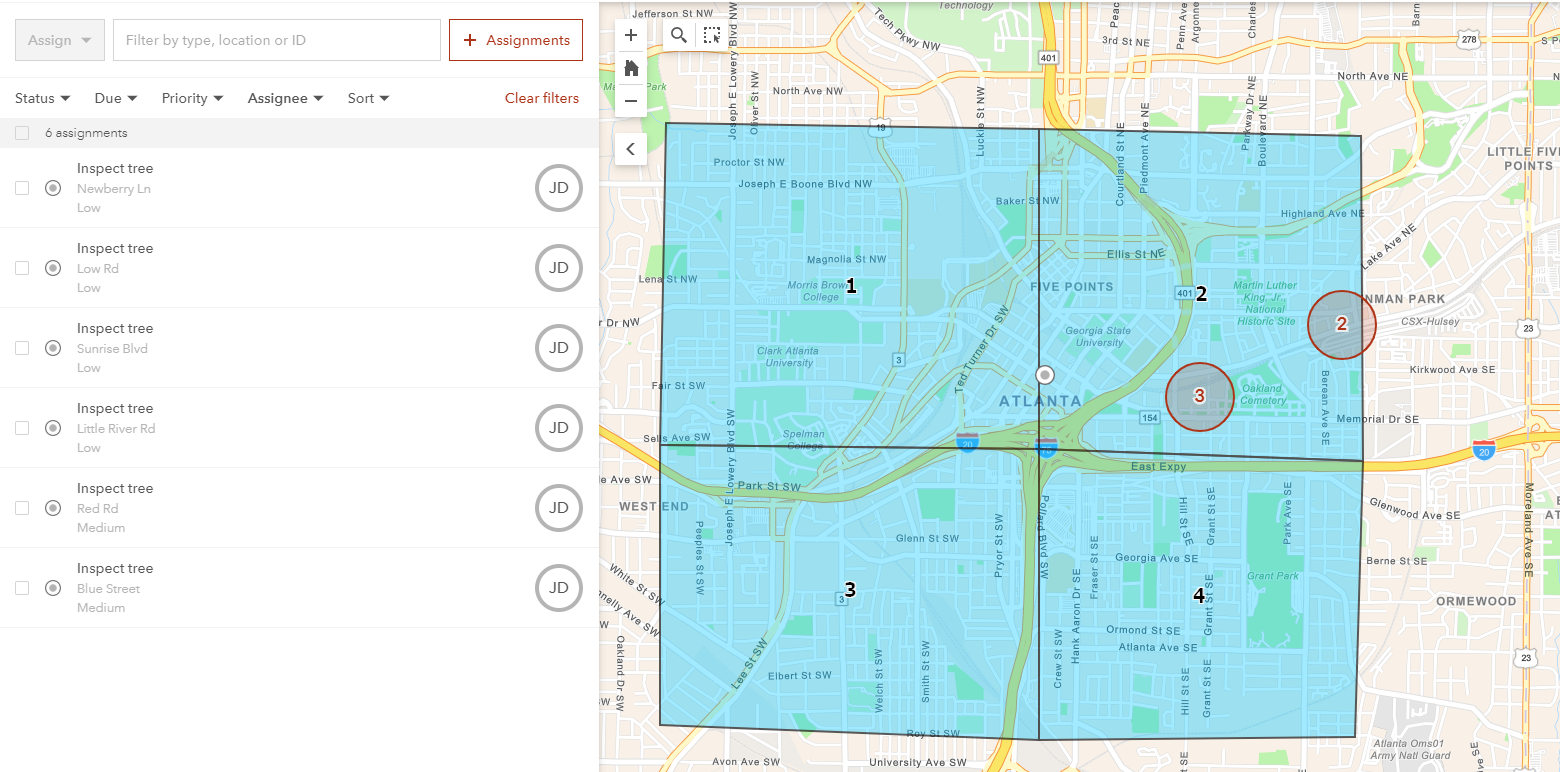
For example, Sharon, a tree inspector, completed three assignments this morning (shown below).
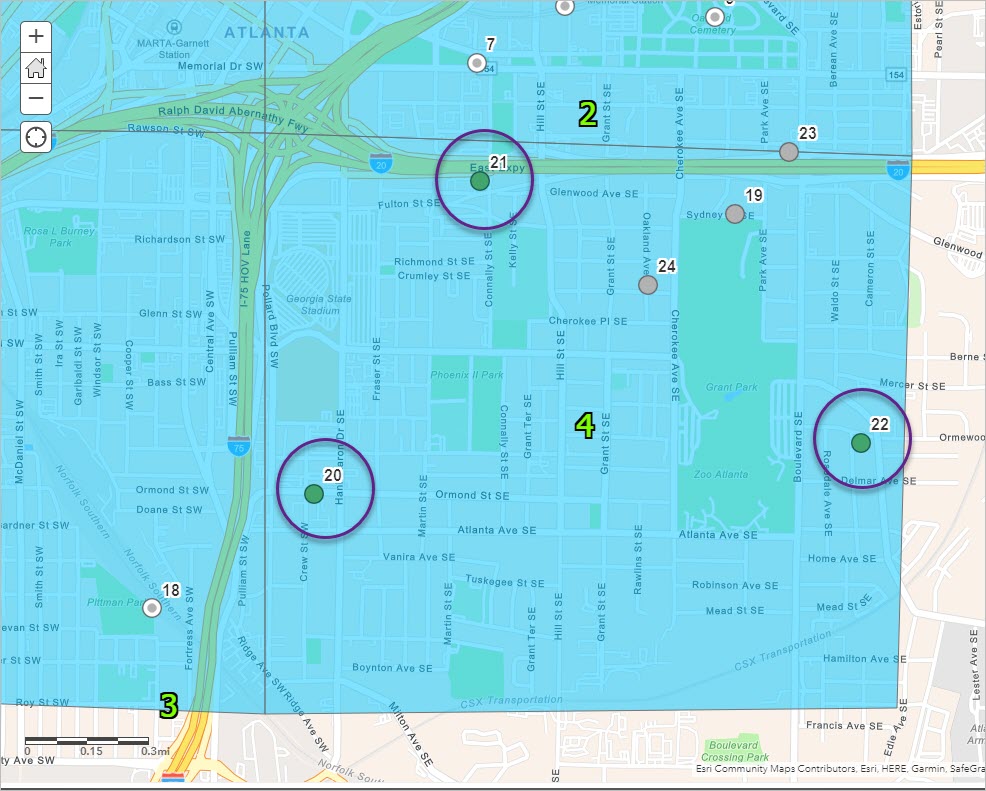
The check_edit_location script is used to verify that Sharon visited the location of each completed assignment.
First, clone or download the Github repository that contains the Python scripts for Tracker.
Next, open the terminal or command prompt and navigate to the scripts folder:
cd C:\Users\user\Desktop\tracker-scripts\scripts
Create the virtual environment with the correct dependencies:
conda env create --file environment.yml
Activate the environment:
conda activate tracker-scripts
Here is the check_edit_location script:
python check_edit_location.py -u username -p password -org https://arcgis.com -workers <worker1>, <worker2> -field-name completedDate -time-tolerance 10 -distance-tolerance 100 -layer-url <layer-url> -tracks-layer-url <tracks-layer-url>
Before you run it, you will want to make sure you edit the parameters as follows:
- Provide your username, password, and AGOL organization to connect to your content.
- List the username for each worker whose assignment and location you want to check.
- Set the field name to the date field within the feature layer you want to verify. To check for assignment completion, use completedDate as input for this parameter.
- Set a time tolerance that provides a range around the time when the assignment was completed. The script defaults to 10 minutes.
- Set a distance tolerance that provides a buffer around the location where the assignment was completed. The script defaults to 100 meters.
- Set the minimum accuracy required when querying worker locations. The script defaults to 50 meters.
- Provide the complete feature service URL for the assignments layer. For example:
- https://services.arcgis.com/a910db6b36ff4066a9d4131fccc3da9b/arcgis/rest/services/assignments_ad9af2fc00314fa49ce79ec7d7317acc/FeatureServer/0
- Enter the complete tracks layer URL if there is a specific track view you want to utilize. The script defaults to the tracks layer in your location tracking service. For example:
- https://locationservicesdev.arcgis.com/US6xjA1Nd8bW1aoAarcgis/rest/services/5bfd7a01b6d4b698df17af205b8dbef_Track_View/FeatureServer/0
Once the parameters are set, run the script.
For this example, the script was run with the default parameters to see if Sharon was within 100 meters of the tree inspection assignments at the time they were completed. The script returned the following message:
The user sharon_user who last edited the feature with OBJECTID 22 was potentially not within the distance tolerance when updating the field completedDate
The script only returns assignments that are invalid. This means that Sharon did visit the location of two of the assignments she completed. However, there is one tree inspection that she may not have visited.
Next, Sharon’s tracks were added to the assignments layer to see if the script’s output made sense.
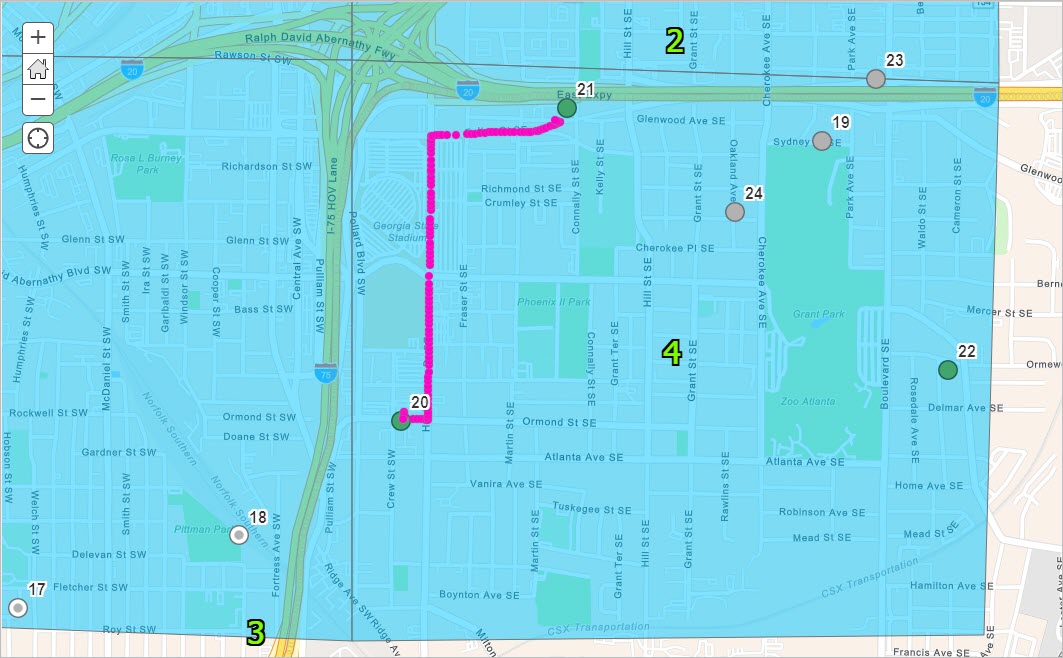
Sharon’s tracks, shown in pink above, show that she visited assignments 21 and 20, but did not visit assignment 22. The script successfully reported that, though assignment 22 was completed, Sharon potentially did not visit the site of the tree inspection.
For more information about this script, see the check_edit_location readme.
Additional resources
This blog post taught you how to use ArcGIS API for Python to monitor your Workforce projects. See the following blog posts to learn about other ways to automate tasks for Workforce:
Feel free to test out all of the Workforce scripts in the Github repo. To learn more about the Workforce module within the Python API, see Managing Workforce for ArcGIS Projects.


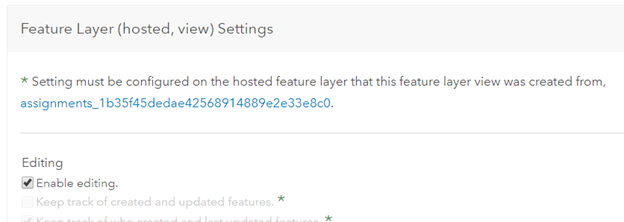
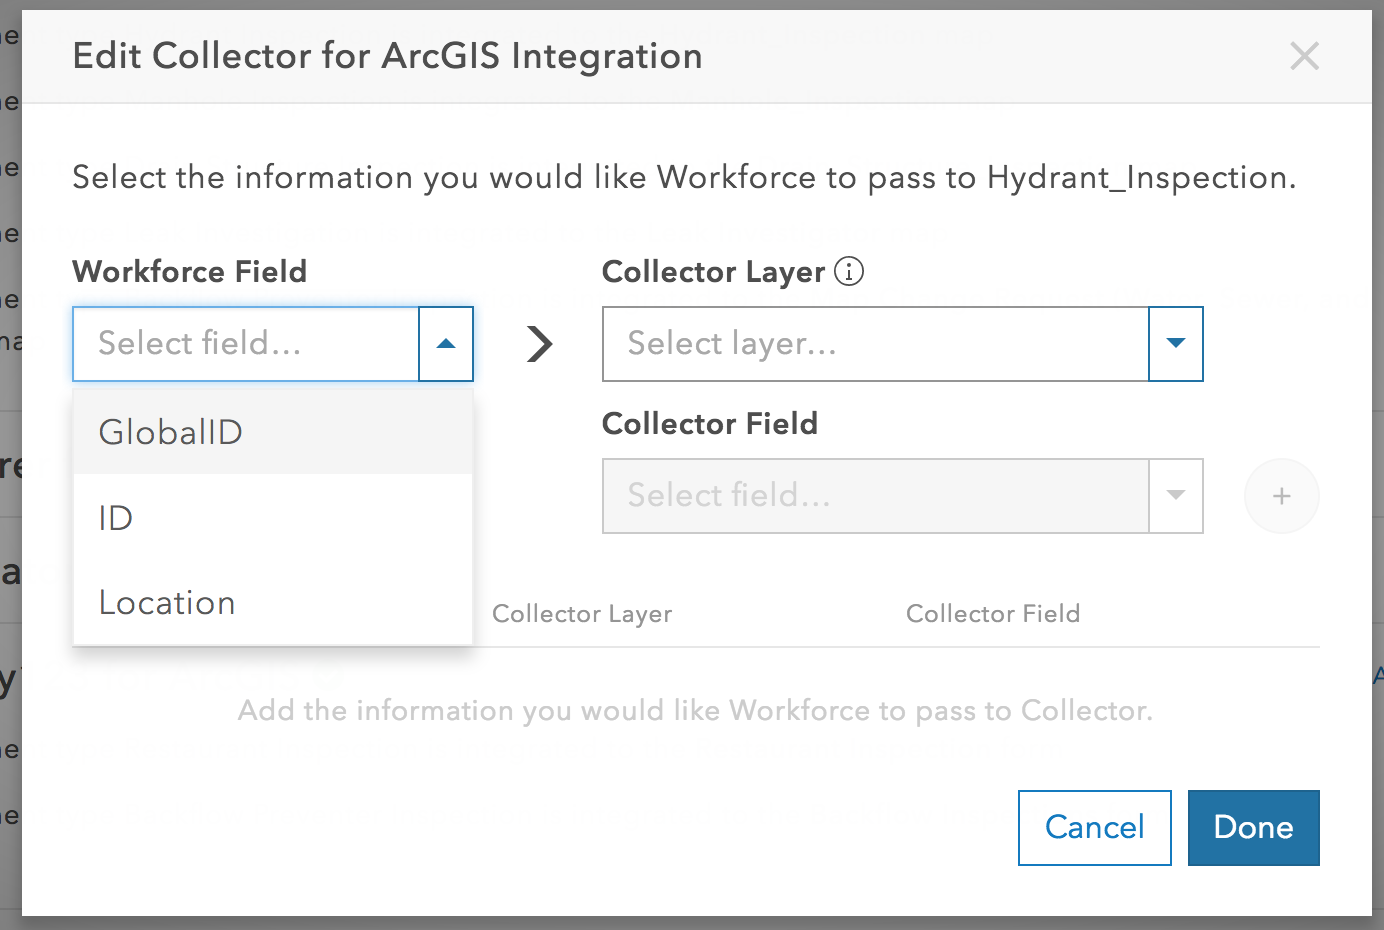
 in the Visualization tab) to limit the data available to mobile workers:
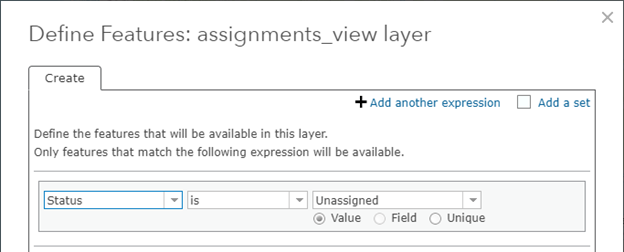
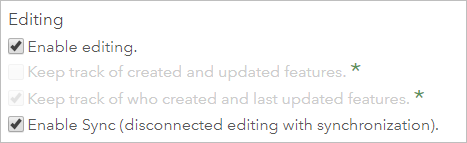
 (which defines the editing experience in Collector):