- Home
- :
- All Communities
- :
- Products
- :
- ArcGIS QuickCapture
- :
- ArcGIS QuickCapture Blog
- :
- ArcGIS QuickCapture Bike Trails Tutorial
ArcGIS QuickCapture Bike Trails Tutorial
- Subscribe to RSS Feed
- Mark as New
- Mark as Read
- Bookmark
- Subscribe
- Printer Friendly Page
[Updated August 5, 2020]
In this step by step tutorial you will learn how to create an ArcGIS QuickCapture project using ArcGIS Pro and the ArcGIS QuickCapture designer. This is a tutorial for advanced ArcGIS QuickCapture users.
Pre-requisites
- Some basic familiarity with ArcGIS Pro 2.3 or newer.
- A mobile device.
- An ArcGIS Online or Enterprise account with permissions to publish feature services (Creator user type, for example)
- Optionally, additional ArcGIS accounts with permissions to create features and the Field Apps Bundle (Field Worker, Creator or GIS Professional user types).
Context
For this exercise, we will pretend we need to map a network of bicycle trails in town. We will create an ArcGIS QuickCapture project that a group of riders can use to map the trails while riding their bicycles. We will map the trails categorizing them by skill (Beginner, Intermediate, Advanced) as well as condition (paved versus non paved). As a bonus, we will also configure the project to capture issues in the trails as well as the locations of intersections, lookouts and bridges.
Overview
This step by step tutorial will guide you through the following:
- Configuring an ArcGIS Pro map to define the features you want to capture and their attributes.
- Publishing your ArcGIS Pro map as a feature service.
- Importing your feature service into a new ArcGIS QuickCapture project
- Modifying your ArcGIS QuickCapture project with the visual editor
- Loading your project into the ArcGIS QuickCapture mobile app
- Modifying your ArcGIS QuickCapture project with the JSON editor
- Sharing your project with a group
- Viewing results
Following the entire tutorial to completion will take approximately 90 minutes.
Configuring an ArcGIS Pro map to define the features you want to capture and their attributes.
In this first step, we will use an ArcGIS Pro map to define the features we want to capture from ArcGIS QuickCapture. Showing how you can create a map, its layers and attributes in ArcGIS Pro is outside the scope of this tutorial, so we have made available a sample Bike Trails ArcGIS Pro project for you.
Open the Bike Trails Tutorial ArcGIS Pro project file from ArcGIS Online
https://www.arcgis.com/home/item.html?id=79b84a40f23340e186e2fd10c551e917

Once open, you can save the map as a new ArcGIS Pro project (aprx) into your own computer.
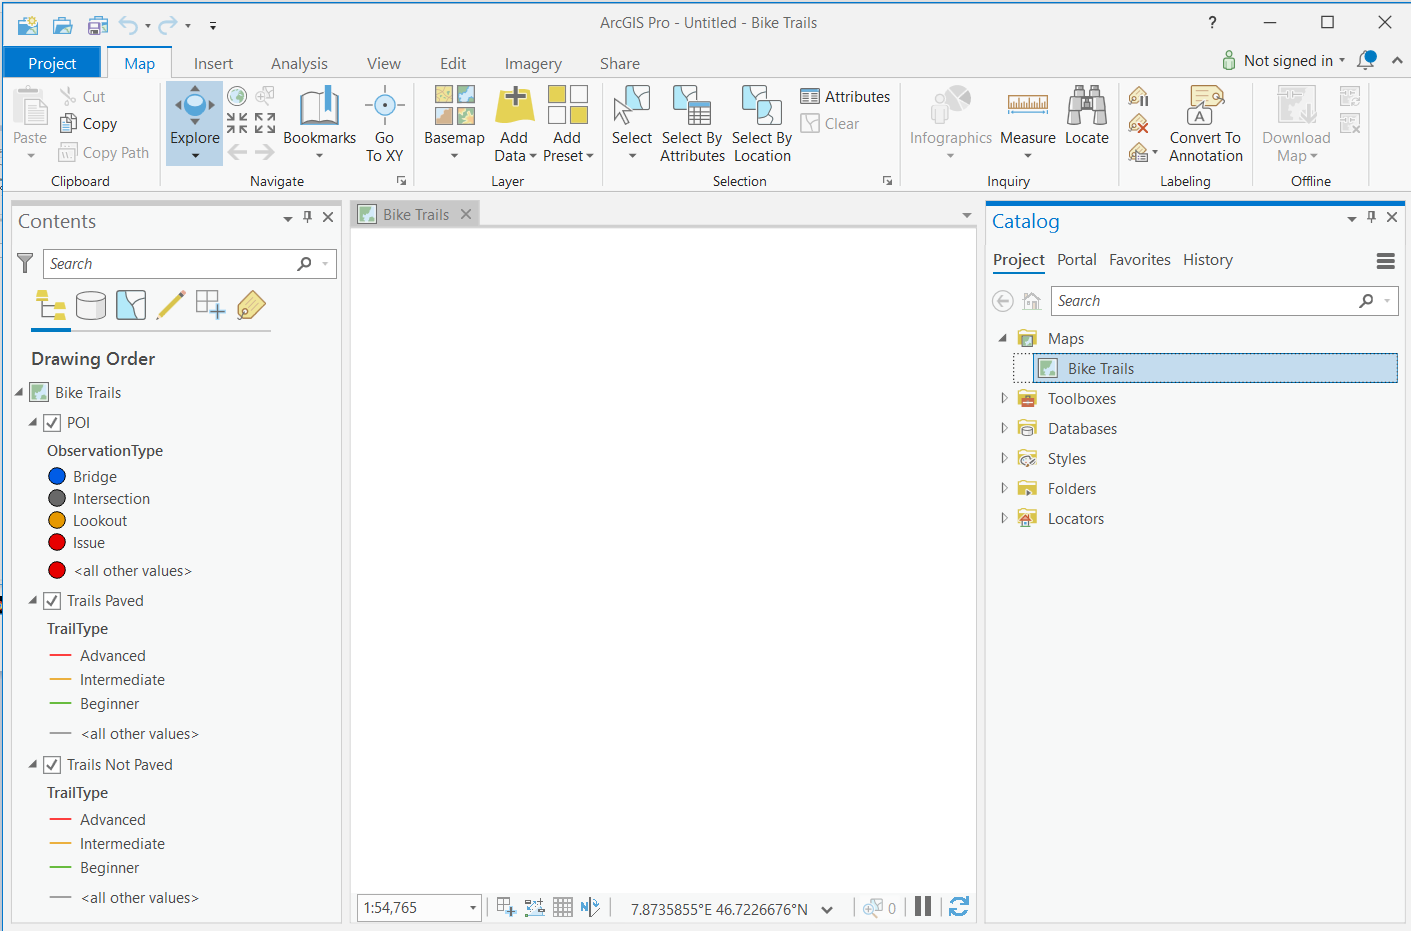
Note that this map has three layers:
- The POI layer is used to define Points of Interest. We categorized Points of Interest using the ObservationType field into Bridge, Intersection, Lookout and Issue, and applied symbology using unique value renderer.
- The Trails Paved and Trails Not Paves layers also applies a unique value renderer to classify the trails by the TrailType attribute: Advanced, Intermediate and Beginner.
When creating your own ArcGIS Pro map documents for use in ArcGIS QuickCapture, you will want to set the symbology of your layers with either unique values or simple symbol renderers. The categories set through your symbology will later be used to create corresponding buttons in the ArcGIS QuickCapture project.
If you open the tables for each of these layers, you will also note that we added a bunch of extra fields to capture attributes such as speed, direction of travel, time captured and other things. These fields are optional but were added on purpose so these attributes can be populated by the ArcGIS QuickCapture mobile app.
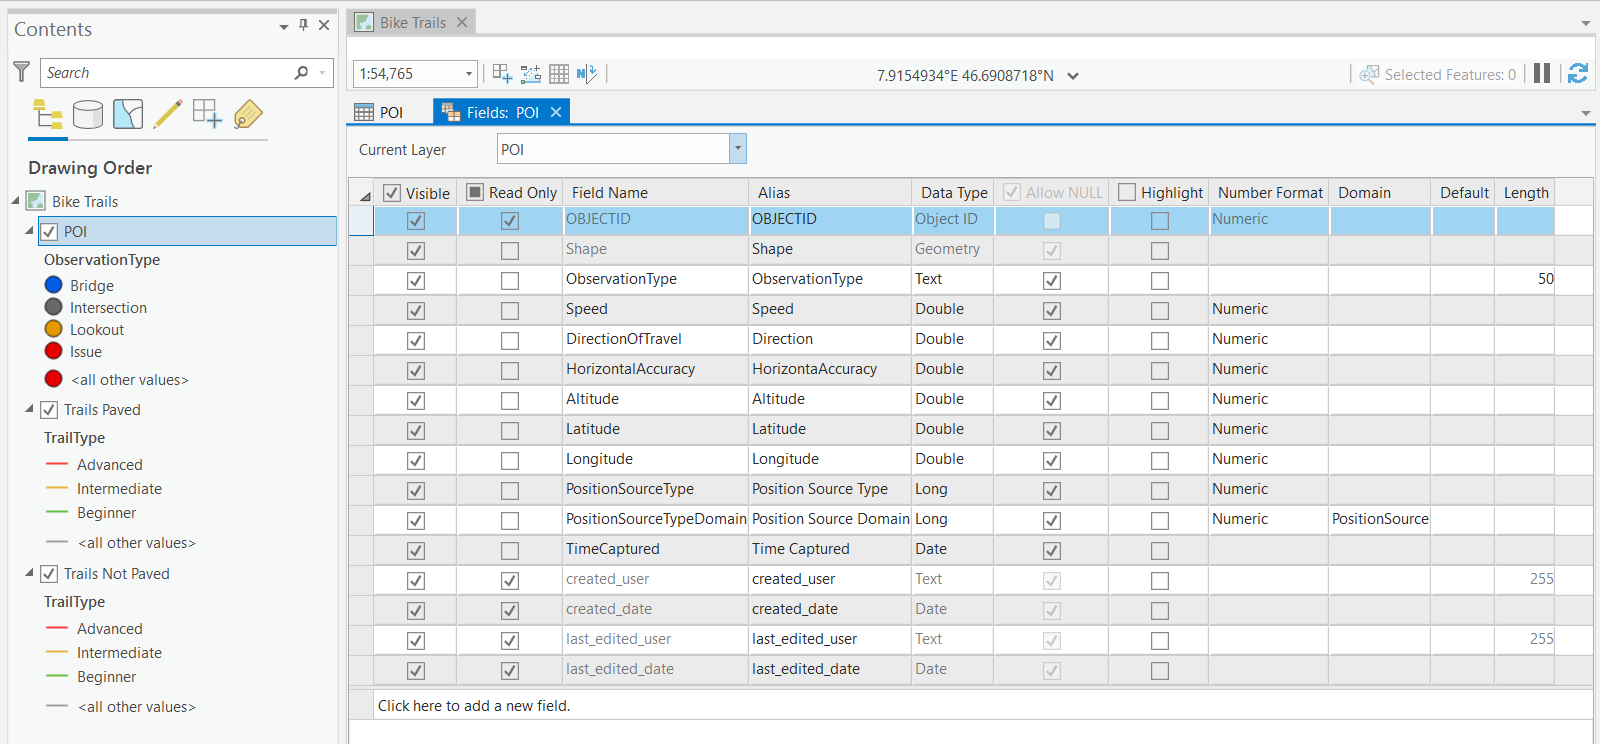
You will be more familiar with the types of attributes ArcGIS QuickCapture can populate for you. At this point, I simply wanted to point out that adding these fields into your schema is important at this stage, so you can take advantage of them later.
Publishing your ArcGIS Pro map as a feature service
ArcGIS QuickCapture works on top of ArcGIS feature services, so we will publish our ArcGIS Pro map next.
From ArcGIS Pro, login into the portal (ArcGIS Enterprise or ArcGIS Online) where you want to publish your feature service. You will need to use a login with permissions to publish feature services.
While your map tab is selected, open the Share ribbon and select Publish Web Layer option.

Within the Share as Web Layer geoprocessing tool, set the name, summary and tags in the General tab.
In the Configuration tab, check the Enable editing and allow editors to: Add, update and delete features. Check also the Sync operation.
Next, publish your feature service.
Your feature service will be created under your ArcGIS account's content. You will be able to find your new feature service in your portal (ArcGIS Enterprise or ArcGIS Online).
Using a web browser, login into your ArcGIS portal and open the item details page of your newly published feature service.
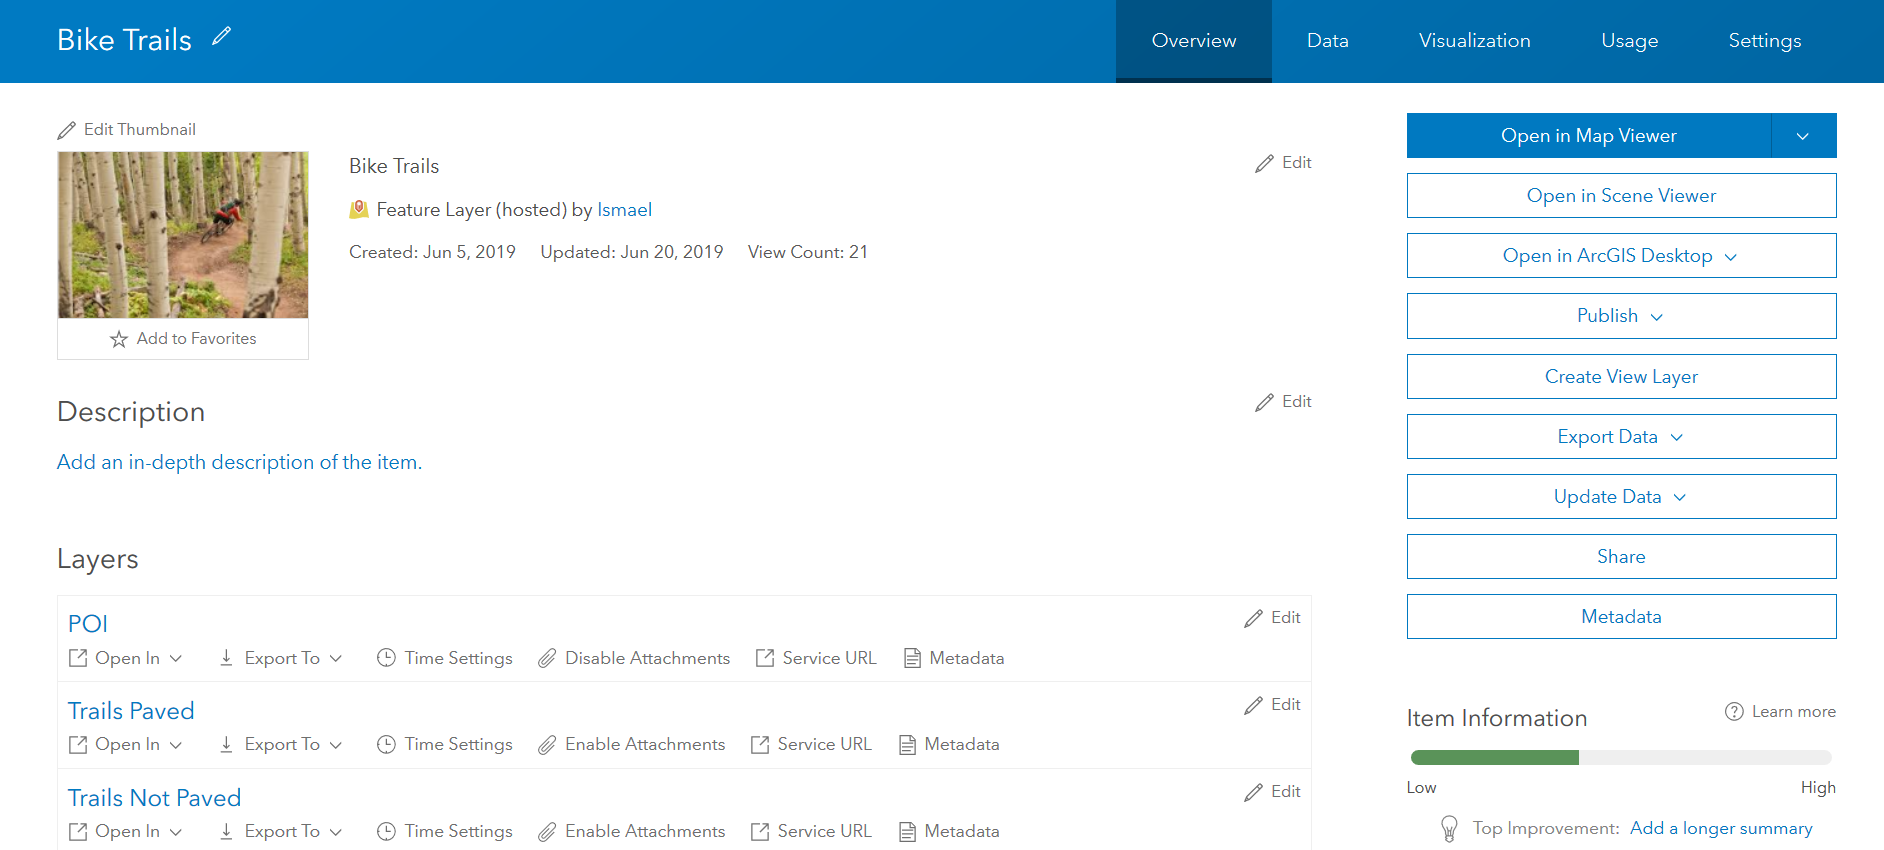
This will be the feature service where ArcGIS QuickCapture will store all data. Right from the item details page of your feature service, you can control some very important characteristics:
- Attachments: Make sure that the POI layer has attachments enabled, or otherwise you will not be able to capture photos when you capture Points of Interest from ArcGIS QuickCapture.
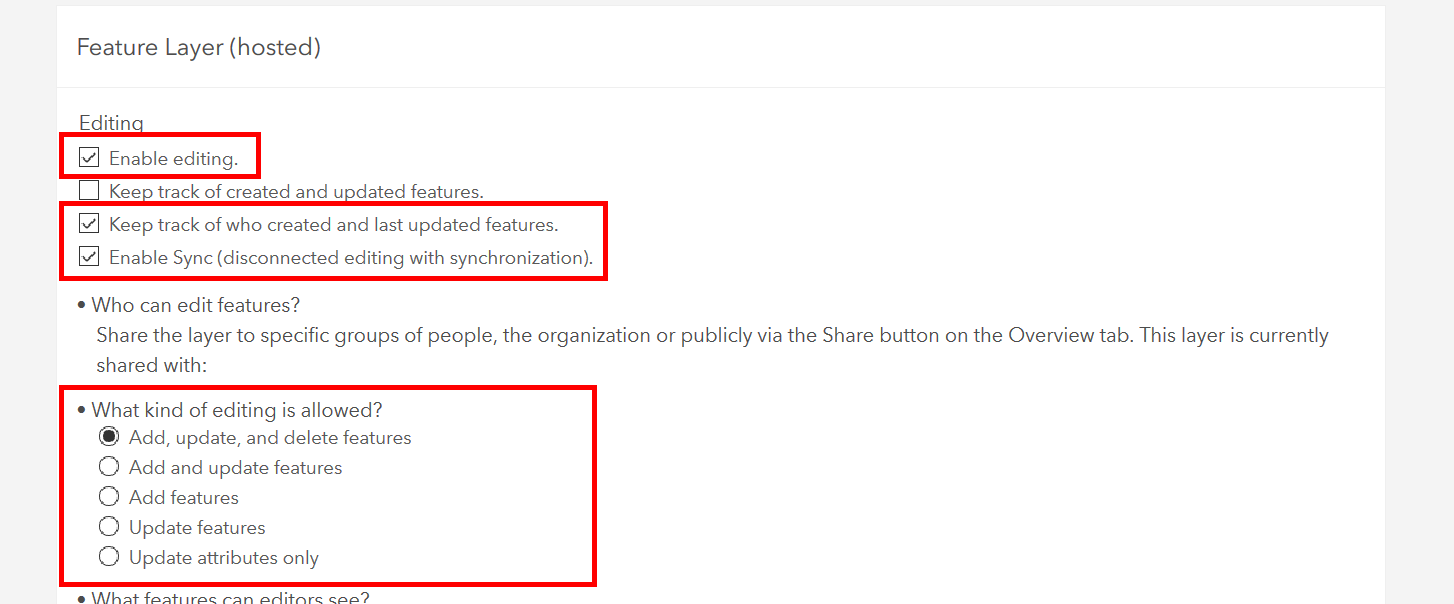
- Editing: If you switch to the Settings tab, you will be able to enable critical editing properties. Specifically:
- Enable editing: You must enable editing, or otherwise nobody (other than you) will be able to capture data on this layer.
- Keep track of who created and last updated features: This option enables Editor Tracking. This is optional, but very handy.
- Enable Sync: Also optional. ArcGIS QuickCapture does not use the Sync capabilities of a feature service at all, but enabling Sync will help making transactions from the mobile app more robust.
- What kind of editing is allowed: ArcGIS QuickCapture can only add new features to your feature service, so you do not need to enable update and delete operations. At the very least, you need to enable Add features.
Importing your feature service into a new ArcGIS QuickCapture project
We are ready to create our ArcGIS QuickCapture project now.
Navigate to https://quickcapture.arcgis.com and login with your ArcGIS credentials.
Click on New Project, and select the Bike Trails feature service you just created.
Give your project a title, thumbnail, and a data recovery email.
The data recovery e-mail is used in the event that data captured from ArcGIS QuickCapture fails to upload. In this case, the ArcGIS QuickCapture mobile app will provide end-users with the option to e-mail all the records that failed to upload to the owner of the QuickCapture project. The data recovery email you set in this step, will be the default recipient of such e-mail.
Click on Create to kick-start your ArcGIS QuickCapture project from the selected feature service.
Changing the look and feel of your project
While feature services define the most fundamental aspects of QuickCapture projects, you can use QuickCapture designer to further configure and fine-tune your ArcGIS QuickCapture projects.
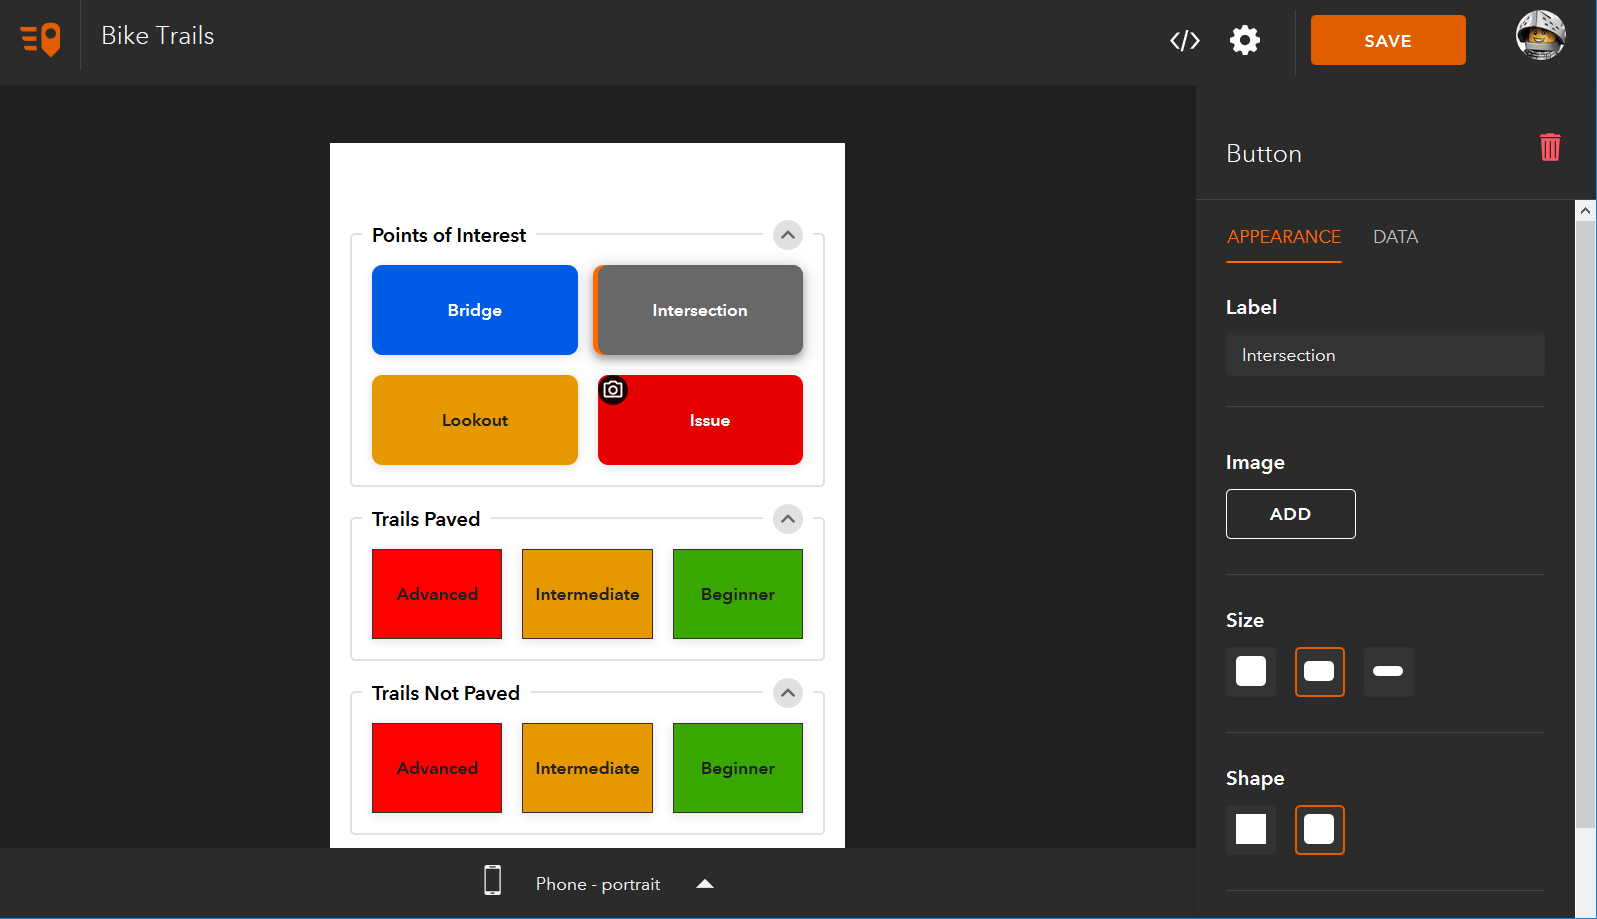
You can visually change properties of your project. For example:
- Change the color, size, shape and other display properties of buttons and groups.
- Reorder buttons within and across groups.
Note that at the bottom of the screen you can change the preview mode across different smartphone and tablet form factors.
Once you are happy with these changes, click on Save to persist your edits to the project.
ArcGIS QuickCapture projects are modeled as as its own item type in your ArcGIS organization. If you now use your web browser to navigate to your ArcGIS content, you will see that a new ArcGIS QuickCapture item type has been added. I like to keep the feature service/s used by the project and the project itself within the same folder. That is a personal preference, but it is not a requirement.
Loading your project into the ArcGIS QuickCapture mobile app
Next, we are going to open the project in the ArcGIS QuickCapture mobile app. If not already, download the app from the Apple or Google Play app stores.
Open the ArcGIS QuickCapture mobile app and login.
Click on Get Projects and download your Bike Trails project.
Push the Issue button to create a new Issue type of feature
If you want to create a trail, you will need to activate a trail button, move around and then stop the trail button.
Note that features are sent to the server automatically 15 seconds after you capture an observation, or immediately after closing the project in the mobile app.
Configuring data properties
We next are going to change the Data properties of buttons to better control what data is captured when you push a button.
Go back to ArcGIS QuickCapture designer in your web browser.
Click on the Issue button
Select the Data tab on the right panel
You will now be presented with the list of fields in the Points of Interest Layer.
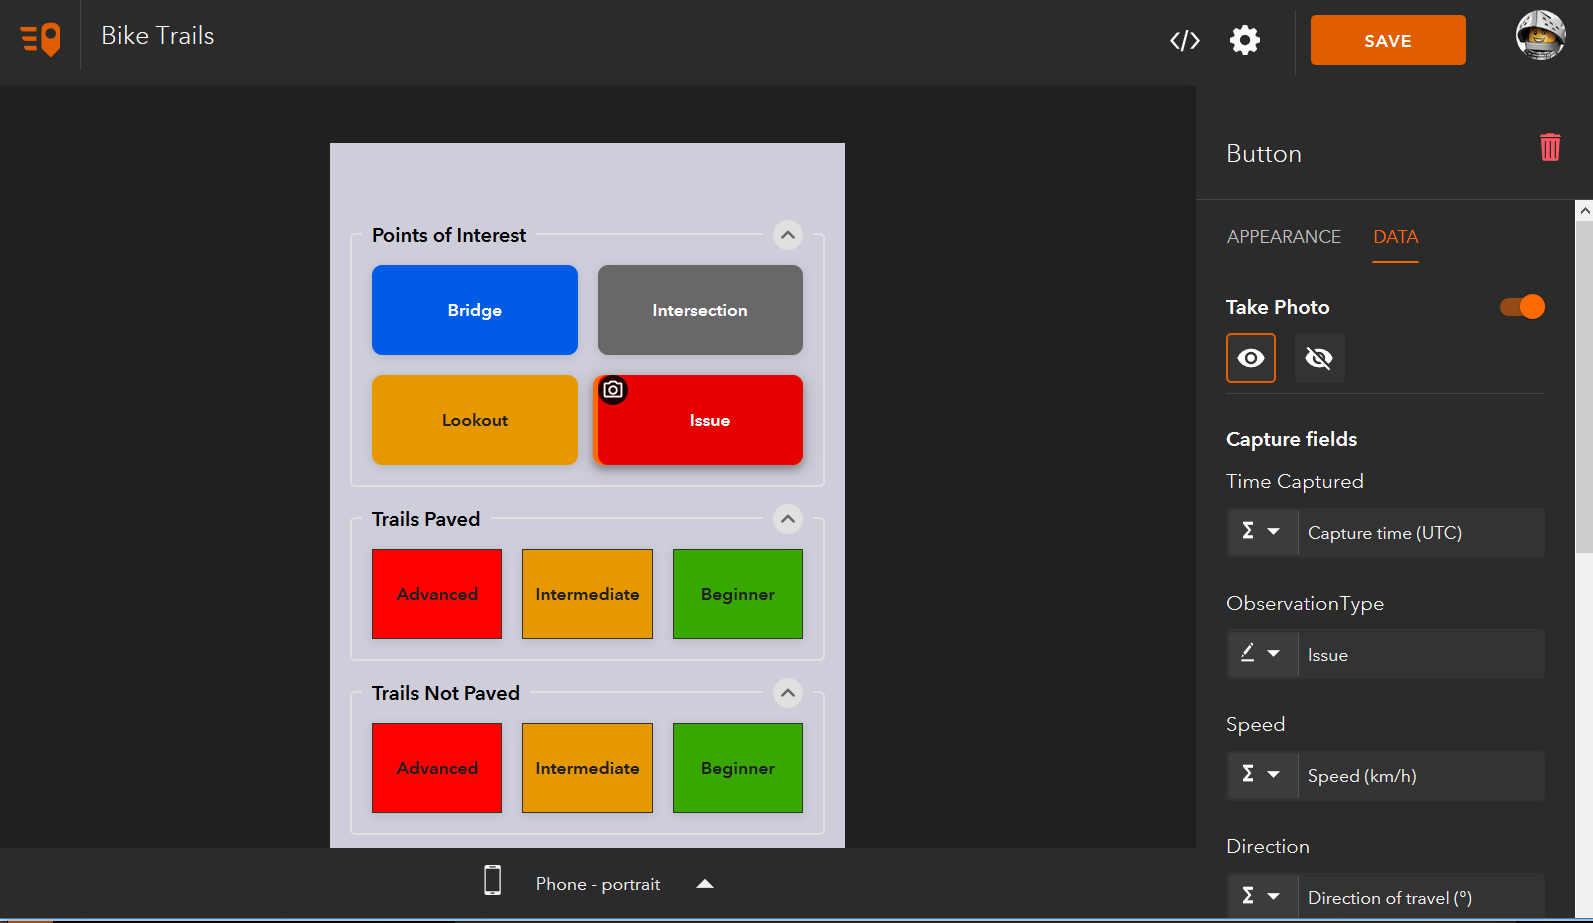
You can set what value you want to store when the button is pushed. You can choose to add a fixed (constant) value, or pick a variable. For example, if you are interested in known when exactly a particular button was pushed, use the Capture time variable in the Time Captured field. You can also capture the speed, direction of travel and many other things.
Set the appropriate variables for the different fields shown for the Issue button.
Note that the Observation Type field has been automatically populated, because this field was set in ArcGIS Pro when defining the symbology of the layer. You will not want to change this value!
Once you have set variables to your fields. Click on Save to persist the changes.
In the mobile app, go back to the main gallery, and click on the Bike Trails project to refresh it.
Open the project again in the mobile app and capture an issue.
You can look at all the data you are capturing by simply adding the Bike Trails feature service into a web map.
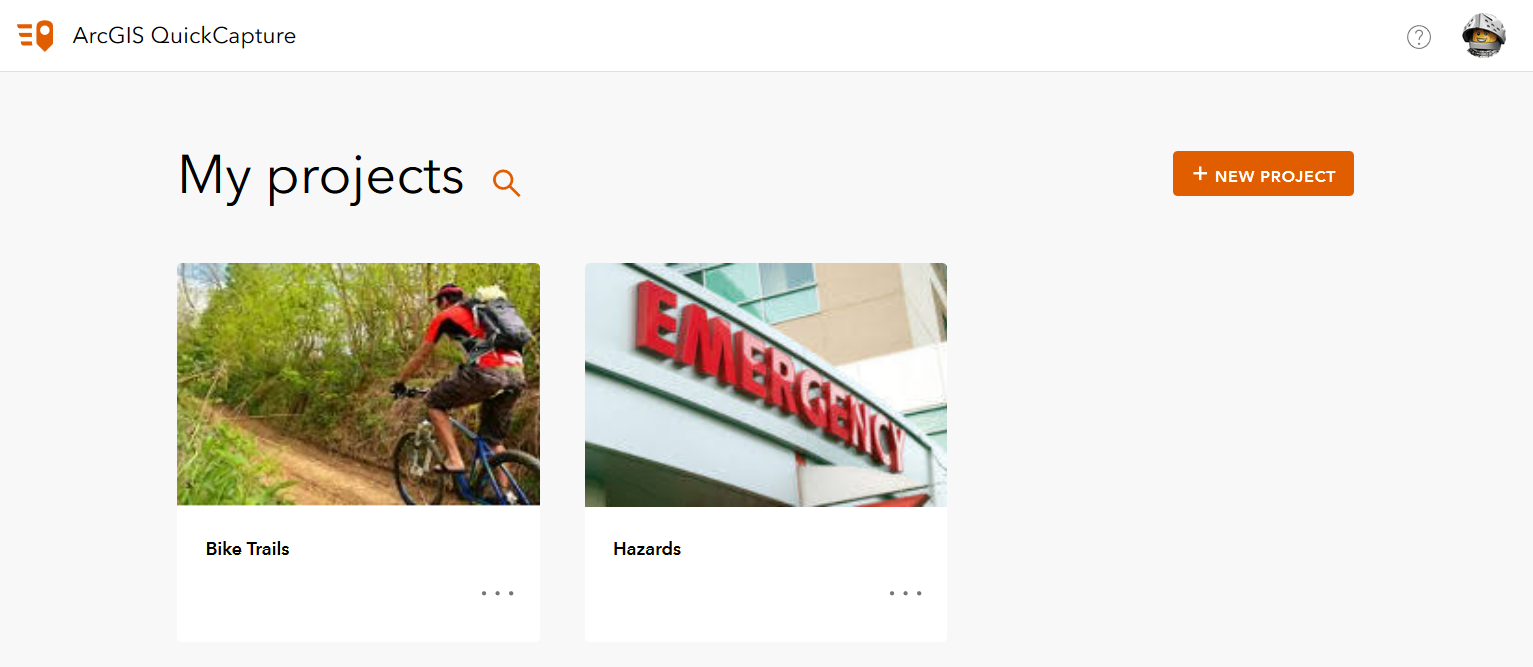
In your web browser, click on the QuickCapture icon in the top-left corner of QuickCapture designer to go back to the project gallery.
Hover your mouse over your Bike Trails project and click on View Results. This will add your project data into a web map for visualization.
When defining variables on fields, you will experience that the list of available variables changes depending on the geometry type of the underlying data source for the button (point, polyline, polygon) as well as the field type (text, decimal, integer, field...).
Tip: If you want to define device variables for multiple buttons at once, use the SHIFT key in your keyboard to select multiple buttons at once, and then apply your variables to the whole selection.
Through the Data tab you can also enable photos. If you do not see the option, you need to go back to the feature service item details page in your portal and enable attachments on the POI layer. Then you will need to reload QuickCapture designer. Photos on polyline buttons are not supported.
Creating exclusivity groups
A bike trail can either be paved, or non-paved, but not both. Similarly, the trail can be cataloged as for beginners or for advanced cyclists, but not both. We will define an exclusivity group to make sure that only one of these 6 buttons can be active at any time.
Go back to ArcGIS QuickCapture designer in your web browser.
Click on the Settings gear in the top panel
Select the Exclusivity Group section and add the 6 trail buttons to a new exclusivity group
If you now test you changes in the mobile app, you will notice that only one button within your exclusivity group will be active at any time. For details on exclusivity groups check the https://community.esri.com/community/arcgis-quickcapture/blog/2019/10/01/understanding-exclusivity-g... blog post.
Sharing your project with a group
Once you are happy with your project, you will want to share it with people within your ArcGIS organization. So far, you have been able to download the project in your mobile app because you are the author of the project, but nobody else in your organization will have access to it.
You can easily share your project right from within ArcGIS QuickCapture designer.

If any of the layers in your project cannot be shared with the groups you select in the dialog, QuickCapture designer will help you adjust the sharing accordingly.
View Results
All data captured by ArcGIS QuickCapture is persisted in a feature service. There is nothing special about these feature services: You can add them into a web map and use them with Web AppBuilder for ArcGIS, Operations Dashboard and even ArcGIS Pro.
The easiest way to view your date is to simply click on the View Results button shown in your project's card, as shown below:
You must be a registered user to add a comment. If you've already registered, sign in. Otherwise, register and sign in.