ArcGIS AppStudio Blog - Page 10

cancel
Showing results for 
Show  only  | Search instead for 
Did you mean: 

Latest Activity

(135 Posts)
ErwinSoekianto
Esri Alum

The "desert oasis" Esri Developer Summit 2018 is around the corner, which scheduled for March 6-9 2018 in Palm Spring, California. The AppStudio for ArcGIS team is excited to see all of you there, here is the list of sessions and workshops that we offer. 

Pre-summit Hands-On Training

The pre-summit hands-on workshop is an excellent opportunity to take a deep-dive to learn everything from A-Z about AppStudio for ArcGIS. Make sure to pre-register to attend.

  • Building Cross-platform GIS Native Apps with AppStudio for ArcGIS

March 4-5, 8:30 am - 5:30 pm

Hard Rock Hotel

In this two-day hands-on course, you will learn how to build native applications containing mapping and GIS capabilities. These applications can be built without code, and then compiled and natively deployed on Windows, Linux, and macOS machines, and also Android and iOS devices. And while the AppStudio interface provides templates and customization options, developers can modify these apps further using the QML language.

It is recommended that you bring your own laptop (Mac or Windows) for development and a smartphone or tablet (iOS or Android) to test the apps. HTML/JavaScript or hybrid app development experience, and light reading on QML is helpful, but not required.

Technical Sessions

Technical sessions are a great way to learn about AppStudio for ArcGIS, where the subject matter expert from the development team will cover from product overviews to a deep-dive on specific workflows

Tuesday, March 6, 1:00 pm - 2:00 pm, Mesquite C

Thursday, March 8, 10:30 am - 11:30am, Catalina/Madera

Join this session to learn how to build cross-platform native apps with AppStudio for ArcGIS. You will learn the basics of programming with the Qt Creator IDE and QML as well as a complete suite of developer productivity tools for ArcGIS developers. This session targets Javascript and Python developers of all levels who want to learn how to build native mapping applications.

Tuesday, March 6, 2:30 pm - 3:30 pm, Mesquite C

Thursday, March 8, 1:00 pm - 2:00 pm, Catalina/Madera

In this session, we will discuss advanced developer techniques with AppStudio for ArcGIS. In particular, we will cover some of the latest enhancements added to AppStudio such as support for high accuracy GNSS receivers, biometric logins, improved data access utilities and more.

Wednesday, March 7, 4:00 pm - 5:00 pm, Mojave Learning Center

Join this session to learn how you can download the source code of Survey123 for ArcGIS and extend it with your own functionality, or change its look and feel. We will use AppStudio for ArcGIS and QML to show you how things are done.

Demo Theater

Demo Theater sessions are focused on specific workflow or feature and only 30 minutes, so make sure to come on time. 

      Thursday, March 8, 10:30 am - 11:00am, Oasis 1-2

      Are you a web developer that would like to build native apps? This session will show you how your       HTML5/CSS/JavaScript skills will help you build native apps that run on smartphones, tablets, and desktops.

User Presentation

Thursday, March 8, 4:30 pm - 5:00 pm, Mesquite C

Abstract 

In 2018, the City of Ottawa will be launching the underground segment of its Light Rail Transit system. As part of the project, a native iOS and Android GIS App has been developed using AppStudio for ArcGIS, allowing First Responders to access an interactive system map, incident response checklists, and detailed station schematics in a fully offline environment. This project is made possible through the use of Esri's new Vector Tile Cache and Mobile Map Package technology.

Presenter

Adam Drackley

Senior GIS Developer, City of Ottawa

Esri Showcase

If you are interested in a product demo, need to ask technical questions, show-off your amazing apps built with AppStudio or just want to say hi and meet with the AppStudio for ArcGIS team; then stop by and come see us in the Esri Showcases. 

Showcase Hours
Monday, March 05: 2:00 p.m. – 7:00 p.m.
Tuesday, March 06, 12:00 p.m. – 6:30 p.m.
Wednesday, March 07, 10:00 a.m – 6:30 p.m.
Thursday, March 08, 9:00 a.m. – 4:00 p.m.


Photo of some of the AppStudio team members at Esri UC 2017

We hope to see all of you out there in Palm Springs. 

Regards,

AppStudio for ArcGIS Team

more
2 4 1,033
JohnathanHasthorpe
Esri Regular Contributor

A quick blog to share the news that MyUSNG is now available in the Windows Store and can be downloaded for both Windows Desktop and Windows Mobile!

For those that are unfamiliar with the app, the United States National Grid (USNG) is a nationally consistent language for location (displayed in a user friendly format), which is commonly used during Search and Rescue operations in the United States (http://usngcenter.org/). MyUSNG reports the location of your device in USNG the format, and includes a simple map that will let you capture the USNG of locations around you and share them. You can also center the map using USNG locations, a range of coordinate formats (including MGRS, USNG, UTM and Latitude and Longitude) or the World Geocode service.

If you want to capture, and share locations with others then this is a valuable app for you!

To get it on Windows Desktop and Mobile, go here: Get MyUSNG - Microsoft Store en-AU 

Or here for IOS and Android.

Note that MYUSNG is an Esri Labs Project and is not an official product. It is built using AppStudio for ArcGIS.

more
1 0 859
by Anonymous User
Not applicable

This functionality is currently in beta, meaning functionality isn’t yet finalized, and we’re looking forward to your feedback.

Applications can communicate with each other through a variety of ways. For example, you can use a custom URL scheme to launch one app from another one and invoke actions specified in the link, check out this blog post for understandingSurvey123's custom URL scheme. You can also use the newly added inter-app communication functionality to pass text or a URL to another app. Inter-app communication functionality brings up the standard iOS, macOS or Android share sheet that allows you to share text or URL to other applications. For instance, instead of copying a URL, navigating and pasting URL into another app, you can easily share a URL in the source app by triggering share sheet using inter-app communication functionality. This blog post explains how to achieve this. 

First of all, you need to enter data or copy data to the clipboard.

    property url urlInfo: "https://appstudio.arcgis.com/"

    Column {
        spacing: 10

        TextField {
            id: inputText
            placeholderText: "Enter some text"
        }

        Text {
            id: sampleURL
            text: urlInfo
        }

        Button {
            id: copyURL
            text: "Copy as URL"

            onClicked: {
                AppFramework.clipboard.copy(sampleURL.text)
            }
        }
    }‍‍‍‍‍‍‍‍‍‍‍‍‍‍‍‍‍‍‍‍‍‍‍‍‍‍‍‍‍‍‍‍‍‍‍‍‍‍‍‍‍‍‍‍‍‍‍‍‍‍‍‍‍‍‍‍‍‍‍‍‍‍‍‍‍‍‍‍‍‍‍‍‍‍‍‍‍‍‍‍‍‍‍‍‍‍‍‍‍‍‍‍‍‍‍‍‍‍‍‍‍‍‍‍‍‍‍‍‍‍‍‍‍‍‍‍‍‍‍‍‍‍‍‍‍‍‍‍‍‍‍‍‍‍‍‍‍‍‍‍‍‍‍‍‍‍‍‍‍‍‍‍‍‍‍‍‍‍‍‍‍‍‍‍‍‍‍‍‍‍‍‍‍‍‍‍‍‍‍‍‍‍‍‍‍‍‍‍‍‍‍‍‍‍‍‍‍‍‍‍‍‍‍‍‍‍‍‍‍‍‍‍‍‍‍‍‍‍‍‍‍‍‍‍‍‍‍‍‍‍‍‍‍‍‍‍‍‍‍‍

Once data is entered or copied to the clipboard, you can use the AppFramework.clipboard.share(QJSValue) method to share text or a URL to other apps. The following code snippet shows how to share input text across apps.

        //Share input text
        TextField {
            id: inputText
            placeholderText: "Enter some text"
        }

        Button {
            id: shareURLButton
            text: "Share as Text"

            onClicked: {
                AppFramework.clipboard.share(inputText.text)
            }
        }‍‍‍‍‍‍‍‍‍‍‍‍‍‍‍‍‍‍‍‍‍‍‍‍‍‍‍‍‍‍‍‍‍‍‍‍‍‍‍‍‍‍‍‍‍‍‍‍‍‍‍‍‍‍‍‍‍‍‍‍‍‍‍‍‍‍‍‍‍‍‍‍‍‍‍‍‍‍‍‍‍‍‍‍‍‍‍‍‍‍‍‍‍‍‍‍‍‍‍‍‍‍‍‍‍‍‍‍‍‍‍‍‍‍‍‍‍‍‍‍‍‍‍‍‍‍‍‍‍‍‍‍‍‍‍‍‍‍‍‍‍‍‍‍‍‍‍‍‍‍‍‍‍‍

The following code demonstrates how to share a URL from clipboard. 


        // Share URL from clipboard
        Text {
            id: sampleURL
            text: urlInfo
        }

        Button {
            id: copyURL
            text: "Copy as URL"

            onClicked: {
                AppFramework.clipboard.copy(sampleURL.text)
            }
        }


        Button {
            id: shareURL
            text: "Share as URL"

            onClicked: {
                AppFramework.clipboard.share()
            }
        }‍‍‍‍‍‍‍‍‍‍‍‍‍‍‍‍‍‍‍‍‍‍‍‍‍‍‍‍‍‍‍‍‍‍‍‍‍‍‍‍‍‍‍‍‍‍‍‍‍‍‍‍‍‍‍‍‍‍‍‍‍‍‍‍‍‍‍‍‍‍‍‍‍‍‍‍‍‍‍‍‍‍‍‍‍‍‍‍‍‍‍‍‍‍‍‍‍‍‍‍‍‍‍‍‍‍‍‍‍‍‍‍‍‍‍‍‍‍‍‍‍‍‍‍‍‍‍‍‍‍‍‍‍‍‍‍‍‍‍‍‍‍‍‍‍‍‍‍‍‍‍‍‍‍‍‍‍‍‍‍‍‍‍‍‍‍‍‍‍‍‍‍‍‍‍‍‍‍‍‍‍‍‍‍‍‍‍‍‍‍‍‍‍‍‍‍‍‍‍‍‍‍‍‍‍‍‍‍‍‍‍‍‍‍‍‍

Inter-app Communication Sample App

The Inter-app Communication sample app is available on AppStudio Desktop.  To create an app based on this sample, follow these steps:

  • Open AppStudio Desktop
  • Click on the New App button 
  • Search and select Inter-App Communication sample 
  • Click on the Create Button


 This sample is also available in the appstudio-samples GitHub repo.                   

Hopefully, this blog post gives you some idea of what this functionality is currently capable of.
Feedback and suggestions are welcomed in the comment section below, and I would also like to hear
how you plan to use this feature in your own AppStudio apps.

To learn more about Inter-app communication, check out the API Guide.  

more
1 1 2,388
by Anonymous User
Not applicable

AppStudio 2.1 has introduced Secure Storage plugin (BETA) that provides a way to store and access sensitive information such as credentials, tokens etc. With Secure Storage, your data is now encrypted and store in the system provided keychain and can only be accessed by the app.  Let’s dive deeper to find out what is Secure Storage and how to use it.   

Note: This functionality is currently in BETA, which essentially means go ahead and use it but there might be slight modifications/enhancements made in the future releases based on usage and feedback. This also means that we are looking forward to your feedback. 

Overview

SecureStorage singleton is part of the SecureStorage module, it allows you to store and retrieve data directly with ease in a cross-platform wayIn its first implementation, you can store as key value pairs and retrieve data as a string format and each value is limited to 240 characters (technical limitation to provide cross-platform support). However, there is no limit on how many key/value pairs you can create. 

On a side note, when testing your app that uses SecureStorage inside of player make sure there are no collisions with key names since inside player both your app and the player app will be using the same keychains. You can easily make your key unique by adding a prefix such as your app name.

Supported Platforms

  • Android
  • iOS 
  • Mac OS
  • Linux
  • Windows


SecureStorage provides two methods and a signal (event):

Method:

  • Bool setValue (String key, String value) – Returns a boolean value indicating the data was stored encrypted in the system keychain. This method is also used to remove the existing keys from the keychain by providing a valid key name and empty string for the value.  
Note:
  • If you use the same key twice the previous one will be overwritten
  • Keys cannot be null or empty
  • If you enter a valid key with empty string, it will remove the key present in the keychain
  • String value(String key) – Returns string value which is the data associated with the key

Signal:

  • error(String errorMessage) - Emits when there is an unacceptable behavior when you try the above methods

How to use Secure Storage plugin  

This step - by - step tutorial will walk you through how to use Secure Storage plugin in your AppStudio apps.

Step 1

Import Secure Storage plugin statement 

import ArcGIS.AppFramework.SecureStorage 1.0‍‍‍‍‍‍‍‍‍‍‍‍‍‍

Step 2

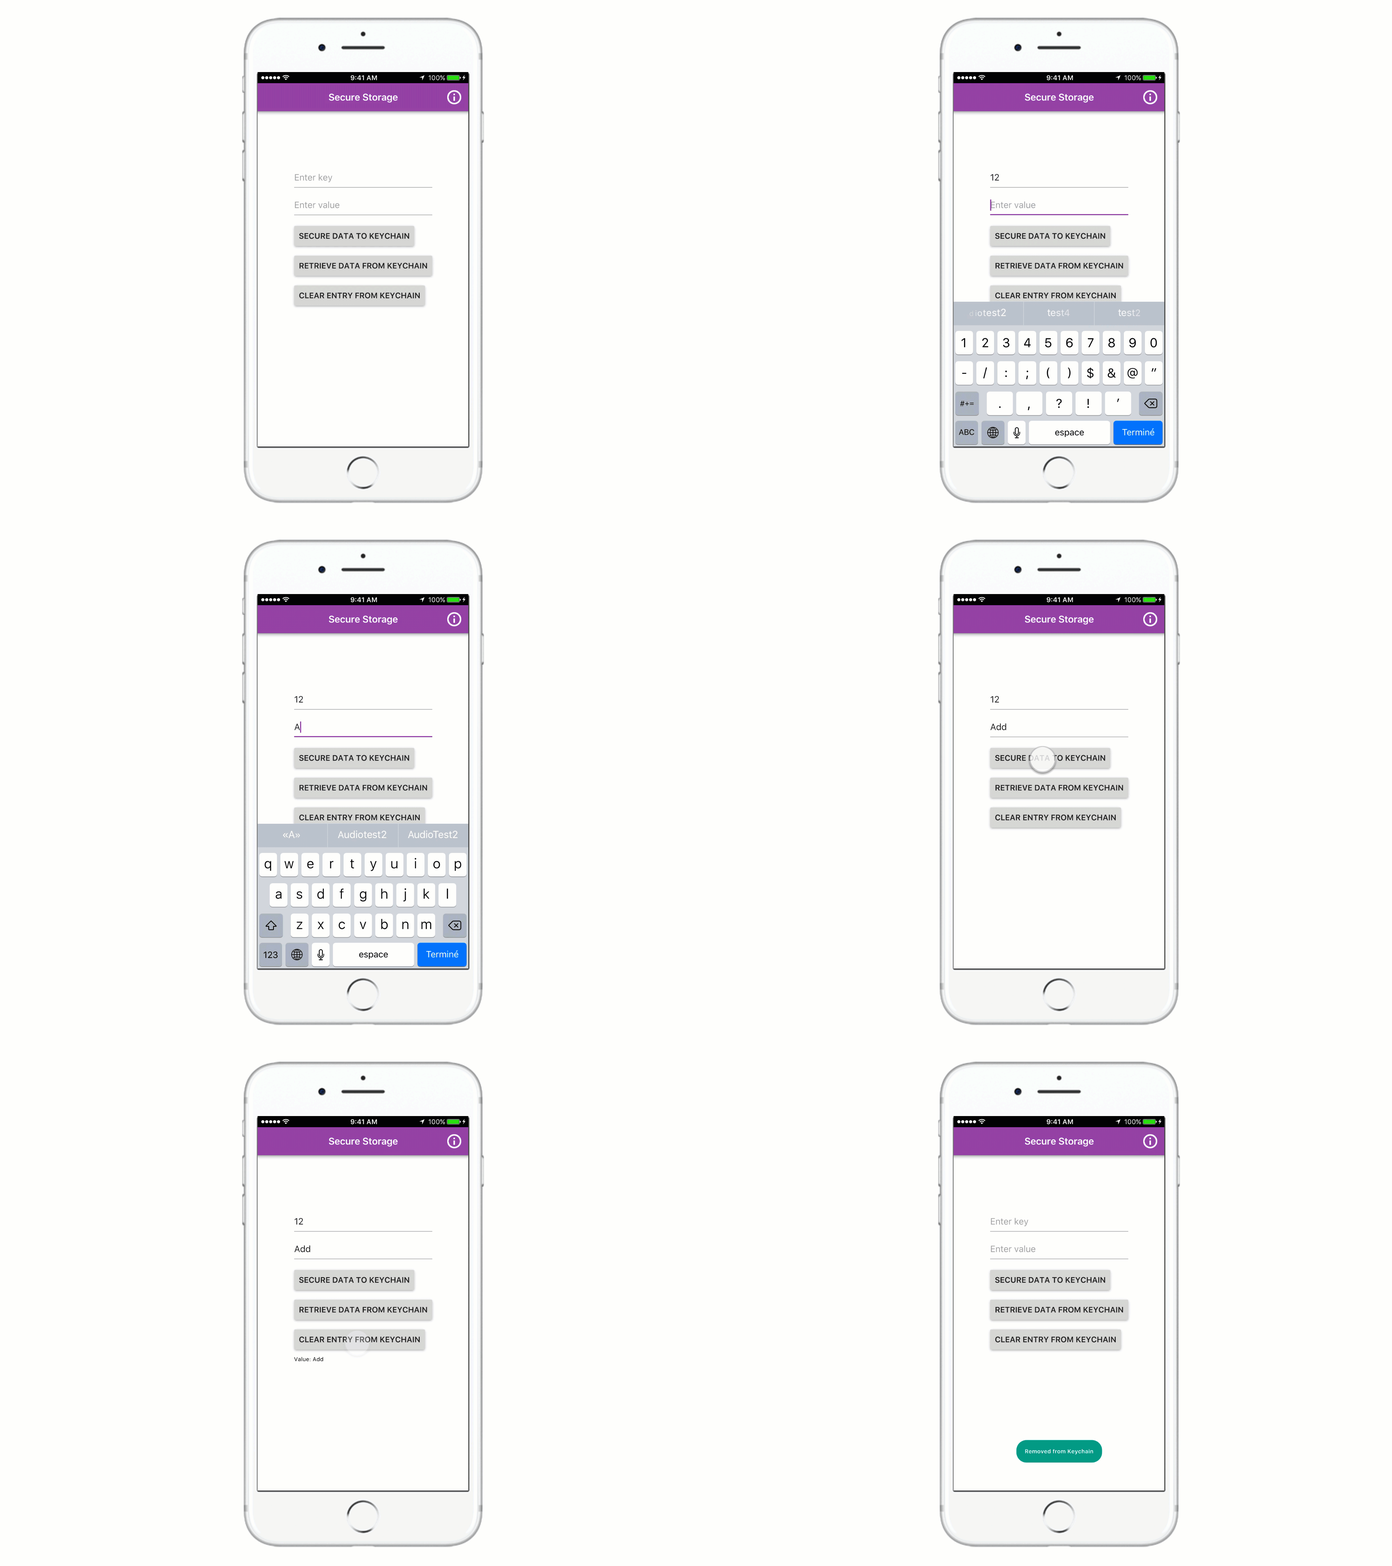
Store data into system Keychain 

    TextField {
        id: key
        placeholderText: "Enter key"
    }

    TextField {
        id: value
        placeholderText: "Enter value"
        anchors.left: key.right
    }

    //Click on the button to store data into the keychain
    Button {
        id: secureButton
        text: qsTr("Secure Data")
        anchors.top: key.bottom
        onClicked: {
            SecureStorage.setValue(key.text,value.text)
        }
    }
‍‍‍‍‍‍‍‍‍‍‍‍‍‍‍‍‍‍‍‍‍‍‍‍‍‍‍‍‍‍‍‍‍‍‍‍‍‍‍‍‍‍‍‍‍‍‍‍‍‍‍‍‍‍‍‍‍‍‍‍‍‍‍‍‍‍‍‍‍‍‍‍‍‍‍‍‍‍‍‍‍‍‍‍‍‍‍‍‍‍‍‍‍‍‍‍‍‍‍‍‍‍‍‍‍‍‍‍‍‍‍‍‍‍‍‍‍‍‍‍‍‍‍‍‍‍‍‍‍‍‍‍‍‍‍‍‍‍‍‍‍‍‍‍‍‍‍‍‍‍‍‍‍‍‍‍‍‍‍‍‍‍‍‍‍‍‍‍‍‍‍‍‍‍‍‍‍‍‍‍‍‍‍‍‍‍‍‍‍‍‍‍‍‍‍‍‍‍‍‍‍‍‍‍‍‍‍‍‍‍‍‍‍‍‍‍‍‍‍‍‍‍‍‍‍‍‍‍‍‍‍‍‍‍‍‍‍‍‍‍‍‍‍‍‍‍‍‍‍‍‍‍‍‍‍‍‍‍‍‍‍‍‍‍‍‍‍‍‍‍‍‍‍‍‍‍‍‍‍‍‍‍‍‍‍‍‍‍‍‍

Step 3 

Add a Retrieve button, click on the button to retrieve data from Keychain. 

    //Click on the button to retrieve data
    Button {
        id: retrieveButton
        text: qsTr("Retrieve Data")
        anchors.top:secureButton.bottom
        onClicked: {
            retrieveData.text = qsTr("Value: ") + SecureStorage.value(key.text)
        }
    }

    //Display retrieved data
    Text{
        id: retrieveData
        anchors.top: retrieveButton.bottom
    }‍‍‍‍‍‍‍‍‍‍‍‍‍‍‍‍‍‍‍‍‍‍‍‍‍‍‍‍‍‍‍‍‍‍‍‍‍‍‍‍‍‍‍‍‍‍‍‍‍‍‍‍‍‍‍‍‍‍‍‍‍‍‍‍‍‍‍‍‍‍‍‍‍‍‍‍‍‍‍‍‍‍‍‍‍‍‍‍‍‍‍‍‍‍‍‍‍‍‍‍‍‍‍‍‍‍‍‍‍‍‍‍‍‍‍‍‍‍‍‍‍‍‍‍‍‍‍‍‍‍‍‍‍‍‍‍‍‍‍‍‍‍‍‍‍‍‍‍‍‍

Step 4 

Display the error message while failing to store and retrieve data 

    Text {
        id: errorData
        anchors.top: retrieveData.bottom
    }

    Connections{
        target: SecureStorage
        onError: {
            errorData.text = errorMessage;
        }
    }‍‍‍‍‍‍‍‍‍‍‍‍‍‍‍‍‍‍‍‍‍‍‍‍‍‍‍‍‍‍‍‍‍‍‍‍‍‍‍‍‍‍‍‍‍‍‍‍‍‍‍‍‍‍‍‍‍‍‍‍‍‍‍‍‍‍‍‍‍‍‍‍‍‍‍‍‍‍‍‍‍‍‍‍‍‍‍‍‍‍‍‍‍‍‍‍‍‍‍

Secure Storage Sample 

We have provided a sample to help you learn how to use Secure Storage plugin.  It is available in AppStudio Desktop 2.1 via "New App" dialog:

  • Open AppStudio Desktop
  • Click on the New App button 
  • Search and select Secure Storage sample 
  • Click on the Create Button 

This sample is also available in the appstudio-samples GitHub repo


If you have any feedback or suggestions, let us know in the comments! 


To learn more about Secure Storage,  check out the API reference.  

more
0 0 1,030
by Anonymous User
Not applicable

Note: This functionality is currently in BETAwhich essentially means go ahead and use it but there might be slight modifications/enhancements made in the future releases based on usage and feedback. This also means that we are looking forward to your feedback.

The Map Viewer template now supports offline maps, which means you can now download and view secured and public Mobile Map Packages (MMPK). An MMPK consolidates a single map or multiple maps into a single file so that you can share with your ArcGIS organization or directly download to your mobile device for offline use. This blog post will show you some tips and tricks for creating MMPKs in ArcGIS Pro and explain how to configure Map Viewer template to consume offline maps (MMPKs) from the organization. 

Creating MMPKs in ArcGIS Pro

MMPKs can be created using the Create Mobile Map Package tool in ArcGIS Pro 1.2 or higher. This help document will help you get started with creating and sharing an MMPK.  Here are a few tips and tricks that I want to share for when you are creating an MMPK for your Map Viewer app.

Tips and Tricks

1. Adding Bookmarks – It’s always useful to add spatial bookmarks to provide shortcuts for future reference. When you are creating an MMPK, don’t forget to create bookmarks that can be used in your Map Viewer app. To do this:


                            Open ArcGIS Pro > Map > Bookmarks > New Bookmark > name the bookmark 


                                                              Map Viewer Template - Bookmarks in Offline Map


2. Creating a locator for feature searchMMPK supports locators for searching features and places. So if you want to enable searching of features in your Map Viewer app, you need to add a locator which is configured for feature search. To do this, you will need to add a locator provider or create a locator in ArcGIS Pro.

Note: The locator for places is not yet supported in Map Viewer at 2.1. If your MMPK already contains offline geocoder it will not be used in the template.


Map Viewer Template Feature Search in Offline Map

3. Adding tags – Entering an ArcGIS query in your app’s settings is one way to find and display MMPKs in the Map Viewer Gallery. Adding meaningful tags not only is a useful way for you and your ArcGIS organization members to quickly and easily find MMPKs, but it is also one of the requirements to display MMPKs in the Map Viewer Gallery.  Please refer to Query and display MMPKs in the Map Viewer Gallery section below for more information about query MMPKs with tags.


4. Changing map metadata

  • Title – A map’s metadata title will be displayed at the top of the Map details Info panel. If you have multiple maps in the MMPK, the metadata title will also show on the Offline Maps Layer panel as the chosen options. By default, the metadata title is “Map”. You can always rename your map before uploading your MMPK.
  • Summary and Description – A map’s metadata summary and description will also be displayed on the Map Viewer Info panel. You can provide additional information on the Map Viewer by adding metadata summary and description while creating an MMPK.

Note: One way to edit metadata information in ArcGIS Pro is to right-click on your map, then select Properties > Metadata.

                                                            Map Viewer Template - Offline Map Details

Configuring Map Viewer to consume MMPK

NoteWe will be using AppStudio desktop standard edition to configure the template. These options are not available on the AppStudio basic or on AppStudio website.  

Step 1 Creating a Map Viewer template

Open AppStudio Desktop and sign in with a Standard license account.  Click on the New App button > Templates > Map Viewer to created a new app based on the Map Viewer template.


Step 2 Registering your app

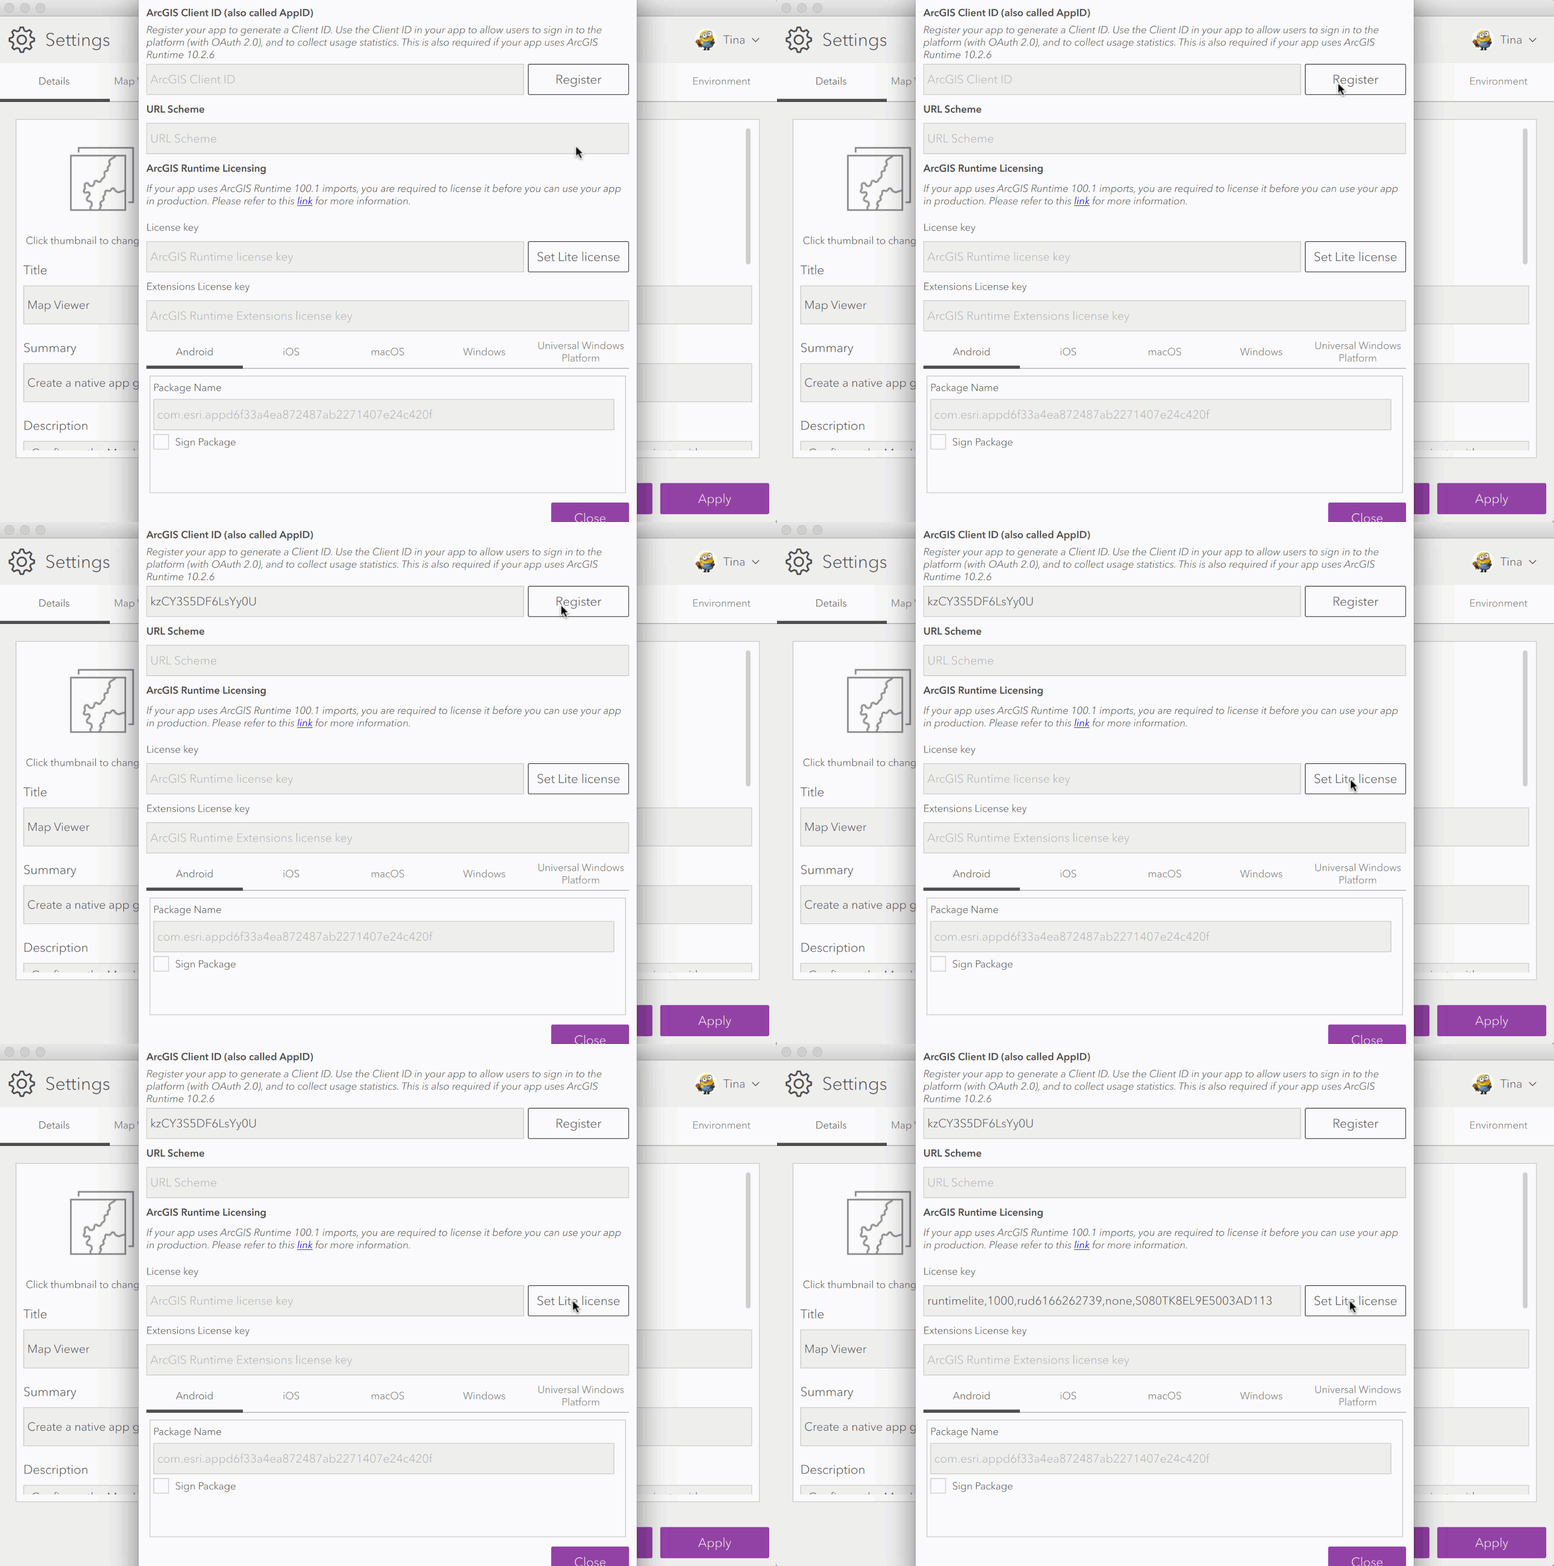
Sign-in is required to access and view MMPKs. This requires a Client ID, also known as an App ID to allow you to sign in. AppStudio Desktop 2.1 has provided a quick and easy way to generate a Client (App) ID to allow users to sign-in to your app, by navigating through AppStudio Settings > Advanced Settings, then clicking on the Register button.

Note: You can only register your app after uploading your app. So upload your app at least once before trying this step.


Step 3 Enable Sign-in button

The Sign-in button is disabled by default in the Map Viewer template. To enable the Sign-In button, go to AppStudio Settings > Gallery, and enable Support secured maps.


Step 4  Query and display MMPKs in the Map Viewer Gallery

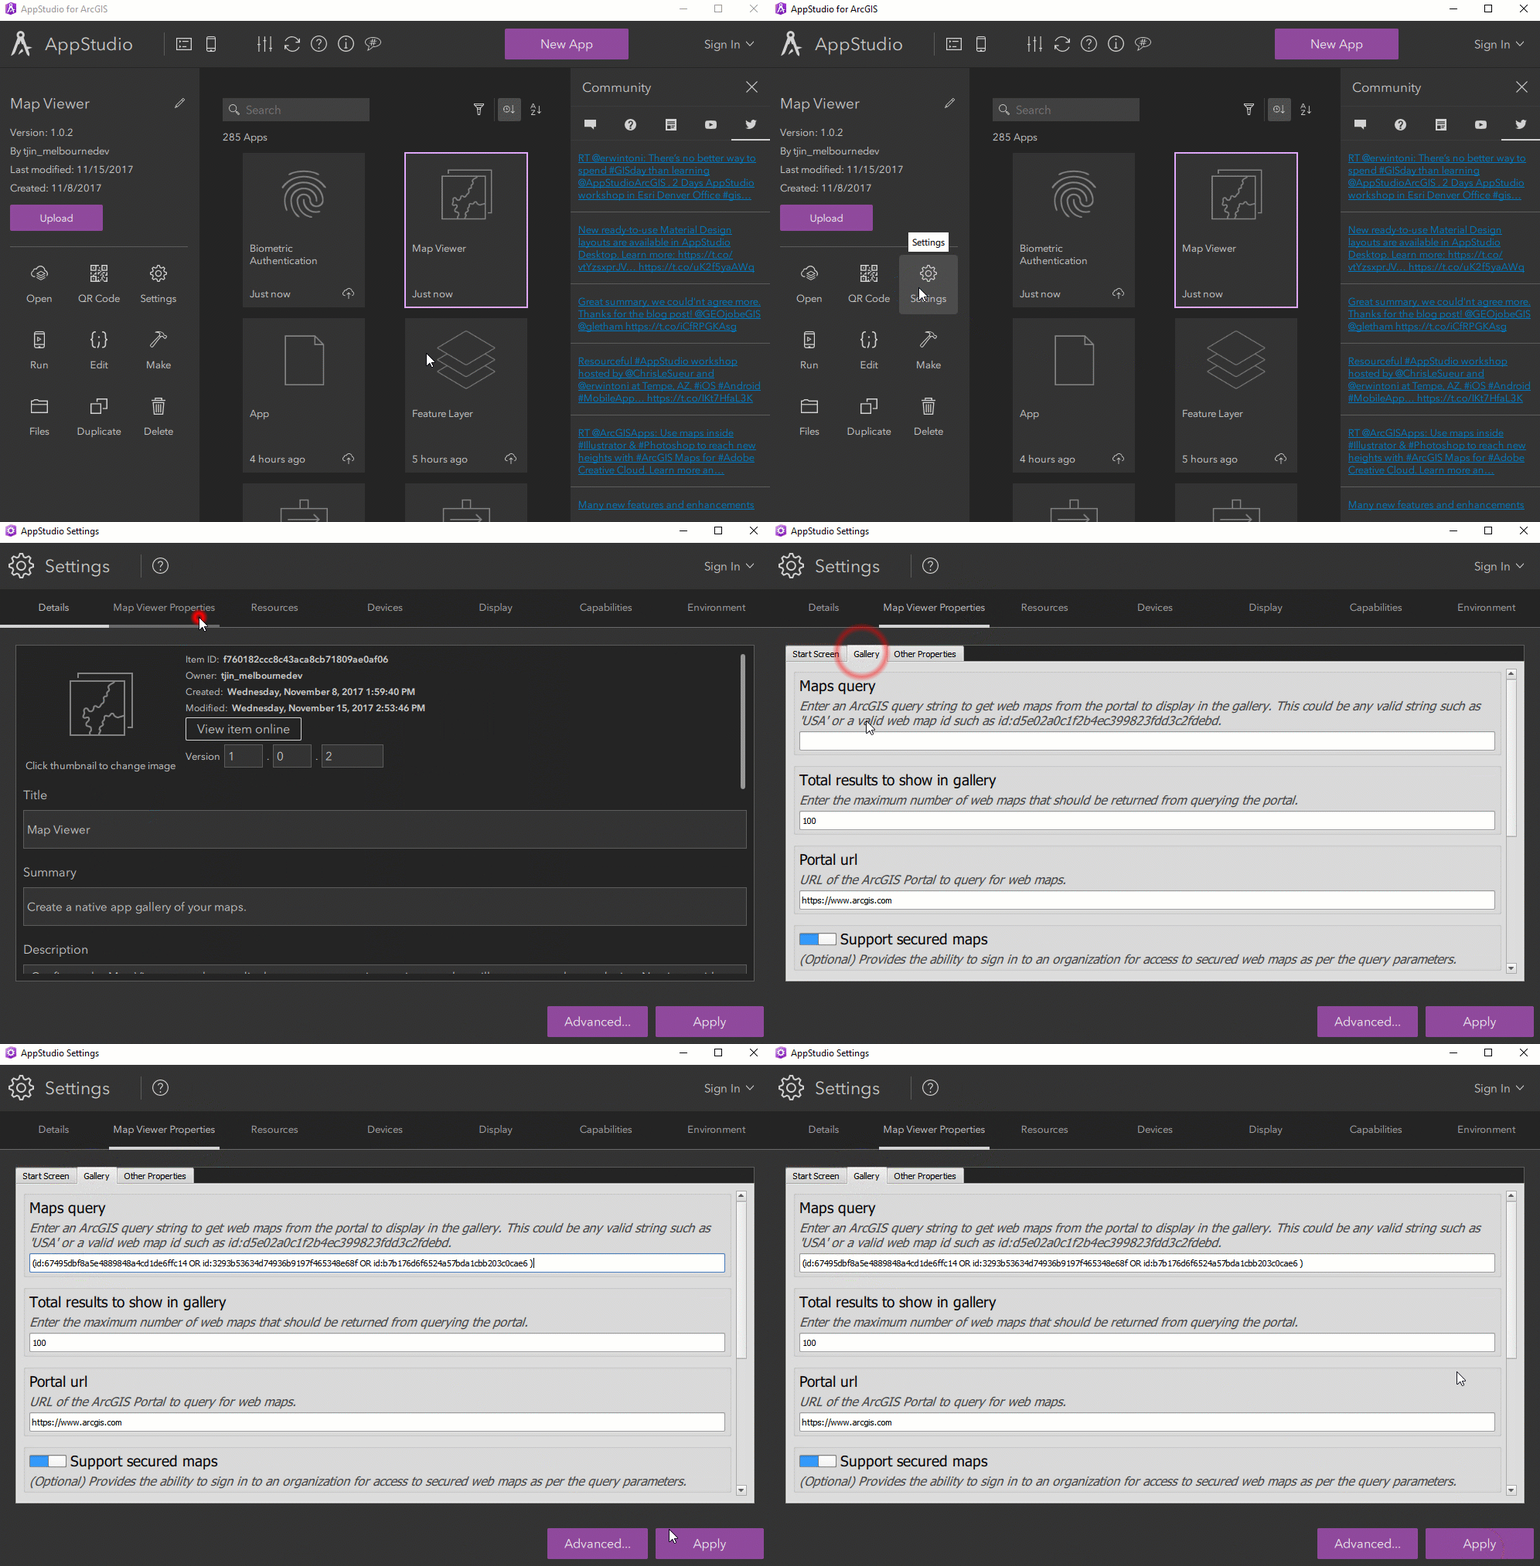
Just like when querying web maps, you can query MMPKs by item ID or tags. To display all of the MMPKs that have a specific tag in the Gallery page, you can simply enter the tag in the Settings > Gallery > Maps query.  You can also enter an item ID in the Maps query field to search and display a specific MMPK in the Gallery.  Note that if you want to specify more than one MMPK in the app, please use the following format:

                                                                        (id: item A ID OR id: item B ID)


Step 5 Testing your App

Double click on the Map Viewer template app to run your app on Desktop with AppRun.  Your offline maps (MMPKs) will appear in the  "Offline Map" section of Gallery and you can download and view them from there.  You can also quickly test your apps on a real device using AppStudio Player.    

Hopefully, this blog post helps explain this new functionality, and please let us know how we can improve this feature in the comment section below.

more
1 0 3,086
by Anonymous User
Not applicable

AppStudio 2.1 release has introduced a new Biometric Authentication plugin that provides a layer of security to authenticate a user in an app via fingerprint scan. This blog post shows how you can enable Biometric Authentication in your apps along with usage.

Please note: This is a BETA feature and is currently available on Windows, iOS, and macOS. Support for Android devices is being worked on and should be available in the next version of AppStudio. We are looking for your feedback while using it in your own AppStudio apps. (You can see that we have added this to the AppStudio player.)

Overview

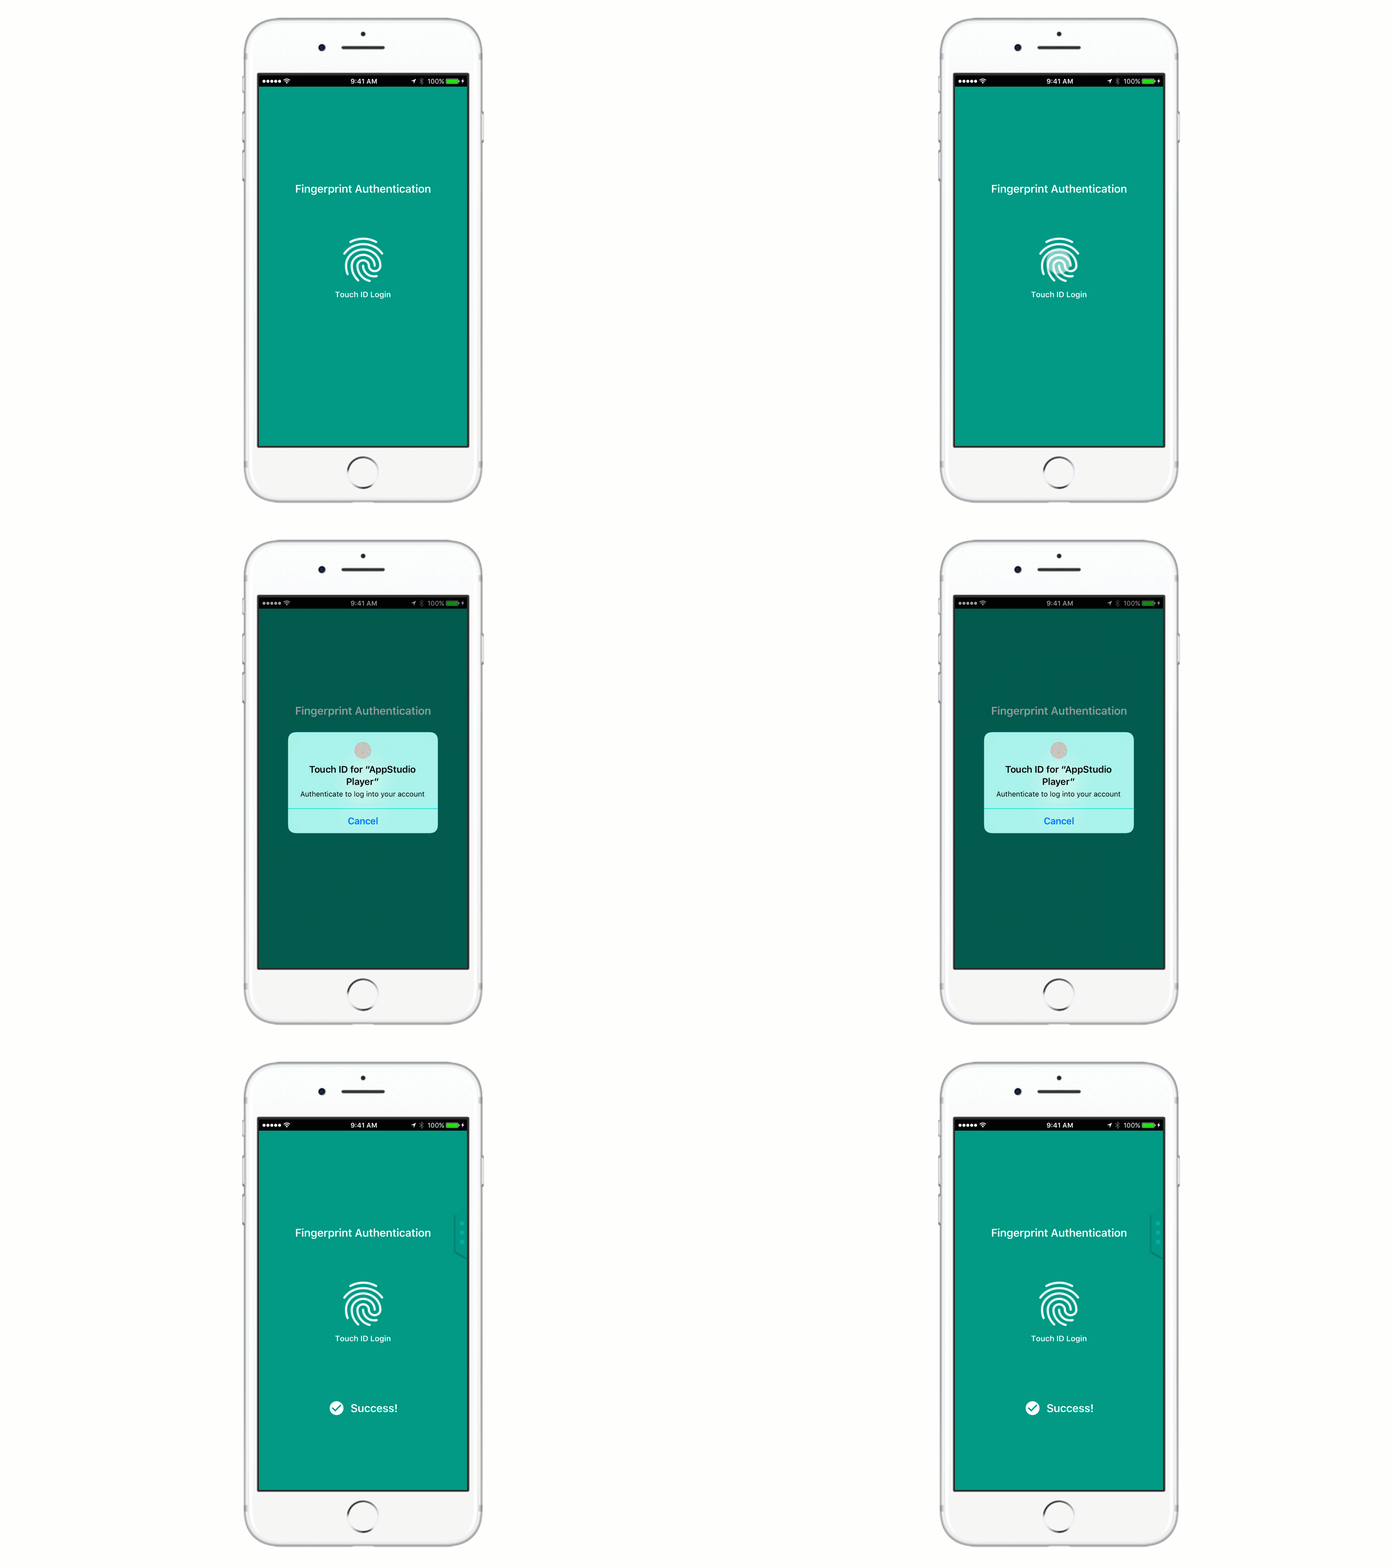
BiometricAuthenticator singleton is part of Authentication module, it currently supports on devices that have a built-in fingerprint sensor or portable reader.  Such as your iPhone or Mac with new touch bar or Windows devices with built-in fingerprint reader or a portable USB one. 

BiometricAuthenticator has the following properties:

  • supported – Return a boolean value whether your device supports this functionality
  • activated – Return a boolean value whether your device is activated to use this functionality
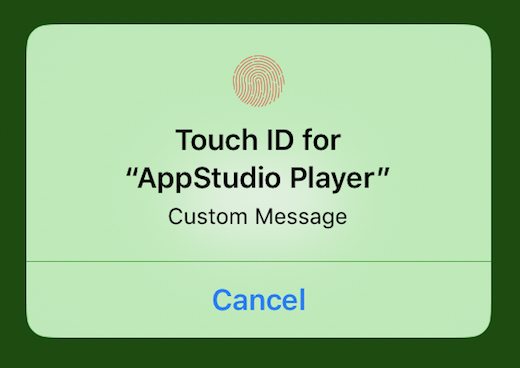
  • message – Set a custom message in the authentication dialog.  
It has to be set before calling authenticate() method
  • errorMessage – It's a read-only property which returns the error message on authentication. By default, it returns “No Error” for unsupported devices.
Make sure that you check for this property only when a device is supported

Methods:


  • authenticate() – Invoke the native biometric authentication dialog (also known as touch id for iOS and macOS)


Signals:

  • accepted() – This signal is emitted when a user is successfully authenticated
  • rejected(Reason reason) – This signal is when emitted when a user fails to authenticate along with the reason for failure


Requirements

  1. Your device needs to have a built-in fingerprint sensor or portable reader
  2. Fingerprint must be enrolled in your device

How to implement fingerprint authentication

This step - by - step tutorial will get your familiarized with BiometricAuthenticator and help you get you started with the fingerprint authentication.


Step 1 

Enable Biometric Authentication capability, to do this:

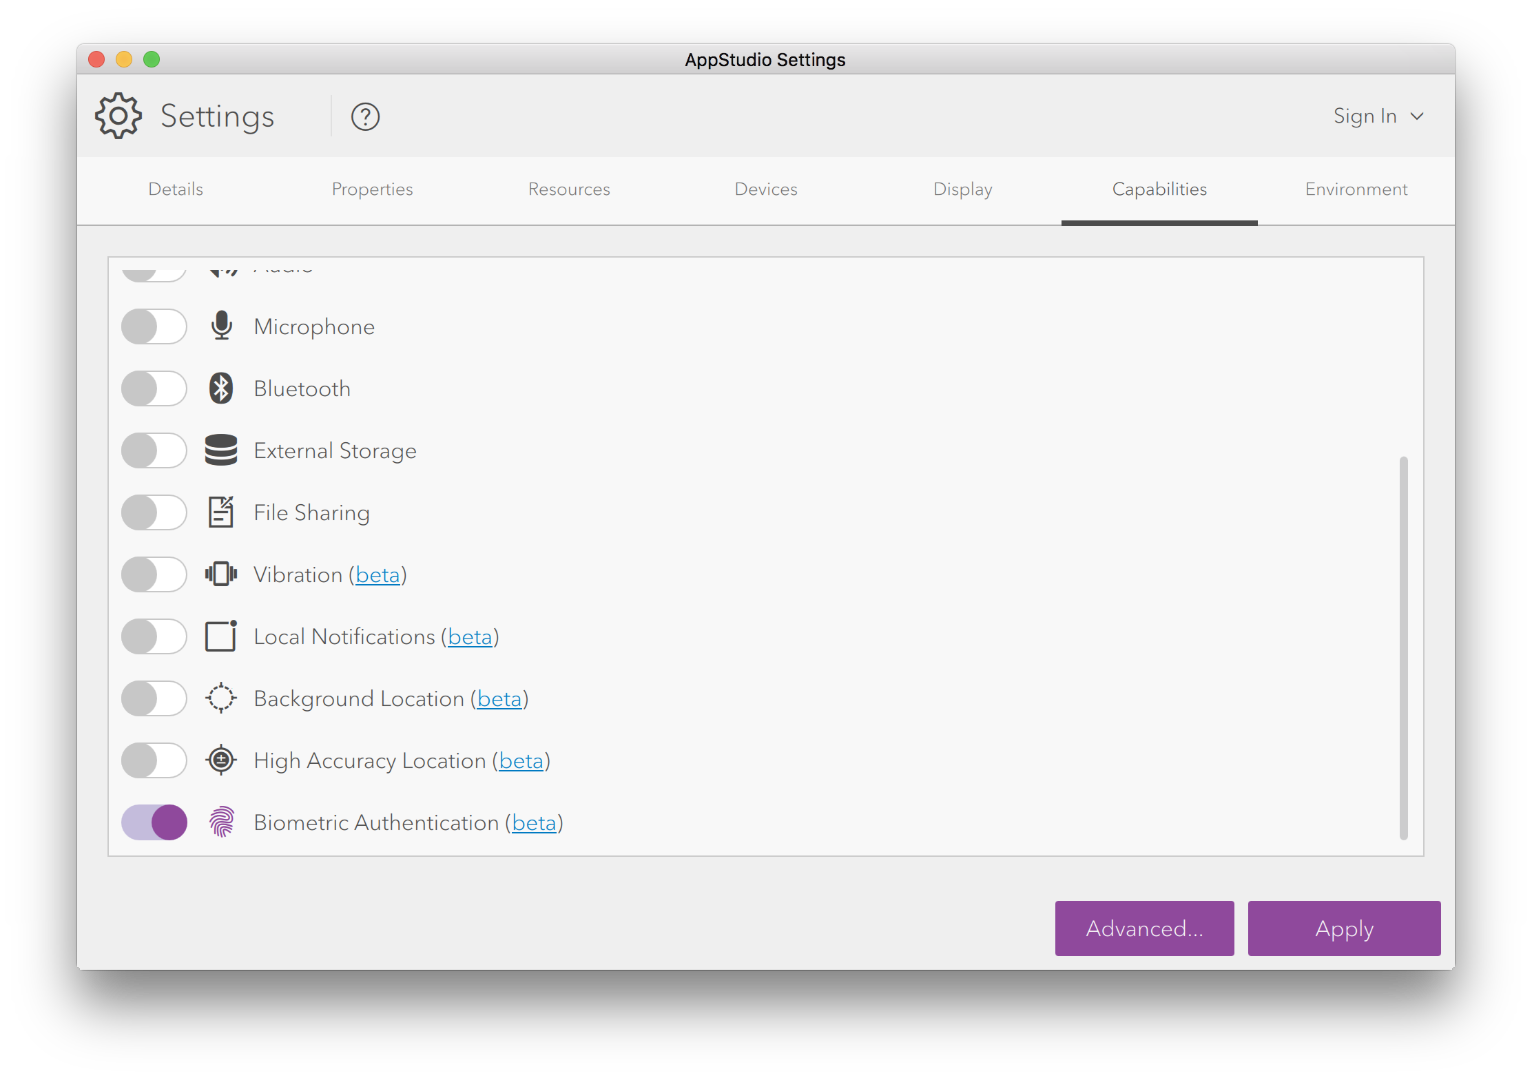
Open Desktop > Select your app > Click on Settings > Capabilities > Enable Biometric Authentication 


Step 2

Import Authentication Module 

import ArcGIS.AppFramework.Authentication 1.0‍‍‍‍‍‍‍‍‍‍‍

Step 3 

Check if biometric authentication is activated or not. Rectangle color will turn to green if biometric authentication is activated and it will turn to red if it is not activated

App {
    id: app
    width: 400
    height: 640

    property color successColor: "green"
    property color errorColor: "red"

    Rectangle {
        anchors.fill: parent
        color: BiometricAuthenticator.activated ? successColor : errorColor
    }
}‍‍‍‍‍‍‍‍‍‍‍‍‍‍‍‍‍‍‍‍‍‍‍‍‍‍‍‍‍‍‍‍‍‍‍‍‍‍‍‍‍‍‍‍‍‍‍‍‍‍‍‍‍‍‍‍‍‍‍‍‍‍‍‍‍‍‍‍‍‍‍‍‍‍‍‍‍‍‍‍‍‍‍‍‍‍‍‍‍‍‍‍‍‍‍‍‍‍‍‍‍‍‍‍‍‍‍‍‍‍‍‍‍‍‍‍‍‍‍‍‍‍‍‍‍‍‍‍‍‍‍‍‍‍‍‍‍‍‍‍‍‍‍


Step 4

Add a button to call authenticate() method 

        Button {
            id: touchIDButton
            anchors.centerIn: parent
            text: "Touch ID"
            onClicked: {
                BiometricAuthenticator.authenticate()
            }
        }‍‍‍‍‍‍‍‍‍‍‍‍‍‍‍‍‍‍‍‍‍‍‍‍‍‍‍‍‍‍‍‍‍‍‍‍‍‍‍‍‍‍‍‍‍‍‍‍‍‍‍‍‍‍‍‍‍‍‍‍‍‍‍‍‍‍‍‍‍‍‍‍‍‍‍‍‍‍‍‍‍‍‍‍‍‍‍‍‍‍‍‍‍‍

Step 5 

Add a custom message on the fingerprint dialog


        Button {
            id: touchIDButton
            anchors.centerIn: parent
            text: "Touch ID"
            onClicked: {
                BiometricAuthenticator.message = qsTr("Custom Message")
                BiometricAuthenticator.authenticate()
            }
        }‍‍‍‍‍‍‍‍‍‍‍‍‍‍‍‍‍‍‍‍‍‍‍‍‍‍‍‍‍‍‍‍‍‍‍‍‍‍‍‍‍‍‍‍‍‍‍‍‍‍‍‍‍‍‍‍‍‍‍‍‍‍‍‍‍‍‍‍‍‍‍‍‍‍‍‍‍‍‍‍‍‍‍‍‍‍‍‍‍‍‍‍‍‍‍‍‍‍

Step 6

Display fingerprint status message with the BiometricAuthenticator signals.  When a fingerprint is successfully authenticated, the accept signal will emit and “Success” text will print out.  When fingerprint fails to authenticate, the reject signal will emit and print out "Fail"

        Text {
            id:statusMessage
            anchors.top : touchIDButton.bottom
            anchors.horizontalCenter: parent.horizontalCenter

            Connections {
                target:BiometricAuthenticator

                onAccepted :{
                    statusMessage.text = qsTr("Success")
                }
                onRejected: {
                    statusMessage.text = qsTr("Fail")
                }
            }
        }‍‍‍‍‍‍‍‍‍‍‍‍‍‍‍‍‍‍‍‍‍‍‍‍‍‍‍‍‍‍‍‍‍‍‍‍‍‍‍‍‍‍‍‍‍‍‍‍‍‍‍‍‍‍‍‍‍‍‍‍‍‍‍‍‍‍‍‍‍‍‍‍‍‍‍‍‍‍‍‍‍‍‍‍‍‍‍‍‍‍‍‍‍‍‍‍‍‍‍‍‍‍‍‍‍‍‍‍‍‍‍‍‍‍‍‍‍‍‍‍‍‍‍‍‍‍‍‍‍‍‍‍‍‍‍‍‍‍‍‍‍‍‍‍‍‍‍‍‍‍‍‍‍‍‍‍‍‍‍‍

Step 7

Upload and test in the AppStudio Player 

Biometric Authentication Sample

We have provided a sample app to demonstrate how to use Biometric Authentication plugin for your apps. 

To create an app based on this sample, follow these steps:  
  • Open AppStudio Desktop
  • Click on the New App button 
  • Search and select Biometric Authentication sample 
  • Click on the Create Button 

 This sample is also available in the appstudio-samples GitHub repo


We would greatly appreciate any comments or suggestions on how we can improve Biometric Authentication plugin.  Please leave your comments down below or email us your feedback.  
To learn more about Biometric Authentication plugin, please check our API guide and API reference.  

more
0 0 1,454
by Anonymous User
Not applicable

There is an updated version for 2.1 release of AppStudio for ArcGIS and AppStudio Player that is available to download now.

This version includes a hotfix that addresses an issue with the Appframework.network.isOnline property, which was always returning true even when not connected to a network on Windows and macOS. With this update, the property will return true if the device is connected to a network, and false when it is not.

Please note that this hotfix only affects AppStudio for ArcGIS and AppStudio Player on the following platforms:

  • Windows 32bit
  • Windows 64bit
  • Mac OS


If you are using AppStudio on Linux, or AppStudio Player on Android, iOS or Linux, you do not need to install this version and you can continue to use the version which was made available in Release 2.1.


With this update, the latest version numbers of AppStudio for ArcGIS and AppStudio Player will be as follows:


Windows 32bit

Windows 64bit

Mac OS

Android

iOS

Linux

AppStudio For ArcGIS

2.1.19

2.1.19

2.1.19

2.1.15

2.1.15

2.1.15

AppStudio Player

2.1.25

2.1.25

2.1.25

2.1.23

2.1.24

2.1.23


All the downloads are available from: AppStudio for ArcGIS | ArcGIS

more
0 0 335
by Anonymous User
Not applicable

In this release, we continue our work on improving UI/UX and adding new functionalities to AppStudio Desktop. 

Here is a quick list of new features and handy improvements:

  • New Material Design layouts
  • Improved UI/UX for Desktop tools
  • Support Universal Windows Platform (UWP) app
  • Fully redesigned AppMake tool
  • New Community Panel  
  • Easily register a Client (App) ID via AppStudio Desktop
  • AppUpload tool enhancements
  • Delete Apps from your ArcGIS organization using AppStudio Desktop
  • Support localization of apps running in AppRun

Please continue reading for more details on the above features.

New Material Design layouts

Material design, which takes inspiration from paper and ink forms, is a visual and interactive card-based design standard developed and used by Google. We have released five brand new ready-to-use layouts based on Material Design Guidelines that will not only help you get started in creating material design apps with AppStudio but also help you get familiarized with the latest Qt Material Control style. Please read this blog post to learn more about Material Design layouts.  


Easily register a Client (App) ID via AppStudio Desktop

An App ID (or Client ID) allows users to sign in to the ArcGIS platform (online or your own on-premise portal) with OAuth and collect usage statistics.  We wanted to improve your app registration experience by providing a Register button to help you generate an App ID right away. This feature will be very handy especially when using the secured/offline maps feature in the Map Viewer template.

As an added convenience we also take care of adding the appropriate redirect url needed by AppStudio apps (urn:ietf:wg:oauth:2.0:oob). 

Please make sure to upload your app first before generate an App ID


Improved UI/UX for Desktop tools

The AppStudio for ArcGIS 2.0 release introduced a brand-new user interface for AppStudio Desktop, with better usability and many new features. In this release, we’re continuing our work on improving UI/UX, this time for few AppStudio Desktop tools.  AppSettings, AppUpload, and AppConsole tools have received UI updates.


Support Universal Windows Platform (UWP) app - BETA

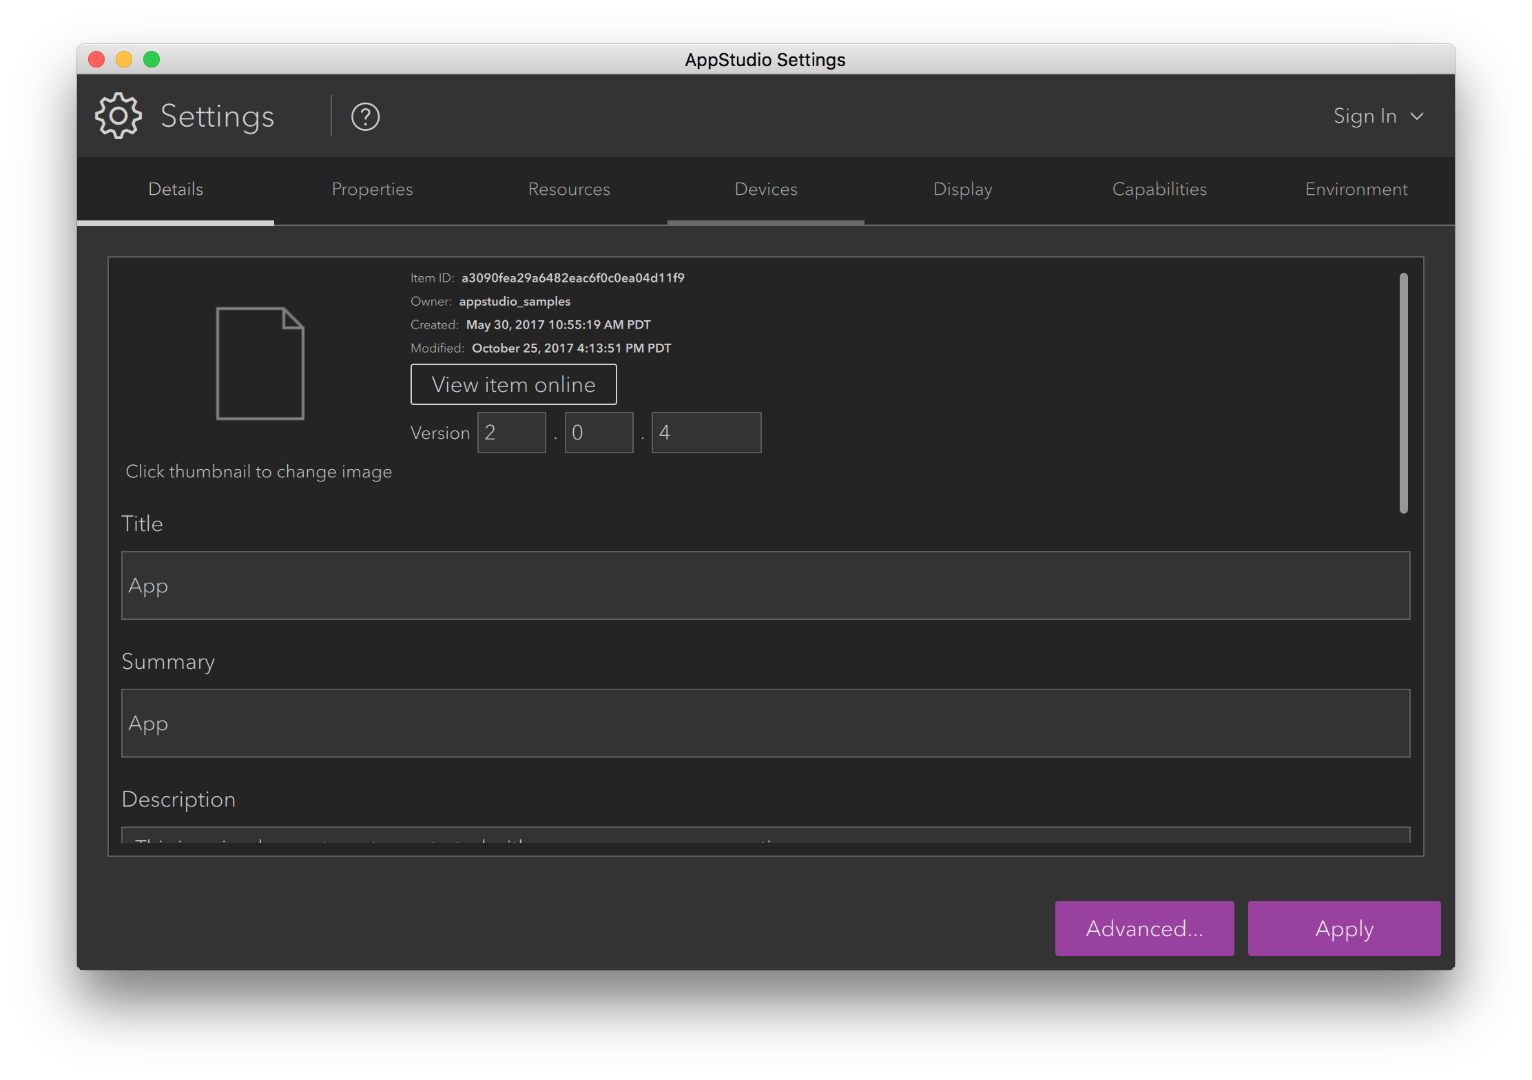
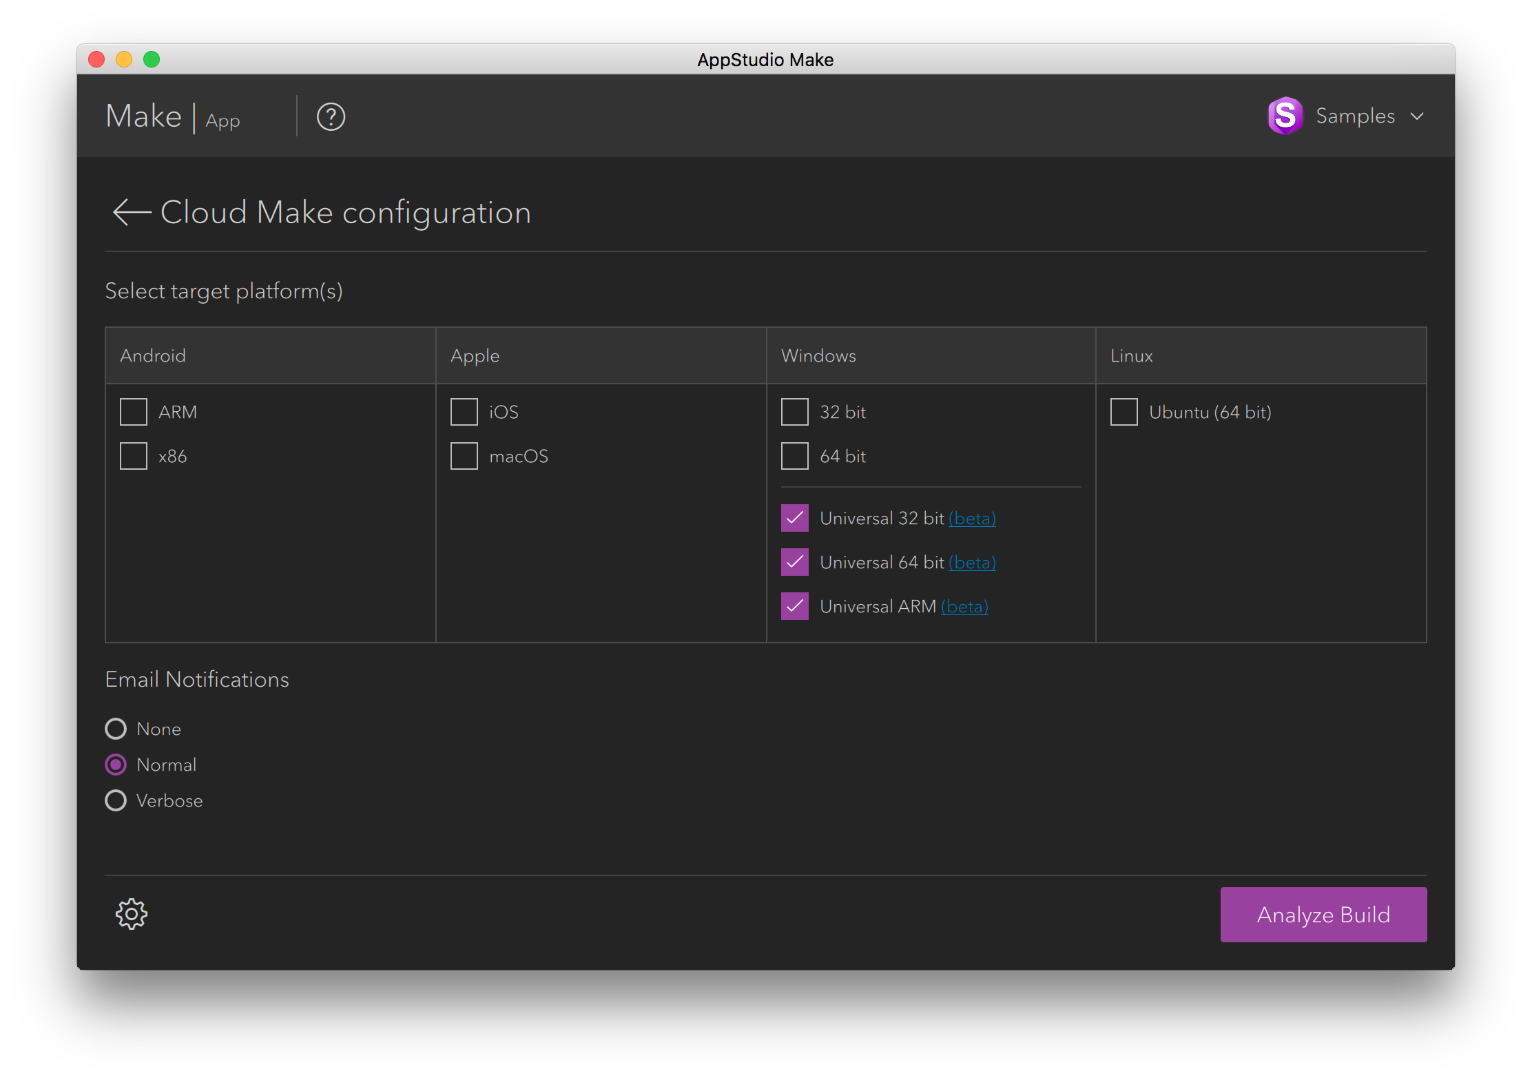
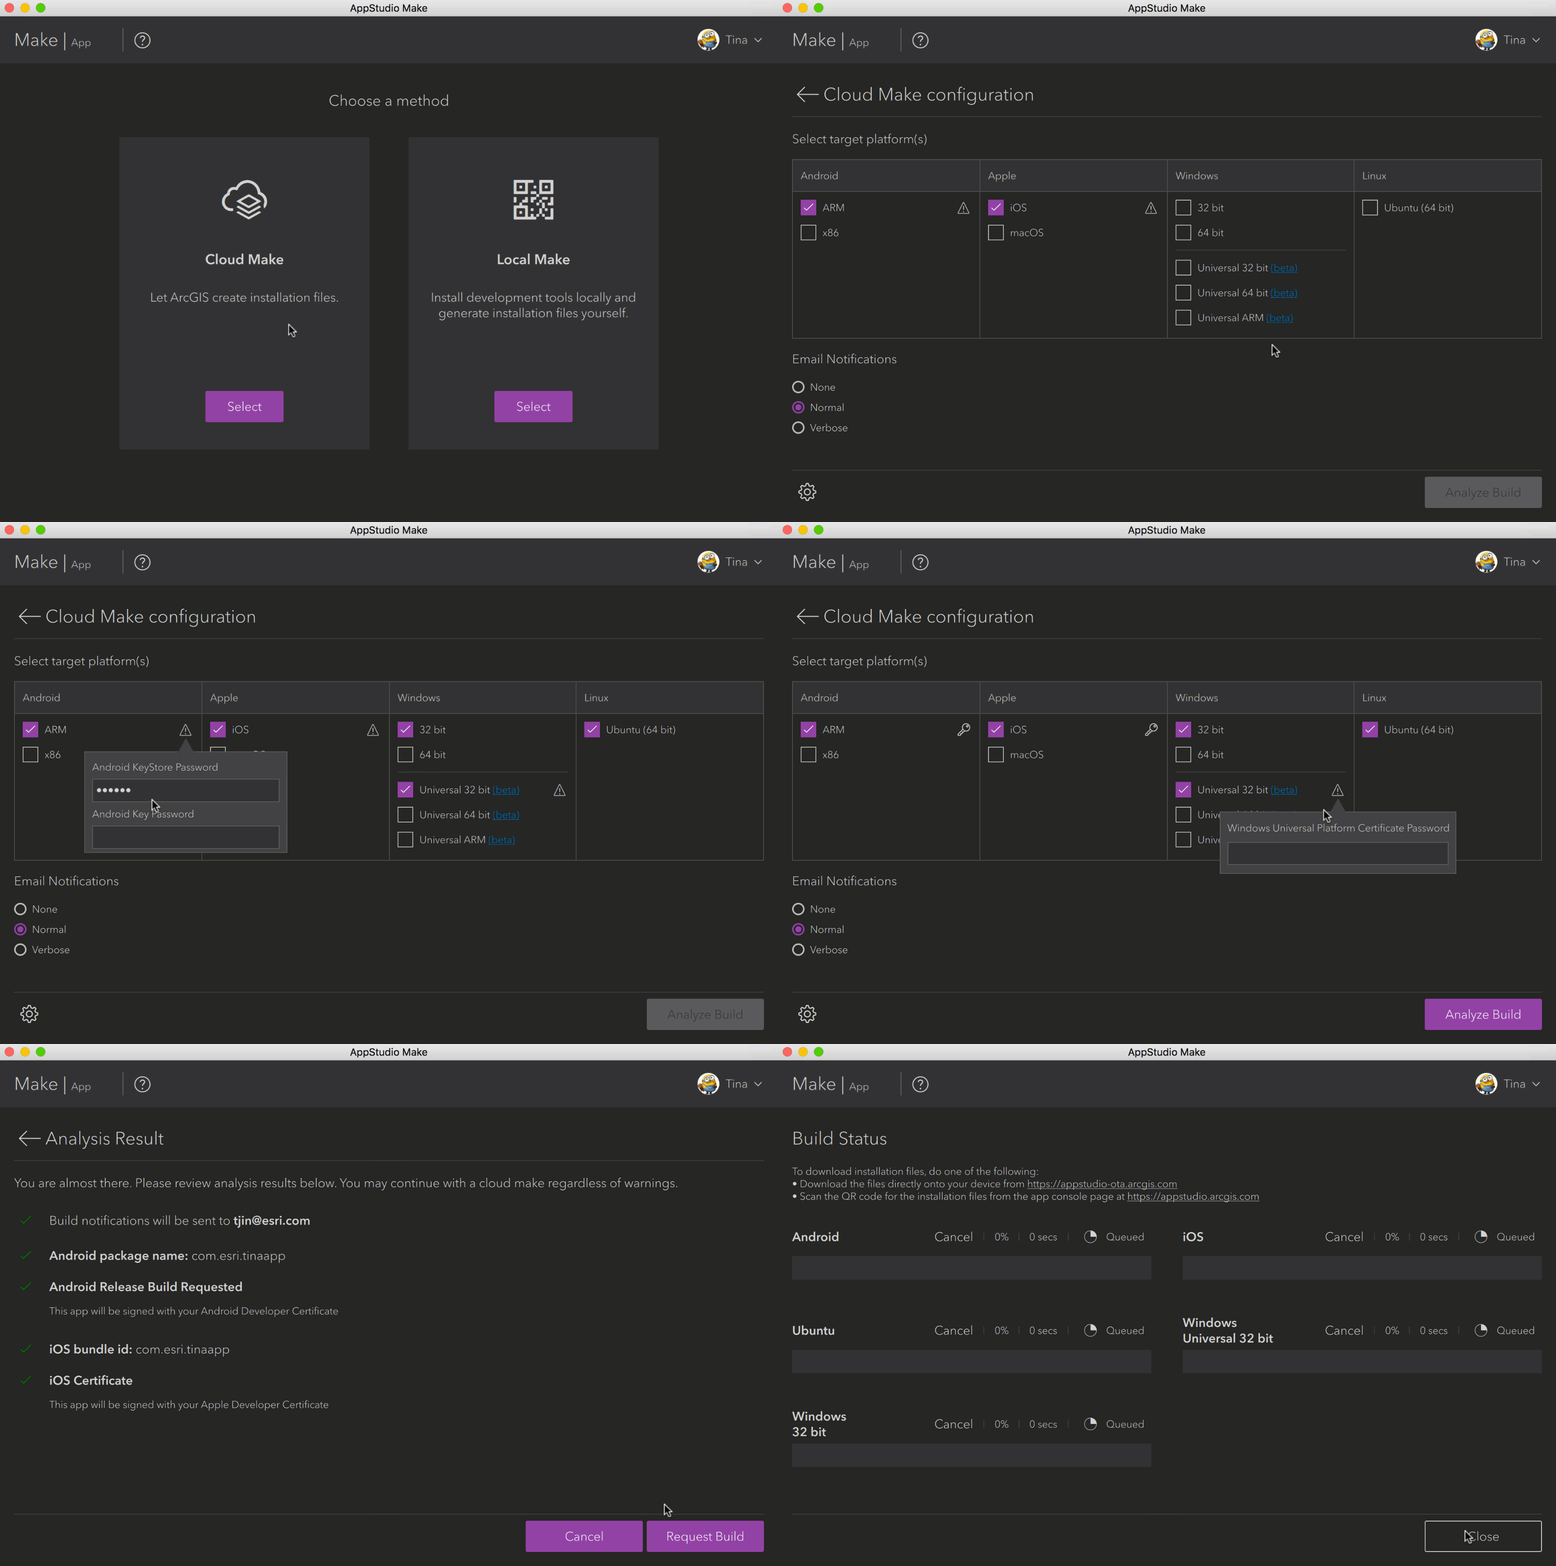
UWP is the universal app platform for Windows 10. UWP apps can run across many Windows devices, such as Windows 10 powered PC, tablet, phone, Xbox, and more. AppStudio for ArcGIS, as a cross-platform application developing tool, has added support for UWP apps in this release. Just like how you build apps for other platforms, all you need to do to create a UWP app is to simply check the box next to the Universal 32 bit, Universal 64 bit, or Universal ARM on the cloud Make interface.           


Note: UWP apps are currently only supported for cloud Make, and cannot be made with local Make.
          Also ArcGIS Runtime apps are not yet supported for UWP (we are working on it).

AppMake tool gets a makeover

AppMake tool has been completely redesigned with the new intuitive UI&UX to make your app-building experience easier and better. Many new features and enhancements were also added to the Make tool such as improved analysis messages and cloud Make support for UWP.
       

Community panel 

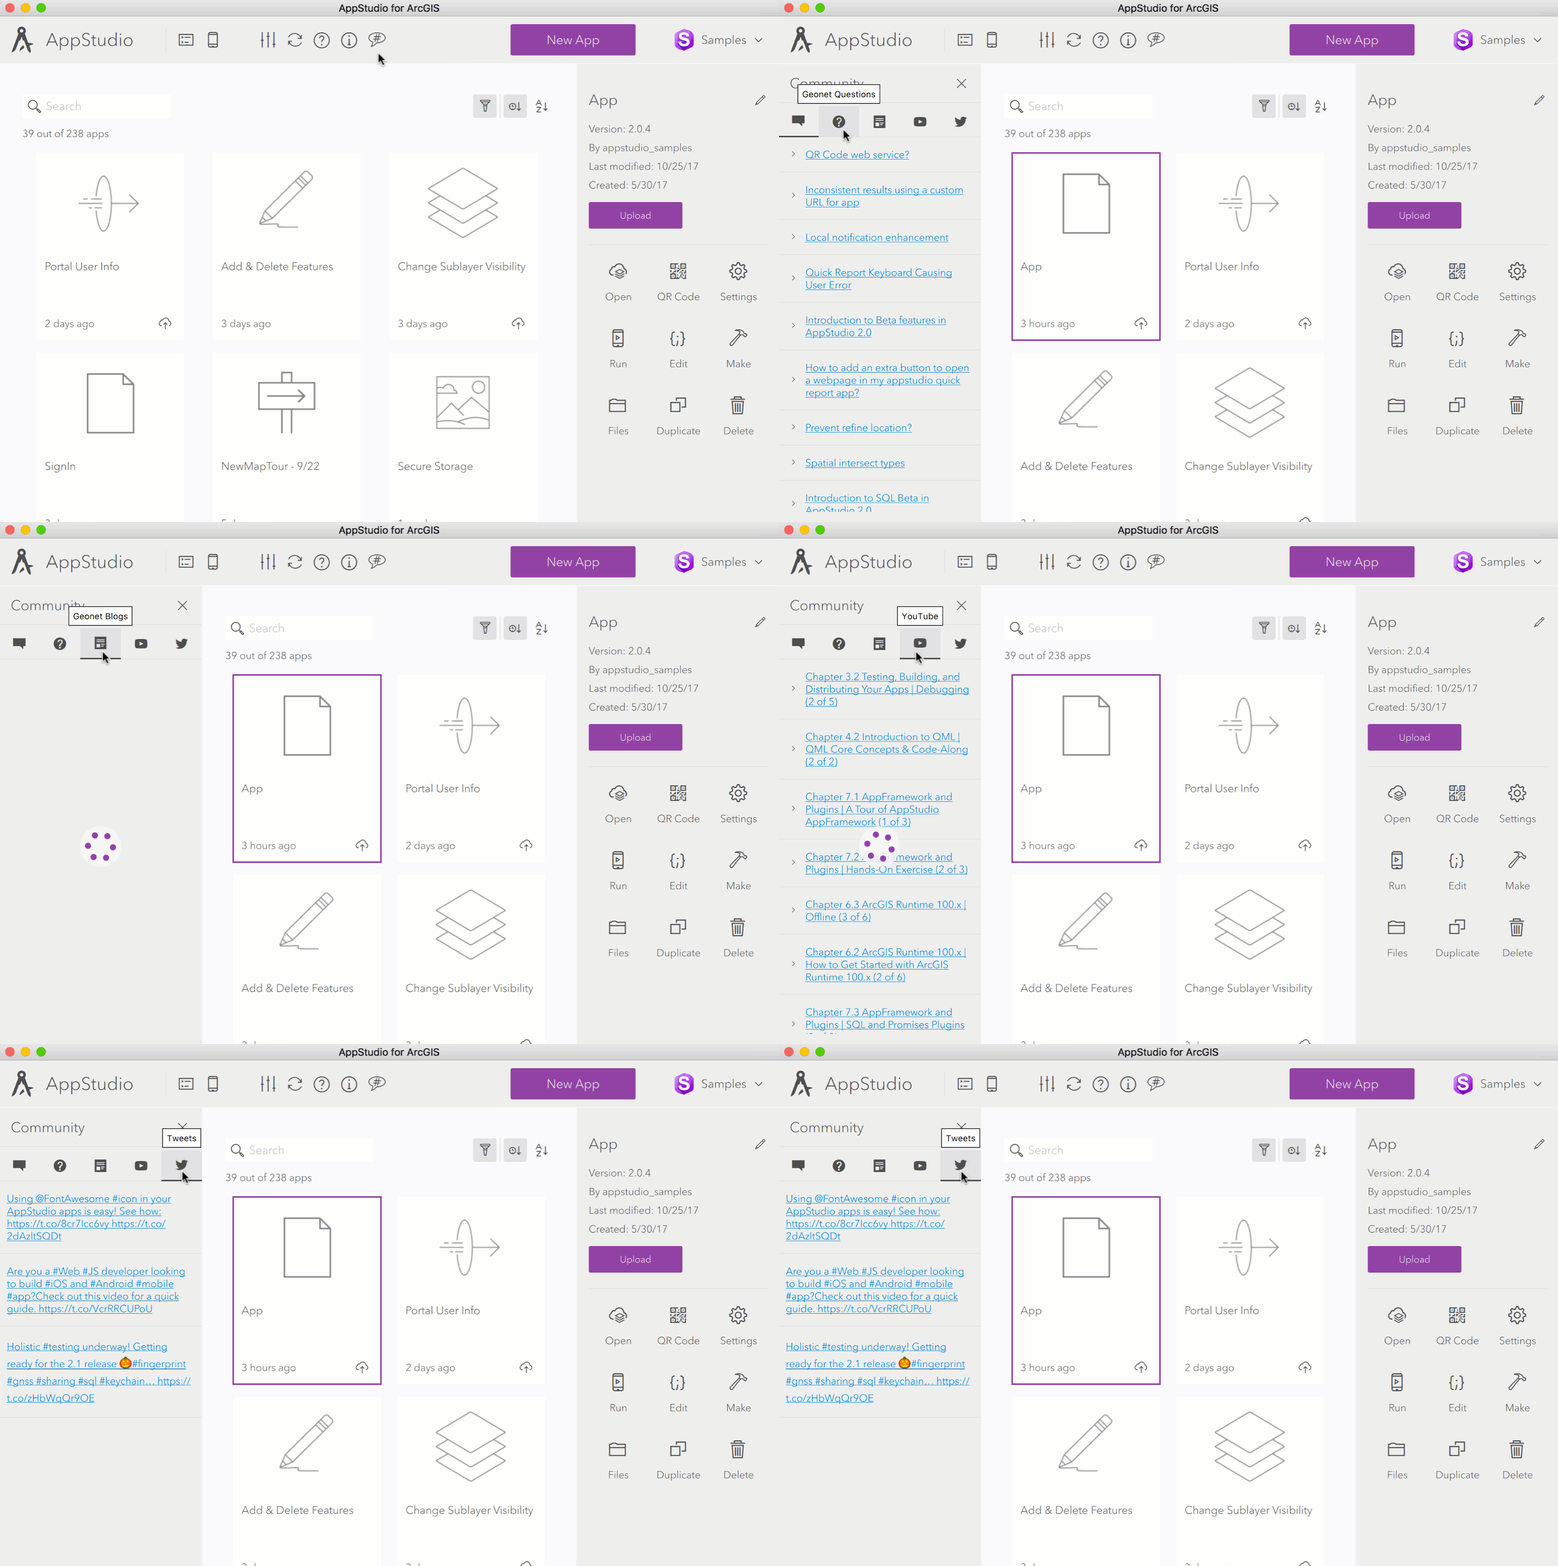
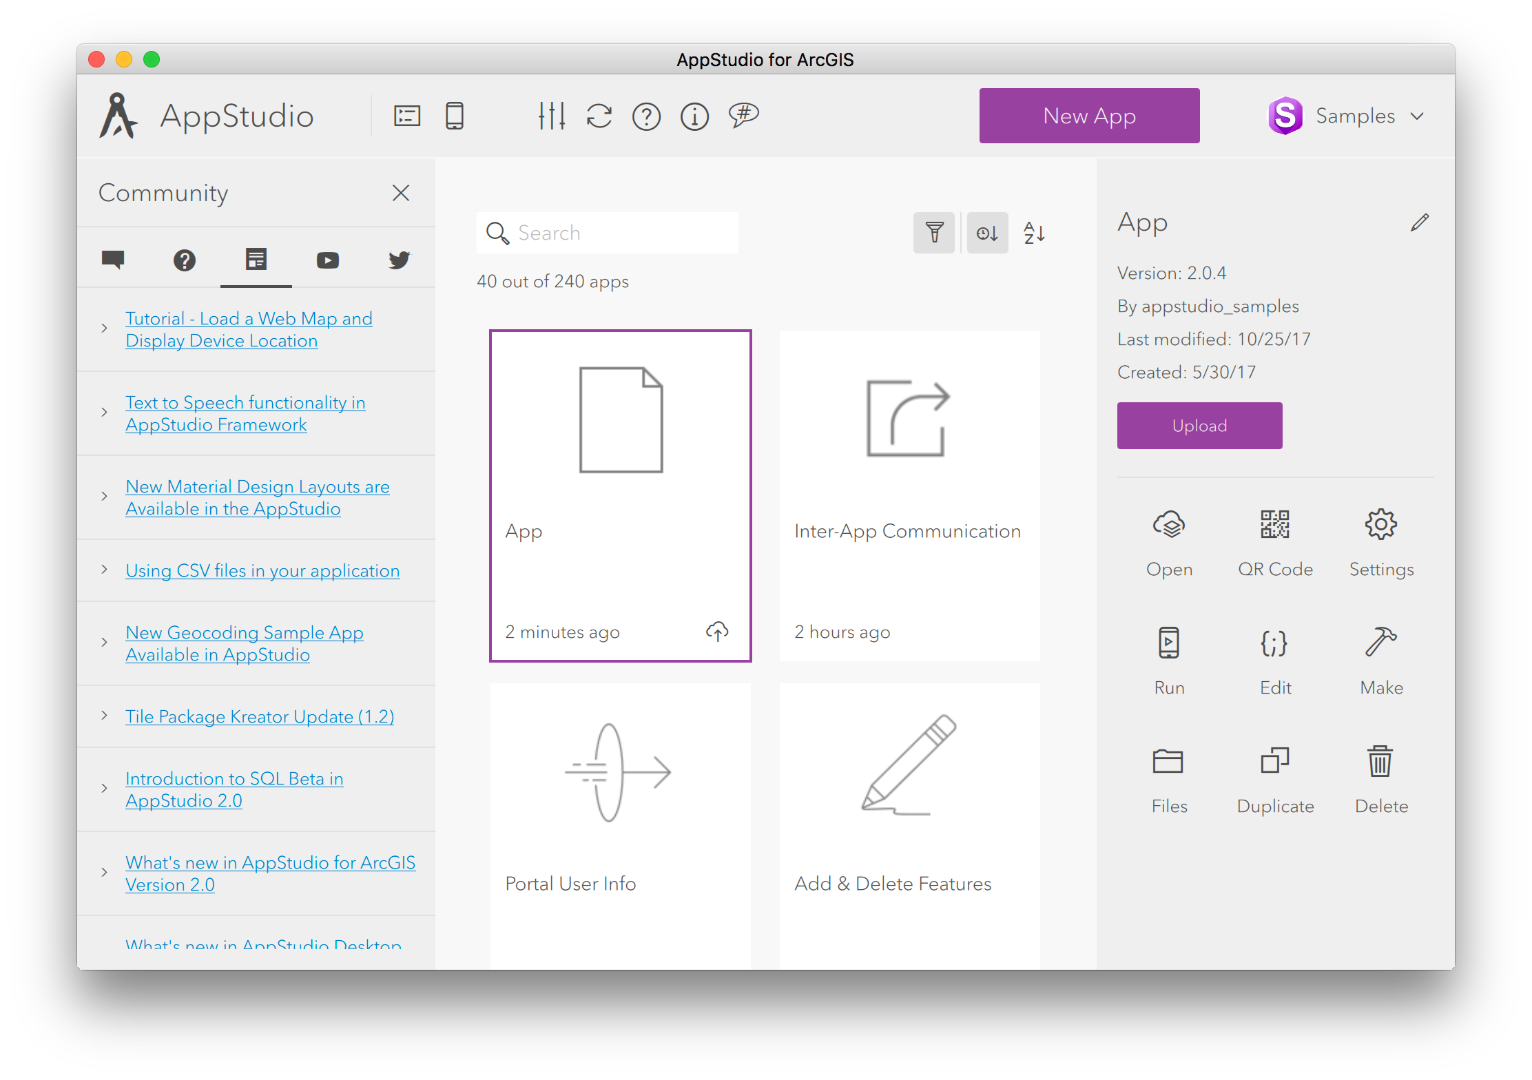
We have implemented a new community panel in the AppStudio Desktop Gallery. The community panel provides live contents of AppStudio Geonet questions, blogs, YouTube, and tweets so you can easily access and engage with us and our community.  This we hope will encourage you to easily read and follow all the developments and also participate in the community to help your fellow AppStudio app developers.


Improvements to AppUpload tool

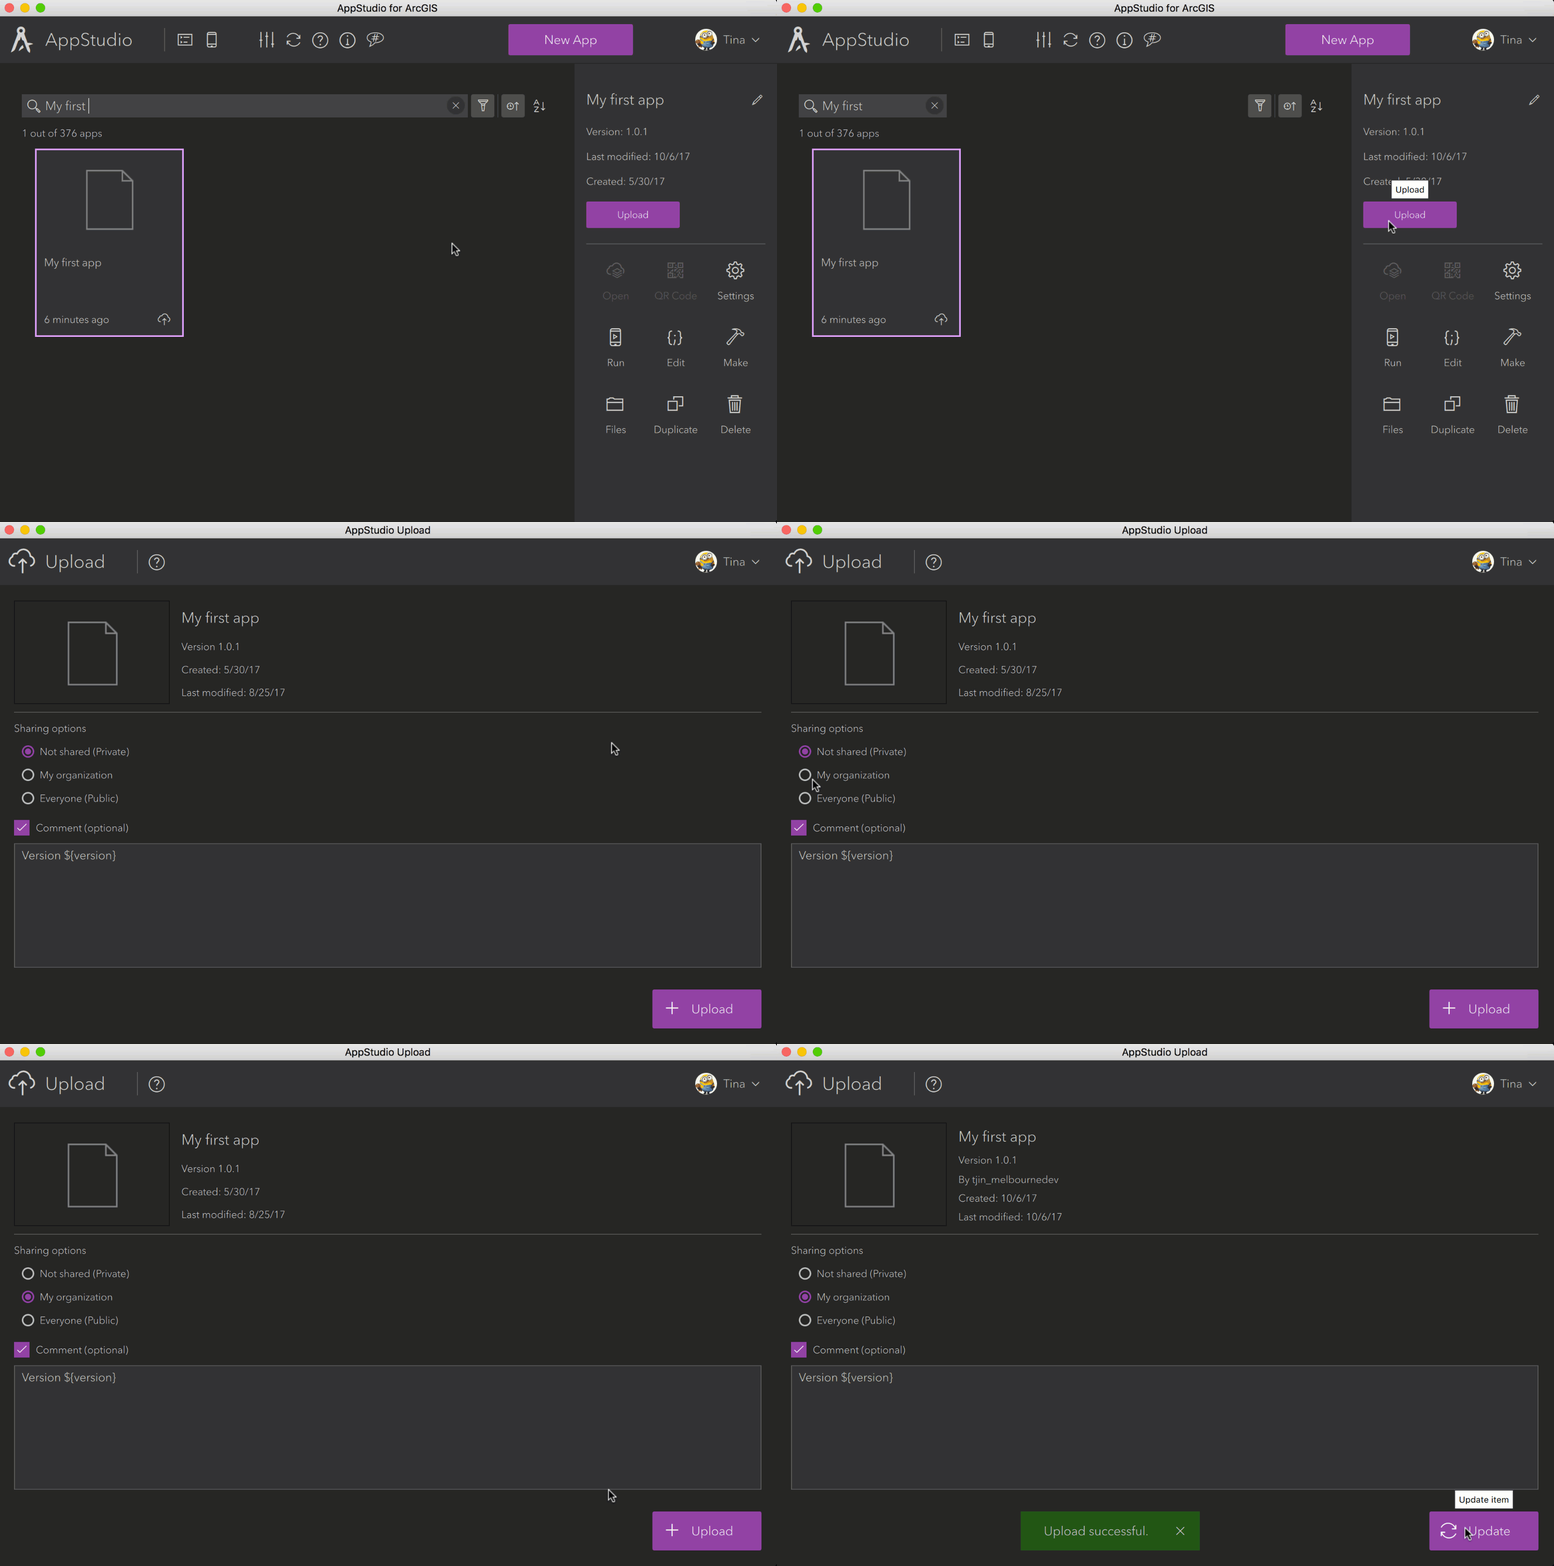
Upload tool is frequently used and very useful but it lacked one feature which is sharing. You (our users) asked us to directly provide a way to change sharing options for the app so that its easy for others in your org or even for your customers to download the app. 
We are now (thanks to your feedback) offering sharing options directly in the AppUpload tool so that you can easily share your apps with a single click. 


Deleting apps from ArcGIS org via AppStudio Desktop

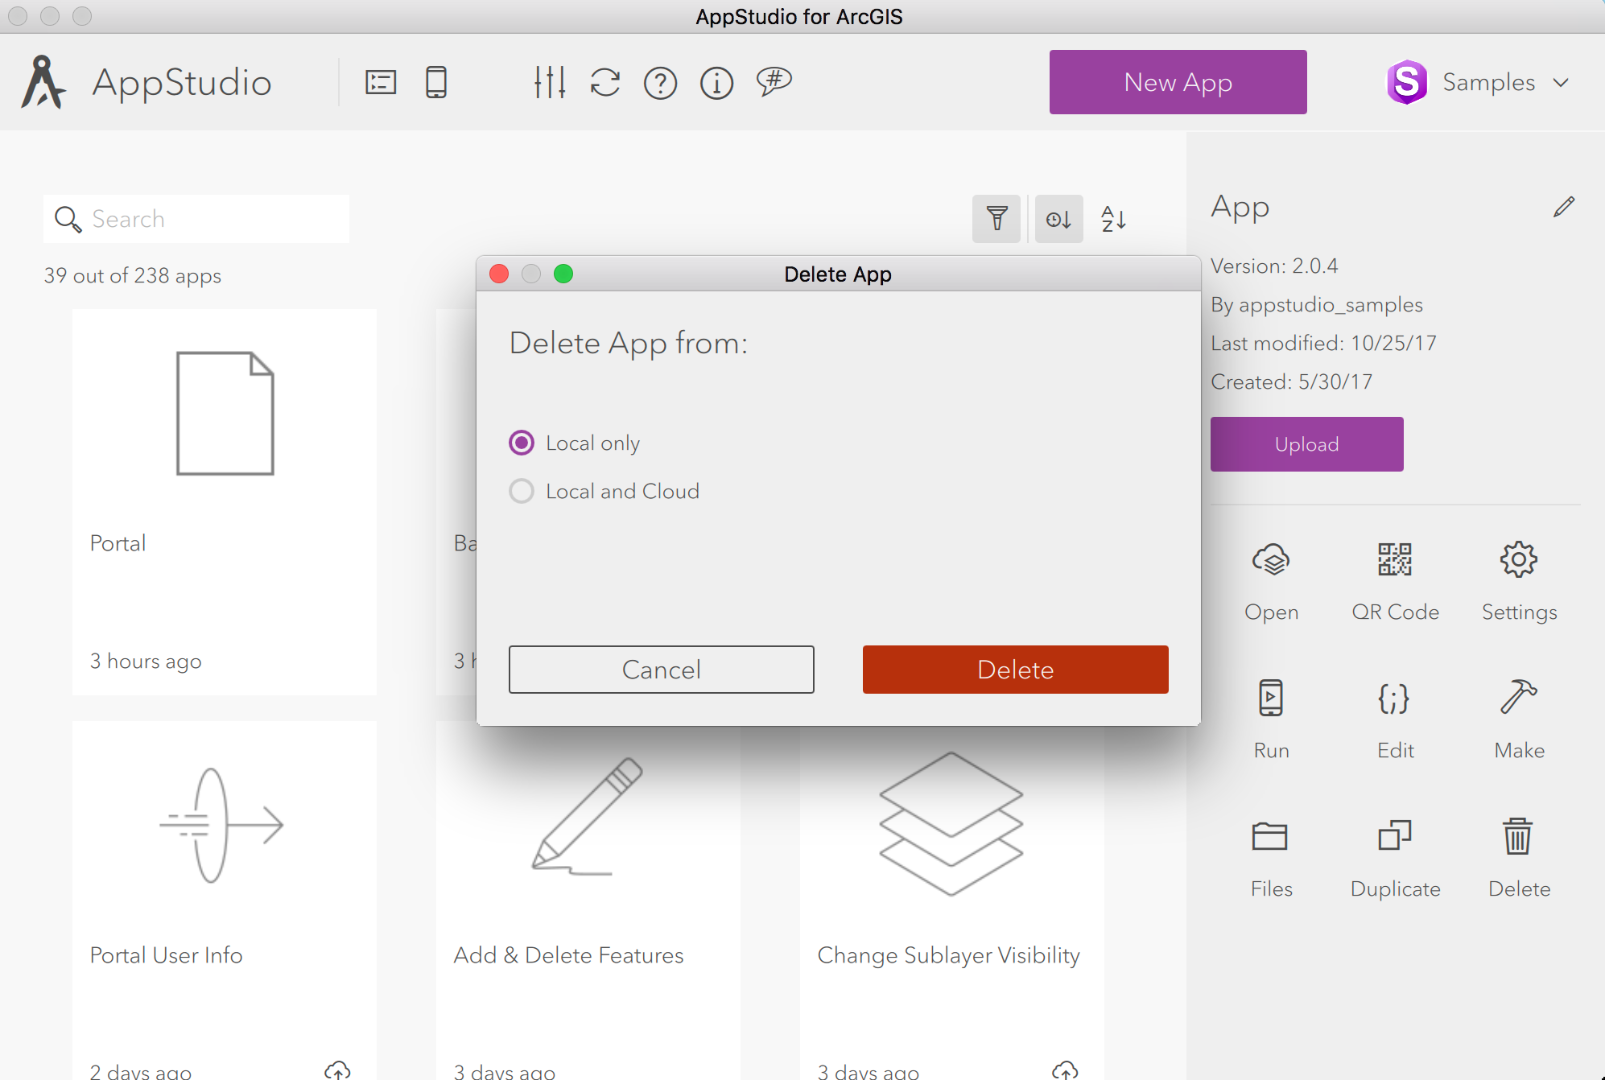
One other feedback we received was to make it easier to manage your apps with in your org. While it was easy to create and update apps we did not have option to delete apps from your org. With this release, you can easily delete the AppStudio app (appears as native application item in your org), with the Delete button in the AppStudio Gallery opening a dialog to choose to delete your app’s files locally, or from both local and online locations.


Supporting localization of apps running in AppRun

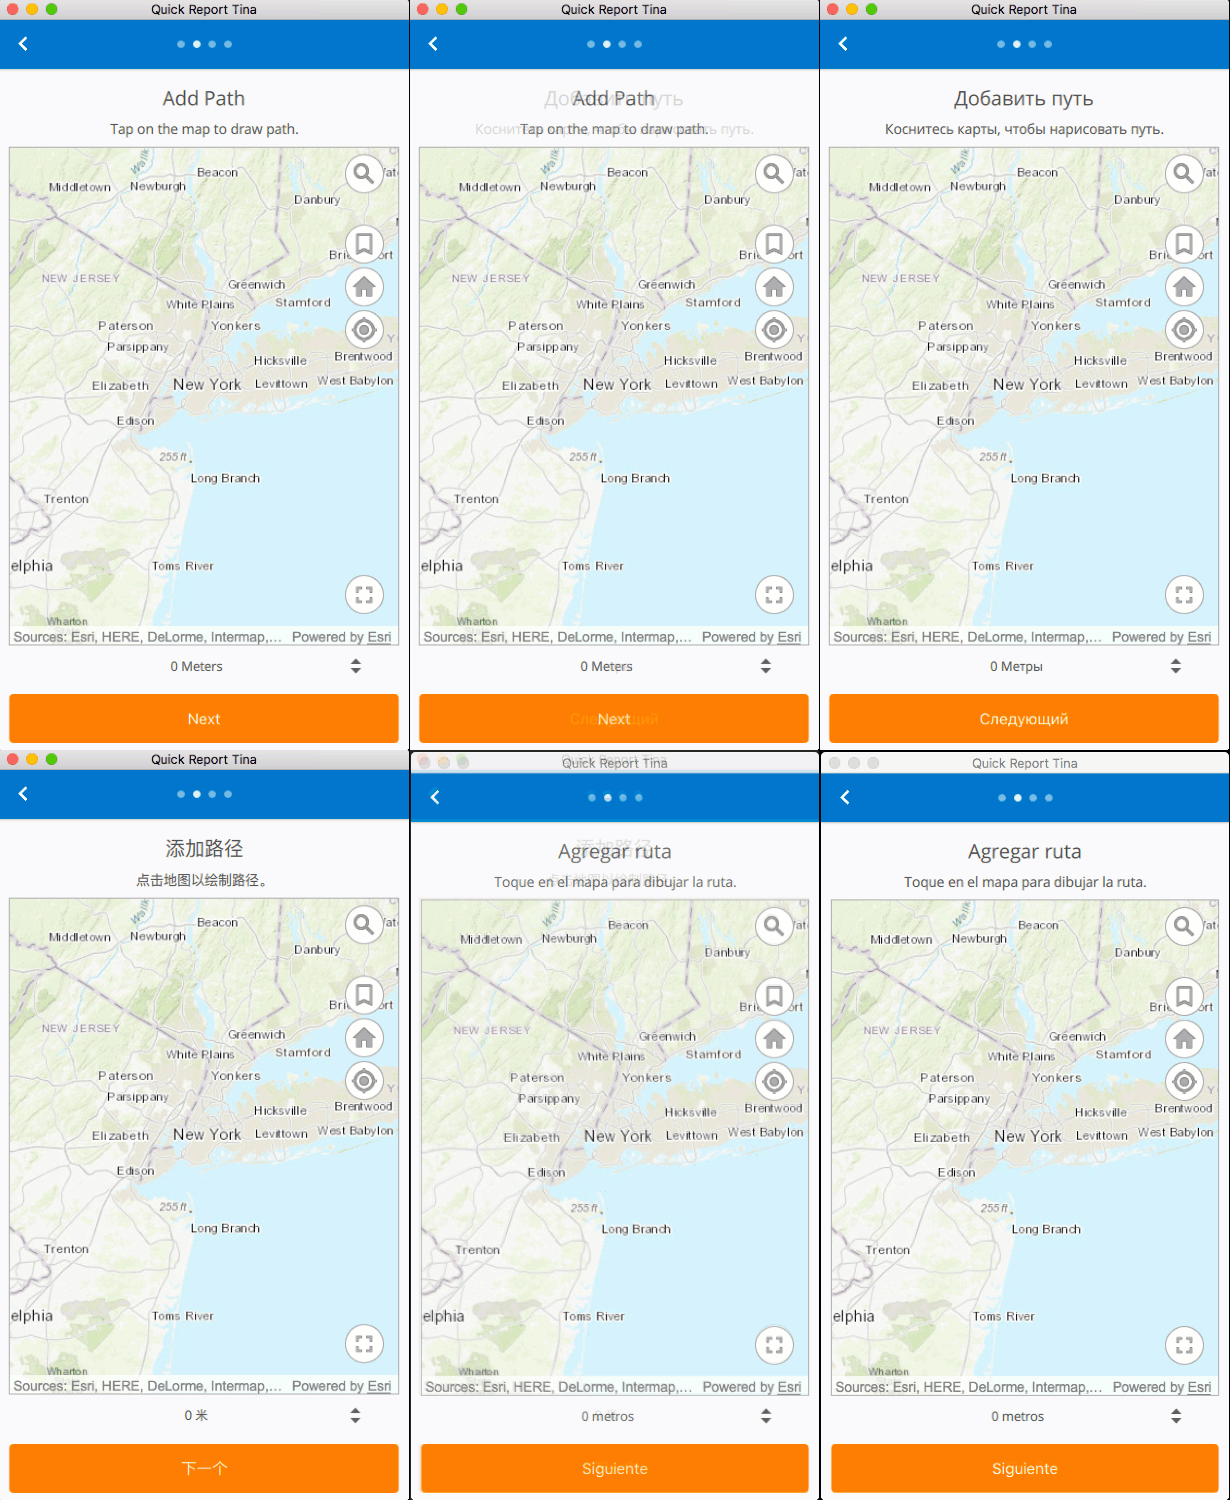
If an app running in AppRun has a translation file that matches the system’s current locale, AppRun will now automatically load the translation file. This new enhancement is essential for testing your apps in multiple languages. 


Click this link to find all the blog posts related to the 2.1 release of AppStudio for ArcGIS.   Look out for new Plugins blog posts coming soon.

more
1 0 924
by Anonymous User
Not applicable

This new release brings many new exciting features and enhancements to all three AppStudio templates - Map Viewer, Map Tour, and Quick Report.  Here is a list of update highlights for each template:

Map Viewer

  • Support for secured web maps
  • Ability to download and view Mobile Map Packages (BETA)
  • Display grids
  • Option to specify the number of maps to display in gallery 
  • Enhancements to Geosearch experience 
  • Ability to adjust font size

Quick Report

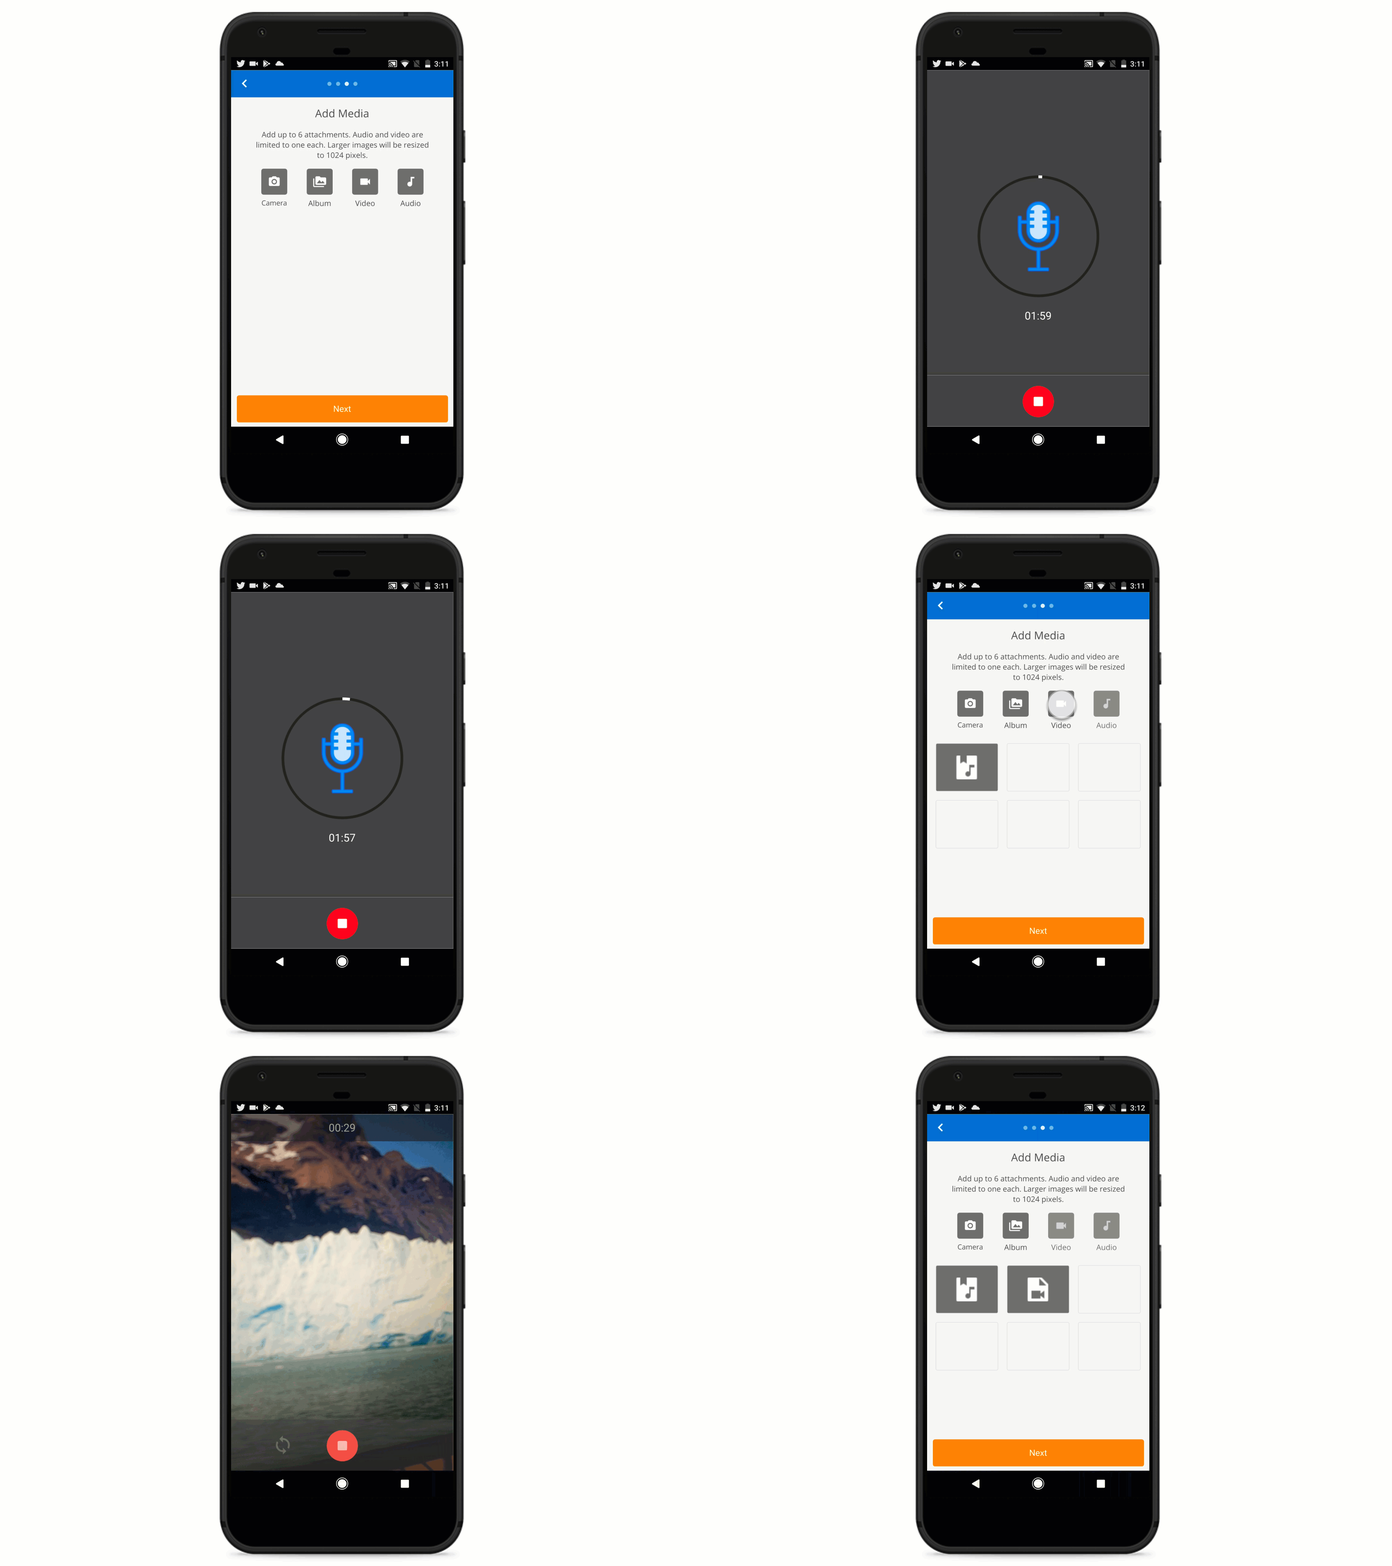
  • Support for audio and video attachments (BETA)
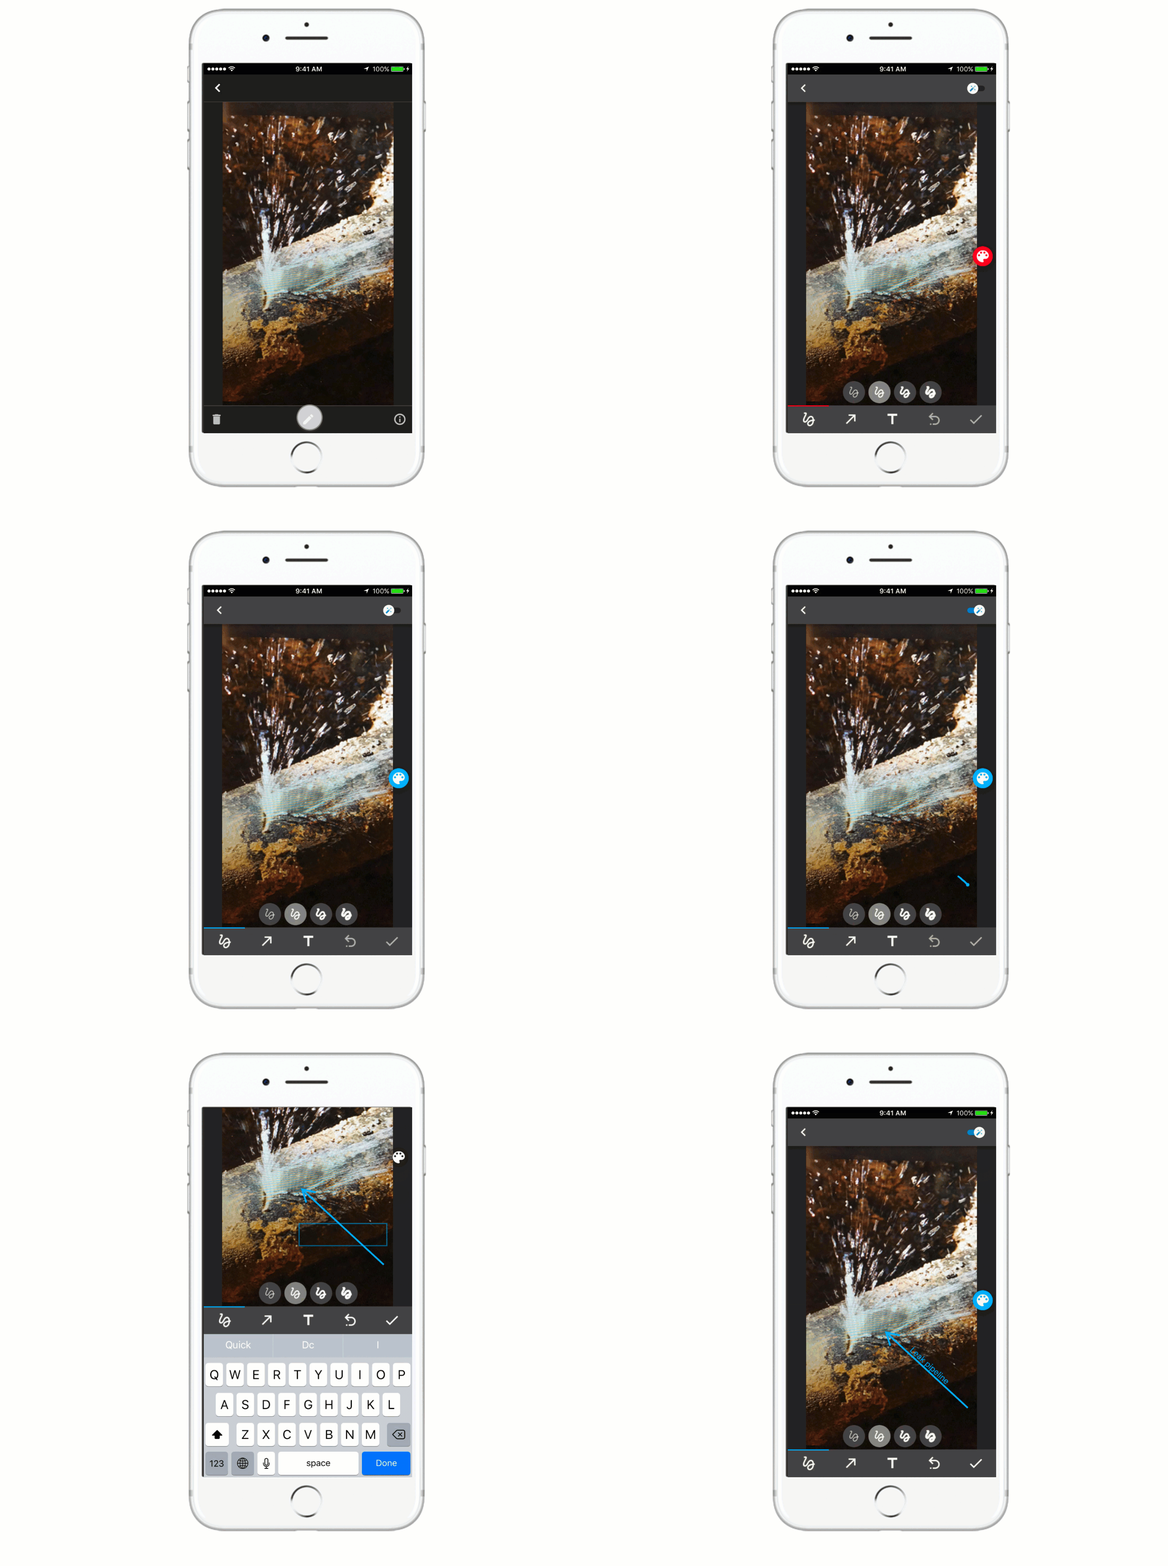
  • Annotation support for images
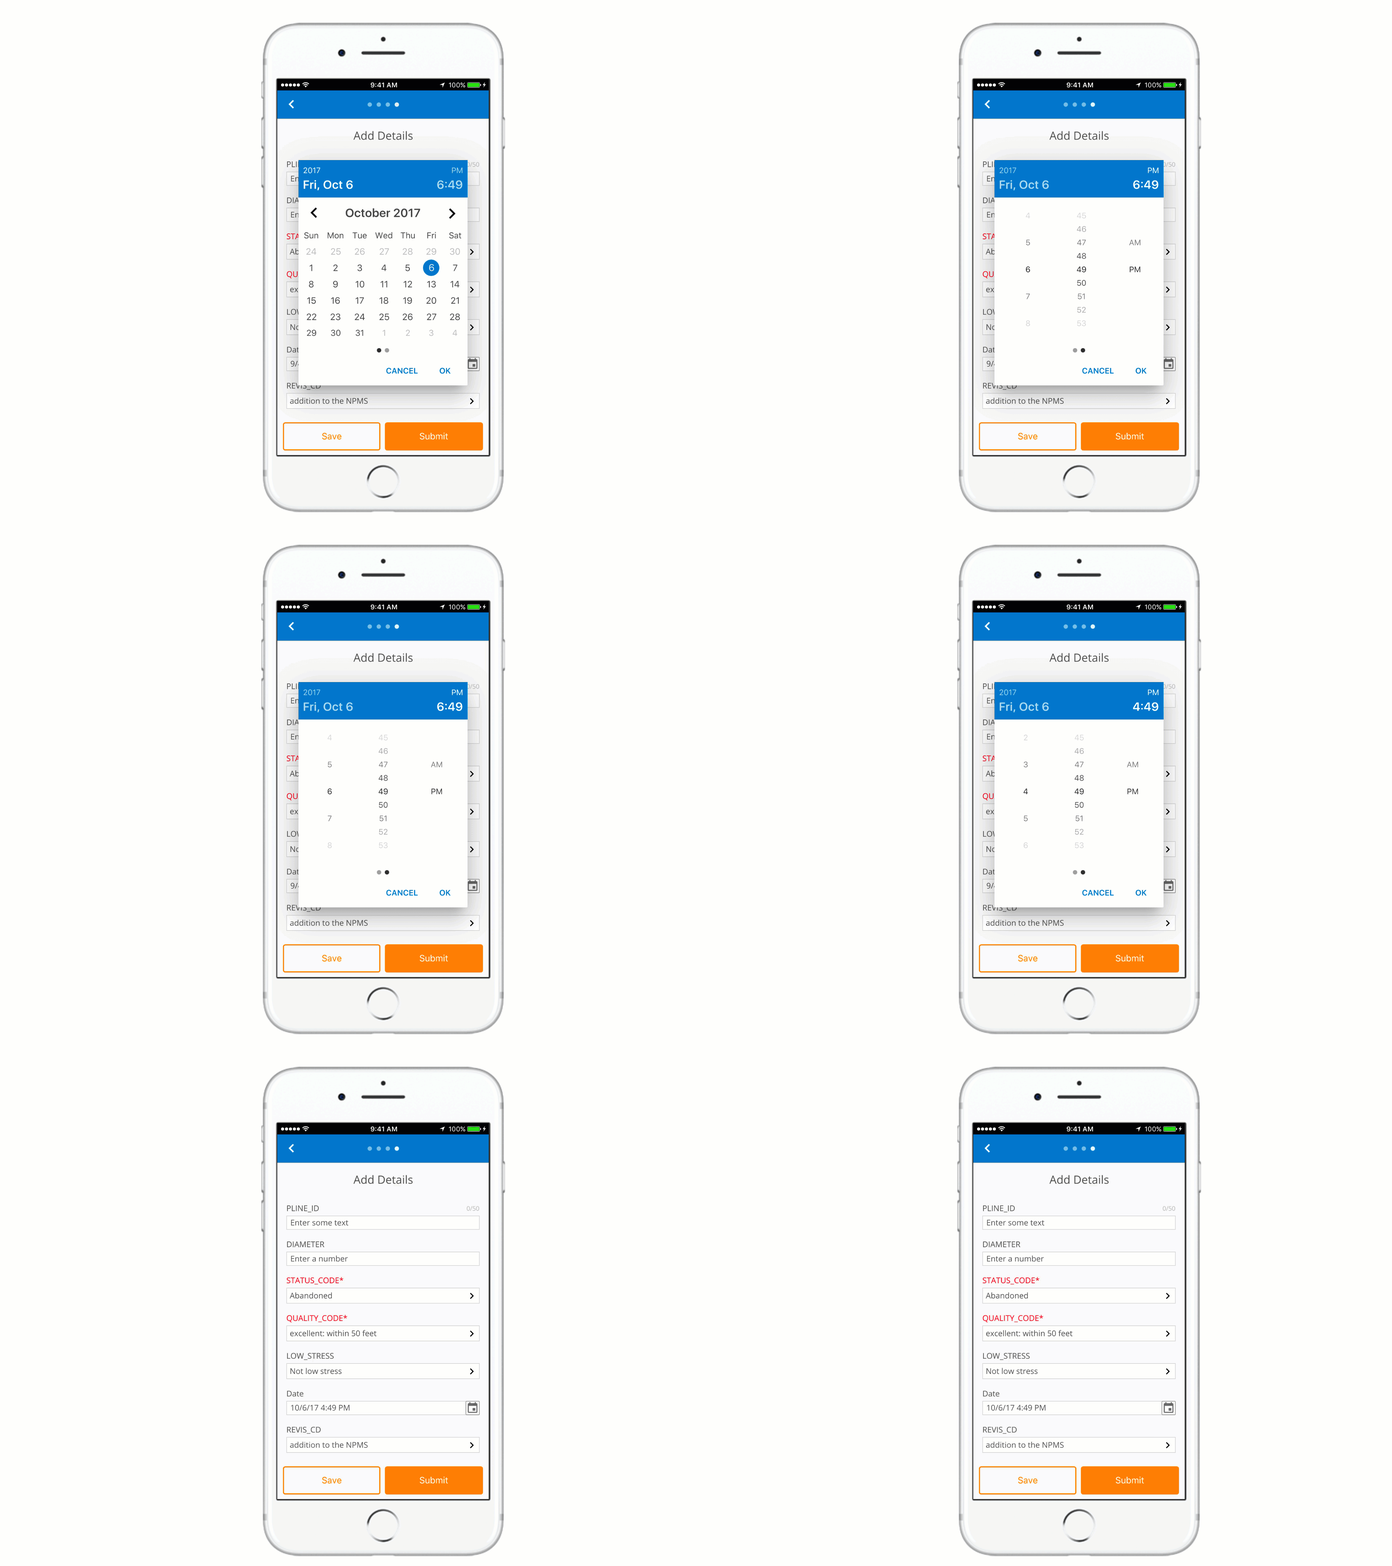
  • New calendar control

Map Tour 

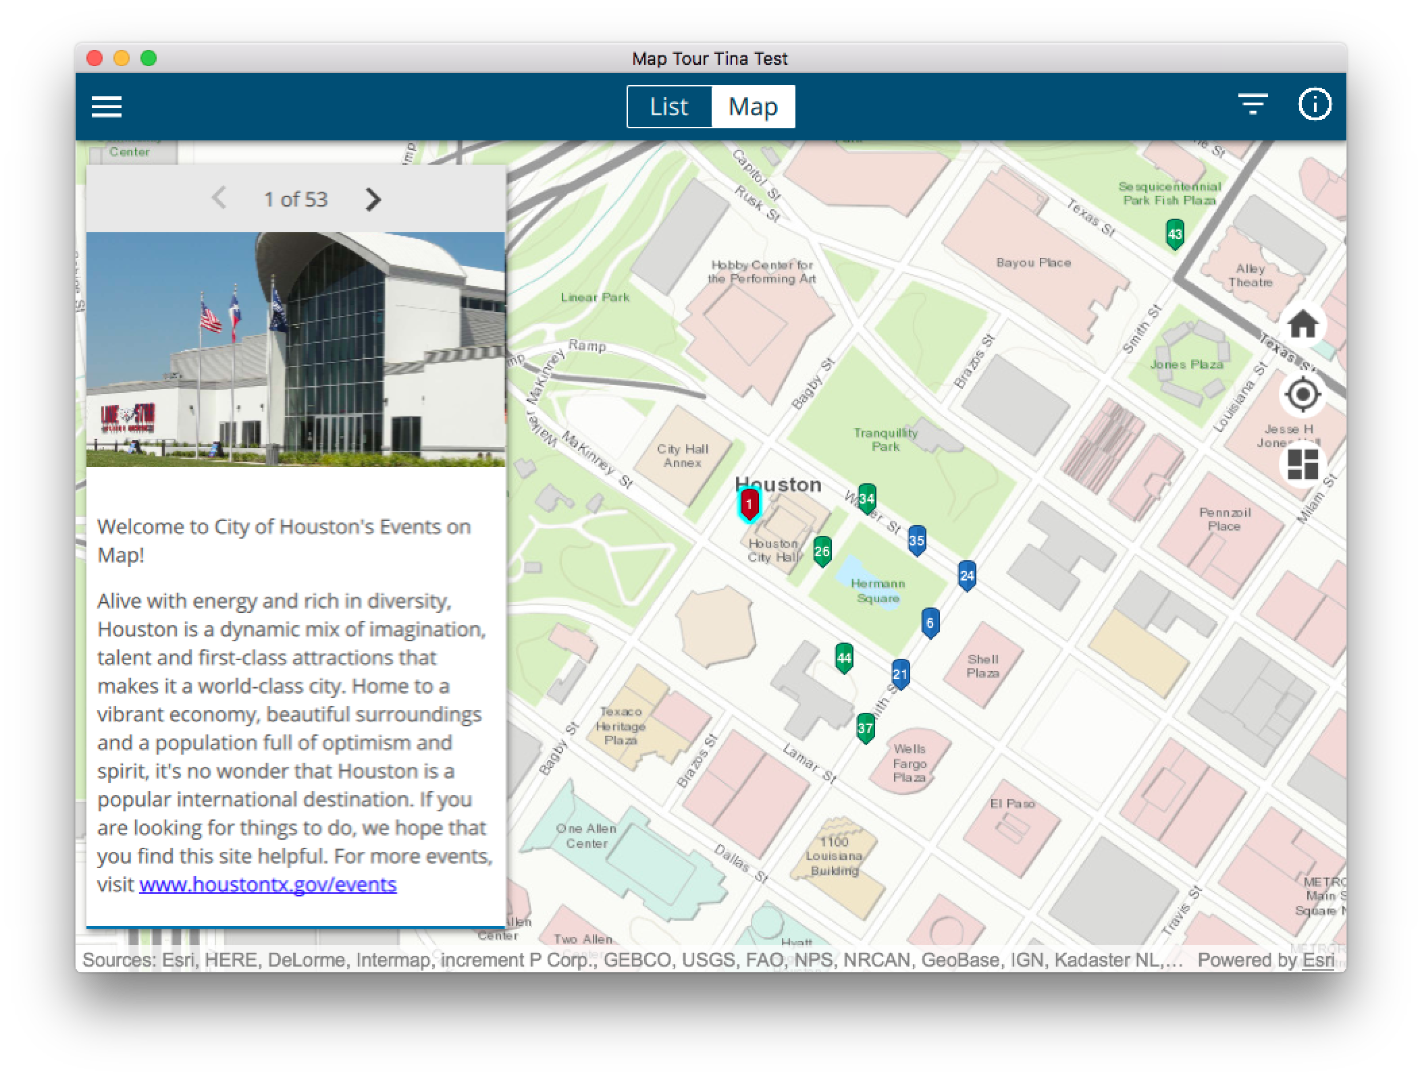
  • New design for Gallery and side panel
  • New basemap switcher 
  • Labels for Map pins
  • Pinch-to-zoom ability for the images
  • Ability to adjust font size

Below are details on the above features:

Map Viewer Template:

Support for secured web maps

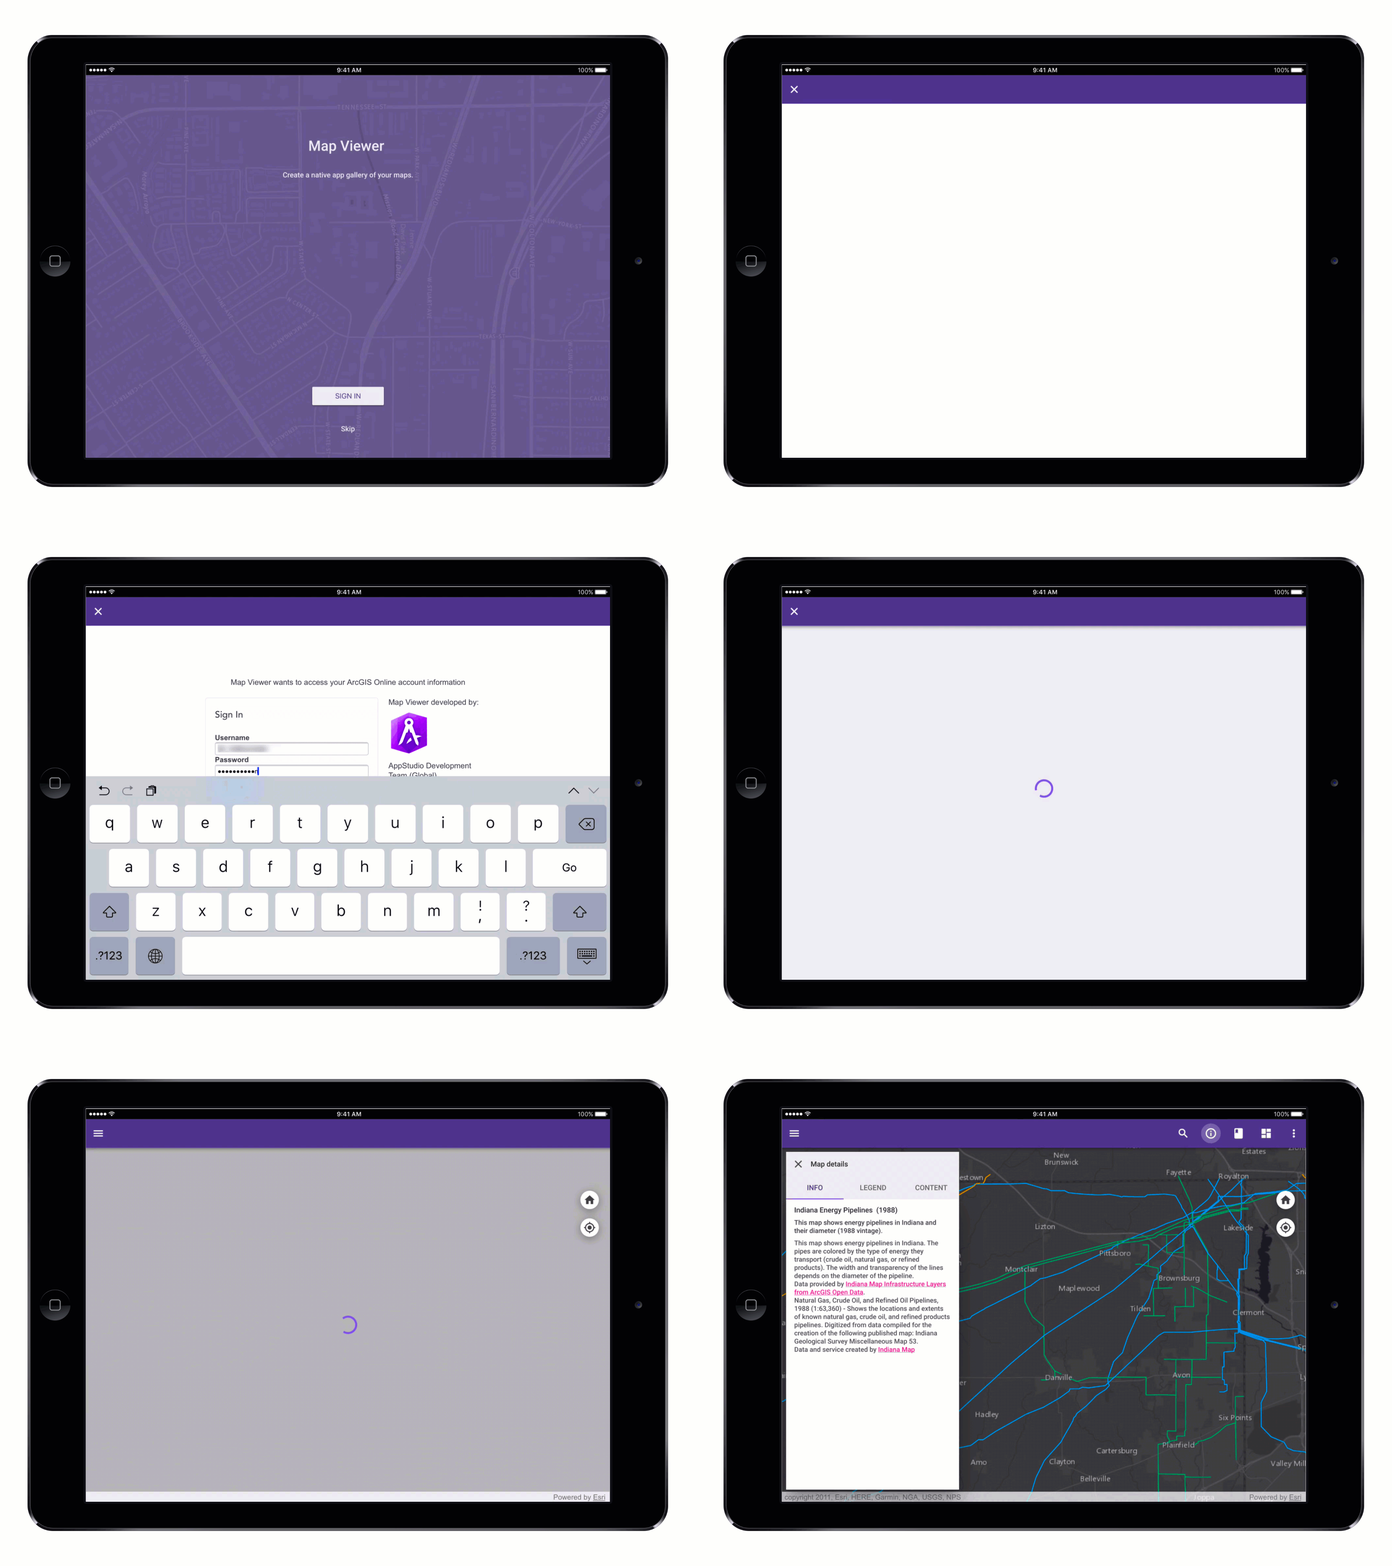
Previously, you could only view public web maps in the Map Viewer template app. In this release, we’re expanding your ability to access private web maps and web maps shared with your organization with a login requirement (supports for OAuth 2.0 and SAML authentication).  Once you have successfully logged in, you will see secured web maps highlighted with a lock icon.  You will automatically be logged in the next time you open Map Viewer template app. To enable this functionality, you need to prepare for this within AppStudio Desktop:

  1. Register your app – Upload your app first, then go to Settings > Click on Advanced button > Register > Close > Apply
  2. Enable secured web maps - Go to Settings > Gallery > click on Support secured maps button


.

Ability to download and view Mobile Map Packages (BETA)

As of 2.1, the Map Viewer template supports Mobile Map packages (MMPK). You can now download both public and private MMPKs from your organization or portal to your device, and access them when you are offline. MMPKs can contain multiple map layers, bookmarks, attachments, media, and address locators.  Map viewer template now supports for viewing all of the above features besides for address locators( will be supported in next release).  You can also easily remove downloaded MMPKs to save the device memory.      

Remember to include your MMPKs to your query string just as you do to your web maps. Once your app launches, sign into your portal or organization to see your MMPKs. The MMPKs will appear in the 'Offline Map' section of your gallery and can be downloaded from there. This section is visible only if your search query returns MMPKs.

Due to licensing restrictions, when using the default template, you must sign in to your Organization or Portal to download or view offline map.

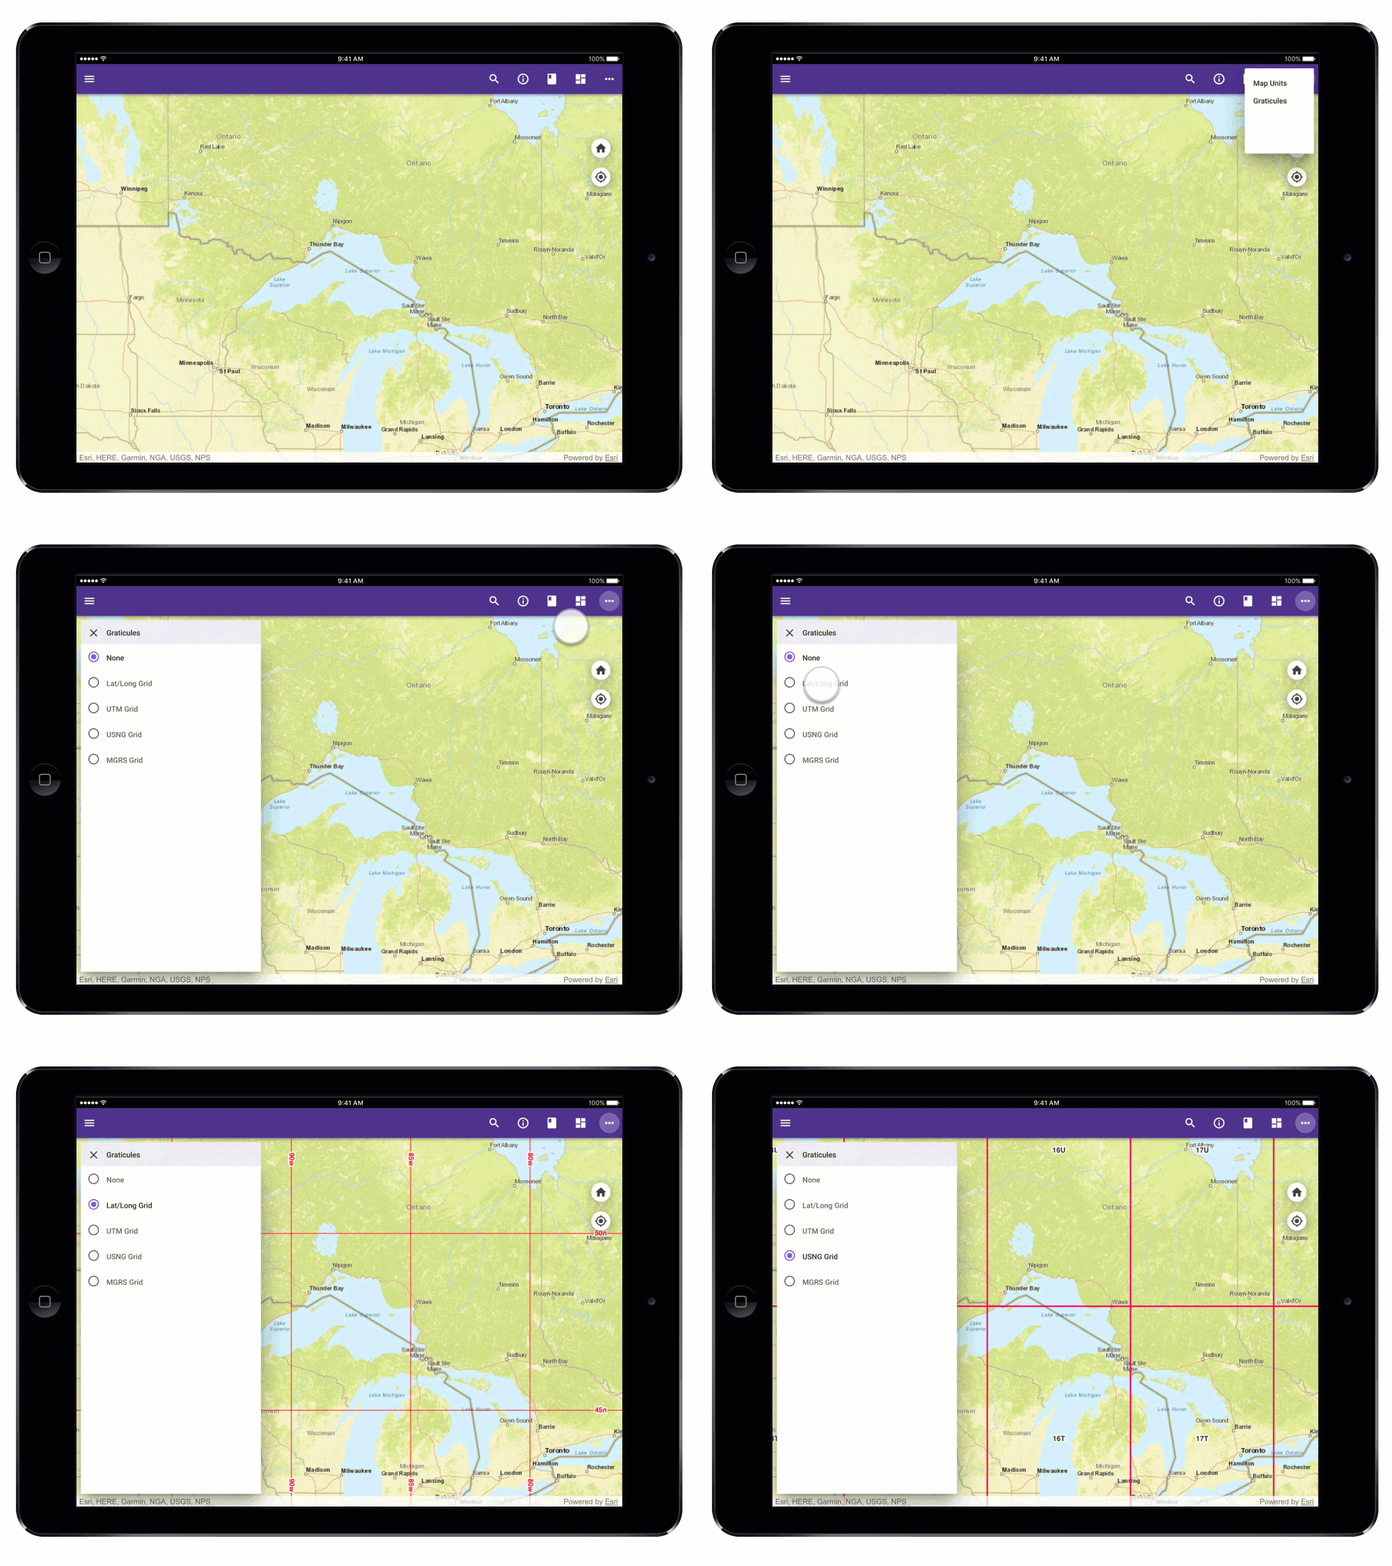
Display grids

Grids are widely used to identify locations on a map in an easily-read format. With this new release, we provide options to display Latitude Longitude Grid, UTM Grid, USNG Grid, or MGRS Grid on the map. 


Specify the number of web maps to display in gallery

Previously, the number of the web maps provided in the gallery had a maximum of 25. You can now specify a number of web maps available in the gallery, which allows you to increase or decrease it as desired. To configure the number of the web maps, you need to prepare for this within AppStudio Desktop:

Open AppStudio Desktop > Select your Map Viewer template app > Click on the Settings > Map Viewer Properties > Gallery > enter the number in the Total results to show in gallery filed


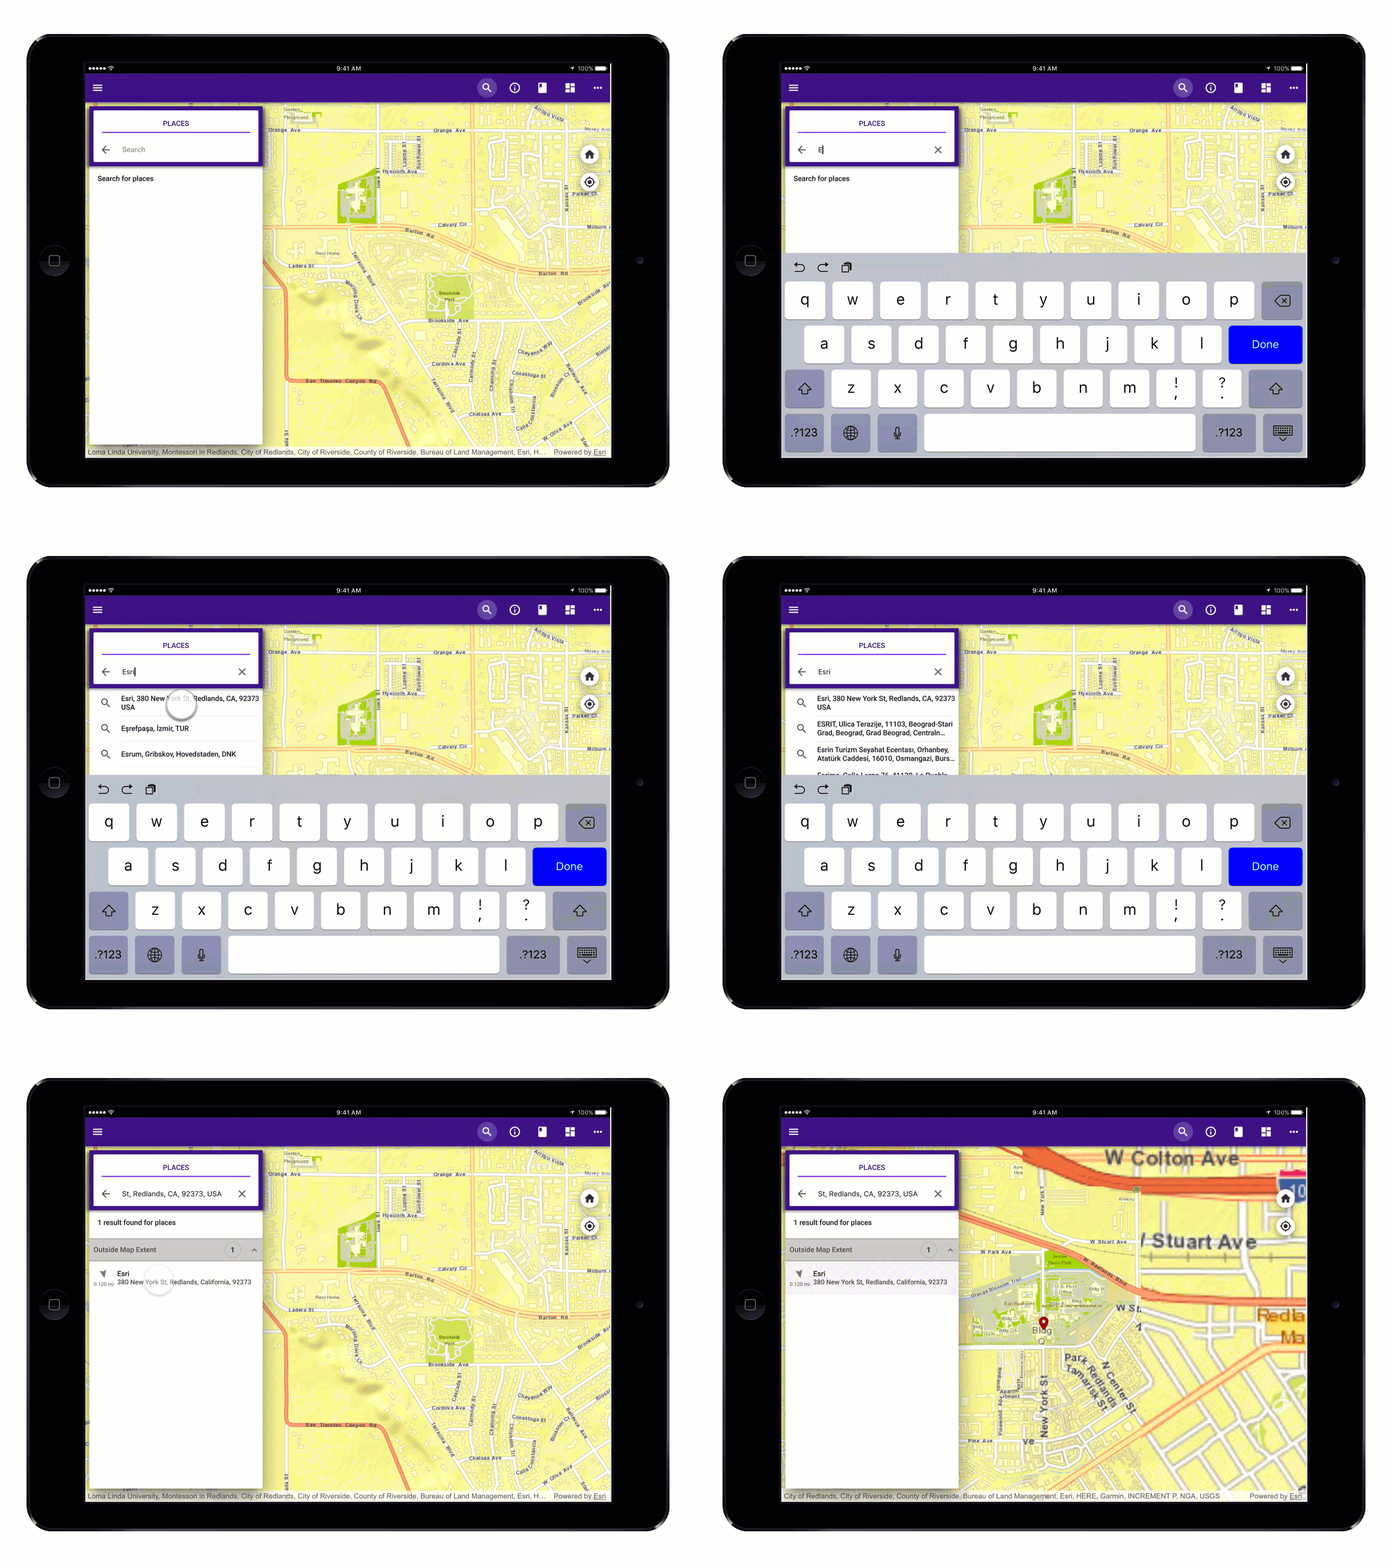
Geosearch Enhancements  

We have refined the Geosearch functionality in the Map Viewer template app. As you enter an address, we are offering a list of address suggestions to help you fill out faster. We also improved the geo-searching experience by sorting search results based on the direction and how far they are from the user’s current location.


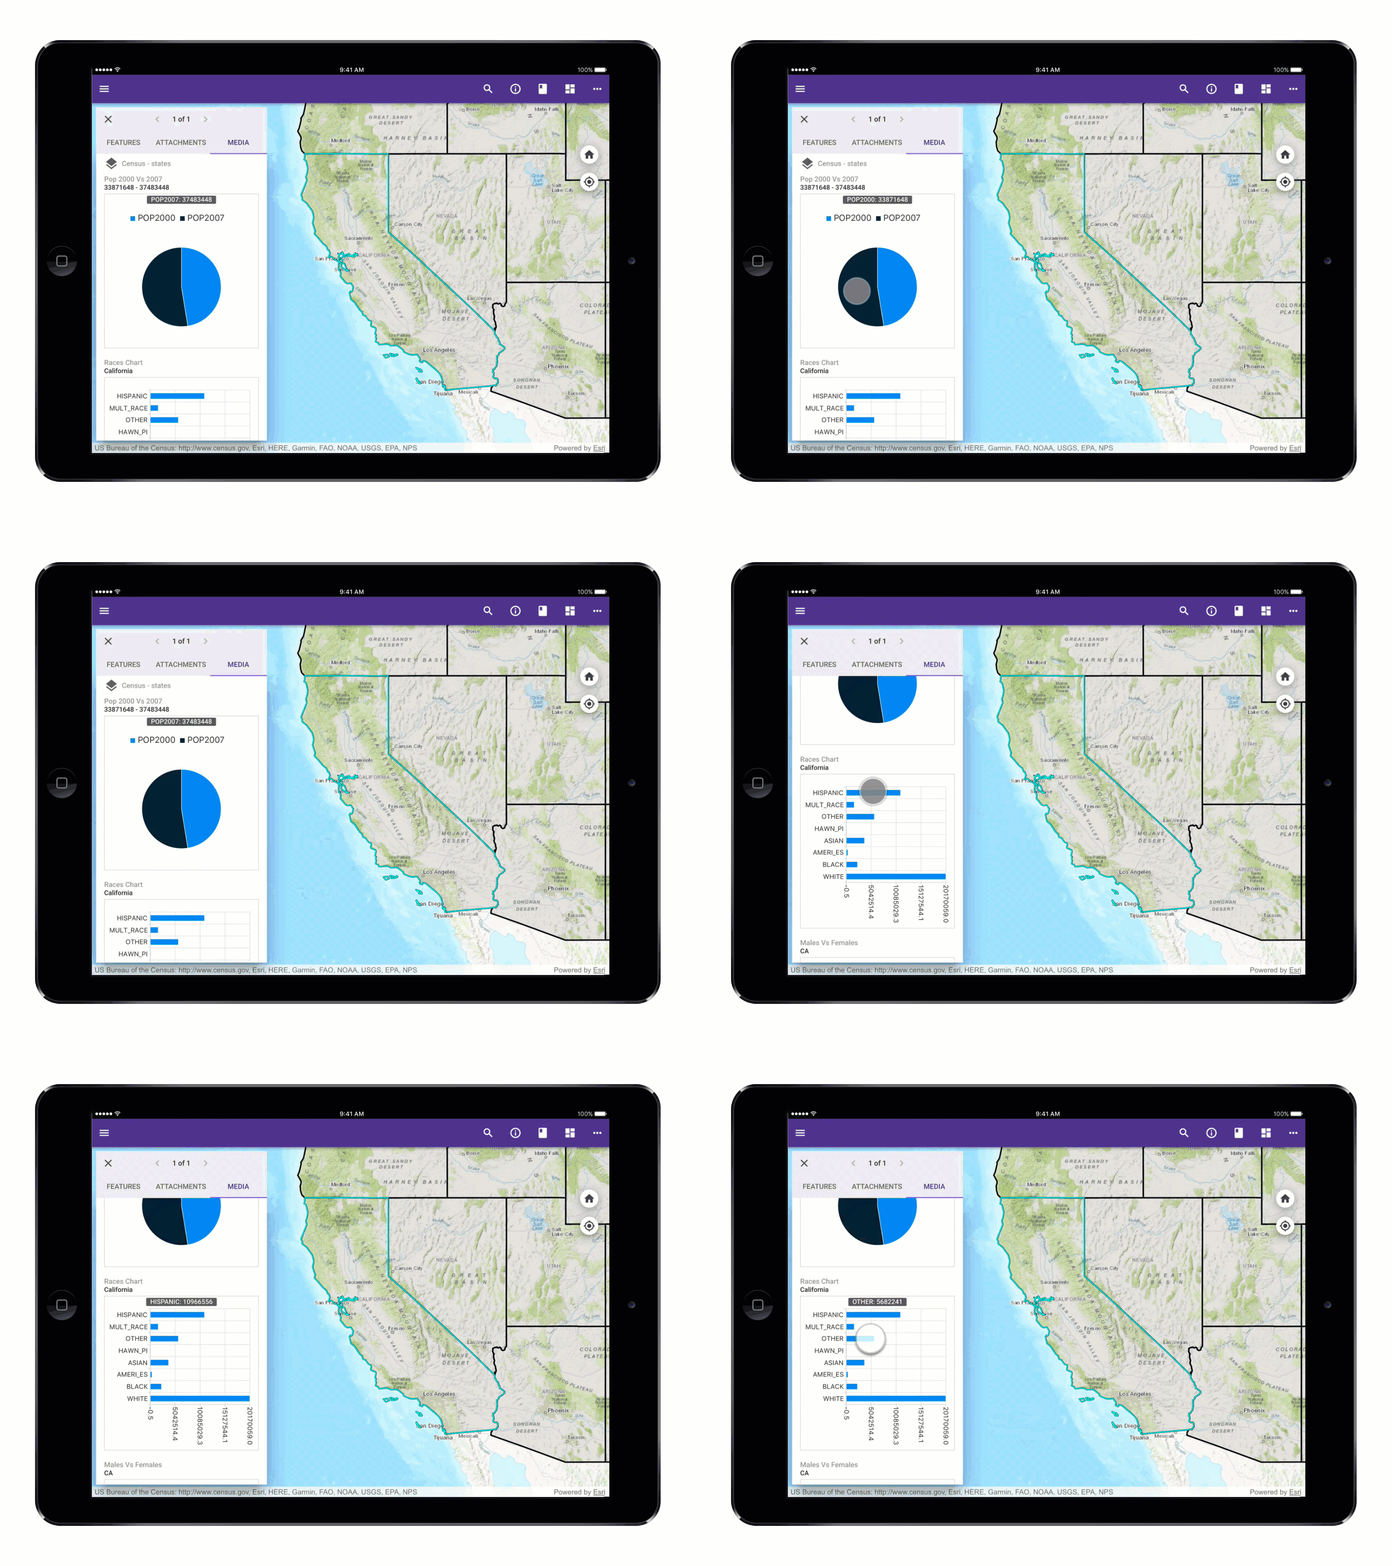
Better experience with Media chart 

Now when you hover over or tap on the chart, you will be able to see the responding numbers displayed on the top of the chart. The chart distance is also improved so that you can now see all of the axis labels. 


Adjust font size

We have implemented the font size control for the Map Viewer template. You can now adjust the font size in the Side Menu. 

Quick Report Template:

Support for audio and video attachments (BETA)

Quick Report 2.1 template gives you the ability to record a video (limited to 30 seconds) and an audio (limited to 2 minutes). You are able to send video and audio as the attachments to the feature service provided for Quick Report.  To enable this functionality, you need to prepare for this within AppStudio Desktop:

Go to Settings > Form, and scroll down to the bottom to Enable video recorder (BETA) and Enable audio recorder (BETA) buttons.


Annotation support for images

Image annotation has been one of the biggest requirements for our users and is now available in the Quick Report 2.1.  We are providing a variety of annotation features such as free draw, changing stroke width, adding text comments, and changing ink color to allow you quickly and easily edit photos. We also support Smart Draw functionality, which adds power to the annotation feature to help you enhance drawing experience.  Annotation tool is smart enough to recognize and correct various shapes such as line, circle, oval, and rectangle.  If you are drawing a line with the Smart Draw mode, it will automatically change into an arrow and display a text box for you to add notes next to it.    


New calendar control

The calendar has been updated with new intuitive controls for selecting date and time.

Map Tour Template:

New design for Gallery page and side panel   

Map Tour Gallery page now has a clean and intuitive new design.  Side panel for large screen design has also received a new design to not only match the Gallery page style but also provide a better image and text view experience for each point in the tour.  


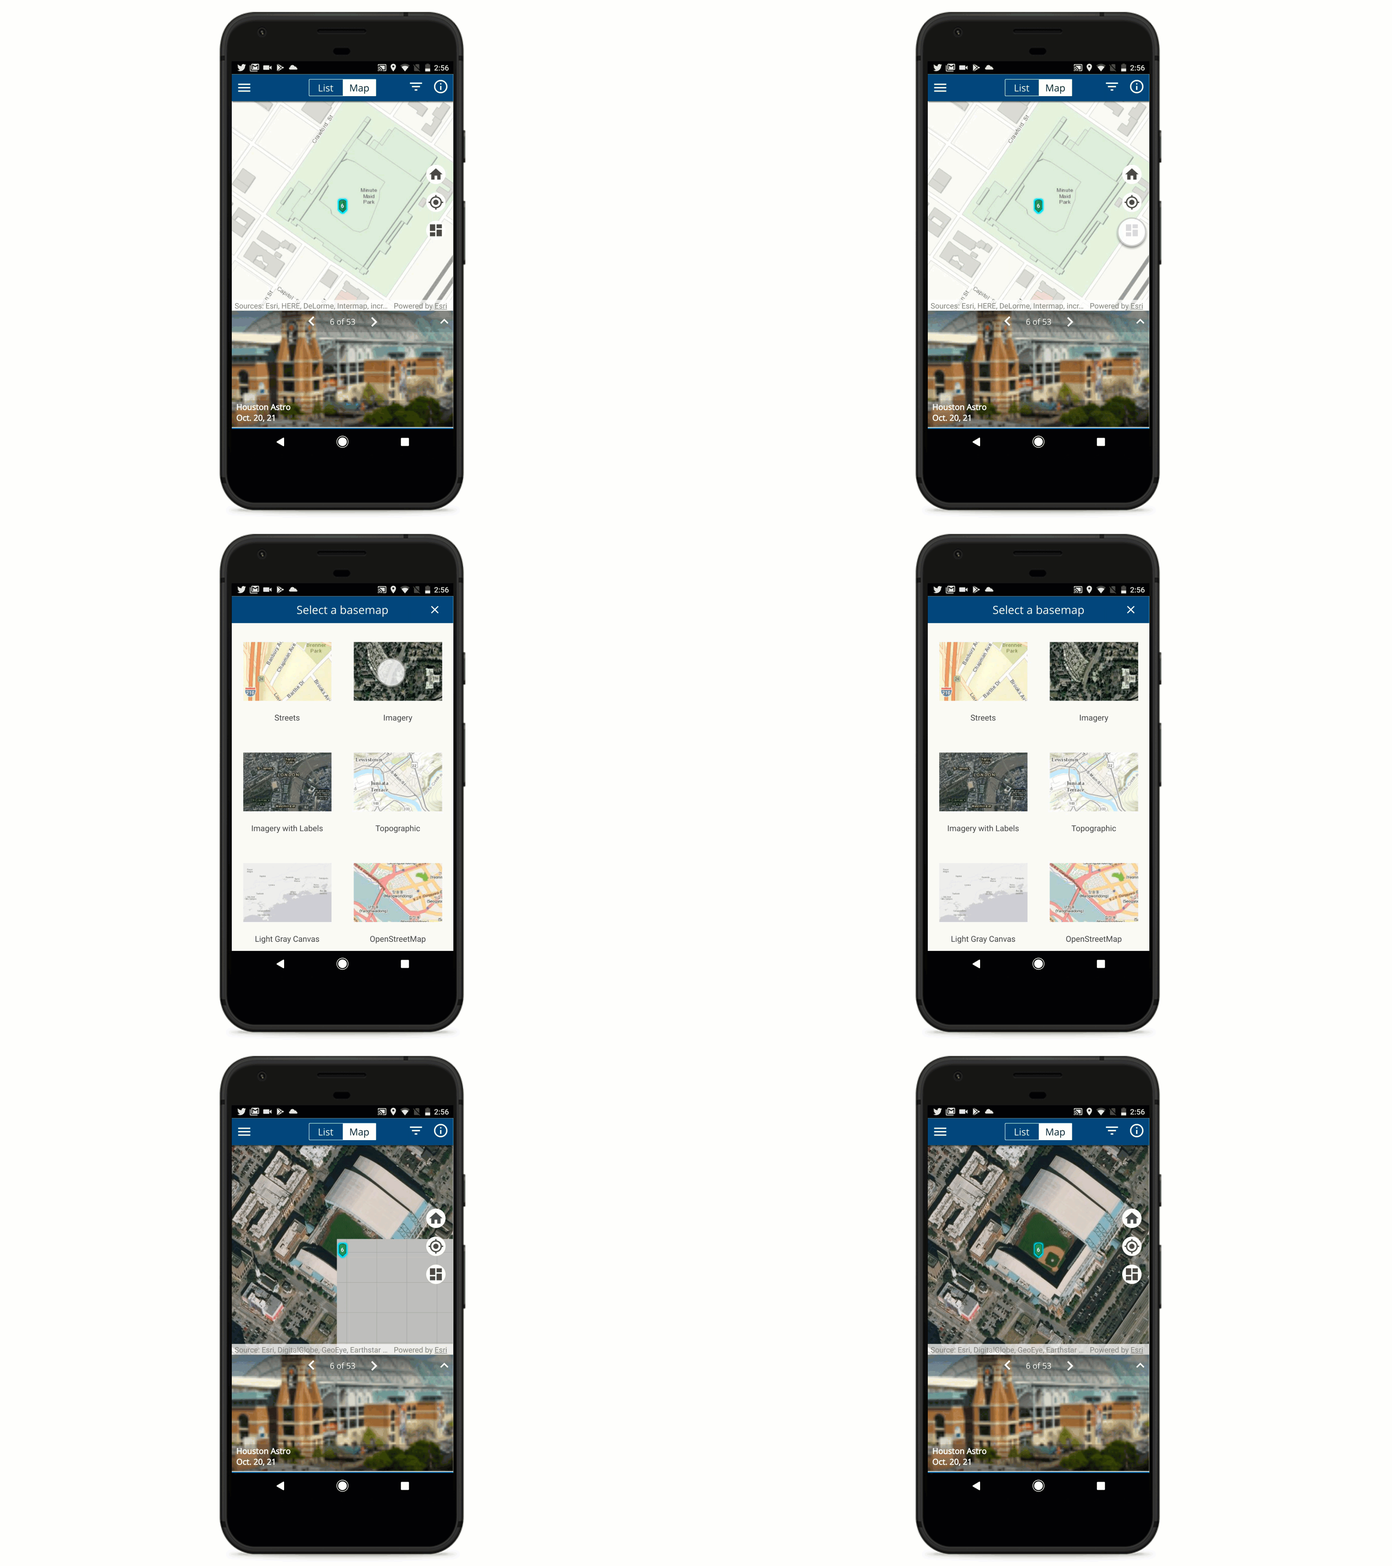
Basemap switcher            

You can now change the basemap using a newly added basemap switcher on the Map page.  


Labeling Map pins     

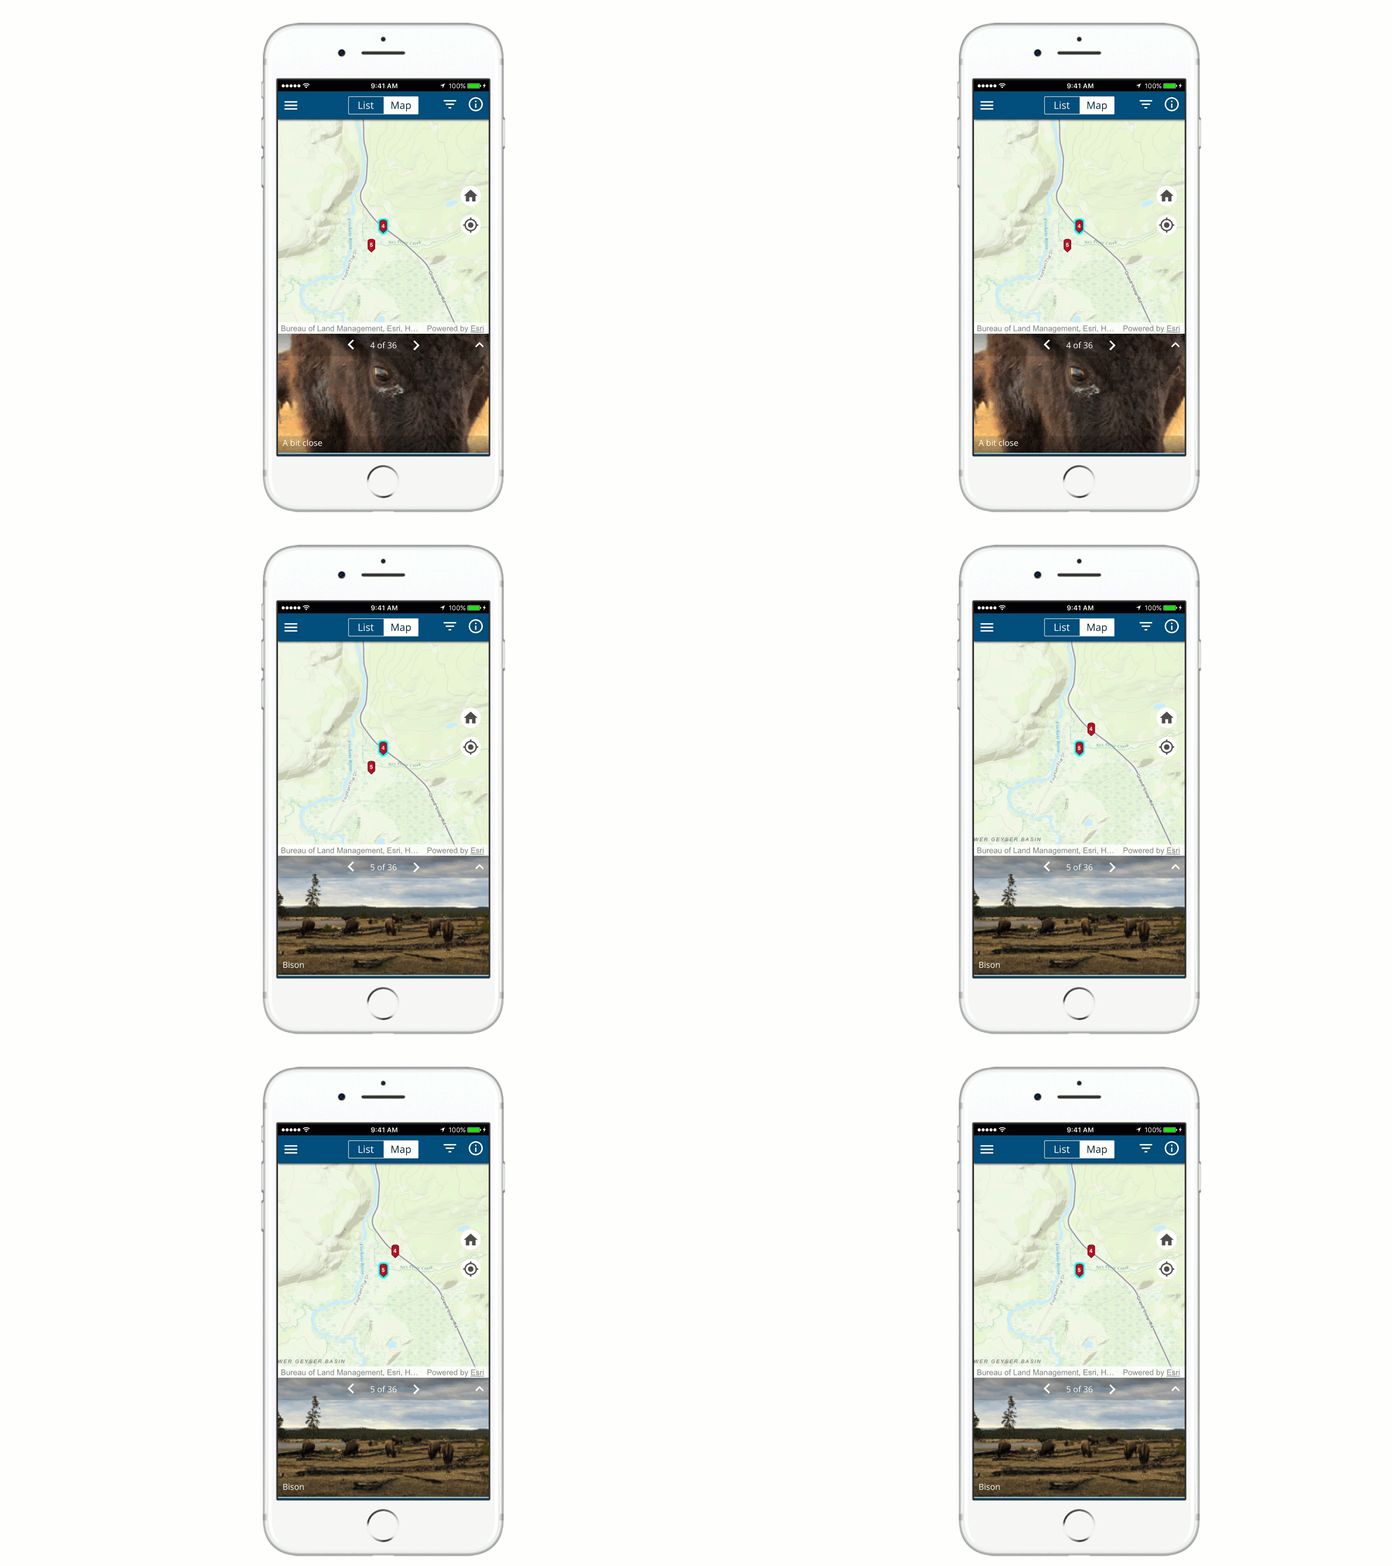
Map pins now have labels. On each pin is a number corresponding, to the order of the pin in the tour.


Pinch-to-zoom ability to the images              

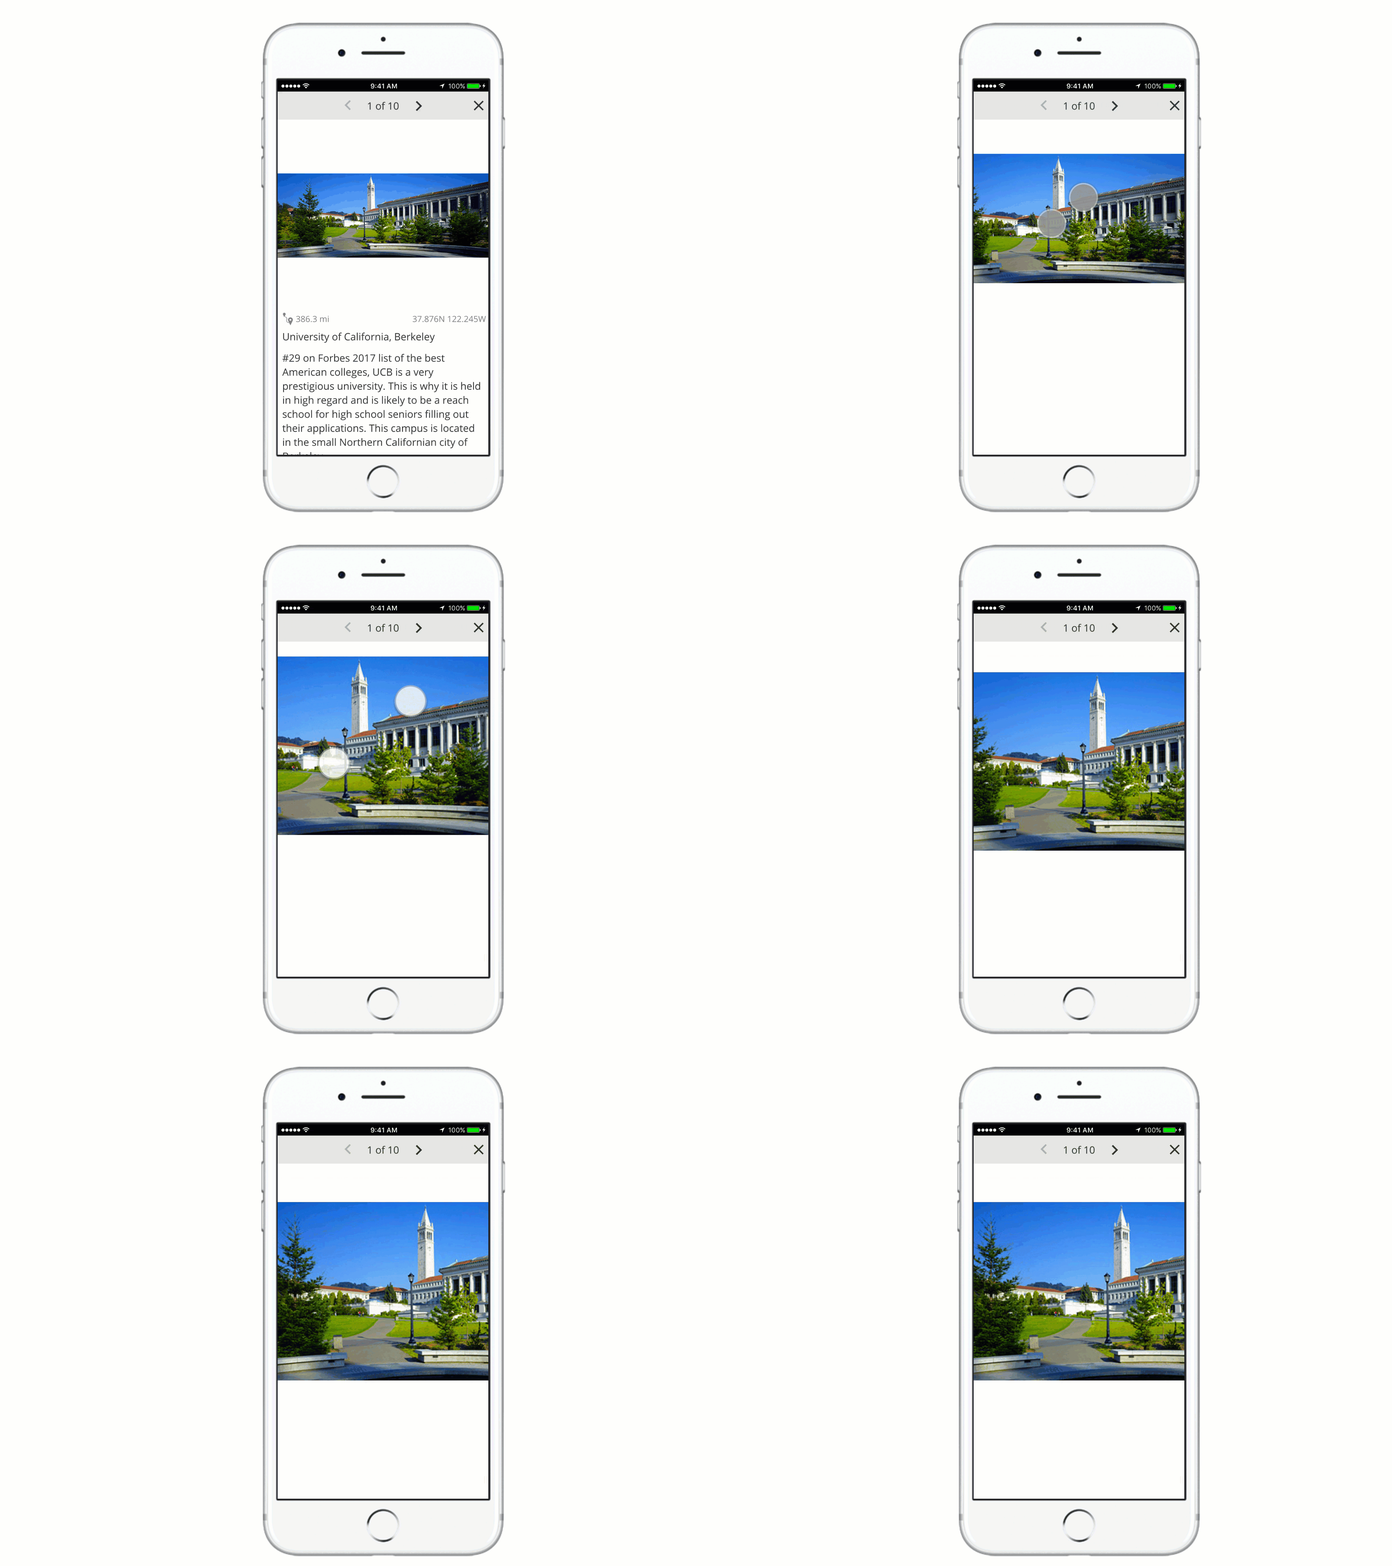
You can now pinch to zoom in on images, and double-tap to release the zoom. This allows you to interact with map tour photos at different levels.

Adjust font size

We are launching new settings that offer you more control over the application font size. You can now increase or decrease the font size in the side menu.

To learn more about what's new in AppStudio Desktop and Plugins, look out for blog posts coming soon!

more
3 0 1,328
by Anonymous User
Not applicable

We are excited to announce the release of the AppStudio for ArcGIS 2.1. This release brings a lot of new features, enhancements, and bug fixes, all to improve your app development experience and to provide more functionality to implement into your apps.

Highlights of 2.1 are as follows:

  • New community panel added to Desktop
  • UI/UX improvements for AppStudio Desktop tools
  • New Material Design layouts
  • Map Viewer template supports secured Web Maps and offline map packages (MMPK)
  • Quick Report template supports audio and video attachments
  • AppStudio Player improvements - Biometric, IWA authentication  
  • New Plugins in AppFramework – Biometric Authentication, Secure Storage, High Accuracy GPS, and Inter-app share
  • Support for non-runtime apps to run on Windows Universal Platform (Beta)
  • Underlying Qt framework has been upgraded from 5.8 to 5.9.1

You can get the latest version of AppStudio for ArcGIS at AppStudio for ArcGIS | ArcGIS.  Don’t forget to update the mobile companion app AppStudio Player on your device from iTunes and Google Play store.

AppStudio Desktop

In this release, we continue our work on improving UI /UX for AppStudio Desktop tools. Many new features and handy improvements for Desktop are also included, such as Material Design layouts, a new community panel in the Desktop Gallery, support for building UWP apps using cloud Make tool, ability to delete apps both locally and in the organization, ability to share apps directly from the Desktop, easily generate client ID and many many more. Watch out for a detailed blog post to learn more about all the new big and small changes to the AppStudio Desktop very soon.    

AppStudio Player

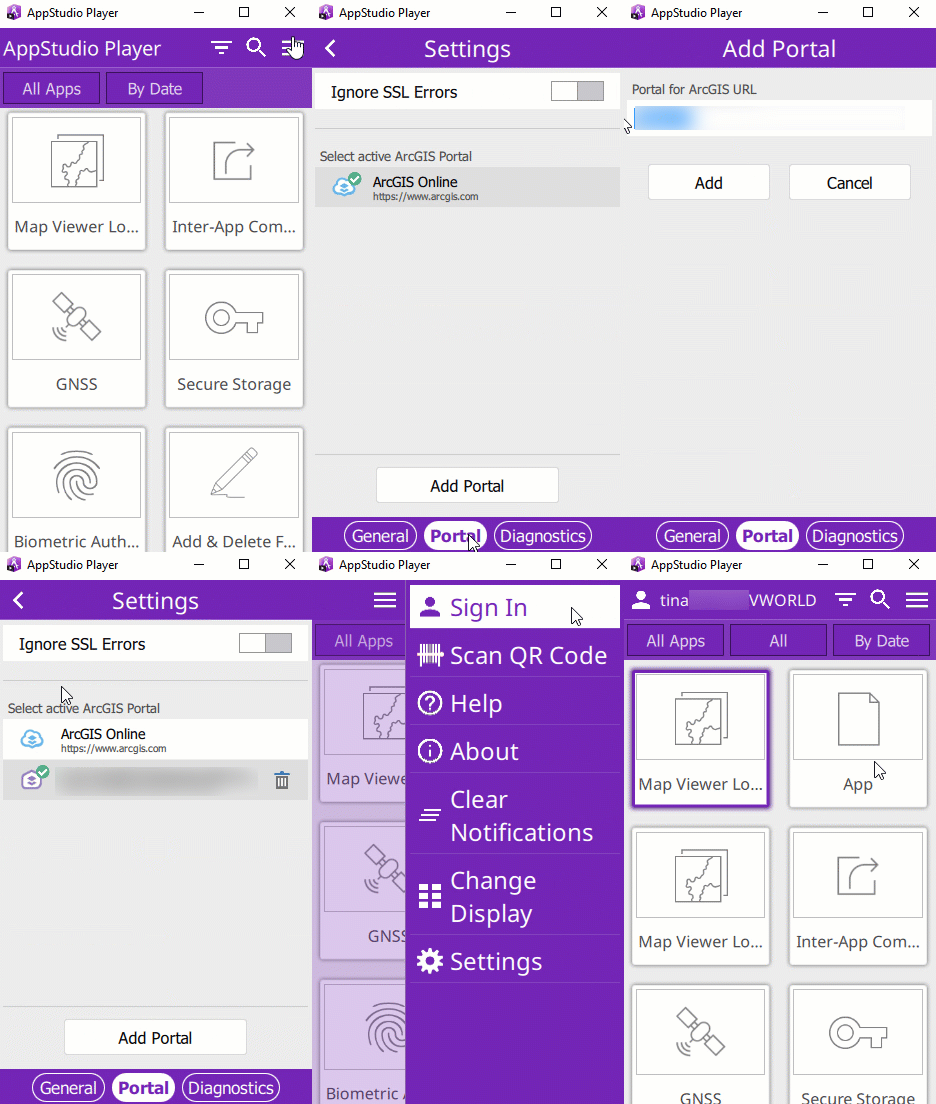
With 2.1, on iOS (MacOS and Windows) devices, you can now login more securely using the newly added biometric authentication functionality (Touch ID). You can enable this feature in the Player Settings

Note:Support for Android device will be coming in the next release

AppStudio Player now supports Integrated Windows Authentication (IWA) on Portal for ArcGIS. This is a requested feature for users who have configured Player to work with an IWA security to sign in and connect to ArcGIS Online or Portal for ArcGIS.  This new feature makes it seamless to use a Windows account to log into Player easier and faster.


AppStudio Templates

All the three templates - Map Viewer, Map Tour and Quick Report have introduced new features, enhancements, and improvements in user experience.

You can now view secured web maps contents in the Map Viewer template. In addition to that, you can also download and view Mobile Map Package (MMPK).  Quick Report template now supports audio and video attachments (Beta). A new basemap switcher was added to the Map Tour template and the side panel to view photo and description along with the map for the large screen was improved.  

Check this blog post to learn more about what's new in AppStudio templates.

AppStudio Framework

We listen to your feedback carefully and have improved documentation and code samples for the usage of the AppFramework.  This is available both inside the Qt Creator help and online.

Exciting new plugins (Beta) now are available with 2.1:

  • Biometric Authentication - Authenticates user within the app through fingerprint scan
  • Secure Storage Stores data encrypted in the system Keychain
  • Devices - Provides data on connected devices (e.g. printers, weather sensors, laser scanners)
  • Positioning - Provides high-accuracy positioning and satellite data from a capable device
  • Inter-app Share (AppFramework Clipboard extension) - Brings up the standard iOS, macOS or Android share sheet that allows you to share text or URL to other application


We are excited about the addition of these new plugins. It's just not about new, a bunch of bug fixes and enhancements have also gone into the existing plugins based on your feedback (Thank you). We have also added new samples showcasing how to use the plugins from both the 2.0 and the 2.1 release. These samples are available in AppStudio Desktop and are just a click away.  We are planning to write a detailed blog post highlighting some of the new plugins and use cases in the near future.

Note: These new plugins are currently in beta, so we’re looking forward to your feedback in how to improve these features in the future.

We hope you enjoy all the new updates, features and bug fixes included in this release.  As always, we will continue listening to your feedback and bringing new features to improve your app development experience.  Do not forget to share your awesome app with us to be showcased in the AppStudio Apps Showcase Gallery

                                      Follow us on Twitter @appstudioarcgis for latest updates and news

List of support issues addressed

BUG-000087195

AppStudio Player: Return to Gallery (App Exit) translation issues got fixed

BUG-000095416

Issue with untranslated Sign In page

BUG-000103775

In AppStudio for ArcGIS, a Map Viewer app does now utilize 'feature search' from all layers within the referenced web map.

BUG-000103906

Successfully signing in after clicking the 'Upload' or 'Make' button redirects users to the 'Upload' or 'Make' window.

BUG-000106828

Fields that have a range domain applied to them now appear in AppStudio Player for ArcGIS.

more
4 0 2,418
105 Subscribers