- Home
- :
- All Communities
- :
- Services
- :
- My Esri
- :
- My Esri Blog
- :
- Tips & Tricks: Helpful tools for Admins who Edit P...
Tips & Tricks: Helpful tools for Admins who Edit Permissions
- Subscribe to RSS Feed
- Mark as New
- Mark as Read
- Bookmark
- Subscribe
- Printer Friendly Page
If you are an administrator for your organization on My Esri, there are some tools available from Edit Permissions that you may find useful. Some of these options appear on other pages on My Esri, too.
To get to Edit Permissions, click on the Edit (pencil) icon on My Organizations > Users > Manage Users.

The following numbered paragraphs correspond to the red circled numbers in the next two screenshots.
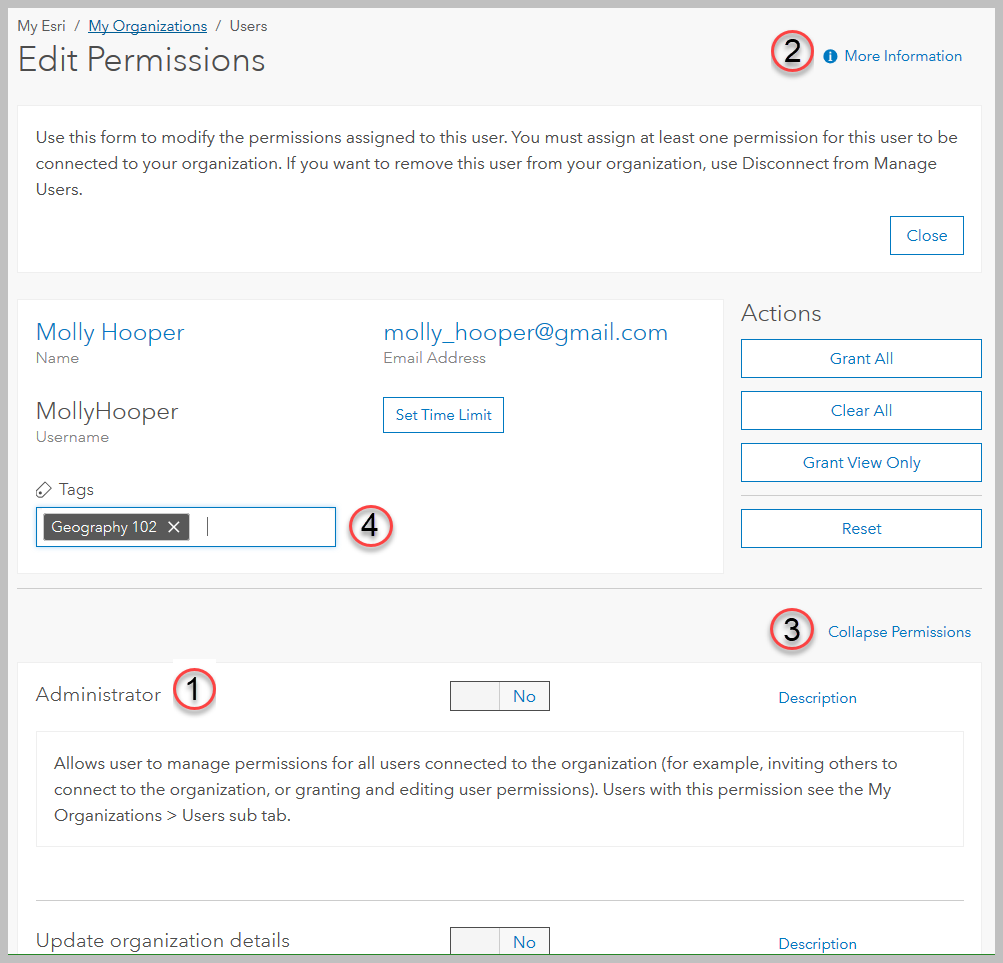
1. Renamed permission. With the with My Esri Release of April 19, 2019, we've renamed the permission that makes a user an admin. Previously, this permission was called "Assign Permissions". We've renamed it to "Administrator" so that it's more clear what this permission is used for. The new term will be used throughout My Esri.
2. More Information. Most My Esri pages have More Information. Click the link to expose details about what you are seeing, instructions on how any tools may be used, and more. If you have questions about what you are seeing on a page, this is a good place to start.
3. Collapse Permissions. The list of permissions on Edit Permissions can be quite long. At any time you can collapse the long list so that you don't have to scroll all the way to the bottom of the page to save your changes.
4. Tags. Tags are a great way to help you keep track of your users. A user may have as many tags as you want. From Edit Permissions, you can create a new tag by simply typing the tag name in the Tags field. Or you can use Manage Tags from My Organizations > Users to create new tags, edit and remove existing tags, and see a breakdown of how many times each tag is used.
5. Email to the user. You can control if the user you are editing receives an email about this change or not. Emails about permission changes are also sent to any other admins at your organization for notification purposes; this setting does not affect that. This is on by default. Note that if you only change tags, no emails are sent, regardless of which option is selected.
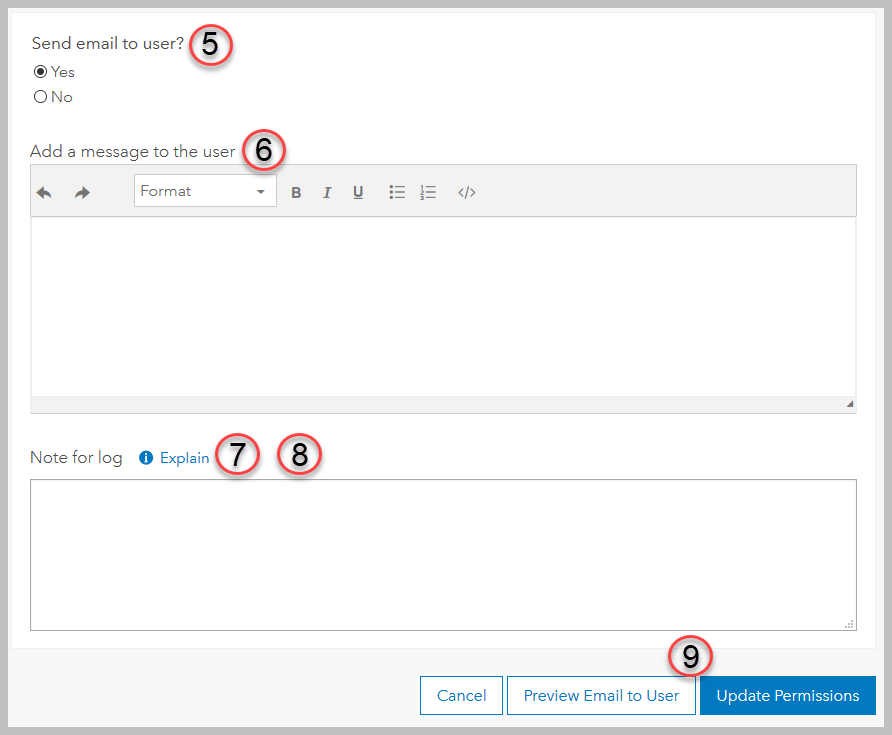
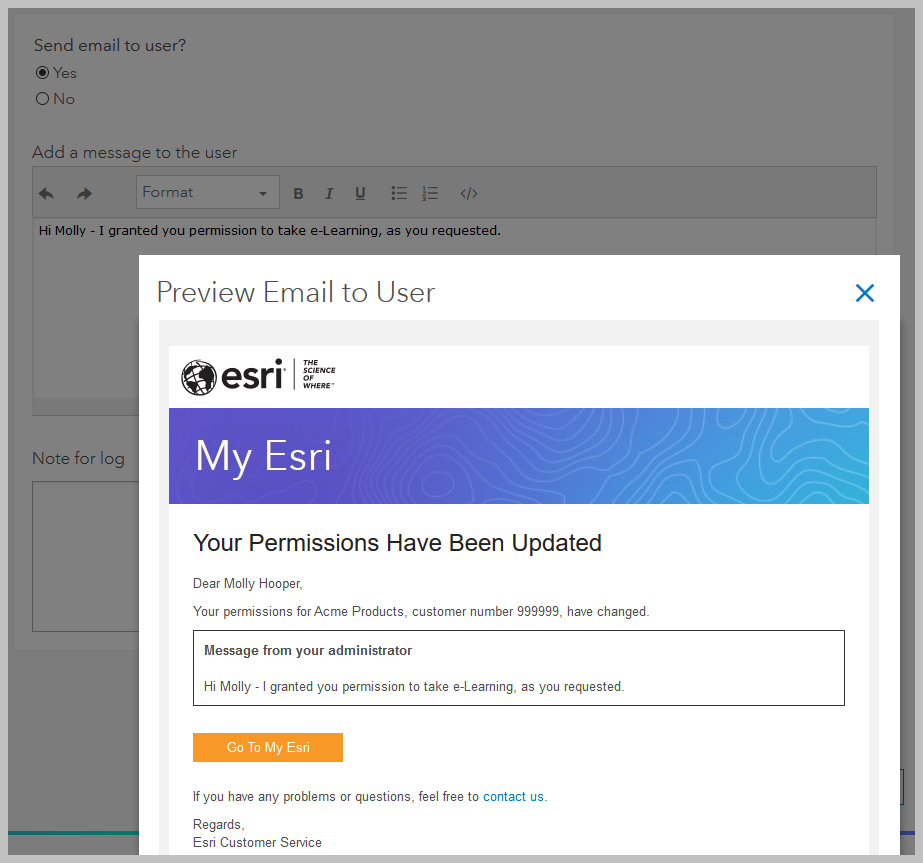
6. Message to the user. Any custom message you type here will be included in the email you send to the user. Some simple tools are provided so that you may format your text if you wish. Your message will appear in a designated section of the email that indicates that this message is coming from you rather than from Esri. This message is only sent in the email; it is not saved anywhere. This message is optional. See an example in the image at the bottom of this blog.
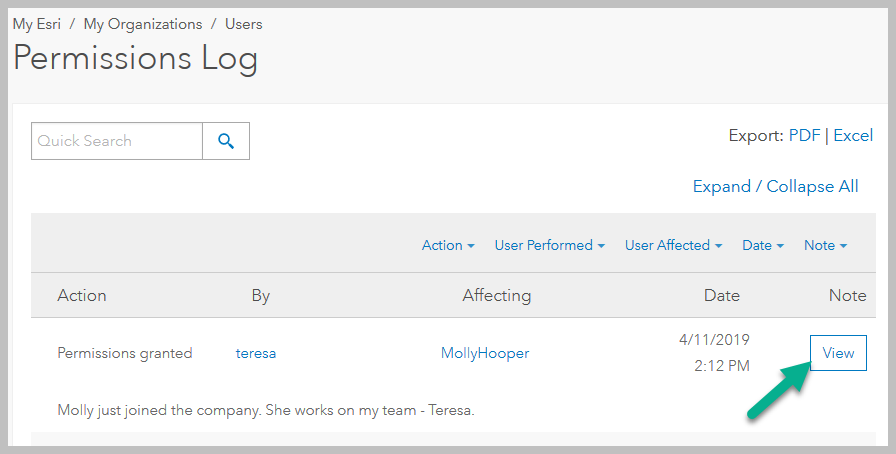
7. Note for log. As an admin, you have access to the Permissions Log from My Organizations > Users. Any text you include here will be saved in the log and can be viewed there. This note is optional.
8. Explain. You'll find these links throughout My Esri. Like More Information, they open up a panel with information, but in this case, for a specific tool or feature rather than the whole page.
9. Preview Email to User. This preview tool allows you to see how your email will appear to the user.
Some things to note:
- If the user has a language set on their own profile, the email they receive will be in their requested language, regardless of what you see in the preview.
- The customer number for the organization is only shown for domestic (US) organizations, as it is the Esri Inc. number. Organizations outside the US may have a different numbering scheme assigned to them by their distributor.
- This email preview tool is also available on My Organizations > Users > Invite Users.
How many did you already know about? How many do you use? Did I miss any that you like to use? Add a comment!
You must be a registered user to add a comment. If you've already registered, sign in. Otherwise, register and sign in.
-
Developer Subscriptions
2 -
downloads
3 -
Licensing
25 -
Manage Users
10 -
My Esri Accounts
10 -
My Esri Release Notes
61 -
Profile
10 -
Reports
1 -
Support
7 -
Training
2 -
Transactions
3