- Home
- :
- All Communities
- :
- Products
- :
- ArcGIS QuickCapture
- :
- ArcGIS QuickCapture Blog
- :
- Data enrichment with ArcGIS QuickCapture and Integ...
Data enrichment with ArcGIS QuickCapture and Integromat
- Subscribe to RSS Feed
- Mark as New
- Mark as Read
- Bookmark
- Subscribe
- Printer Friendly Page
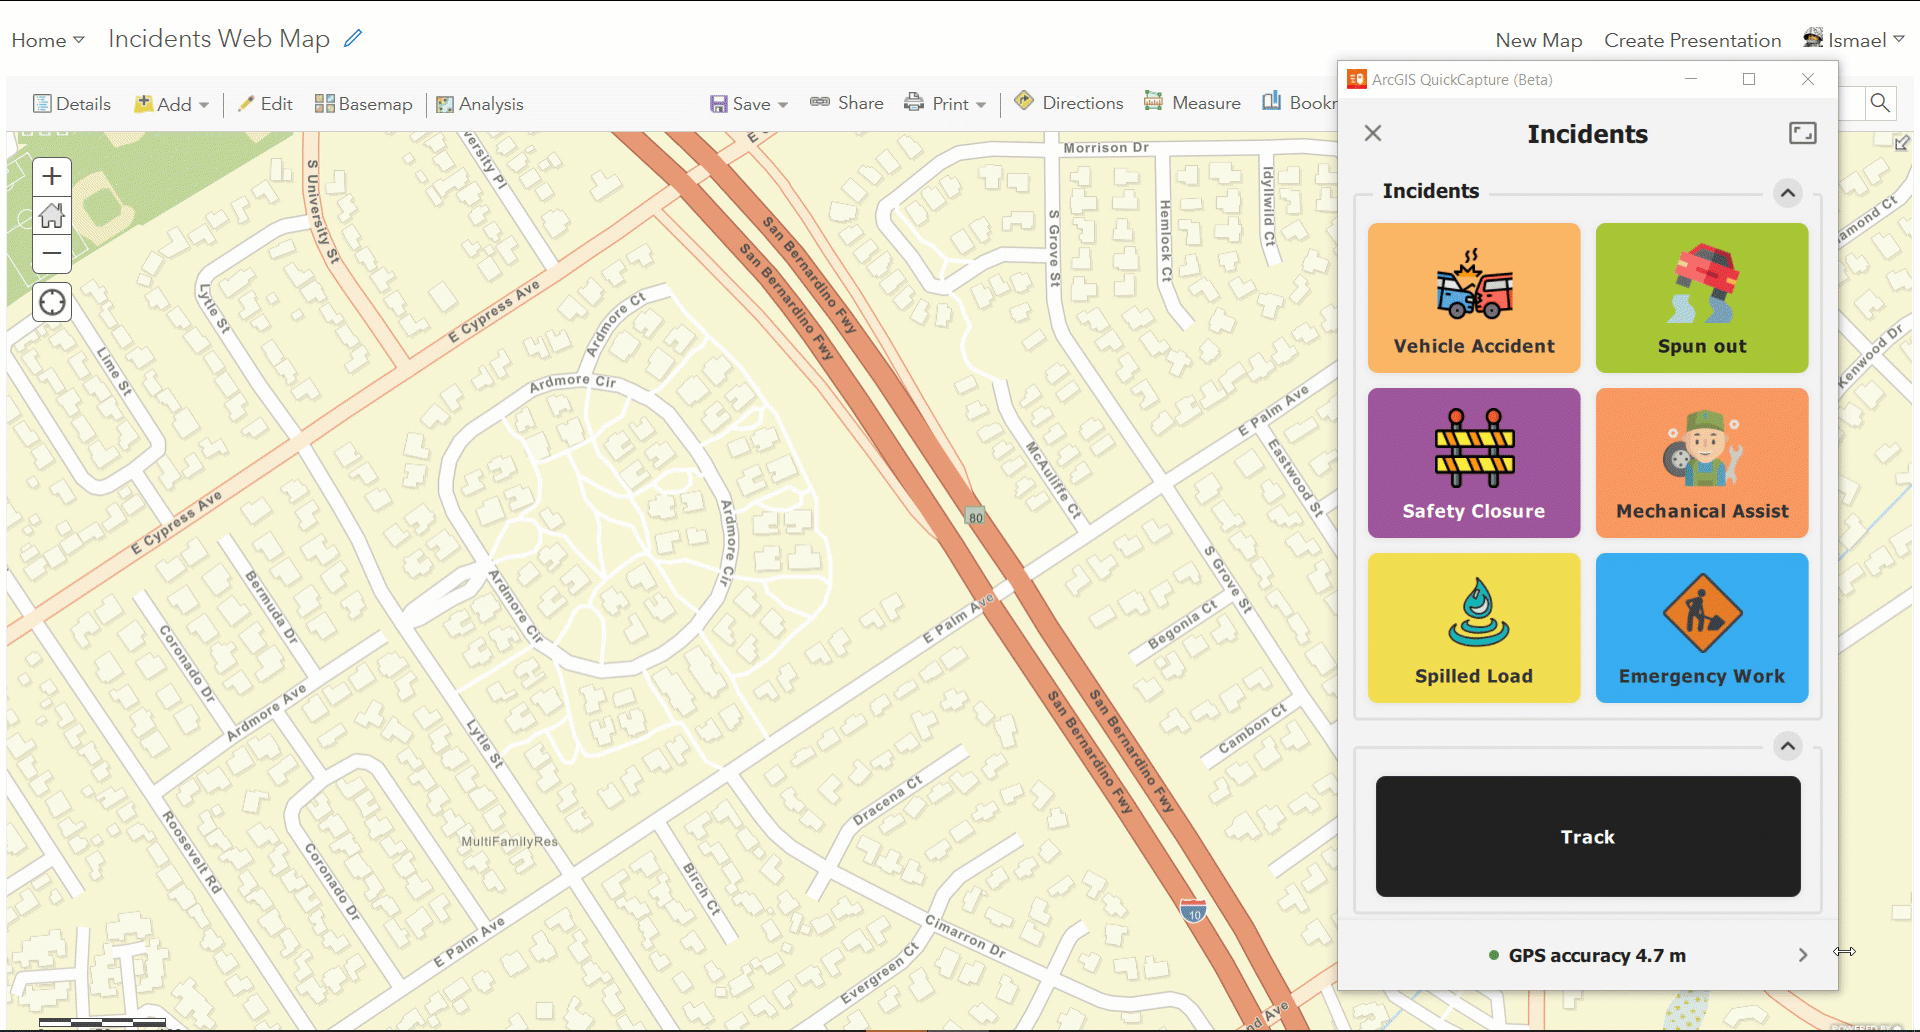
The whole idea with ArcGIS QuickCapture is to simplify as much as possible the field data collection experience. Now, simplicity for end users, is not in conflict with being able to generate rich GIS data. I assume you are already familiar with ArcGIS QuickCapture's device variables. Device variables allow you to automatically calculate a good number of GIS attributes such as direction of travel, fix time, username, speed, horizontal accuracy and many others. Device variables are a great way to enrich the GIS attributes of field observations made with the QuickCapture mobile app.
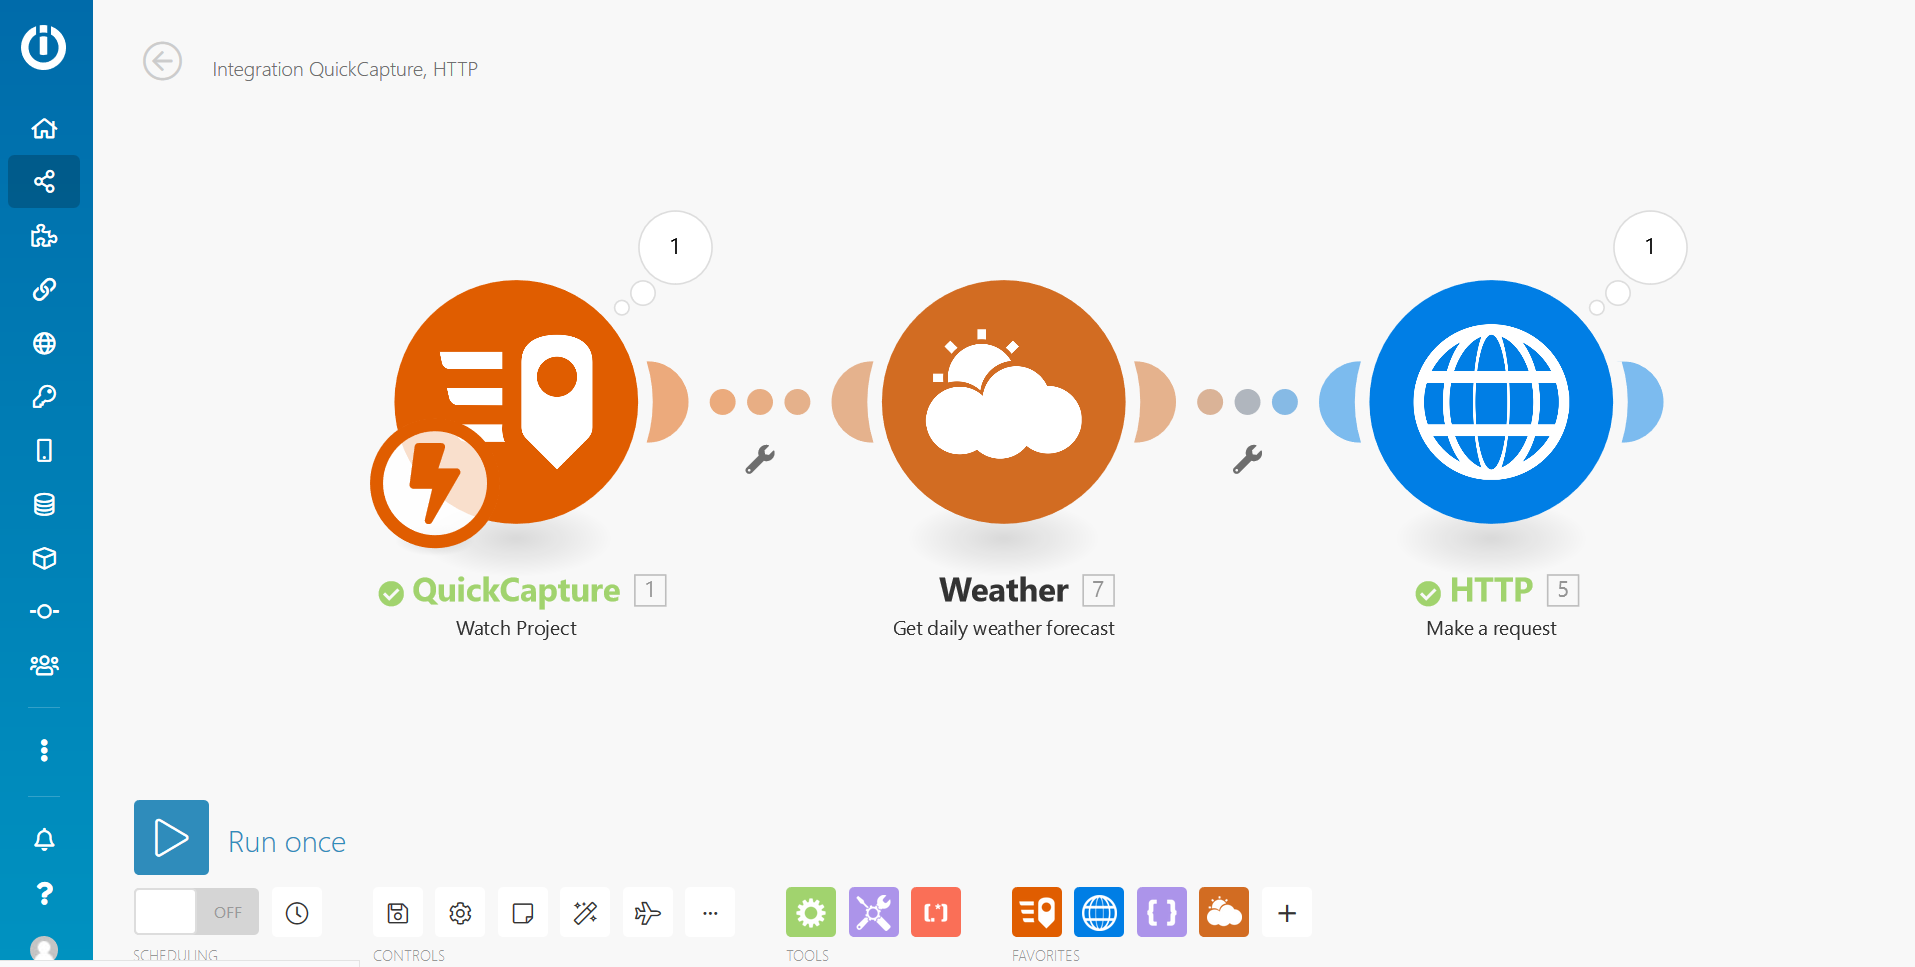
In this article, we will explore options to enrich your data using Integromat. Integromat is a workflow automation solution that lets you integrate many applications and services together without writing code. If Integromat is news to you, I recommend you watch the ArcGIS QuickCapture: Automate Workflows with Integromat - YouTube video. You can create an Integromat account at integromat.com for free and then decide if it is worth for you to upgrade to a paid subscription.
Integromat is commonly used to automate notifications when data from QuickCapture is captured. For example, say you want an SMS to be sent to a field coordinator when a high priority issue is reported through the QuickCapture mobile app. That is about one of the most common reasons why people use Integromat. As I said earlier, our intent in this article is to explore data enrichment with Integromat. This is also a very powerful use! What if you could automatically populate GIS attributes to field observations from QuickCapture? Say you want to calculate the closest address to a record submitted, or store the current weather conditions at the location where an incident is reported... What if you want to automatically associate a parcel identifier with data submitted from QuickCapture? All of this can be done. Automatically, and without much effort.
Example 1: Reverse Geocoding
Lets start with a simple example to warm up: A new record is submitted from the QuickCapture mobile app and the closest address to that location is automatically found and stored as a GIS attribute. Something like this:
To achieve the above an Integromat scenario can be put together so every time a record is submitted, a call to the Esri World Geocoding service is made. The output from the reverse geocoding service call is used to update the new record with the address. A step by step guide is included in this 12 minute video. This recording should give you enough information for you to build scenarios like this on your own:
Note: At 9:52, the video describes how you need to add curly brackets around the JSON in features. That is necessary, but you ALSO need to enclose the whole thing with square brackets. Do not forget that! Sorry about the omission in the video.
The video references the following links, which will be useful if you plan to do this on your own:
When using the Esri World Geocoding service, keep in mind you should pass forStorage=true as a parameter in your reverse geocode call if you plan to store the output as an attribute in your feature. Alternatively, you can use a similar technique to use your own locator service from ArcGIS Enterprise. When using your own locator service, you do not have to worry about ArcGIS Online credit consumption or including the forStorage=true parameter.
Custom locator services can also be used to find the closest asset to a location. In this case, you may not be interested in getting an address, but just the identifier of the closest asset to a location. This can be useful, for example, when using QuickCapture to report the condition of an asset. The user taps the button when close enough to the asset and keeps moving; your Integromat scenario will do the rest: associate the condition to the closest asset.
Example 2: Point in Polygon query
You can also enrich field observations using a point in polygon query. Say for example you have a parcel layer and you want to know in which parcel a particular observation was made. As long as the observation was made inside the parcel, a point in polygon query will do the job for you.
The technique to get this done is very similar to what was described in the Reverse Geocoding video. The HTTP module in Integromat is used to execute the query, and again to update the record. The query operation is described in the Query (Feature Service/Layer)—ArcGIS REST API: Services Directory | ArcGIS for Developers help topic. However, as a quick reference, here is the bare bones URL pattern you will want to follow:
https://<featurelayerURL>/query?geometry=<x>,<y>&geometryType=esriGeometryPoint&inSR=4326&spatialRel...
You will note that in the documentation for the query operation, the geometry input is a json object, but you can also pass, for points an x,y value. Not officially documented, but it works!
A quick important reminders:
- Always use https
- Your feature layer URL must specify the layer index too. The end of it will look something like https://...FeatureServer/0/ Where /0/ is the index of your layer in the feature service.
- It is important to pass the inSR parameter as 4326, to ensure that the query will work regardless of the spatial reference of your target polygon layer.
- For the outFields parameter, indicate the exact attributes you want to back from your query. Do not be lazy requesting all the attributes as this will increase the network traffic unnecessarily and will complicate your life when authoring the scenario in Integromat.
Once you have the values you want from the intersecting polygon, you will use the Integromat http module to update your feature attributes. If you have watched the reverse geocoding video above, this should be no secret to you.
Example 3: Weather forecast
Using the Integromat Weather app, you can also enrich incoming QuickCapture records with a weather forecast. The Weather app takes an an input the XY coordinates of the location you are interested in and can report a weather forecast for the following day or days.
Example 4: ArcGIS Geoprocessing Services
If you are into ArcGIS geoprocessing services, you can also use the HTTP module in Integromat to pass parameters and run your own gp services. The great thing about gp services is that they provide great flexibility to do more sophisticated analysis on the QuickCapture record location. In the screenshot below, for example, the HTTP module invokes a service that runs a valve isolation trace against a Utility Network dataset. The output, again, is used to enrich a QuickCapture observation.
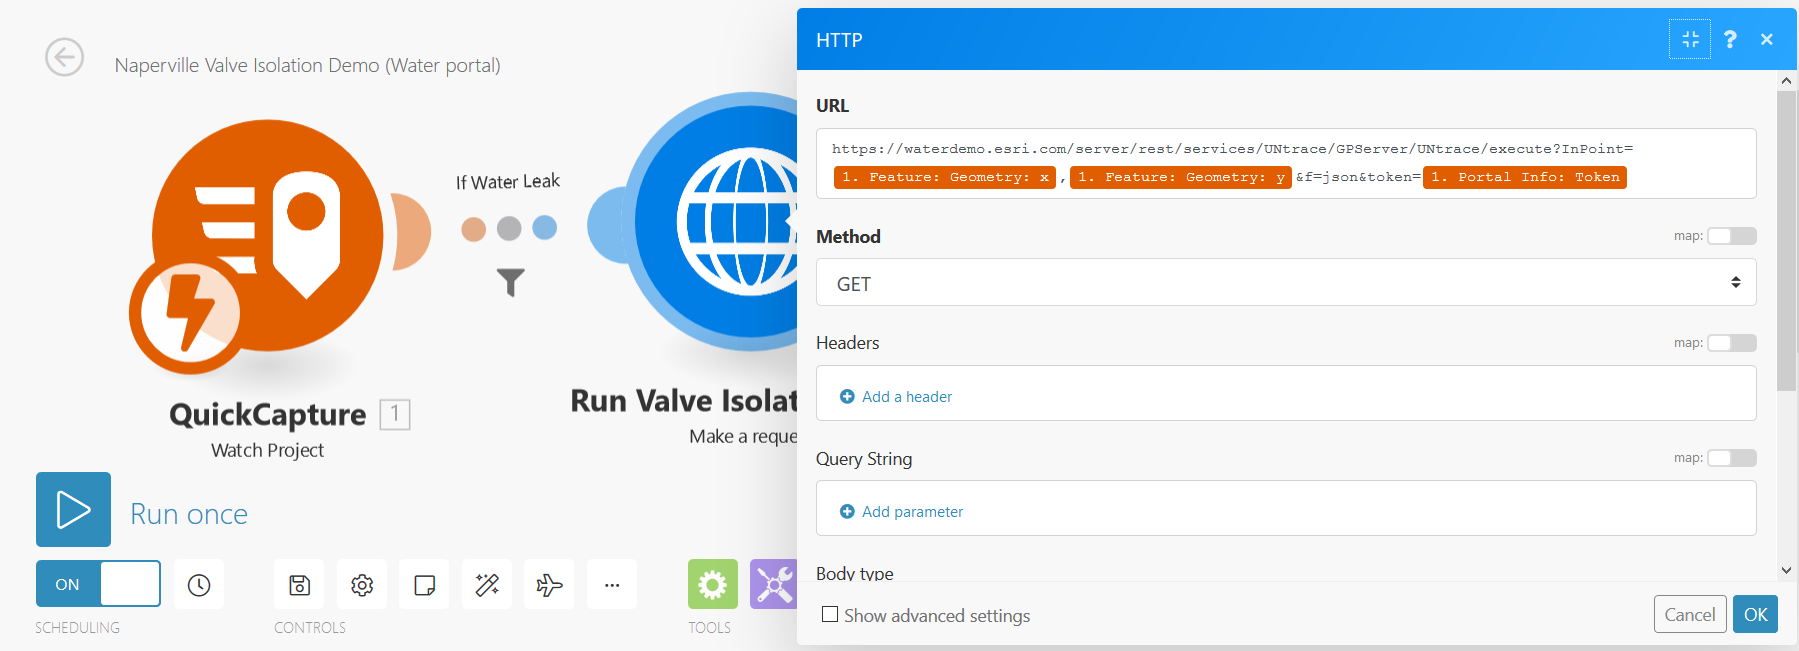
When working with Geoprocessing services in this way, it is important to execute the tasks synchronously. The ouptuts from a gp service are processed similarly to how outputs are parsed from the Esri Geocoding service.
You must be a registered user to add a comment. If you've already registered, sign in. Otherwise, register and sign in.