Turn on suggestions
Auto-suggest helps you quickly narrow down your search results by suggesting possible matches as you type.
Cancel
- Home
- :
- All Communities
- :
- Services
- :
- Esri Training
- :
- Esri Training Matters Blog
- :
- Want to Create Python Scripts? Try the F-C-P-M-T M...
Want to Create Python Scripts? Try the F-C-P-M-T Method
Subscribe
1460
0
09-10-2009 01:54 PM
- Subscribe to RSS Feed
- Mark as New
- Mark as Read
- Bookmark
- Subscribe
- Printer Friendly Page
09-10-2009
01:54 PM
We got a lot of requests on our Esri Training survey for more courses on scripting, particularly with Python, the preferred scripting environment for ArcGIS Desktop. Currently, we have an instructor-led course and a variety of e-Learning resources that cover Python scripting.
So why the big interest in scripting? The main reason is that scripts allow you to automate GIS workflows that would be time-consuming to complete one task at a time. For example, suppose you needed to update attributes for thousands of features on a daily basis. You can write a script to update the attributes, and have the script run at a specific time each day (or at night after working hours).
The steps below show a quick way to create a Python script using what I call the F-C-P-M-T method (that's Find, Copy, Paste, Modify, Test). Like developers who find sample code and modify it for their own purposes, you can find example Python script code in the ArcGIS Desktop Help and modify it for your needs. To work through the steps, download and unzip the data.
The steps assume you have ArcGIS 9.3 or 9.3.1, Python 2.5, and PythonWin installed on your computer or a network location you can access and write data to.
Suppose you work in public safety for the city of San Diego and your task is to identify trolley stops that may need to be evacuated and closed in the event of an emergency on a nearby freeway. You have feature classes representing the San Diego freeways, trolley lines, and trolley stops. You want to write a script to buffer the freeways, then overlay the trolley stops and the buffers to output all the trolley stops that may be impacted in an emergency to a new feature class.
Why bother to write a script to do this fairly simple GIS operation?
At this point, you have created a script that contains example code that will run the two geoprocessing tools you need for your project. Because you have combined the examples, your script contains some extra code you don't need, plus of course the example code refers to data you don't have. The first thing to do is examine the code and remove the duplicate lines.Step 3: Modify the Code to Meet Your Needs
Python scripts that incorporate ArcGIS geoprocessing functionality start with these two lines of code:
In the script window, you see this code at the very top of the first example and again in the second example, which starts with a comment that explains the code's purpose. Including comments in a script is good practice so that others can understand what the code is doing. In Python, comments display in green italic text and are always preceded by a pound sign (#). When the script is run, comments are ignored.
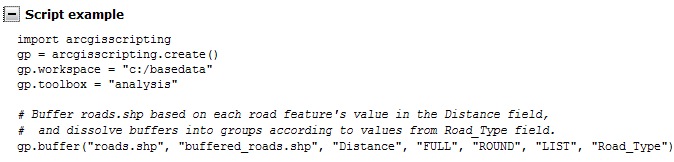
The example code for the buffer tool includes all seven parameters accepted by the tool. Only the first three parameters are required (input feature class, output feature class, and buffer distance).
For this project, you only need the required parameters. Notice that parameters are separated by a comma in Python.
In the example code, the buffer distance is a string (surrounded by quotes). For this project, you are going to enter an explicit numeric distance.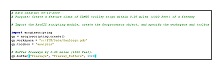
The example code for the intersect tool includes error handling. The try and except statements are used to handle unexpected errors during the code execution. For this simple project, you won't include error handling. Additionally, the example includes multiple geoprocessing operations and optional parameters for the intersect operation. For this example, you only need the intersect code (gp.Intersect_analysis) and you will use only required intersect parameters (the inputs and output).
The code for the geoprocessing operations now meets the project needs. When the script is run, you want confirmation that the code is executing properly. You can add print statements to display a message in the Interactive Window after each tool runs.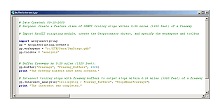
That's it, you're done. The script is ready to test.Step 4: Run the Script
After a moment, in the Interactive Window, you should see the print statements you entered.
If you like, you can verify the data was created using ArcMap.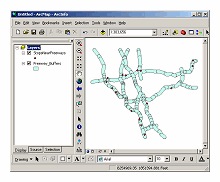
This was obviously a very simple scripting exercise intended to show how you can find example Python code and combine it to create a script that does something you need to do. To create robust scripts, however, you need to invest some time learning Python concepts and syntax.
So why the big interest in scripting? The main reason is that scripts allow you to automate GIS workflows that would be time-consuming to complete one task at a time. For example, suppose you needed to update attributes for thousands of features on a daily basis. You can write a script to update the attributes, and have the script run at a specific time each day (or at night after working hours).
The steps below show a quick way to create a Python script using what I call the F-C-P-M-T method (that's Find, Copy, Paste, Modify, Test). Like developers who find sample code and modify it for their own purposes, you can find example Python script code in the ArcGIS Desktop Help and modify it for your needs. To work through the steps, download and unzip the data.
The steps assume you have ArcGIS 9.3 or 9.3.1, Python 2.5, and PythonWin installed on your computer or a network location you can access and write data to.
- Note: If you are going to write Python scripts, you'll want to have PythonWin, an application that provides a friendly script-creation, testing, and debugging environment. PythonWin 2.5.1 is included on the ArcGIS 9.3 and 9.3.1 installation media, but it isn't installed by default. You can also get PythonWin version 2.5.4 from http://www.python.org/download/releases/2.5.4/.
Suppose you work in public safety for the city of San Diego and your task is to identify trolley stops that may need to be evacuated and closed in the event of an emergency on a nearby freeway. You have feature classes representing the San Diego freeways, trolley lines, and trolley stops. You want to write a script to buffer the freeways, then overlay the trolley stops and the buffers to output all the trolley stops that may be impacted in an emergency to a new feature class.
Why bother to write a script to do this fairly simple GIS operation?
- Reusability—you can quickly change the buffer distance if you need to just by editing the script, then run the script to create new buffers.
- You can share the script file with colleagues, who may want to use the script for their own purposes. They could modify the buffer distance and specify different feature classes to create data for their own projects, all without ever opening ArcMap or ArcCatalog.
- You can also save the script as a custom tool and include it in a geoprocessing model.
- Start ArcMap, open a new empty map document, and display the ArcToolbox window.
- Expand the Analysis Tools toolbox and the Proximity toolset.
- Right-click the Buffer tool and choose Help.
- In the help window, scroll down until you see the Scripting syntax section.
- Below the syntax is a script example. Expand the example to see the code.
- Click Start > All Programs > Python 2.5 > PythonWin.
- From the File menu, choose New > Python Script and click OK.
- With the Script1 window active, from the File menu, choose Save As and save the script with the name BufferIntersect.py in a local folder.
- Go back to the ArcGIS Desktop Help window, select all the code in the script example, right-click the selection, and choose Copy.
- In PythonWin, right-click inside the BufferIntersect.py window and choose Paste.
- Close the ArcGIS Desktop Help window and navigate to the Analysis Tools toolbox > Overlay toolset > Intersect tool.
- Right-click the Intersect tool and choose Help.
- Again, scroll down to the script example, select all the code, right-click the selection, and choose Copy.
- In PythonWin, press Enter to move your cursor to a new line, then right-click and choose Paste.
- Close the ArcGIS Desktop Help window and minimize ArcMap.
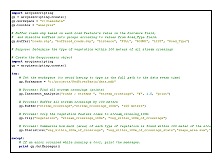
At this point, you have created a script that contains example code that will run the two geoprocessing tools you need for your project. Because you have combined the examples, your script contains some extra code you don't need, plus of course the example code refers to data you don't have. The first thing to do is examine the code and remove the duplicate lines.Step 3: Modify the Code to Meet Your Needs
Python scripts that incorporate ArcGIS geoprocessing functionality start with these two lines of code:
In the script window, you see this code at the very top of the first example and again in the second example, which starts with a comment that explains the code's purpose. Including comments in a script is good practice so that others can understand what the code is doing. In Python, comments display in green italic text and are always preceded by a pound sign (#). When the script is run, comments are ignored.
- Cut the Purpose and "Create the Geoprocessor object" comment lines and paste them at the top of the script.
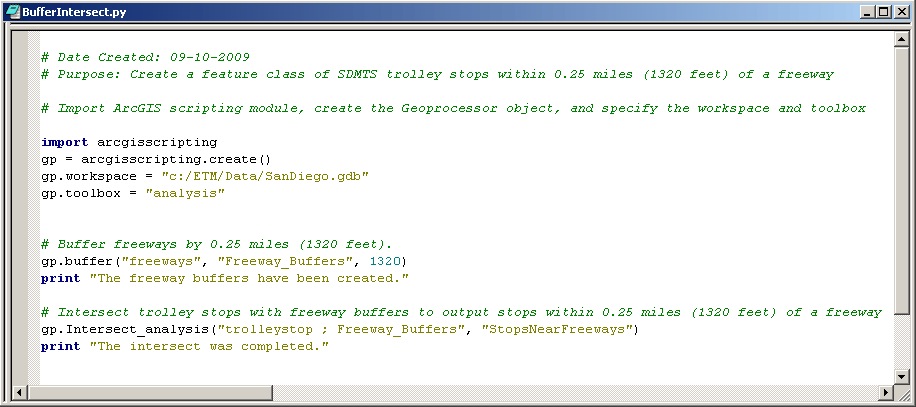
- Edit the purpose text to reflect this project's purpose and change the second comment text to: Import ArcGIS scripting module, create the Geoprocessor object, and specify the workspace and toolbox.

- Add a Date Created comment as the first line in the script.
- In the gp.workspace line, change the path to reflect the path where you saved the San Diego geodatabase. Note that Python is case-sensitive.
- The gp.toolbox = "analysis" line of code means that the geoprocessing tools referenced in the script are located in the Analysis toolbox. This is true for your project, so you don't need to change it.
- Select and delete the second (duplicate) lines that import the ArcGIS scripting module and create the geoprocessor object.

The example code for the buffer tool includes all seven parameters accepted by the tool. Only the first three parameters are required (input feature class, output feature class, and buffer distance).
- To learn more about the parameters, open the ArcGIS Desktop Help for the tool and look at the scripting syntax.
For this project, you only need the required parameters. Notice that parameters are separated by a comma in Python.
- Edit the comment text about what is being buffered to reflect this project.
- Change the input and output parameters as follows:
- Input feature class: freeways (remember, Python is case-sensitive)
- Output feature class: Freeway_Buffers
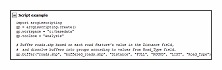
In the example code, the buffer distance is a string (surrounded by quotes). For this project, you are going to enter an explicit numeric distance.
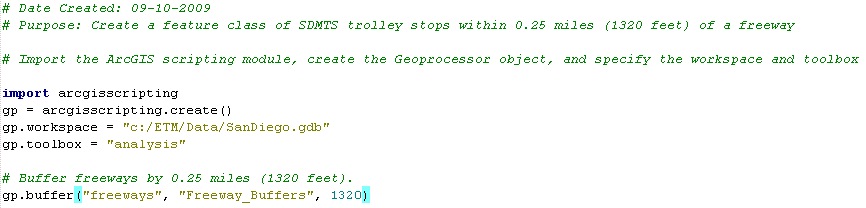
- Select and delete "Distance" and replace it with 1320.
- The distance is specified in feet because the freeway data units are feet.
- Delete the last four optional parameters from the example code.
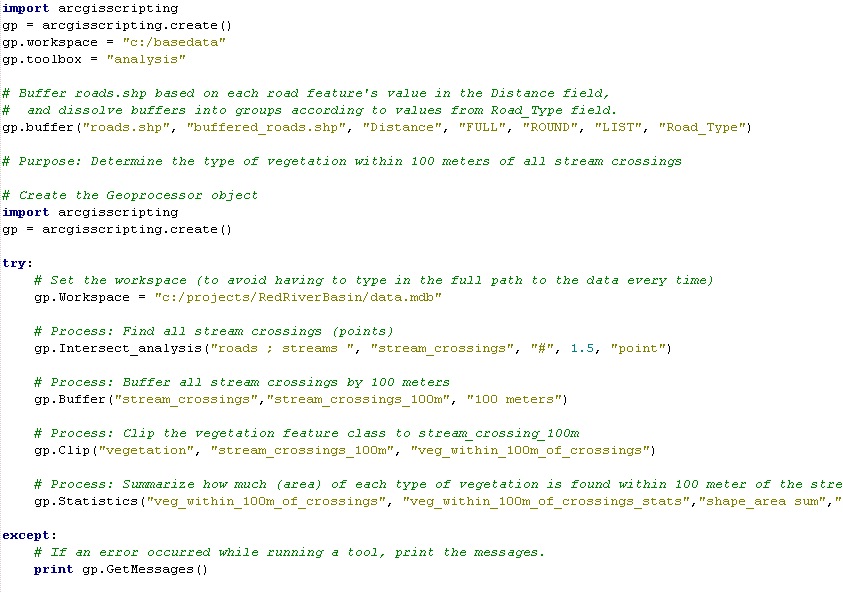
The example code for the intersect tool includes error handling. The try and except statements are used to handle unexpected errors during the code execution. For this simple project, you won't include error handling. Additionally, the example includes multiple geoprocessing operations and optional parameters for the intersect operation. For this example, you only need the intersect code (gp.Intersect_analysis) and you will use only required intersect parameters (the inputs and output).
- Delete the try: statement and the except: statement.
- Delete the comment about setting the workspace and the line of code that specifies the workspace—you have already taken care of this at the top of the script.
- Edit the comment for the intersect code (starts with # Process) to describe the purpose of this intersect operation.
- Use the Backspace or Delete key to move the comment and intersect code up to be just below and aligned with the buffer code (remove the indentation from the intersect section).
- Modify the intersect code as follows:
- Inputs: trolleystop and Freeway_Buffers
- Notice that the input feature classes are separated by a semicolon and that quotes are used only before the first input and after the last input. Be sure to keep this formatting.
- Output: StopsNearFreeways
- Delete the last three optional parameters.
- Delete the comments and lines of code that buffer, clip, and generate statistics and delete the print statement at the bottom.
The code for the geoprocessing operations now meets the project needs. When the script is run, you want confirmation that the code is executing properly. You can add print statements to display a message in the Interactive Window after each tool runs.
- Place your cursor at the end of the buffer line of code and press Enter.
- Type print "The freeway buffers have been created."
- Place your cursor below the intersect line of code and type print "The intersect was completed."
- Save the script.
That's it, you're done. The script is ready to test.Step 4: Run the Script
- Click the Run button
 , then click OK.
 - If you can't see the Interactive Window, from the Window menu, choose Interactive Window. (If you don't see it on the Window menu, use the View menu.)
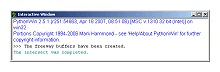
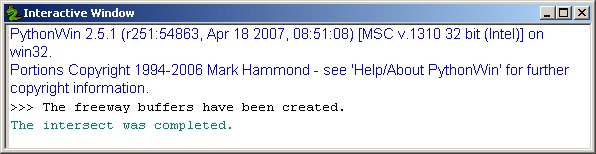
After a moment, in the Interactive Window, you should see the print statements you entered.
- If your script does not run correctly, carefully compare your code to the code shown in the last graphic of step 3, make any fixes, save and run the script again. Note, however, that if the buffer portion ran correctly the first time but the intersect did not, and you re-run the script, you will get an error because the buffer output will already exist in the geodatabase. Solution? Use ArcCatalog to delete the buffer output (Freeways_Buffer), then run the script again.
If you like, you can verify the data was created using ArcMap.
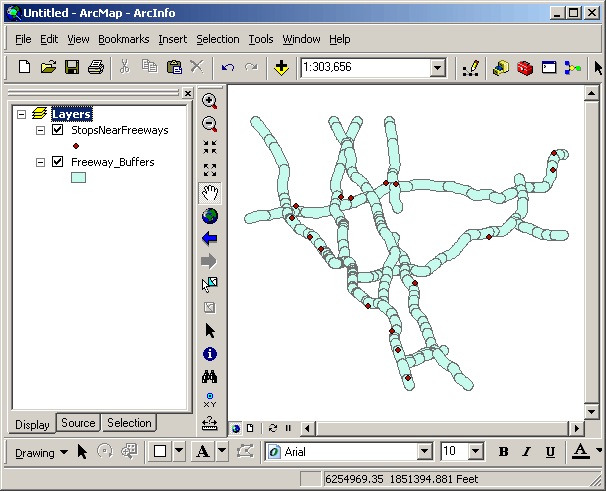
In ArcMap, click the Add Data button, navigate to the location where the data was output, and add the Freeway_Buffers and StopsNearFreeways feature classes.- Explore the data as desired. When you're finished, exit ArcMap and PythonWin.
This was obviously a very simple scripting exercise intended to show how you can find example Python code and combine it to create a script that does something you need to do. To create robust scripts, however, you need to invest some time learning Python concepts and syntax.
- The training options linked to above will get you well on your way to being a script master.
- A couple of recommended books for beginners are Learning Python, 3rd Edition (by Mark Lutz) and Core Python Programming, 2nd Edition (by Wesley Chun). Many books have been written, however. One of them is sure to appeal to you.
Labels
You must be a registered user to add a comment. If you've already registered, sign in. Otherwise, register and sign in.
About the Author
Suzanne is a Maryland native who enjoys writing about Esri technology, GIS professional development, and other topics. She is the Marketing Manager for Esri Training Services in Redlands, California.
Labels
-
ArcGIS Desktop
28 -
ArcGIS Step by Step
46 -
Class Resources
25 -
e-Learning
63 -
MOOCs
30 -
Software Demos
11 -
Technical Certification
16