- Home
- :
- All Communities
- :
- Products
- :
- ArcGIS Workforce
- :
- ArcGIS Workforce Blog
- :
- Schedule tasks for Workforce
Schedule tasks for Workforce
- Subscribe to RSS Feed
- Mark as New
- Mark as Read
- Bookmark
- Subscribe
- Printer Friendly Page
Take automation to the next level by scheduling tasks for Workforce for ArcGIS. If you are operating on a Windows machine, you can use the Windows task scheduler to automatically run Python scripts for your Workforce project at a customized date and time.
Here are a couple of examples of when you might want to schedule a Python script for Workforce:
- You want a daily report of all completed assignments, so you schedule the export_assignments_to_csv script to run at the end of each day.
- Every two weeks, you want to reset workers within your project to a status of “not working”, so you schedule the reset_stale_workers script to run every other Sunday.
All of the available Python scripts for Workforce are found in the workforce-scripts GitHub repository. If you are new to automating tasks for Workforce, you may want to check out this introductory blog series first: Automating Workforce with ArcGIS API for Python.
For this exercise, you will schedule the reset_stale_workers script using the Windows task scheduler. You can also use any script that makes sense for your Workforce project.
Overview
- Create the Python environment
- Clone the workforce-scripts repo and install dependencies
- Schedule the script in Windows Task Scheduler
Create the Python environment
First, you will create the Python environment that you'll use to run the Python scripts for Workforce. To do so, you'll first add the ArcGIS Pro helper scripts to your system path. Then you'll create a new conda environment to run the scripts in.
1. Sign into ArcGIS Pro with a licensed account. Then, exit the program.
Note: ArcGIS Pro comes with ArcGIS API for Python and Conda. If you don’t have ArcGIS Pro, you will need to download and install ArcGIS API for Python separately.
For more information, see Install and set up ArcGIS API for Python.
2. Add the ArcGIS Pro helper scripts that come with Pro to your system path environment variables. This will allow you to run conda in the command prompt.
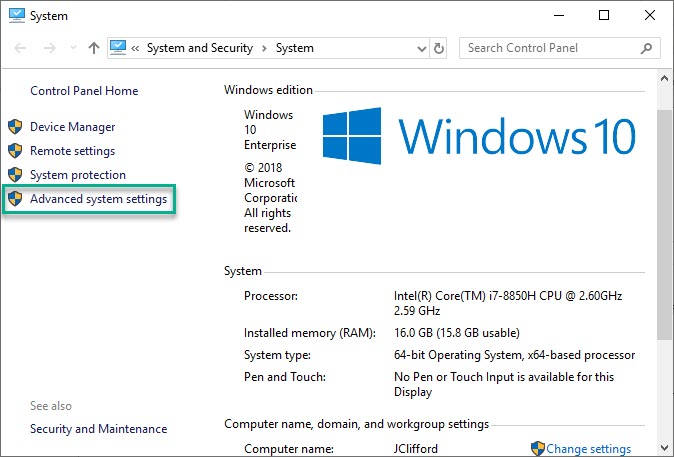
On your Windows device, search for and open System (control panel)
In the System window, click Advanced system settings.
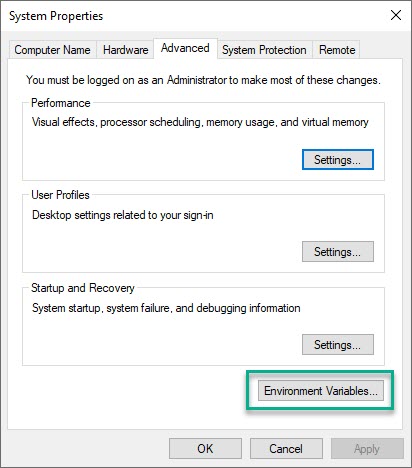
In the System Properties window, click Environment Variables.
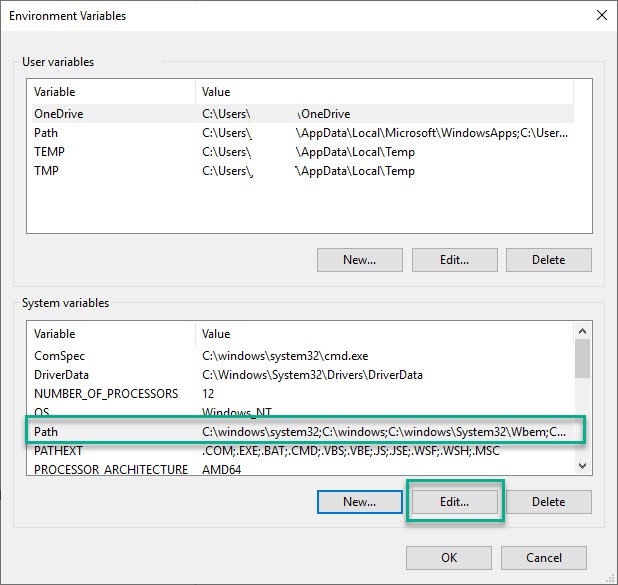
In the Environment Variables window, under System variables, select Path. Then, click Edit.
In the Edit environment variable window, click New, and add the file path to the ArcGIS Pro Python scripts.
Here is the default file path: C:\Program Files\ArcGIS\Pro\bin\Python\Scripts
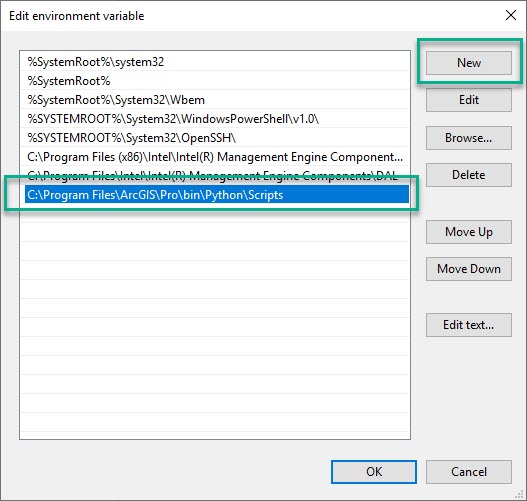
Click OK.
3. Open the ArcGIS Python Command Prompt. This should be located in:
Programs -> ArcGIS -> ArcGIS Pro -> Python Command Prompt
In the command prompt, run:
conda create -n workforce --clone arcgispro-py3 –y
This will create a new conda environment in the following location:
C:\Users\<account-name>\AppData\Local\ESRI\conda\envs\workforce
This is the environment that you'll use to run the Python scripts for Workforce.
Clone the workforce-scripts repo and install dependencies
Next, you'll clone the Workforce scripts to your machine and install the required Python libraries needed to run them.
1. Clone or download the Workforce scripts found in the GitHub repository.
2. In the ArcGIS API for Python Command Prompt, navigate to the Workforce scripts folder:
cd C:\Users\user\Desktop\workforce-script\scripts
3. Run:
activate workforce
4. Install the required libraries using Python's default package installer, pip:
pip install -r requirements.txt
ArcGIS API for Python and the required libraries are now installed. You are now able to run Workforce scripts on your machine.
Schedule a script in Windows Task Scheduler
Finally, you will schedule a Python script to run using Windows Task Scheduler. You’ll schedule the reset_stale_workers script to run every other Sunday evening.
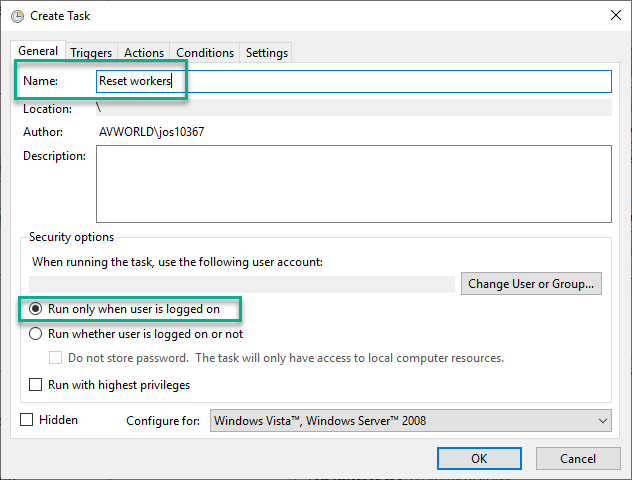
1. In the Windows Start menu, search for "Task Scheduler" and open the program. Click Actions > Create task. In the Create Task dialog box, name the task “Reset Workers” and select the Run whether user is logged on or not security option.
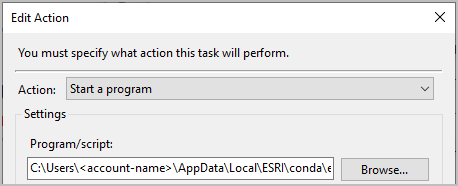
2. In the Create Task dialog box, click Actions > New.

The New Action window appears.
For the Program/script setting, copy and paste the file path for the Python environment you created earlier. The file path should read as follows, where <account-name> is your system account name:
C:\Users\<account-name>\AppData\Local\ESRI\conda\envs\workforce\python.exe
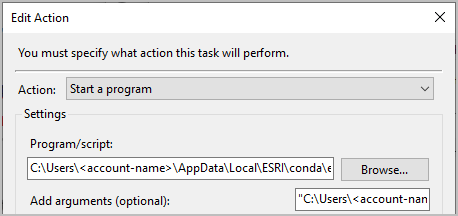
For the Arguments setting, enter the complete file path to the script you want to run followed by the script’s parameters. It should look like this:
"<full path to reset_stale_workers.py>" -u <arcgis-username> -p <password> -org <url-to-your-organization> -project-id <project-id> -cutoff-date 1 -timezone "US/Eastern" -log-file "<full path to log.txt>"
Be sure to edit the following parameters:
- Include the full path to your reset_stale_workers.py script.
- Edit the username, password, organization, and project-id to match your own credentials.
- Set the cutoff-date to 1. This tells your script to reset workers whose statuses haven’t changed in the past minute.
- Include the full path to your log.txt file.
Note: If you are working with a Classic project (a v1 project), the Project ID is the item ID of the project item. If you are working with projects enabled for offline use (a v2 project), the Project ID is the item ID of the Workforce feature service. Regardless of what version you are working with, the Project ID can be found in the URL of your project.
- For example, if the project URL is: https://workforce.arcgis.com/projects/a0f297f949f549f0ade07eer562d9934/configure/overview
- The project-id is: a0f297f949f549f0ade07eer562d9934
In the Add arguments setting, add the complete file path to the script you want to run followed by the list of parameters (shown above).
Click OK to close the Edit Action window.
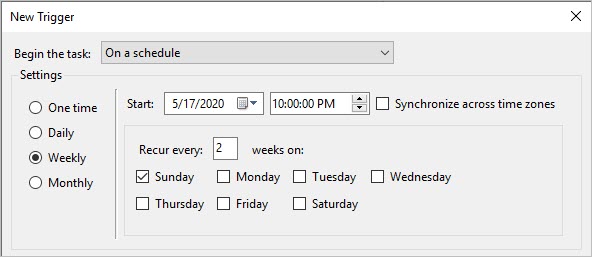
3. Create a new trigger
In the Create Task dialog box, on the Triggers tab, click New to open the New Trigger window. This is where you set how often you want your script to run. For this exercise, the script is set to run every two weeks on Sunday at 10:00PM.
Click OK to close the New Trigger window. The trigger you just created is now listed in the Triggers tab.
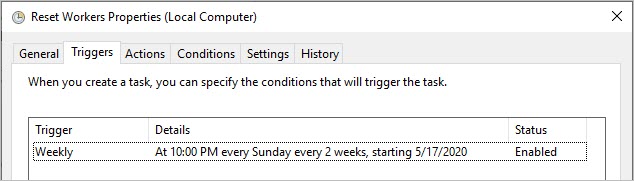
You can set multiple triggers for your script, depending on the needs of your Workforce project. Click OK to close the Reset Workers Properties window.
The reset_stale_workers script is now set to run every other Sunday. If you want to test that this script will work, you can run it manually at any time. Select the script in the Task Scheduler Library and click Run.

After running the script, you can view the log file to confirm that it worked.
You must be a registered user to add a comment. If you've already registered, sign in. Otherwise, register and sign in.