- Home
- :
- All Communities
- :
- Products
- :
- ArcGIS Survey123
- :
- ArcGIS Survey123 Blog
- :
- Using Spike® with Survey123 for ArcGIS
Using Spike® with Survey123 for ArcGIS
- Subscribe to RSS Feed
- Mark as New
- Mark as Read
- Bookmark
- Subscribe
- Printer Friendly Page
In this blog post I will describe how you can integrate Survey123 with Spike. Spike is a laser-based measurement solution by Esri partner ikeGPS. What makes Spike unique is that it allows you to easily measure the dimensions of remote objects, such as areas and lengths, all from a photo.
Say, for example, while doing a property inspection you need to calculate the height of a balcony, or the size of a garage door. Rather than using a ladder and measuring tape, you can simply take a photo of the building, and then calculate dimensions by drawing on top of the photo. You can similarly use Spike to calculate the size of road signs, billboards, poles, etc.
You can embed Spike questions within Survey123 and automatically bring all measurements from Spike into your form: Tap on a Spike question, snap a photo, measure on it… and your measurements will get persisted in ArcGIS along with the rest of the survey data.
The integration of Survey123 with Spike is exciting news, because it has the potential to boost the productivity of certain data capture workflows tremendously. This short video tutorial describes the basics of how Survey123 and Spike work together:
Lets next get into the details...

About Spike®
The Spike laser: The most visible aspect of Spike is the laser instrument. It is an eye safe Class-1 laser, designed to measure distances in a range between 2 and 200 meters with an accuracy of 5 centimeters. The laser is designed to be attached to your smartphone or tablet and paired using a Bluetooth connection.
Spike units have a retail price of $499 and are sold online and through a network of resellers.
The Spike app: Once the laser is paired, the Spike app uses the camera on your smartphone or tablet so you can take a photo of your object of interest. Using the distance to the photographed object captured by the laser, the Spike app can accurately calculate lengths and areas as you draw lines and polygons over the photo.
The Spike app is available for iOS and Android operating systems and is certified for use against a wide collection of smartphones and tablets.
Getting familiar with Spike: Spike is straight-forward to use, but knowing a handful of tips and good practice in the field is key to get the best out of it. The best reference to take your first steps is the Spike User Manual.
Spike can be operated through two main modes:
- Photo Measurement: When working in New Photo Measurement mode, you take a single photo, and then derive all measurements from it. You can for example simply get the distance from your location to the object, or extract lengths and areas by drawing on your photo.
- Point-to-Point Measurement: In this mode you can calculate the distance (horizontally and vertically) difference between two objects by taking a separate photo of each object.
Photo Measurement mode:In its simplest form, the Photo Measurement mode will allow you to simply snap a photo of an object, and get back the exact distance to that object form your current location. This alone can be useful in multitude of use cases. Say for example you need to document the width of a road: stand on one side of the road and take a photo targeting at the other end across. After taking the photo, Spike will give you the exact distance. Not only you can get an accurate measurement, but you can do it without risking your life; safely from one side of the road.
With Photo Measurement mode you can also measure distances (and areas) on objects by simply drawing on top of the photo you just took. For example, say you want to know what is the height of a building. Well, you take a photo of it, and then you extract the height by drawing on that photo. If you want to derive measurements from a photo in this way, certain conditions need to be met. When used correctly and in ideal conditions, you can expect a measurement with an accuracy of 1%. For example, if you measure the height of an object to be 10 meters, you can expect the accuracy to be around 10 centimeters.
Let’s describe next what used correctly and ideal conditions means:
- Measurements against a flat surface: You should only perform measurements on flat surfaces, such as a wall or a sign. The specific shape you want to measure should be on a rectangular plane. This is because you will need to define the plane in the photo before you can measure anything.
- Face your target front-on: For the most accurate measurements, you should take your photo while facing your target perpendicularly. That is, you need to be right in front of the plane on which you will do your measurements. If you need to take your photo at an angle, the expected accuracy of the measurements will be reduced progressively as you get further from being perpendicular.
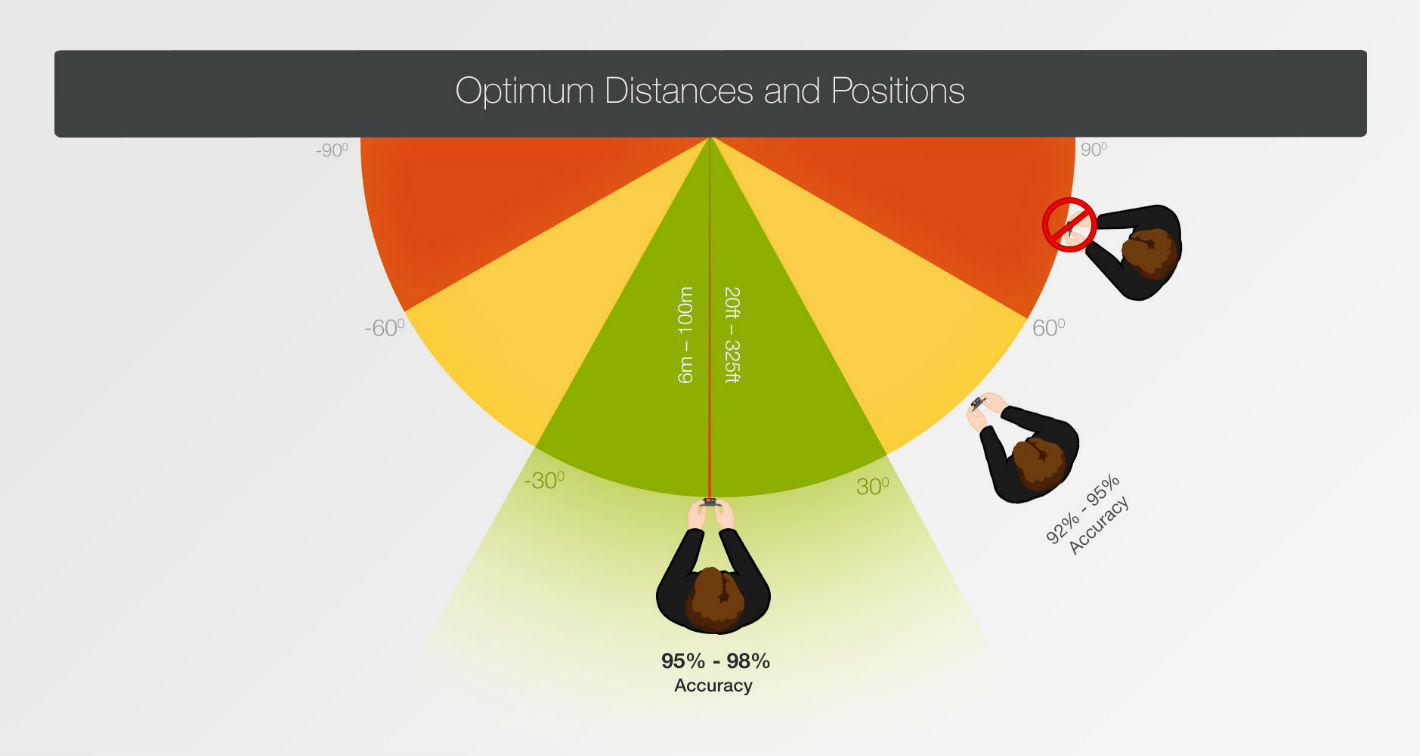
- Ideal target range: The ideal working range of the laser is between 6 and 100 meters, although technically you can push the limits and measure objects between 2 and 200 meters away.
- Center your target: You also want to make sure that the object you want to measure is right in the center of the camera bulls eye, because the laser always calculates distances through the bulls eye.
- Draw accurately: Once you have taken the photo, you will want to make sure you accurately draw your lines and areas for measurement. The Spike app has a handy magnifying window that will help you with that task. If your photo is taken following all the tips above, but you do not take pride in carefully drawing the exact shapes you want to measure… the measurement will not be as accurate as it could be.
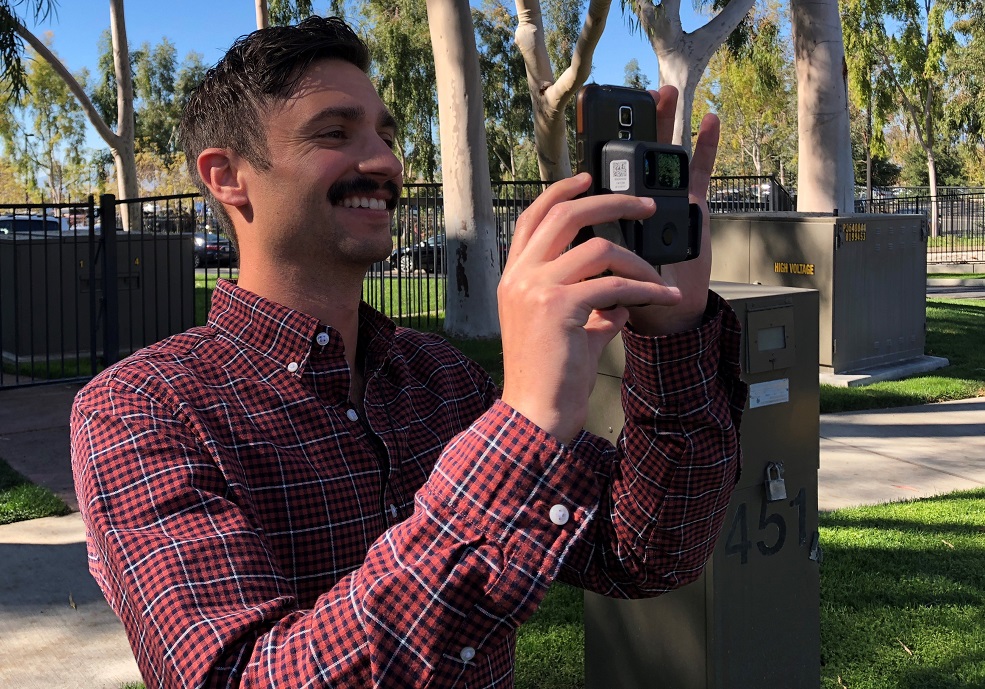
So far all of this may sound a little bit intimidating, but once you have the Spike device in your hand things are much simpler. Not just simpler, but also fun. Next you can see Brandon having a good time while ‘spiking’ outside Esri.
From our own experience, the Photo Measurement mode works best with man-made structures: walls, signs, billboards, doors, straight poles, streetlights etc. Measuring the height of trees, rocks etc is much more challenging because you often do not have a good plane to reference your measurements. If you do not have a good 2D plane to make your measurements on, then you should consider using the Point to Point measurement mode.
Point to Point Measurement mode: Point to Point or P2P is very useful when all you need is to measure the distance between two objects in front of you and you either cannot fit the two objects within a single photo, or when you do not have a good 2D plane on which to base your measurements. With P2P, you simply need to center your camera on your first target, say for example a tree and take a photo. Then you turn from that same location to take a photo of your second target, say for example a wall. Spike will compute the horizontal and vertical distances between the two photographed objects.
Like with any tool out there, it takes a bit of practice to fully understand what is the best measurement mode for the job. Spike can greatly boost the productivity of field workers saving valuable time. It also can provide a much safer way to make measurements. For hard to reach objects, Spike can make it possible to perform measurements that could not be done otherwise.
Now that I have described the basics of Spike, it is time to go into the details of how Survey123 and Spike work together.
Integrating Survey123 with Spike (Photo Measurements)
Starting with Survey123 version 2.6, you can incorporate Spike functionality into your form. This allows you to streamline the use of Spike within your data collection workflows. For example,

if you have a survey to help map the presence of graffiti in the city, you will want to capture many things including the location, typology (Tag, Throw-up, Blockbuster…), surface, photo and size. Spike can help you capture the size accurately, so you can estimate the cost of removal.
Adding Spike questions into a survey: You can add Spike questions to a survey using Survey123 Connect for ArcGIS. In your XLSForm, add a question of type image, and then set the appearance to either spike-full-measure, spike or spike-point-to-point:
- spike: With this appearance, Survey123 will launch the Spike app so you can simply aim at your object of interest and snap a photo of it. The spike appearance is useful when you simply want to get the distance to the photographed object and its estimated location.
- spike-full-measure: This appearance sets the Spike app in New Photo Measurement mode as described in the previous section. When using this appearance, you will be able to get the measured lengths and areas, into your form.
- spike-point-to-point: Launches Spike in Point to Point mode so you can calculate the horizontal and vertical distances between two photographed objects.
When using the spike-full-measure, spike-point-to-point and spike appearances, Survey123 will let users easily launch the Spike app from within the form. Once the photo has been taken and measurements added, Spike will return back to Survey123, so all measurements of interest can be extracted and stored in the survey. The measure object with Spike help topic describes step by step how Survey123 and Spike work together.
Spike photos will be stored as an attachment automatically. This is a great feature because photos will become a verifiable record persisted with your data. Photos will show how accurately the measurement was made in the field, and if needed, the photo itself could be used in the back-office to make additional measurements.
The use of Spike within Survey123 is only available to logged-in users. Spike questions can be used while online or offline, but you must be logged-in.
Extracting Spike measurements with pulldata(): Spike uses EXIF photo headers to store information such as the location from which the photo was taken, the direction, distance and measurements made in the Spike app. In a previous blog post we explored how to extract EXIF metadata from an image in Survey123 using the pulldata() function. This same technique can be used to extract Spike metadata.
The Spike metadata in the EXIF of the image is split between standard EXIF tags and custom information stored in the ImageDescription tag. The following table describes standard tags populated by Spike:
| EXIF tag | Description |
|---|---|
| gpsdestlongitude | The estimated X coordinate of the photographed object |
| gpsdestlatitude | The estimated Y coordinate of the photographed object |
| gpsdestcoordinate | The XY coordinate pair of the photographed object |
| gpstimestamp | The time when the photo was taken |
gpsdatestamp | The date when the photo was taken |
| gpsdestdistance | The distance between the photographed object and your device |
| imageDescription | A JSON string including measurements captured by the Spike app |
This expression will extract the distance in meters between the photographed object and the device:
pulldata("@exif", ${spike}, "gpsdestdistance")
In order to extract photo-measurements from Spike, your pulldata() function will need to first get the ImageDescription EXIF tag, and then parse the returning JSON string to extract the specific dimensions you are looking for.
For example, the following expression assumes the first measurement made in Spike was of type length, and gets its value in meters:
pulldata("@json", pulldata("@exif", ${spike }, "ImageDescription"), "Spike.objects[1].dimensions")
The next expression assumes the first measurement made was of type area and extracts its value in square meters:
pulldata("@json", pulldata("@exif", ${spike_full}, "ImageDescription"), "Spike.objects[1].area")
This expression gets the horizontal distance between two objects as measured through the Point to Point measurement mode:
pulldata("@json", pulldata("@exif", ${spike }, "ImageDescription"), "P2P.horizontal_distance")
Spike returns many other properties through the ImageDescription EXIF tag including: the pitch, roll and direction of your device when the photo was taken, the unique identifier of the specific Spike laser unit that captured the distance measurement etc. The Spike section of the Media help topic describes in detail the contents of the JSON object stored in the ImageDescription.
Another way to explore the contents of the ImageDescription tag is to simply add a text question to your form and have it populated with the contents of the ImageDescription tag through a calculation. When you do this, it is important that you set the esriFieldLength column of your text question to 1000 characters. The ImageDescription JSON string can be quite big.
A great starting point to experiment with all the things you can do with XLSForms and Spike is our Spike sample. I strongly recommend that you have a look at it:
1. Open Survey123 Connect for ArcGIS
2. Click on Create New Survey
3. Search for the Spike survey in the Samples category
4. Publish it and test from your smartphone
5. Look into the XLS file to learn all the techniques used in the sample.
Integrating Survey123 with Spike (Estimate Locations)
While the heart of what Spike excels at is helping you measuring dimensions over photos, you can also use Survey123 to roughly estimate the location of remote objects. For example, you can map the location of a building without stepping out of your car, or the location of a streetlight across the street.
Before we go into the details of estimating the location of remote objects, I want to emphasize that Spike is not a high accuracy surveying device. It can measure accurately distances to objects, but when estimating the location of remote objects there are several sources of error that will come into play outside of what Spike is designed to do.
To define the location of a remote object, Spike relies on the following:

- The location of your own phone or tablet: This is the first source of error. A typical smartphone is not going to give you a highly accurate location for your phone. Your location accuracy may vary depending on many factors and if your location is off, the estimated location of the remote object will be off too. To correct this problem, you can connect an external GNSS receiver to your own phone or tablet via Bluetooth. If used correctly, external GNSS receivers will improve the source location used by Spike in its calculations. In the side photo, for example, Survey123 is combined with Spike and Juniper Systems Geode Sub-meter GNSS antenna.
- The distance to the remote object: This is going to be very accurate as long as you keep yourself within the working range of Spike (2 to 200 meters) and you aim at the remote object using the bull’s eye in the Spike app. Measuring distances to objects is what Spike is designed to do, and does it very well.
- The azimuth to the remote object as measured from your own device location: The azimuth is another important source of error. The azimuth is obtained from the compass in your own smartphone or tablet. The compass in your smartphone must be calibrated before use by Spike. It is critical that you follow steps in this compass calibration video-tutorial before you estimate remote locations. Even with your compass calibrated, it is normal to get deviations of a few degrees, which will increase the error as the distance to the remote object increases.
The gpsdestlongitude and gpsdestlatitude properties will be populated with both the spike and spike-full-measure appearances.If you do not plan to capture any length or area measurements and all you want is the location of the photographed object, then the best is to use the spike appearance.
To extract the estimated latitude and longitude of the photographed object, you will use the pulldata() function within a calculation. For example, the following expression will extract the latitude:
pulldata("@exif", ${spike}, "gpsdestlatitude")
You can store the latitude and longitude as attributes in your survey, and then create an XY Event Layer with them in ArcGIS Pro or other tools.
While it should be possible for you to calculate a geopoint question with the latitude and longitude values extracted from the Spike photo, there is currently a known limitation in Survey123 preventing the successful calculation when applied. This is in our backlog and we will work towards resolving the problem as soon as possible.
As stated before, it is best that you exercise Spike in the field in all its capabilities. To fully understand its potential and limitations you must experience it in the field in real working conditions.
If you need some ideas, here is an informative video by IkeGPS further describing some common use cases for Survey123 and Spike.
You must be a registered user to add a comment. If you've already registered, sign in. Otherwise, register and sign in.