Turn on suggestions
Auto-suggest helps you quickly narrow down your search results by suggesting possible matches as you type.
Cancel
- Home
- :
- All Communities
- :
- Products
- :
- ArcGIS CityEngine
- :
- ArcGIS CityEngine Questions
- :
- split command for a desk
Options
- Subscribe to RSS Feed
- Mark Topic as New
- Mark Topic as Read
- Float this Topic for Current User
- Bookmark
- Subscribe
- Mute
- Printer Friendly Page
split command for a desk
Subscribe
6689
9
07-29-2013 06:53 AM
by
Anonymous User
Not applicable
07-29-2013
06:53 AM
- Mark as New
- Bookmark
- Subscribe
- Mute
- Subscribe to RSS Feed
- Permalink
Original User: Patrickhall111
Hello
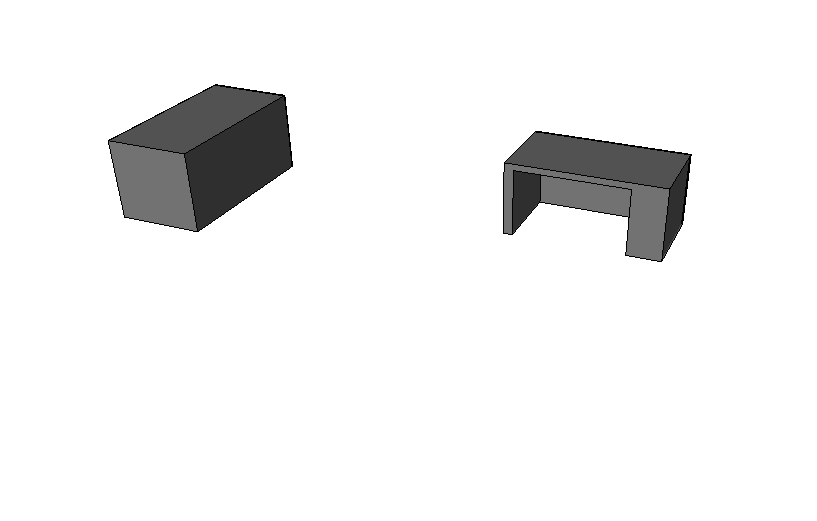
I just recently downloaded this software to try and create a floor plan model of our building in hope of drumming up new business utilizing CityEngine. Im new to programming so please forgive my ignorance. I have created a floor plan and assigned a few rules to interior walls,exterior,...ect. I am running into problems when trying to create desk in each cubical. Below is a screen shot of what i have and what I am trying to do. Below I have a static shape of what I am trying to do, and since I have over 100 cubical I would like to do this by code rather than manually do each shape, however all my attempts at splitting this shape have failed. Any help would be appreciated.[ATTACH=CONFIG]26278[/ATTACH][ATTACH=CONFIG]26279[/ATTACH]
Hello
I just recently downloaded this software to try and create a floor plan model of our building in hope of drumming up new business utilizing CityEngine. Im new to programming so please forgive my ignorance. I have created a floor plan and assigned a few rules to interior walls,exterior,...ect. I am running into problems when trying to create desk in each cubical. Below is a screen shot of what i have and what I am trying to do. Below I have a static shape of what I am trying to do, and since I have over 100 cubical I would like to do this by code rather than manually do each shape, however all my attempts at splitting this shape have failed. Any help would be appreciated.[ATTACH=CONFIG]26278[/ATTACH][ATTACH=CONFIG]26279[/ATTACH]
9 Replies
by
Anonymous User
Not applicable
07-29-2013
01:03 PM
- Mark as New
- Bookmark
- Subscribe
- Mute
- Subscribe to RSS Feed
- Permalink
Original User: obrjo181
Prehaps you could play around with splits to generate your model, this sort of thing would work for a square shape:
hope it gives you some ideas anyway
Prehaps you could play around with splits to generate your model, this sort of thing would work for a square shape:
attr frontLWidth = 1
 attr leftLWidth = 1
 attr deskHeight = 1
@StartRule
Lot --> alignScopeToAxes(y)
  shapeL(frontLWidth,leftLWidth) {shape: Desk | remainder: NIL}
Desk--> extrude(deskHeight)X
X--> split(y){~1 : A | 0.2 : C}
A--> split(z){~1: B | 0.2 : C}
B--> split(x){0.5 : C | ~1 : NIL}
C--> color("#ff6666")
hope it gives you some ideas anyway
07-30-2013
09:12 AM
- Mark as New
- Bookmark
- Subscribe
- Mute
- Subscribe to RSS Feed
- Permalink
Thank you
This helps me alot, will post pictures when done.
This helps me alot, will post pictures when done.
07-30-2013
11:19 AM
- Mark as New
- Bookmark
- Subscribe
- Mute
- Subscribe to RSS Feed
- Permalink
I actually have one more question if its not to much trouble. I have a normal square desk that needs the center indented for leg room. Right now I have both sides of the desk split and the top split. My problem is this is for all sides of the desk,how separate the split to just one side of the square?
by
Anonymous User
Not applicable
07-30-2013
03:33 PM
- Mark as New
- Bookmark
- Subscribe
- Mute
- Subscribe to RSS Feed
- Permalink
Original User: obrjo181
It's hard to understand visually what you're meaning, but have you tried first inserting a comp function to break everything up into individual sides before your splits? That could work. Alternatively, if you want the same shaped desk every time and already have parcel footprints for them, you could always create the desk using the Polygonal Shape Creation tool and then export this shape as an obj and import the obj into your cga code. Then all you'll need to do is tell it to inset the desk shape, and it should adjust the size depending on the shape you're applying the code to and how you've inserted it in the code. Just a thought if the splits get too complex!
It's hard to understand visually what you're meaning, but have you tried first inserting a comp function to break everything up into individual sides before your splits? That could work. Alternatively, if you want the same shaped desk every time and already have parcel footprints for them, you could always create the desk using the Polygonal Shape Creation tool and then export this shape as an obj and import the obj into your cga code. Then all you'll need to do is tell it to inset the desk shape, and it should adjust the size depending on the shape you're applying the code to and how you've inserted it in the code. Just a thought if the splits get too complex!
07-31-2013
08:06 AM
- Mark as New
- Bookmark
- Subscribe
- Mute
- Subscribe to RSS Feed
- Permalink
Hey Joanna Thank you for helping me so far. Yes I did watch the tutorial on bringing objects in however since I am creating this as ademo for management I would like to show off the ability to change the desk size..ect below is the screen shot of the square desk and a shot of what I am trying to achieve. [ATTACH=CONFIG]26348[/ATTACH]
My code currently
attr Desk_Height =.7
@StartRule
lott-->
extrude(world.y,Desk_Height)
desk
desk-->
comp(f) { side :facade | top : desktop }
desktop-->
setupProjection(0,scope.xy,'1,'1)
projectUV(0)
texture("table_5_v5.jpg")
attr legwidthR = .1
attr legwidthL = .3
attr tableTop =.1
facade-->
split (x) { legwidthR: LeftLeg |~1 :emptyspace |legwidthL : RightLeg}
emptyspace-->
split (y) {~1:NIL |tableTop : bottom}
This gives me what I want as Far as Structure but I only need this on a selected side, not all sides
[ATTACH=CONFIG]26349[/ATTACH]
by
Anonymous User
Not applicable
07-31-2013
02:02 PM
- Mark as New
- Bookmark
- Subscribe
- Mute
- Subscribe to RSS Feed
- Permalink
Original User: obrjo181
Perhaps you can break up the sides a bit further with another comp command (or just add it to the first comp command) and then for the solid sections add in a builtin:cube like so:
Then you can add different attrs to modify the legs individually in the inspector window. Also you can of course add the gaps on the sides too by using the split command you used on the front. hope that gives you some more ideas! 🙂
Perhaps you can break up the sides a bit further with another comp command (or just add it to the first comp command) and then for the solid sections add in a builtin:cube like so:
facade-->
 comp(f){object.front : Front | object.back : Back | object.left : Left | object.right : Right}
 Front--> split (x) { legwidthR: LeftLeg |~1 :emptyspace |legwidthL : RightLeg}
 Back-->Solid
 Left-->Solid
 Right-->Solid

Solid-->t(0,0,-0.4)
 s('1,'1,0.4)
 i("builtin:cube:notex")
Then you can add different attrs to modify the legs individually in the inspector window. Also you can of course add the gaps on the sides too by using the split command you used on the front. hope that gives you some more ideas! 🙂
by
Anonymous User
Not applicable
08-02-2013
04:17 AM
- Mark as New
- Bookmark
- Subscribe
- Mute
- Subscribe to RSS Feed
- Permalink
Original User: matthiasbuehler
maybe an important point :
using procedural tools is great to create a wide variation of different objects which obey the same rules. but furniture in an office is always the same, only the distribution changes.
so I'd never try to model the furniture itself procedurally. model every item once and just code the distribution.
It's very important to distinguish those parts of your project which need manual modeling and those with procedural modeling.
does that make sense ?
or do you really have unique furniture in each cubicle ?
matt
by
Anonymous User
Not applicable
08-05-2013
07:49 AM
- Mark as New
- Bookmark
- Subscribe
- Mute
- Subscribe to RSS Feed
- Permalink
Original User: Patrickhall111
No I understand, just for this project I am trying to show off the power of this software in hopes of getting permission to purchase the full license software. I want to thank you Joanne and Matt for your help. I am almost there and I figured I would show some pictures of where I am at with this project so far.
[ATTACH=CONFIG]26461[/ATTACH]
[ATTACH=CONFIG]26462[/ATTACH]
I still have to add people and a few textures but the first floor is pretty much done. I did have one more question. I need to do two more floor and it should not be to hard since its almost the same floor plan however how do I set the second floor above the first? and how do I go about setting a rule to turn a floor on and off?
08-06-2013
01:14 AM
- Mark as New
- Bookmark
- Subscribe
- Mute
- Subscribe to RSS Feed
- Permalink
Hi,
Cool ! Looking good ! 🙂
About the second floor :
Very easy:
on each shape of each floor, create an attribute with the actual height above floor Even though that if you import the shapes they're at 0 height.
then, in your code, initialize the attr and use it to directly translate the shape up.
e.g.
Ok ?
Cool ! Looking good ! 🙂
About the second floor :
Very easy:
on each shape of each floor, create an attribute with the actual height above floor Even though that if you import the shapes they're at 0 height.
then, in your code, initialize the attr and use it to directly translate the shape up.
e.g.
attr shapeElevation = 0 # points to object attr with e.g. 2.88 m height

@StartRule
Shape -->
    alignScopeToAxes(y)
    t(0, shapeElevation, 0)
    DoYourStuff.
Ok ?