- Home
- :
- All Communities
- :
- Products
- :
- ArcGIS Pro
- :
- ArcGIS Pro Blog
- :
- Using ArcGIS Pro 2.2 Sharing and the Publisher Ext...
Using ArcGIS Pro 2.2 Sharing and the Publisher Extension to make a public offline map with hillshading
- Subscribe to RSS Feed
- Mark as New
- Mark as Read
- Bookmark
- Subscribe
- Printer Friendly Page
In this post we will continue forward from what was covered in the blog post Use ArcGIS Pro 2.1 to make an offline map.
In this exercise we will modify the package created in that post and re-share it.
So, let’s get to it.
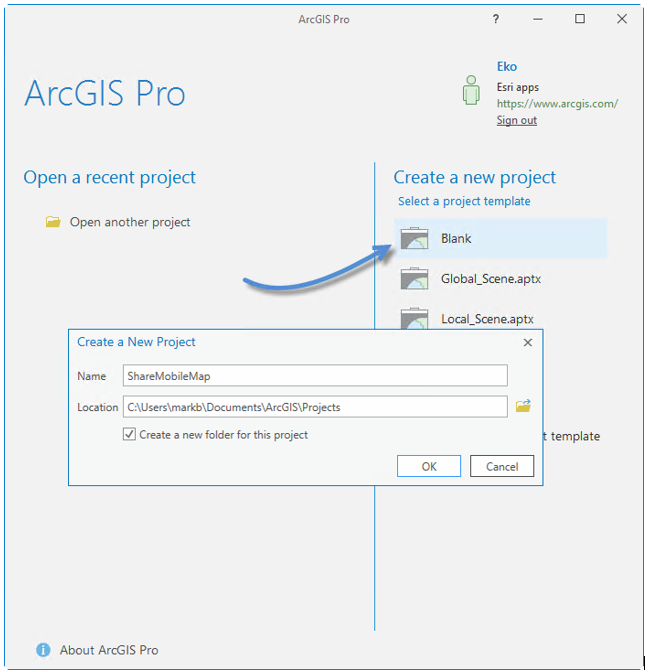
1. Start ArcGIS Pro 2.2 and open a new blank project
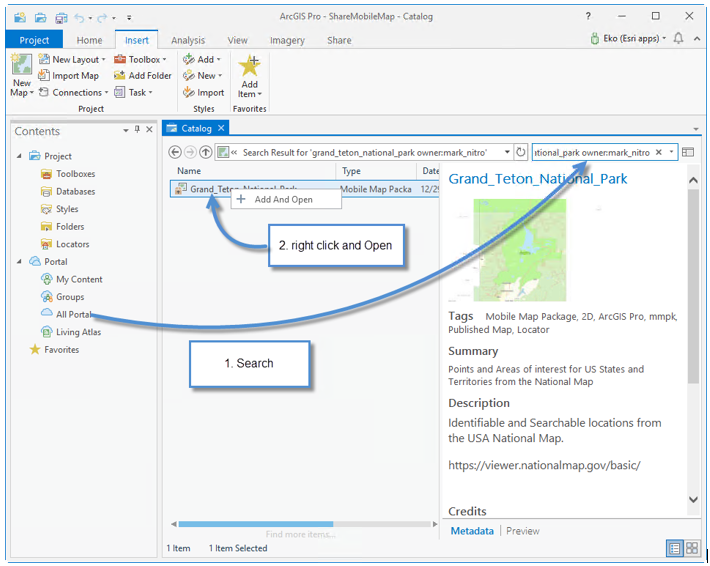
In the Contents pane click All Portal and Search for “grand_teton_national_park owner:mark_nitro” and Right click on it to open it.
We will enhance the map by adding a hillshade layer to it. Specifically, we will create a tile package of hillshade imagery to add to our map. The Esri Living Atlas has an Imagery Service that we can use to do this. ArcGIS Pro makes it easy to use Living Atlas data.
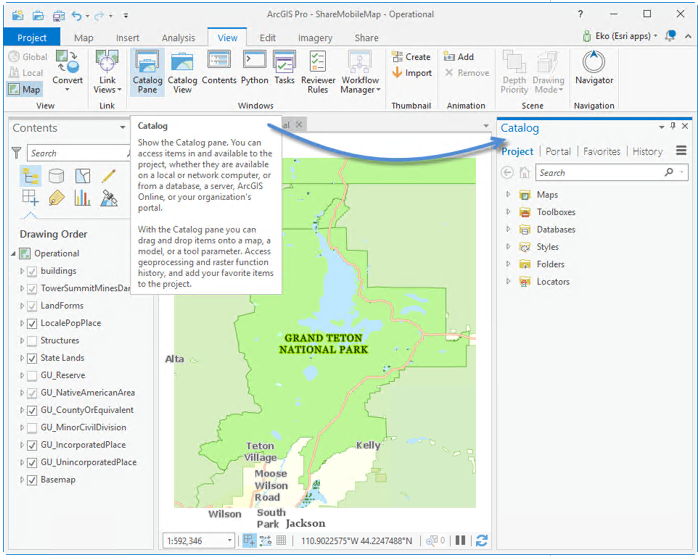
Click the View tab and open the Catalog Pane.
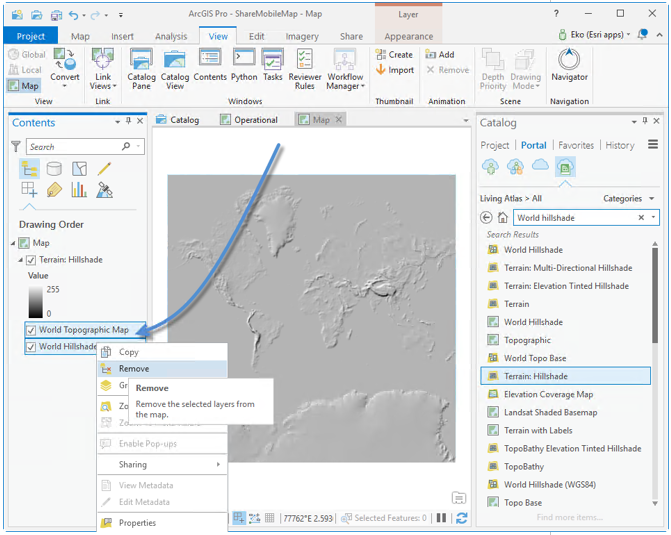
Click Portal, the Living Atlas button, Search for ‘World Hillshade’ and Add ‘Terrain: Hillshade’ to a New Map.
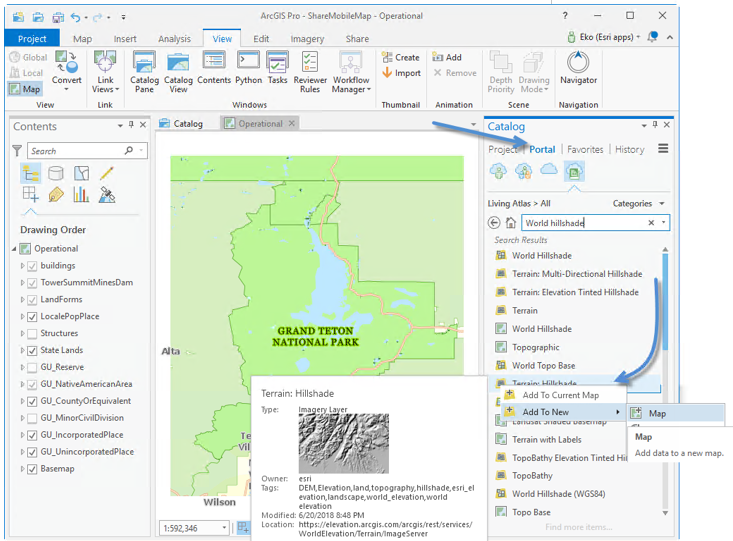
Remove the “World Basemap” layers from the map.
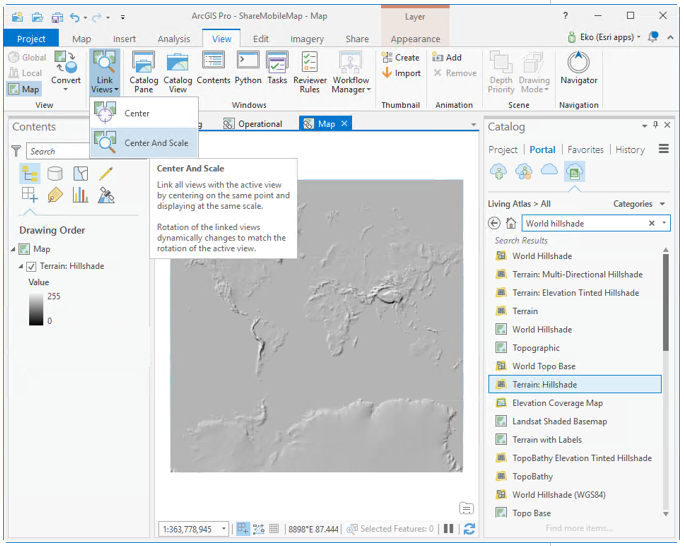
On the View Tab click Link Views Center and Scale.
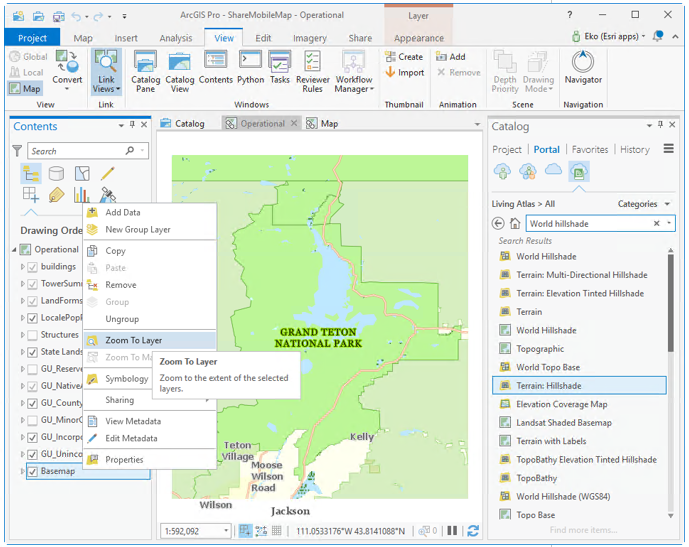
Click the Operational Map tab to activate the map and zoom to the extent of the basemap.
Click the Map map tab to activate it, and see that it is zoomed to the desired extent.
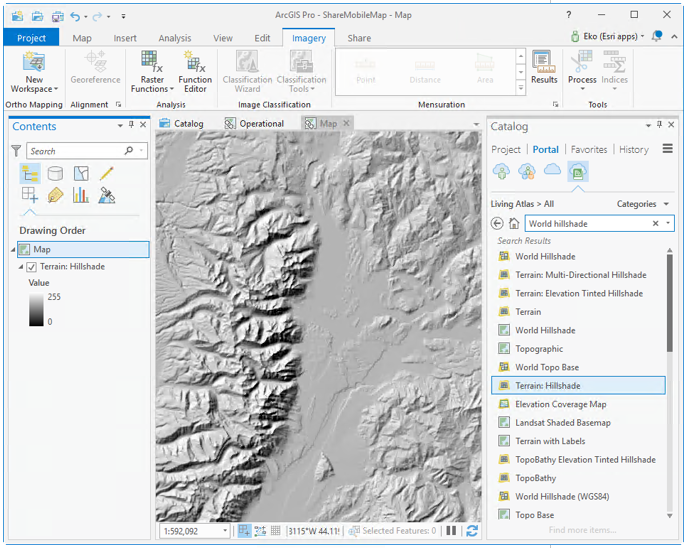
This is the extent of the data that we want to include in a Map Tile Package. The tile package needs to be in the same coordinate system as our Operational map, which Is GCS North American 1983. Esri Apps like Explorer for ArcGIS and applications developed with the Esri runtime cannot project Map Tile Packages (.tpk) on the fly. If the tile packages coordinate system is different from the map’s coordinate system, it will not display. Many of the Living Atlas services are in the WGS 84 Web Mercator Auxillary Sphere coordinate system, so creating a Map Tile Package (.tpk) from the map as it is now, will create a tile package in that Coordinate system . For image services there is an easy way to get the data into the coordinate system we want, using the Make Image Service Layer geoprocessing tool.
Right Click on the Terrain:Hillshade layer in the table of contents and Click Properties. Click Source and copy the Location URL for the Terrain: Hillshade layer. https://elevation.arcgis.com/arcgis/services/WorldElevation/Terrain/ImageServer

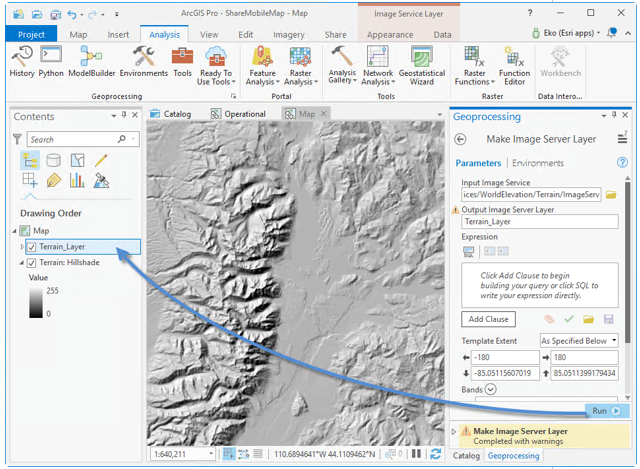
Click the Analysis tab, click Tools and search for Make Image Server Layer in the Geoprocessing pane. Click Make Image Server Layer to open the tool.


For Input paste in the ImagerServer URL https://elevation.arcgis.com/arcgis/services/WorldElevation/Terrain/ImageServer
For Processing Template choose Grayscale_Hillshade
On the Environments tab set the Output Coordinate system to GCS_North_America_1983

Click Run
The layer will be added to the map.
Remove the Terrain: Hillshade layer from the map.

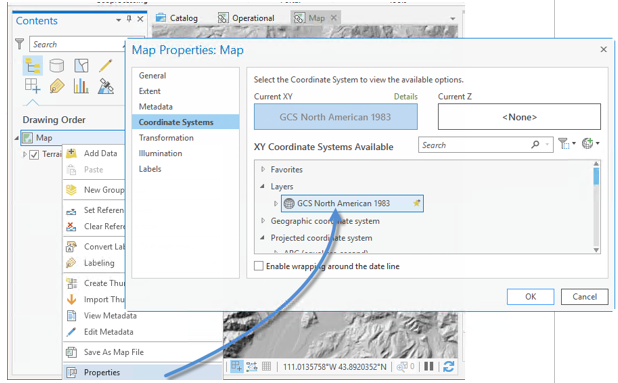
Right Click the map in the Contents Pane, click Properties and Set the Coordinate System of the map to GCS North American 1983.
Since we have the Map Properties window open, click Metadata and enter a Description for the map. A map description is required when creating a Map Tile Package

We are going to use this layer to provide shading for the Grand Teton National Park map. Let’s lighten up the shading a little bit.
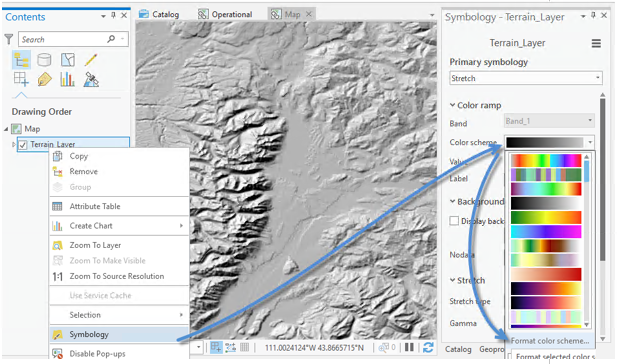
Right Click on the Terrain_Layer and click Symbology to open the Symbology Pane. On the Symbology Pane click the Color Scheme and Click ‘Format color scheme…’
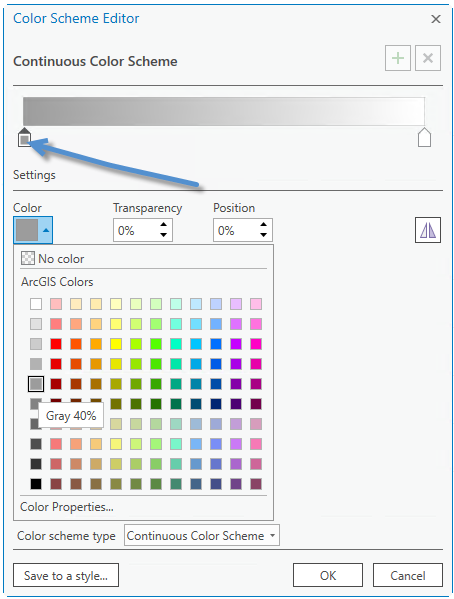
Lighten up the color scheme by adjusting the color of the first stop. Click the first stop and change its color to a lighter shade of gray and click OK
In the Geoprocessing Pane Search for Create Map Tile Package and Open the tool.

The Create Map Tile Package tool is set up to create content in WGS 1984 Web Mercator Auxillary Sphere coordinate system, this won’t work for our example map, so un-check the box.
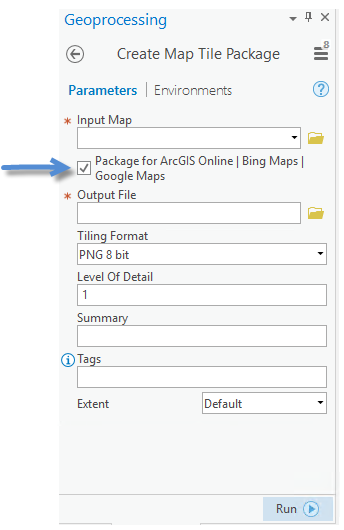
Notice that the Create Map Tile Package tool requires an existing service or .xml tiling scheme file to create the tile package in a coordinate system that is not WGS84 Web Mercator Auxillary Sphere.

We will use the Generate Tile Cache Tiling Scheme geoprocessing tool to create a tiling scheme.
Click the burger menu on the geoprocessing pane and click Open Another Tool.
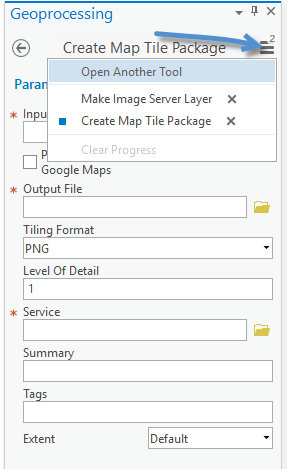
Search for Generate Tile Cache Tiling Scheme and open the tool.


Generate Tile Cache Tiling Scheme requires and input data source. Ideally, we could use the Terrain_Layer we created with the Create Image Server Layer tool, but this won’t work, if you use it, a tile scheme for WGS84 Web Mercator Auxillary Sphere will be created. To create an input data layer that we can use, do the following:
Click the Terrain_Layer in the content pane, Click the Imagery tab and click the Process Button to Create a temporary raster clipped to the current display extent.
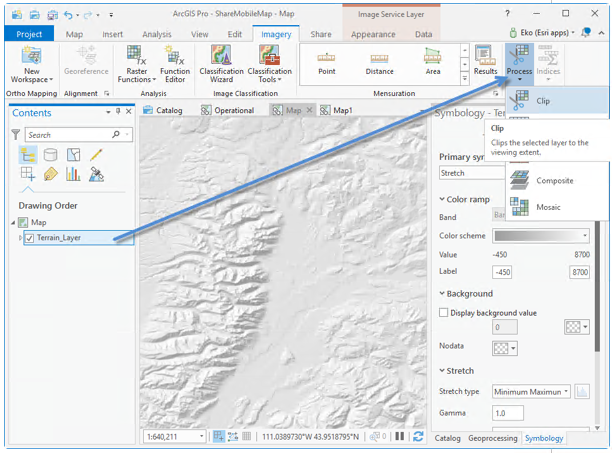
This will add a new layer, Clip_Terrain_layer, to the Content Pane. We will use this layer as Input to the Generate Tile Cache Tiling Scheme tool.
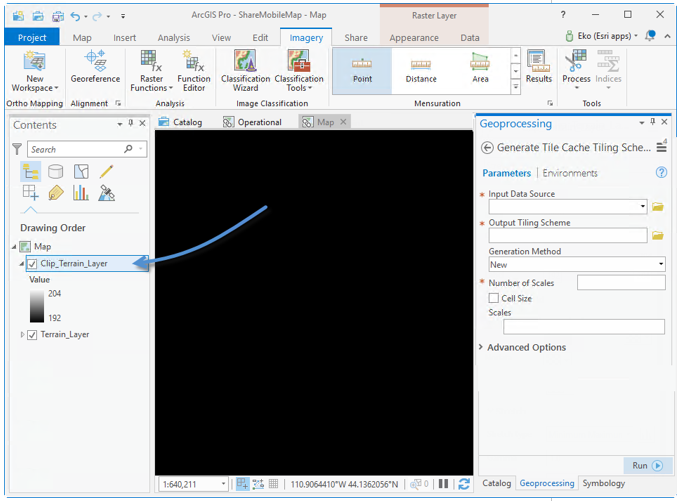
Fill out the input for the Generate Tile Cache Tiling Scheme tool.
For input data source choose the “Clip_Terrain_Layer”
Enter a name “GCS_NAD_1983” and location for the output tiling scheme XML file.
Set number of Scales to 20, the scales will fill in automatically.
In Advanced Options, set the Tile Format to JPEG.

Click Run to create the Tiling Scheme. You can open the XML file in a webbrowser or text editor to confirm that the coordinate system is correct.

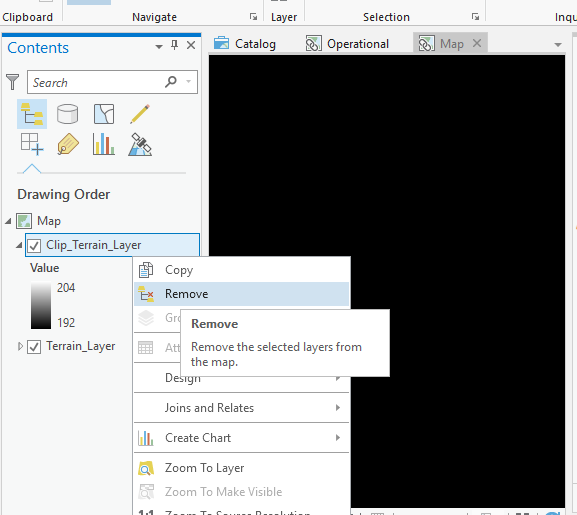
On the Content pane Right Click “Clip_Terrain_Layer” and remove it from the map.
Now we will create a Map tile package, the tile package will be created based on the current display of the map, that is why we adjusted the cartography to our liking, before creating the tile package.
Continued - Using ArcGIS Pro 2.2 Sharing and the Publisher Extension to make a public offline map with hillshadi...
You must be a registered user to add a comment. If you've already registered, sign in. Otherwise, register and sign in.