Surveys with style
- Subscribe to RSS Feed
- Mark as New
- Mark as Read
- Bookmark
- Subscribe
- Printer Friendly Page
Updated September 2021. New HTML style syntax and renewed screenshots.
Here are 6 quick tips to make your surveys look better using Survey123 Connect: Thumbnails, Titles, Images, Styles, Label HTML formatting and emojis.
1) USING A SURVEY THUMBNAIL
The thumbnail is important to visually differentiate your surveysbin the Survey123 mobile app gallery. This is particularly important if field crews download more than one survey.

You can change the thumbnail image of your survey from the Details tab of your survey in Connect. Alternatively, you can also change the thumbnail from the Survey123 website or directly in the item details page of the Form item in ArcGIS.
2) SETTING A SURVEY TITLE
The name and the title of your survey are different things. The name is just the name of the Form item. The title is what users of your form will see in the Survey123 field and web apps.

In Survey123 Connect, the survey title is controlled through the form_title property in the Settings worksheet of your XLSForm.

3) USING IMAGES IN YOUR SURVEY
It is not just a matter of making your surveys look good, which is important... images in your survey can help people make the right calls when filling out information.
For example, say you are creating a Wolf Reporting survey. Well... you will want to make sure people can tell the difference between a wolf and a coyote. You may think you know the difference, but lots of people don't.
Here is an example showing how an image, for informational purposes, has been embedded into a form.

To add an image into a form using Survey123 Connect, you first need to copy your image into the survey's media folder. Then, you reference it in XLSForm:
- In Survey123 Connect, while previewing your survey, click on the Files option in the side bar. This will open your survey's directory, where you will find the media folder.
- In your XLSForm, add the name of your image file, including the extension, into the media::image column. In the example below, I added an image to a note question with no label.

You can also use the media::audio column to associate audio files with questions, groups and notes in the survey worksheet. You can also associate them with choices in the choices worksheet!
4) USING STYLES
Styles help you control the colors of basic elements in your survey. You can open the style dialog in Connect by clicking on the painter's palette icon in the right vertical bar. In the example below I changed the background and text color in the form to create a dark theme.

5) LABEL HTML FORMATTING
You can use HTML formatting to highlight words in your questions, display warning notes as red and much more. Here is one example where we use a note to hint that values in questions above are not adding to 100. Note that we use HTML formatting to display the warning in red. We also bold some words in the questions.

The complete list of HTML tags accepted is listed in our style your survey help topic. Some common things you may want to do:
- Center the label of a group or note: <div style="text-align:center">Centered label</div>
- Change color of text in a label: <div style="color:red">Label in red</div>
- Change the background color of a group: <div style="color:white; background-color:blue">Label with blue background</div>
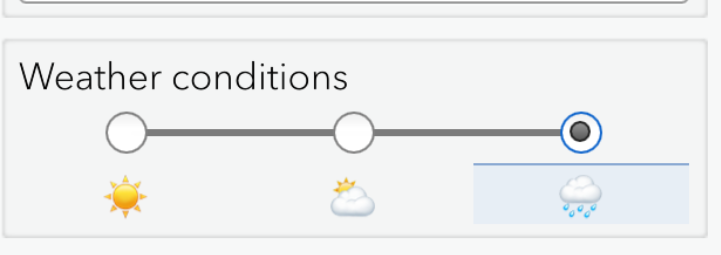
6) Emojis
I bet you did not know about this one. You can use emojis in your forms. In the example below, I took weather emojis from EmojiMedia and pasted them into the Labels of choices in a select_one question. Fun!
You must be a registered user to add a comment. If you've already registered, sign in. Otherwise, register and sign in.