- Home
- :
- All Communities
- :
- Products
- :
- ArcGIS Survey123
- :
- ArcGIS Survey123 Blog
- :
- A simple e-mail notification system for Survey123 ...
A simple e-mail notification system for Survey123 for ArcGIS
- Subscribe to RSS Feed
- Mark as New
- Mark as Read
- Bookmark
- Subscribe
- Printer Friendly Page
IMPORTANT NOTE: Content in this blog post has been revised in the https://community.esri.com/groups/survey123/blog/2018/01/22/a-simple-e-mail-notification-system-for-... blog post. The new blog as an improved version of the content and Python script.
I constantly get requests from people who want to configure an e-mail notification system on top of Survey123 for ArcGIS. The idea is simple: notify someone via e-mail every time a new survey is submitted.
There are different approaches to do this. I have seen some organizations configure ArcGIS GeoEvent Server in ArcGIS Enterprise for this purpose. It works pretty well and provides a great deal of flexibility, but not everyone has the luxury of having GeoEvent at hand. I have seen clever database triggers been written and also FME Server workflows for automating e-mail notifications.
In this blog, I will describe a technique for doing this with a Python script and Windows Task Scheduler. Essentially, Windows Task Scheduler will run a Python script at a regular interval that you can define. The Python script will connect to your survey's feature service, look for any added records, and then connect to your own corporate e-mail server to send notifications accordingly.
Many thanks to Mark Smith from Esri's Applications Prototype Lab who patiently worked on this Python script.
While the Python script may not format the e-mail message exactly as you need, I hope that at least will give you a starting point from which you can write the exact logic that matches your needs. Below are step by step instructions so you can configure this Python script with your own survey.
Configuring your ArcGIS Online feature layer
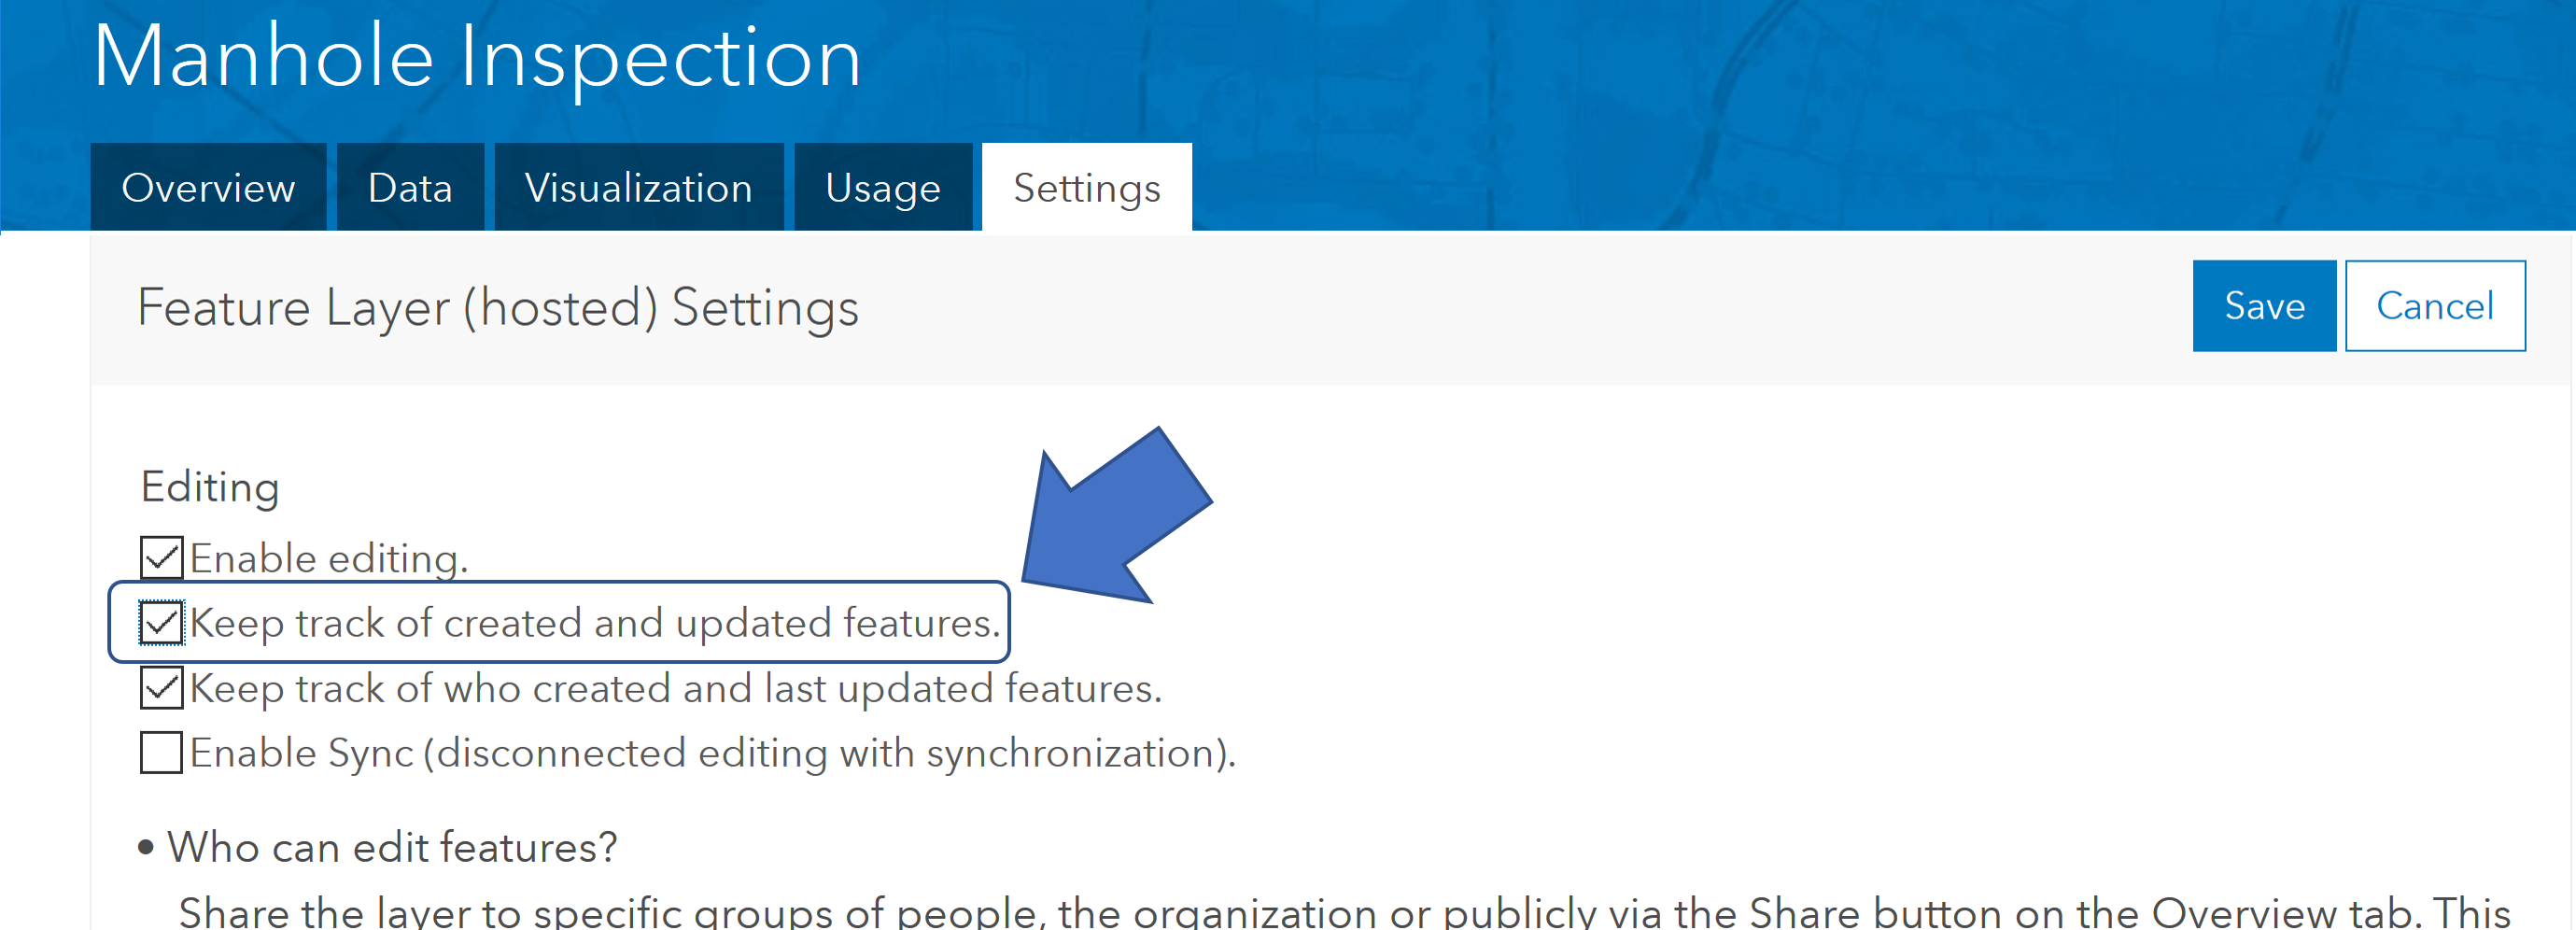
For the script to work you need to enable an option in your survey's feature layer called 'Keep track of created and updated features' . This is not to be confused with Editor Tracking. This option helps the Python script determine if any changes have been made in your feature service.
- Login into ArcGIS Online and open the Details page of your survey's feature layer.
- Switch to the Settings tab and make sure the 'Keep track of created and updated features' option is checked as shown in the screenshot below.
Configuring the Python script
Next we need to configure the Python script. Since you will want this script running unattended every at a regular interval, I suggest you choose a computer which will always running and connected to the internet. Your laptop, which you may disconnect from time to time or take home is not a good choice. Choose either a desktop computer which is always on or even better a server managed by your IT department.
The script requires Python 3.x to run and the 'requests' Python module installed. If the computer already has ArcGIS Pro installed, you already have Python 3.x and the 'requests' module installed. However, ArcGIS Pro is not required to run this script so you can install Python 3.x and then the 'requests' module.
Now you can download and configure the script as follows:
- Download the Detect Changes and Notify Python script and its associated init.json file and save them together within a folder in your computer.
- Edit and save the init.json file. At the very least, you will need to change the properties highlighted in blue below.
- recipients: This is the e-mail that will be receiving notifications. You can create an email alias if you want several people to receive the email.
- from: This is the e-mail of the person/organization that is sending the e-mail. You can also set it to a DoNotReply email address.
- server: This setting refers to your email server connection properties which are defined as a comma separated list of strings.
- The first parameter is the host of your email server which can be specified by hostname or IP address. It will look something like smtp.yourCompany.com for example or smtp.gmail.com
- The second parameter is optional and defines the port where the SMTP server is listening. Common ports are 25 and 587 but it could really be anything depending on how your mail server is configured.
- The third and fourth parameters are also optional and are used to set a user and password to access your email server.
To properly get the email  server connection properties, you will really want to contact your IT department and describe what you are trying to achieve as many email servers are configured with strict security policies that will prevent the script from successfully connecting and using your corporate e-mail server.  Folks in your IT department should know how to give you the right hostname and port for  your email server. Handing over the source code of the Python script may be of help too.

If you want to configure this script using your Gmail,  You will need to configure your Gmail account with 2-step verification, and then setup a Gmail App password.  Once you have done that, use your complete Gmail e-mail address as the user (third parameter) and the App password for the fourth parameter.  When using Gmail you do not need to specify a port number.
- fsURL: This is the URL of your survey's feature service.
- serviceuser and servicepw: The credentials of an ArcGIS Online account with access to the feature service.
{
"email":
{"recipients": ["[email protected]"],
"from": "cityofACME@acme.com",
"subject": "Changes detected in your service",
"text": "You are receiving this e-mail because records have been added, updated or deleted in:\n",
"server": ["smtp.acme.com", "", "",""]
},
"service":
{"fsURL": "https://services2.arcgis.com/fJJEXNgxjn0dpNsi/arcgis/rest/services/service_871ea76e106e4b1ab671ecc1e...",
"serviceuser": "username",
"servicepw": "password",
"fsLayerNum": 0,
"viewerURL": "http://arcgis.com/home/webmap/viewer.html","viewerMapLevel":19
},
"filenames":
{
"layergens": "layergens_ms.json"
}
}
After saving changes to the init.json file, it is time to give the script a quick test:
- Run the script once so it can capture the current state of your feature service.
- Submit one record to your feature service and run the script again.
If any errors occur during execution, an error text file will be created in the same folder where you saved the Python script.
Scheduling the script
The Windows operating system includes a simple utility called Task Scheduler. It is quite easy to setup. Once you have determined when the script will be triggered for the first time, you can repeat its execution at regular intervals. For example, every 5 minutes. Obviously, the computer where you setup the task will need to be running all the time, although you can configure the task to run regardless of who is logged in.
The configuration of tasks in the scheduler is pretty much self-explanatory, but here are some specific instructions that can save you some back and forth:
- General: Check the option to run with highest privileges and set the task to run even if you are not logged-in.
- Trigger: If you want to quickly test your task, you can simply select your task in the gallery and then hit Run in the Selected Item panel on the right. When configuring the task for real, I suggest you select the startup trigger and that you also configure the task to run indefinitely every five or ten minutes or so.
- Actions: You will need to be particularly careful with this one. The Program/Script setting needs to point to the Python executable (Python.exe).
- If using your own copy of Python, refer to the installation directory of Python where you will find Python.exe
- If using Python from ArcGIS Pro, it will be under the Pro installation directory. For example: C:\Program Files\ArcGIS\Pro\bin\Python\envs\arcgispro-py3\python.exe"
You also need to indicate the location of your DetectChanges.py Python script as an argument. Do not forget to include the .py extension in the path. If the path to your DetectChanges.py file includes spaces, then you need to enclose the path with quotes. Lastly, set the 'Start in' property so it points to the directory in which you are storing the DetectChanges.py file.
Beyond the basics
The technique described in this blog post is a bit rudimentary, but it may do its job reasonably in some simple scenarios. You can manipulate the Python script to properly format the email message to be sent, and also to apply some logic to determine if a n email needs to be sent, and to who. Since you are in 'Python land' already, you can get creative and import the arcpy.mapping module to do all sort of sophisticated things in the script. You can for example take the incoming feature added into your feature service and do a straight (buffer) or network distance (closest facility) search to determine who will be notified.
We are working on some more flexible ways to make notifications via e-mail, SMS, voice call etc simpler with Survey123. We plan on adding some specifics about this before the end of the year in our Early Adopter Program. In the meantime, you may want to play with the approach outlined here as it may work just well for you.
You must be a registered user to add a comment. If you've already registered, sign in. Otherwise, register and sign in.