- Home
- :
- All Communities
- :
- Products
- :
- ArcGIS Spatial Analyst
- :
- ArcGIS Spatial Analyst Questions
- :
- Snap Pour Point Not Processing
- Subscribe to RSS Feed
- Mark Topic as New
- Mark Topic as Read
- Float this Topic for Current User
- Bookmark
- Subscribe
- Mute
- Printer Friendly Page
Snap Pour Point Not Processing
- Mark as New
- Bookmark
- Subscribe
- Mute
- Subscribe to RSS Feed
- Permalink
I am trying to create a watershed around a small lake. I clipped the DEM down from the size of a county to about 6000 meters x 3500 meters. I followed the following steps per esri (How To: Create a watershed model using the Hydrology toolset )
Step 1: fill - input DEM clipped to 6000x3500m
Step 2: flow direction - input fill created from step 1
Step 3: flow accumulation input flow direction from step 2
All the above steps work fine...
Per esri: ther input a point feature class or a raster as the 'Input raster or feature pour point data'.
Step 4: I input the original dem (clipped to 6000x3500 m) and input the flow accumulation (step 3 result) per steps - see link above
I set the snap distance to 1000 (m) hoping that the larger the snap the shorter the running time as I tried smaller values previous and the processing took hours/ not minutes or seconds.
Image shows screenshot of results and TOC.
Any suggestions? Thanks in advance.
- Mark as New
- Bookmark
- Subscribe
- Mute
- Subscribe to RSS Feed
- Permalink
Pour point is in the same projected coordinate system as the raster? and close enough to a stream that it would likely be picked up?
- Mark as New
- Bookmark
- Subscribe
- Mute
- Subscribe to RSS Feed
- Permalink
Doug, from what I understand, you are using a DEM surface raster, clipped to the extent of a lake (6000 x 3500 m) as 'input pour point raster or feature data' to the 'Snap pour point' tool? I am not sure if this would work for what you are trying to create.
If your objective is to create a watershed for a Lake, I would go about the process in this way. I'll demonstrate the process using an example lake in Stowe, Vermont.
- This is the example lake for which watershed is desired

- Start with input DEM surface raster.

1) Run Fill tool to remove any sinks or imperfections. Output is Filled Surface Raster.
2) Run Flow Direction tool on the Filled Surface Raster to create D8 Flow Direction Raster.

3) Run Flow Accumulation tool using the D8 Flow Direction Raster as input to create D8 Flow Accumulation Raster. The cells of high flow accumulation (this is where streams form) should go through your lake. Adding some transparency to the output Flow Accumulation Raster, we can see that cells of high flow accumulation (seen in white) flow through the lake.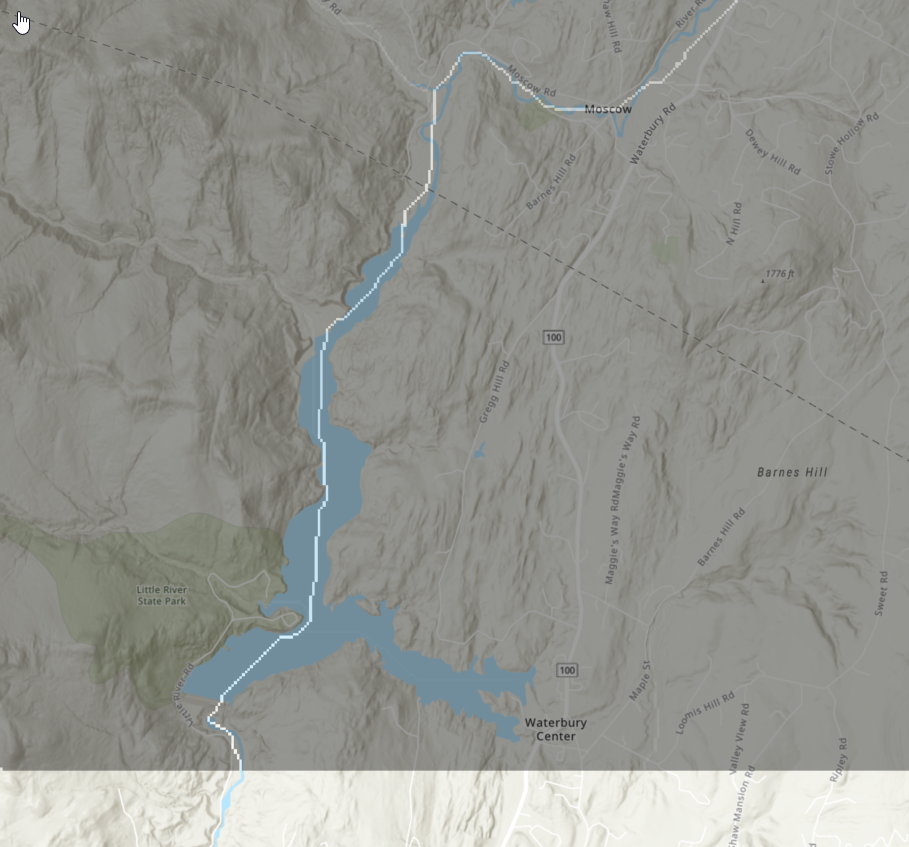
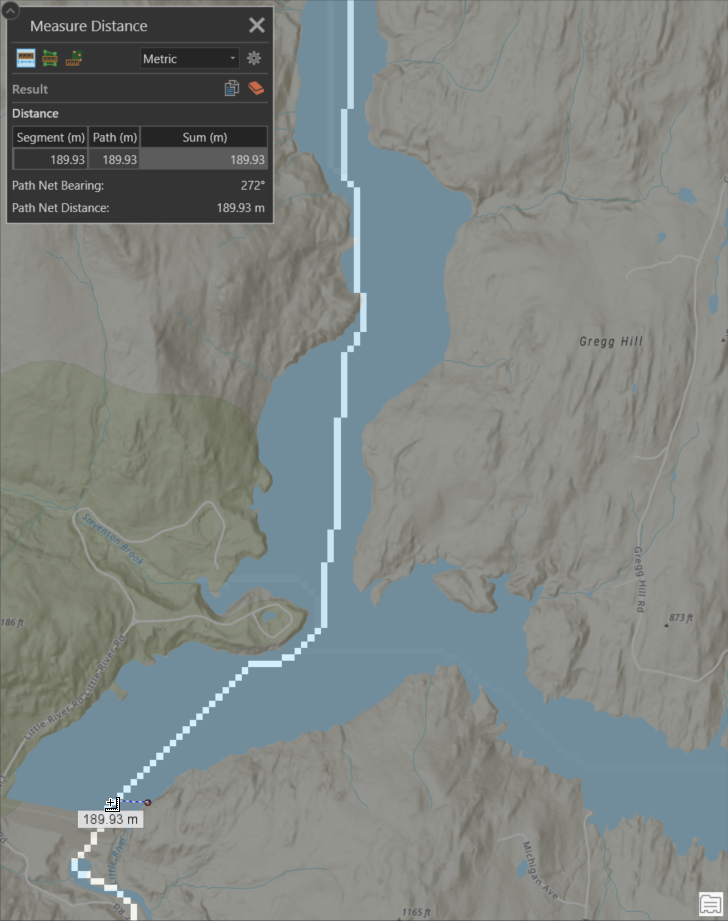
4) Create a new point feature class near the downstream end of your lake, which we will provide as input to the snap pour point tool. Using a point further downstream would create a watershed for the entire lake, including all regions that drain into the lake.

5) Use the snap pour point tool. Input pour point feature data is the point you just created. Input accumulation raster is the Flow Accumulation Raster created from the flow accumulation tool. Provide a conservative search distance by approximately measuring the distance between the point you created to a cell of high flow accumulation. In this case I will use 200 meters.
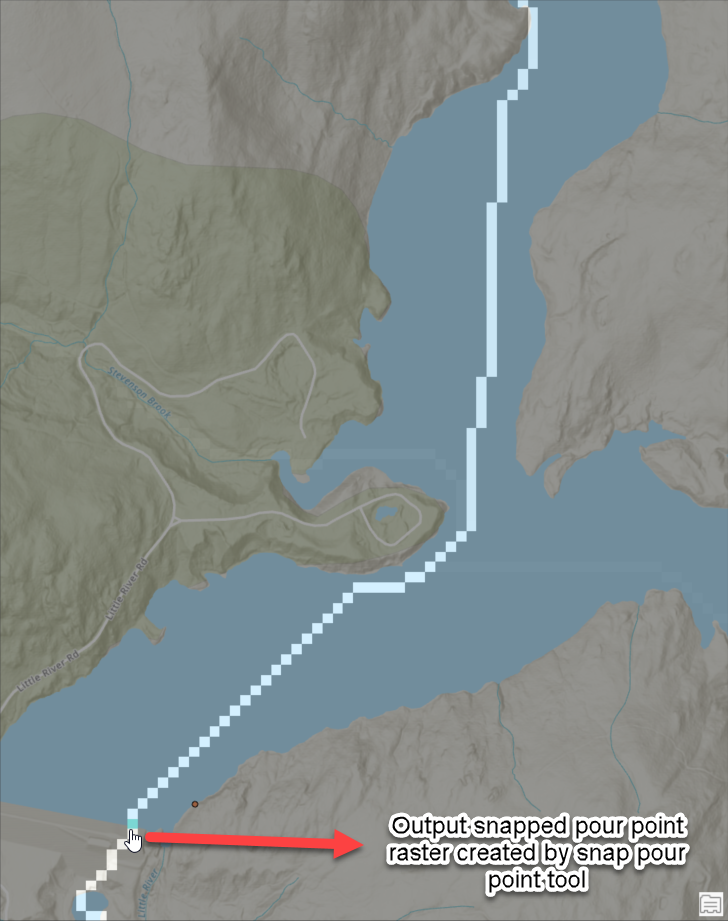
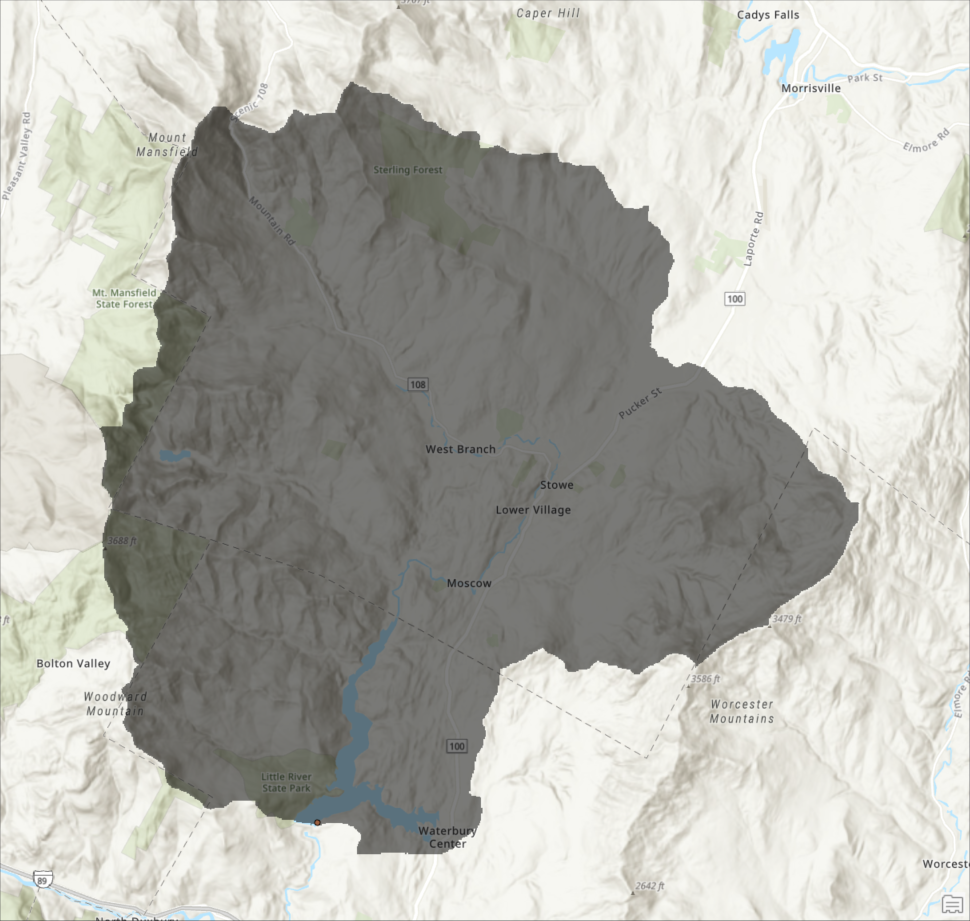
6) Run the Watershed tool. Input D8 flow direction raster is the D8 Flow Direction Raster and Input pour point data is the output snapped pour point created by the snap pour point tool. This creates a watershed for the entire lake. Apply some transparency to the output Watershed to see the regions encompassed by the watershed, which include the entire lake.
- Hope this addresses your question.
Thanks,
Neeraj
- Mark as New
- Bookmark
- Subscribe
- Mute
- Subscribe to RSS Feed
- Permalink
Thanks All. The images are super helpful and explain where I went amiss when following the online esri instructions. I did not create a point on the lake where the water flows out. I think the images shared here would improve the esri workflow as described by esri - How To: Create a watershed model using the Hydrology toolset
I will try the step of creating a point at the downstream end of the lake and using that in step 4B of the esri How To: Create a watershed model using the Hydrology toolset process.
- Mark as New
- Bookmark
- Subscribe
- Mute
- Subscribe to RSS Feed
- Permalink
I had same question. The esri workflow is perfect until this step, where they provide no guidance or explanation of how to create a pour point.
- Mark as New
- Bookmark
- Subscribe
- Mute
- Subscribe to RSS Feed
- Permalink
Thanks Neeraj
If I understand your recommendations and steps, I need to define a point, near the outlet of my lake and use that as a feature around which to run the snap pour analysis. I believe I did this by drawing a point, converting a graphic to a layer and then using that point as the input for the snap pour point. I appears to have worked as I do not receive an error in the Results pane of arcmap. Thanks.
- Mark as New
- Bookmark
- Subscribe
- Mute
- Subscribe to RSS Feed
- Permalink
That is correct. To make sure the point has snapped on, run the Watershed Tool using the snapped pour point to delineate a watershed for the lake. The output watershed should encompass the lake and some surrounding regions that flow into it (varies depending on the local terrain).
- Mark as New
- Bookmark
- Subscribe
- Mute
- Subscribe to RSS Feed
- Permalink
where a lake meets the stream outflow, where 2 streams meet are all classic pour point locations
- Mark as New
- Bookmark
- Subscribe
- Mute
- Subscribe to RSS Feed
- Permalink
 Why would my watershed, extend beyond my pour point/lake outlet. The blue arrow indicates the lake outlet.
- Mark as New
- Bookmark
- Subscribe
- Mute
- Subscribe to RSS Feed
- Permalink
Generaly I solve this issue by setting an extent same as my raster terrain in environments