- Home
- :
- All Communities
- :
- Products
- :
- ArcGIS Living Atlas of the World
- :
- Living Atlas Blog
- :
- Creating Selective Focus in your Map
Creating Selective Focus in your Map
- Subscribe to RSS Feed
- Mark as New
- Mark as Read
- Bookmark
- Subscribe
- Printer Friendly Page
by ArcGIS Content Team
In photography, selective focus is a technique in which the subject of the image is made clear, while the remainder of the image is out of focus. This technique is used to draw the eye of the viewer to the part of the photograph the photographer wishes to be observed.


Selective focus in photography can be used to bring attention to a subject - Photo by Ian Dooley on Unsplash
When creating maps, it is often important to use similar techniques to guide a user’s attention to the focus area of a map, while making the contextual information more “out of focus”.
One way this type of visual hierarchy can be achieved in mapmaking is by isolating and enclosing the area of interest using a buffer or vignette and masking or darkening the background.
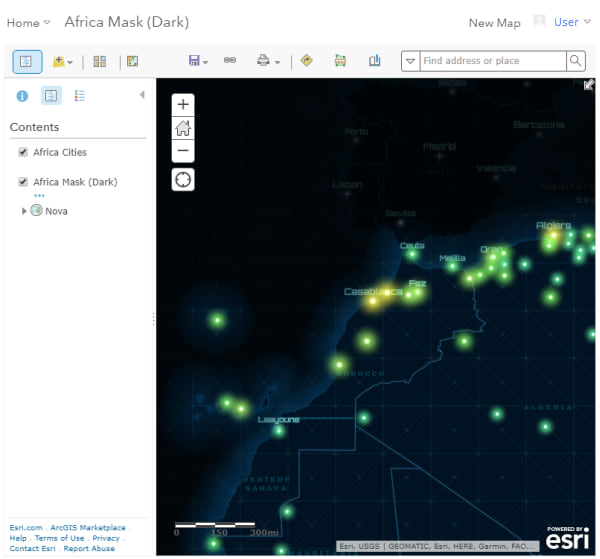
A good example of the need for some ‘selective focus‘ came about recently as the Africa GeoPortal was about to be launched.
The web maps initially display at small scale. To help focus on the continent of Africa, we quickly created a buffered mask in ArcGIS Pro, produced and uploaded a vector tile package, then published it as a tile layer. Finally, the buffered mask was added to many of the Africa Living Atlas web maps.


In addition to creating some ‘selective focus’, we also get the added benefit of establishing a sense of cohesiveness between the various maps. The repeated use of the buffered mask reinforces the sense that we are looking at an atlas and the subject of the atlas is Africa.
The method for creating the mask is straightforward and can be used to highlight any area of interest in your web maps or projects. Here are the steps:
Create a new ArcGIS Pro project.
Create or add a feature class of your area of interest (AOI).
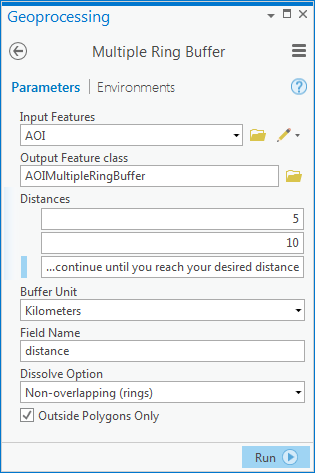
Use the Multiple Ring Buffer tool to buffer a distance around your AOI. You need to establish the distance and number of rings. For an AOI the size of the continent of Africa, a buffer distance extending 250 kilometers beyond the coastline was chosen and each ring of the buffer was determined to be 5 kilometers (resulting in 50 rings). A smaller AOI would require a smaller ring size/number of rings and a smaller overall buffer distance. Ensure that Outside Polygons Only is checked on so that the resulting feature class includes only the ringed buffer, not the AOI.
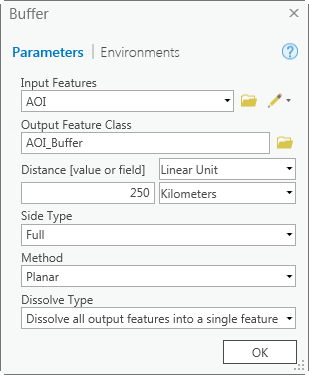
- Once the distance is established and the Multiple Ring Buffer tool completes, the AOI is buffered again using the Buffer tool. The distance should be the same as the final distance from the multiple ring buffer. Side Type is set to full to include the AOI with the buffer. The resulting feature class will be used solely as the erase feature for step
- Using the buffered feature class from the previous step, run the Erase tool. The buffered feature class should be the erase feature, while the input feature should be a simple polygonal feature class that covers the world. If you need a feature class that covers the global extent of the ArcGIS Online basemaps, you can access it here.
- The newly erased feature class and the Multiple Ring Buffered AOI feature class can now be symbolized. Give the erased feature class a single symbol RGB value of 0,0,0 (Hex #000000) with a 20% transparency.
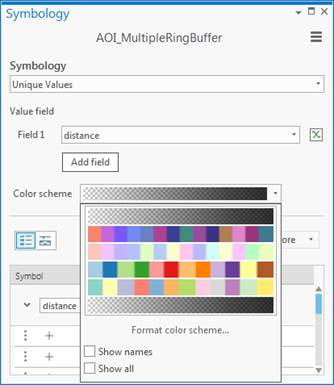
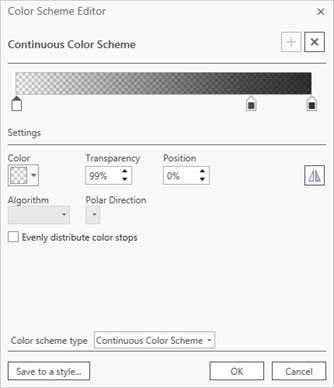
- Change the buffered feature class’ Symbology to Unique Values and add all values. Highlight all values, format to remove outlines’ and change the color scheme type to ‘Continuous’ black with varying levels of transparency 99% – 20%. To use the buffered mask on lighter basemap styles, you can use the same scheme, then change the colors to white.
Alternatively, you can download the continuous black color scheme style (STYLX) created for the Africa GeoPortal. To add it to your ArcGIS Pro project, click the Inserttab on the ribbon, then select Add Style from the Add drop-down menu.
- Once the symbology is established, create a group layer of the two feature classes. On the Metadata pane within the Map Properties, provide a title, tags, summary and a description for your map. Remove any extraneous content from the project.
- Run the Create Vector Tile Index tool.

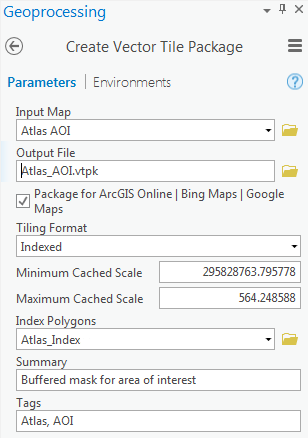
- Run the Create Vector Tile Package tool.
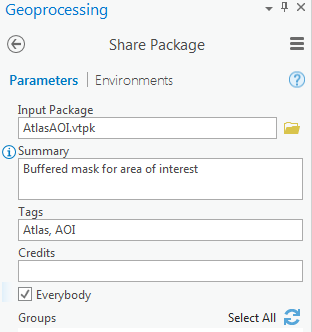
- Run the Share Package tool.
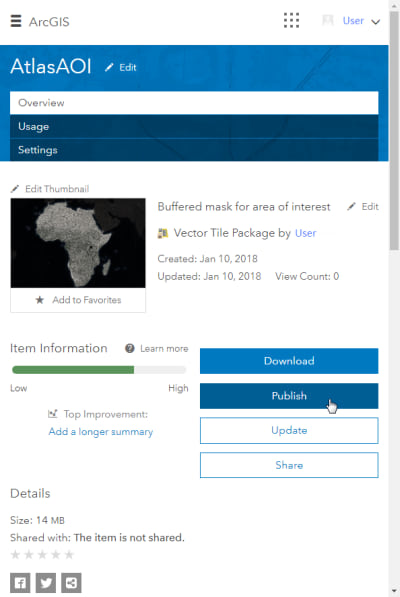
Log into your ArcGIS account. The vector tile package is an item in your Content. Publish the vector tile layer by clicking Publish on the vector tile package item page.
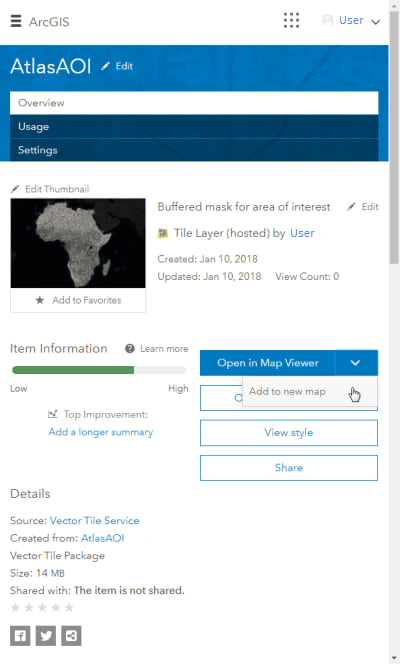
- Open the tile layer in a new map.
- The tile layer appears above the basemap. Select your basemap, add any additional thematic data above or in between the mask and basemap, and Save as a web map.
This post was written by Cindy Prostak, the cartographer responsible for creating vector basemap designs such as Nova, Colored Pencil, and more.
You must be a registered user to add a comment. If you've already registered, sign in. Otherwise, register and sign in.