- Home
- :
- All Communities
- :
- Developers
- :
- JavaScript Maps SDK
- :
- JavaScript Maps SDK Questions
- :
- Re: How to take screenshot in Javascript for arcgi...
- Subscribe to RSS Feed
- Mark Topic as New
- Mark Topic as Read
- Float this Topic for Current User
- Bookmark
- Subscribe
- Mute
- Printer Friendly Page
How to take screenshot in Javascript for arcgis basemap with layers
- Mark as New
- Bookmark
- Subscribe
- Mute
- Subscribe to RSS Feed
- Permalink
Hi All,
How to capture the screenshot of map( basemap with additional layers) using Javascript?
Can anyone help on this? Thanks!
- Mark as New
- Bookmark
- Subscribe
- Mute
- Subscribe to RSS Feed
- Permalink
Venkata,
One of the best ways is to use the esri PrintTask to do this and request Map_Only as the layout.
Example code snippet:
var oWid = map.width;
var oHgt = map.height;
var printTask = new PrintTask('.../rest/services/ExportWebMap/GPServer/Export_Web_Map');
var template = new PrintTemplate();
this.imgHeight = (740/oWid) * oHgt;
template.exportOptions = {
width: 1542,
height: (1542/oWid) * oHgt,
dpi: 200
};
template.format = "jpg";
template.layout = "MAP_ONLY";
template.preserveScale = false;
template.showAttribution = false;
var params = new PrintParameters();
params.map = this.map;
params.template = template;
printTask.execute(params, lang.hitch(this, this.printResult));
  function printResult(rsltURL){
        var mapImg = domConstruct.toDom('<img src="'+rsltURL.url+'" border="0" style="width:740px;height:'+this.imgHeight+'px;"/>');
        domConstruct.place(mapImg, dom.byId('mapImgDiv'), 'replace');
},- Mark as New
- Bookmark
- Subscribe
- Mute
- Subscribe to RSS Feed
- Permalink
As Robert said, the PrintTask is a great solution. I would also recommend the Print Widget if you don't need as fine-grained control. Here are some helpful links:
API Reference: Print Widget | API Reference | ArcGIS API for JavaScript 4.6
API Reference: PrintTask | API Reference | ArcGIS API for JavaScript 4.6
Sample app: Print Widget Sample | ArcGIS API for JavaScript 4.6
-Noah
- Mark as New
- Bookmark
- Subscribe
- Mute
- Subscribe to RSS Feed
- Permalink
Robert one question. this part of the code, return the result to the window i want for example if a want to show in a altert window ?
function printResult(rsltURL){
var mapImg = domConstruct.toDom('<img src="'+rsltURL.url+'" border="0" style="width:740px;height:'+this.imgHeight+'px;"/>');
domConstruct.place(mapImg, dom.byId('mapImgDiv'), 'replace');
}- Mark as New
- Bookmark
- Subscribe
- Mute
- Subscribe to RSS Feed
- Permalink
Juan,
What is returned is an image url so anything you can do with a image url is what you are limited to. I don't think I have ever tried to put an image in an alert. As far as I know an Alert can only take a string.
- Mark as New
- Bookmark
- Subscribe
- Mute
- Subscribe to RSS Feed
- Permalink
Thank you robert, i refer an alert like a new window to put an example, thank you !
- Mark as New
- Bookmark
- Subscribe
- Mute
- Subscribe to RSS Feed
- Permalink
You can also use/download custom widget named Screenshot widget from the custom widgets list..
And you have to use the latest version html2Canvas.js and html2Canvas.svg.js files..
Cheers,
Srikanth Dasari
- Mark as New
- Bookmark
- Subscribe
- Mute
- Subscribe to RSS Feed
- Permalink
Hi Srikanth, Thanks for your reply.
I have used html2canvas js to take the screenshot. But I am getting top layer details in the image. Not getting base layer image.
Used code:
document.getElementById("btnSave").addEventListener("click", printToFile);
//Creating dynamic link that automatically click
function downloadURI(uri, name) {
var link = document.createElement("a");
link.download = name;
link.href = uri;
link.click();
}
function printToFile() {
html2canvas(document.getElementById('panel-container')).then(
function (canvas) {
var myImage = canvas.toDataURL("image/png");
downloadURI("data:" + myImage, "yourImage.png");
});
html2canvas(document.getElementById('sceneDiv')).then(
function (canvas) {
var myImage = canvas.toDataURL("image/png");
downloadURI("data:" + myImage, "yourImage.png");
});
- Mark as New
- Bookmark
- Subscribe
- Mute
- Subscribe to RSS Feed
- Permalink
You have to download the html2canvas.js and html2canvas.svg.js 0.5.0 version files
You can attach the source code here so that I would like to take a look...
- Mark as New
- Bookmark
- Subscribe
- Mute
- Subscribe to RSS Feed
- Permalink
Hello srikanth dasari venkata,
I try to do the same thing but i have a problem. Generated image is almost empty, i have only buttons +/- and copyright, but nothing about content map.
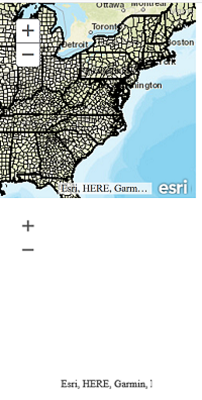
I follow your advice, that is use 0.5.0 version... I also try to use last version but :
- there is always no map content.
- it does not work with IE 11.
Here is my code, do you see something wrong ?
Thanks a lot 
Flavie
<!DOCTYPE html>
<html>
<head>
<title>Test screen shot</title>
<meta http-equiv="Content-Type" content="text/html; charset=utf-8">
<meta name="viewport" content="initial-scale=1, maximum-scale=1,user-scalable=no">
<link rel="stylesheet" href="https://js.arcgis.com/3.23/esri/css/esri.css">
<style>
#tools {
top: 20px;
color: #444;
height: auto;
font-family: arial;
right: 20px;
margin: 5px;
padding: 10px;
position: absolute;
width: 115px;
z-index: 40;
border: solid 2px #666;
border-radius: 4px;
background-color: #fff;
}
html, body, #mapDiv {
padding:0;
margin:0;
height:100%;
}
button {
display: block;
}
#mapDiv{
height: 250px;
}
</style>
<script type="text/javascript" src="html2canvas.js"></script>
<script src="https://js.arcgis.com/3.23/"></script>
<script>
var map;require([
"esri/map", "esri/layers/ArcGISDynamicMapServiceLayer",
"dojo/dom", "dojo/on", "dojo/domReady!"
], function(
Map, ArcGISDynamicMapServiceLayer,
dom, on
) {
map = new Map("mapDiv", {
basemap: "streets",
center: [-25.312, 34.307],
zoom: 3
});
map.on("load", init);
var demographicsLayer = new ArcGISDynamicMapServiceLayer("https://sampleserver6.arcgisonline.com/arcgis/rest/services/Census/MapServer");
map.addLayer(demographicsLayer);function init() {
on(dom.byId("screenShotTool"), "click", function(evt) {
screenShot();
});
}
function screenShot(){
html2canvas(document.getElementById('mapDiv')).then(function(canvas){
document.body.appendChild(canvas);
});
}
});
</script>
</head>
<body>
<div id="tools">
<button id="screenShotTool">Screen shot</button></div>
<div id="mapDiv"></div>
</body>
</html>