- Home
- :
- All Communities
- :
- Products
- :
- ArcGIS Experience Builder
- :
- ArcGIS Experience Builder Documents
- :
- Get Started with ArcGIS Experience Builder Develop...
- Subscribe to RSS Feed
- Mark as New
- Mark as Read
- Bookmark
- Subscribe
- Printer Friendly Page
Get Started with ArcGIS Experience Builder Developer Edition
Get Started with ArcGIS Experience Builder Developer Edition
This document shows how to set up Experience Builder Developer Edition on your machine, access the developer guide, and create an experience from scratch.
Set up Experience Builder Developer Edition on your machine
- Download and install Node.js (V10.x and up) on your computer.
- Unzip the arcgis-experience-builder-beta.zip file.
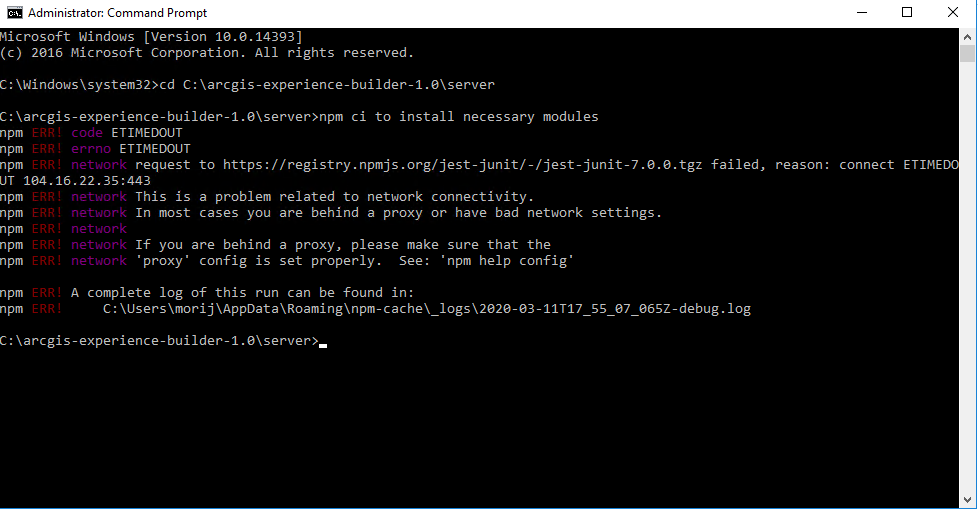
- Open the Command Prompt window, cd to the /server directory of the Experience Builder installation, and type npm ci to install necessary modules.
- Type npm start to start the server.
- Register your Experience Builder client on ArcGIS for Developers site to get the Client ID. The URL to open Experience Builder https://[machine_name]:3001/ needs to be one of the Redirect URIs under the Authentication tab.
- Enter your ArcGIS Online Organization or Portal for ArcGIS URL and Client ID.
- Log in with your ArcGIS Online Creator account or Portal for ArcGIS account.
Note: Currently, only built-in account is supported if connecting to Portal for ArcGIS.
For the complete developer guide, see https://[machine_name]:3001/doc/index.html.
Create an experience
You may create an experience by choosing a template or from a scratch with Experience Builder. The following workflow demonstrates how to create an experience from scratch.
1. Log in with your ArcGIS Online Creator account.
2. On the Experience Builder home page, click Create New.
3. Choose the Blank Scrolling Page template and click create to start the editor.
4. Click the + to open the Insert panel.
5. Drag and drop an Image widget to the page.
6. Make sure the Image widget is selected on the page. On the right-side panel browse to a local image file and configure the properties.
7. Drag and drop a Text widget to the page.
8. Select the widget and type your sample texts.
9. Drag and drop a Map widget to the page.
10. Make sure the map widget on the page is selected. Set web map or/and web scene as the data source and configure properties on the right-side panel.
11. Drag and drop the widgets on the page to arrange them in the layout you want.
12. Optionally, close the Insert panel then click the Add page button to add a new page.
13. Click Save to save the experience.
14. Click Preview to preview the experience.
15. Click Publish to publish the experience.
16. Click View published item from the dropdown list beside the Publish button to view the experience.
Create a widget
See Widget Development Guide at https://[machine_name]:3001/doc/index.html
Hi,
when I create a new experience, is it possible to download it as in the web appbuilder (e.g. /server/apps/<ID>)?
Thank you
Fabio
Hi Fabio,
Currently no, however, this is on our roadmap.
David
Ok..so, where i can find configuration files of my app (not the code, but just the json files)? I image that local json files are sent to the online builder after publishing. Right?
Unlike Web AppBuilder developer edition saving the app config file locally, the app config file created by Experience Builder is stored in My Content in your portal. Currently, only online org is supported, so you are right, the config is available online under My Content regardless the app is drafted or published. Thanks,
Jianxia
Fabio,
You can find the config.json file stored as an item in ArcGIS Online. Here is the syntax:
https://www.arcgis.com/sharing/rest/content/items/{itemid}/resources/config/config.json?f=json&token={yourtoken}
Are these instructions supposed to work with Enterprise as well as AGOL at the present beta release? I've tried with Enterprise but get stuck in a 'sign-in to Portal' loop no matter what combinations of URLs I've tried in the app URL and the redirect URL settings for the app. Please could you confirm?
Robert,
No. The current version of dev edition beta does not support connection to ArcGIS Enterprise. The coming beta 2 in two weeks will support ArcGIS Enterprise 10.8 and up. And 10.8 Enterprise is planned to ship around the end of January 2020.
Hi Haley,
This is by design, the online edition has all the experiences stored on ArcGIS Online and the developer edition has your experiences local created from it.
Thanks,
David
Step 1. "Download and install Node.js (V10.x) on your computer." Is this still correct? Would the most recent, recommended 12.16.1 be OK?
Is there any way to install this without connecting to the internet, my server environment is closed off, and it's a long process to get a website opened up
Jonathan,
The workaround we have is to get the modules from another place that has the internet installed, then copy the node module folder over to your environment without the internet. Keep in mind, the node version from both places should be the same. Otherwise, you may run into problems. Hope this helps.
The documentation states that we can preview commonly used components at by visiting: https://localhost:3001/theme-builder.
But that does not work. I am running npm start on both client and server folders. Any suggestions?
Hi Roy,
That URL isn't working in this current edition. We will update the documentation to use this URL, for now, Theme Builder.
Thanks,
David
When working with Experience Builder the projects we create are stored somewhere in the Experience Builder folder (e.g., C:\arcgis-experience-builder-1.0), right? Is it possible to install Experience Builder on a network share? If not, and just so we know, where is our work being saved (except for widgets of course because the documentation says to put them in arcgis-experience-builder-1.0\client\your-extensions)?
Hi Dave,
The Experience Builder apps for developer edition are stored at exb/server/src/public/apps/0. These folders will contain the JSON that makes up your experience. I haven't tried installing on a network share, but if it has an OS (Windows or Mac) and node I don't see any problems it would just be a webserver.
Thanks,
David
Maybe I wasn't clear enough in my question. If I install Node.js on the web server, can I place the Experience Builder folder (e.g., C:\arcgis-experience-builder-1.0) on a network share (a different server where files are backed up and Node is not installed)? It didn't work when I tried it, but I am not a system administrator, so I may be missing something. The problem I am trying to solve is having my work backed up automatically on a regular basis. The instructions here https://developers.arcgis.com/experience-builder/guide/install-guide/#client-install say to put the folder on your local drive. I want to be certain that I need to find a way to backup stuff from the local drive (something my organization does not do).
Hi Dave,
Got it thanks. Wherever you install Experience Builder you will need node. Perhaps a better solution is just to have an automated process that backups that particular directory daily to the network share.
Thanks,
David
What is the purpose of the client? Something just does not make sense to me in the client setup and need (also it failed to start so that adds to my confusion).
Also I seem to be not understanding something in how this is published to my Enterprise. Am I supposed to copy something to a portal folder? I can navigate to the Experience, but this requires server to be running, how do I setup to have the experience as part of my Enterprise and a user would navigate there from within portal. I have read the guide and your instructions and this seems to me to be missing
Thanks
-Joe
Hi Joe,
The purpose of the client is to run our module bundler, which is webpack. If you're planning to develop widgets or copy other widgets into your Experience Builder developer edition environment, you will need this running. It basically creates a package of your custom widgets into js files and places them in the distribution folder. It also listens for updates in your custom widget code. However, if you add a new file or folder, you will need to restart this service so it can pick up these new changes and add them to your distribution package.
The Experience developer edition is designed to be used against your Enterprise to utilize services, webmaps, and extend Experience Builder based on your requirements. This summer, there will be a release of Enterprise that has Experience Builder embedded in portal. This will allow your users to build apps with Experience Builder. Is that the type of workflow you're looking for?
Thanks,
David
Hi,
I am currently developing an Experience with the ExB 1.0 Beta.
So, after I have developed an Experience-Template, which the company should use for a quick start,
I would like to share the Code and Experiences in the Team Foundation Server (TFS) or Git.
I have also shared the Experience as template for the company and group with the share/publish button within the Experience Builder itself.
The problem is that my team still has no way to access this template.
Is it even possible to work on an experience with the team or is an experience user bounded so that only I can develop it?
Thanks in advance and kind regards,
Alex
Hi Alex,
I am wondering why you are still using ExB 1.0 beta. We made changes to store apps/templates locally in the final developer edition.
In order for others to access the experience, you should deploy the experience or template to a web server. See the deployment topic here.
Apps and templates created inside the developer edition can only be edited or viewed by yourself until deployed. In fact, the developer edition is a tool for individual developers to create their custom code and is not designed for collaboration or item management like AGOL.
Hello dear ESRI Community,
I have a question regarding Experience Builder (Developer Edition) deployment. It is clear how to make it up and running on local PC by URL like https://localhost:3001/, but how to make it work remotely by url like https://my.domain.com:3001/ and make it available to the team of developers? With WAB there were examples of .bat files with pointing of ports and URLs (I have one instance of WAB working this way). Is there any examples for Experience Builder running on dedicated server and accessible remotely? I was thinking about URL Rewrite module in IIS, but I'm pretty sure you guys could propose more elegant solution.
Thank you in advance!