- Home
- :
- All Communities
- :
- Products
- :
- ArcGIS Enterprise
- :
- ArcGIS Enterprise Questions
- :
- Extract Data Task Tool
- Subscribe to RSS Feed
- Mark Topic as New
- Mark Topic as Read
- Float this Topic for Current User
- Bookmark
- Subscribe
- Mute
- Printer Friendly Page
Extract Data Task Tool
- Mark as New
- Bookmark
- Subscribe
- Mute
- Subscribe to RSS Feed
- Permalink
I'm having trouble modifying the Extract Data Task modelbuilder for a geoprocessing service I'm trying to publish.
I've successfully published a GP service without modifying the spatial reference parameter, but now I would like to expose some custom projections in the spatial reference parameter and I'm having trouble with the modelbuilder finding said projections.
The problem is defining the custom spatial reference folder. I've gone through the ESRI workflow/documentation setting up the folder, populating the desired projection files in it, and then exposing those projections under the model parameters form in the spatial reference parameter of the Extract Data Task tool.
Objectives:
1. How to connect to the custom spatial reference folder?
2. How to populate the spatial reference parameter when referencing the custom spatial reference folder?
Has anyone done this successfully, or have a successful work flow documented that they would like to share?
Thanks for the help!
Casey
- Mark as New
- Bookmark
- Subscribe
- Mute
- Subscribe to RSS Feed
- Permalink
I hope this helps.
1. Copy the "Extract Data" Script and the "Extract Data Task" model into a New toolbox you create.
2. Make a copy of the python script used by the "Extract Data" Script to a Folder location of your choice( You can maintain the original if you choose to).
3. Skip this step if you maintain the original. Right click on "Extract Data" Script and select Properties, click on the folder icon and point it your copy of the python script.
4. Click "Apply" to commit the change.
5. Right click on the Model and select "Edit"
6. Use the "Select" tool to select and delete the "Extract Data" Script contained in the model.
7. Drag and drop within the model, your copy of the "Extract Data" script.
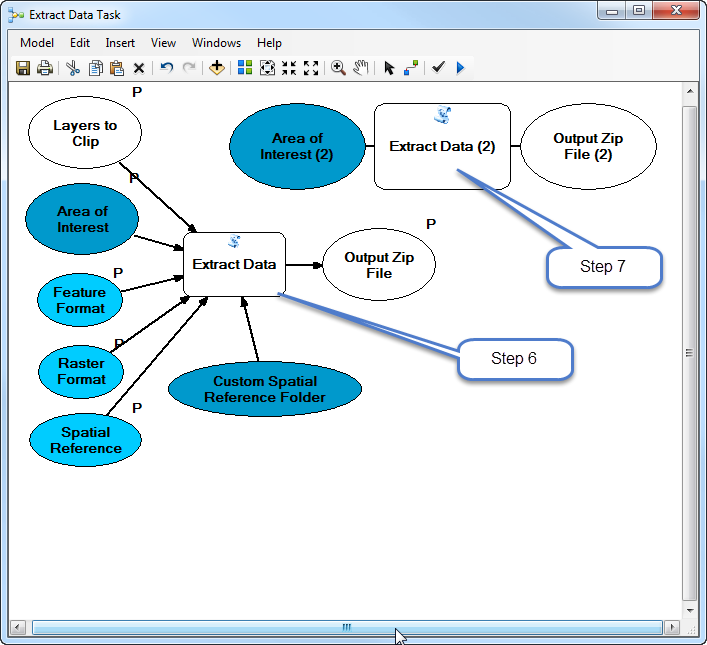
8. Right click on the "Area of Interest" and make it a Model Parameter just as in the original.
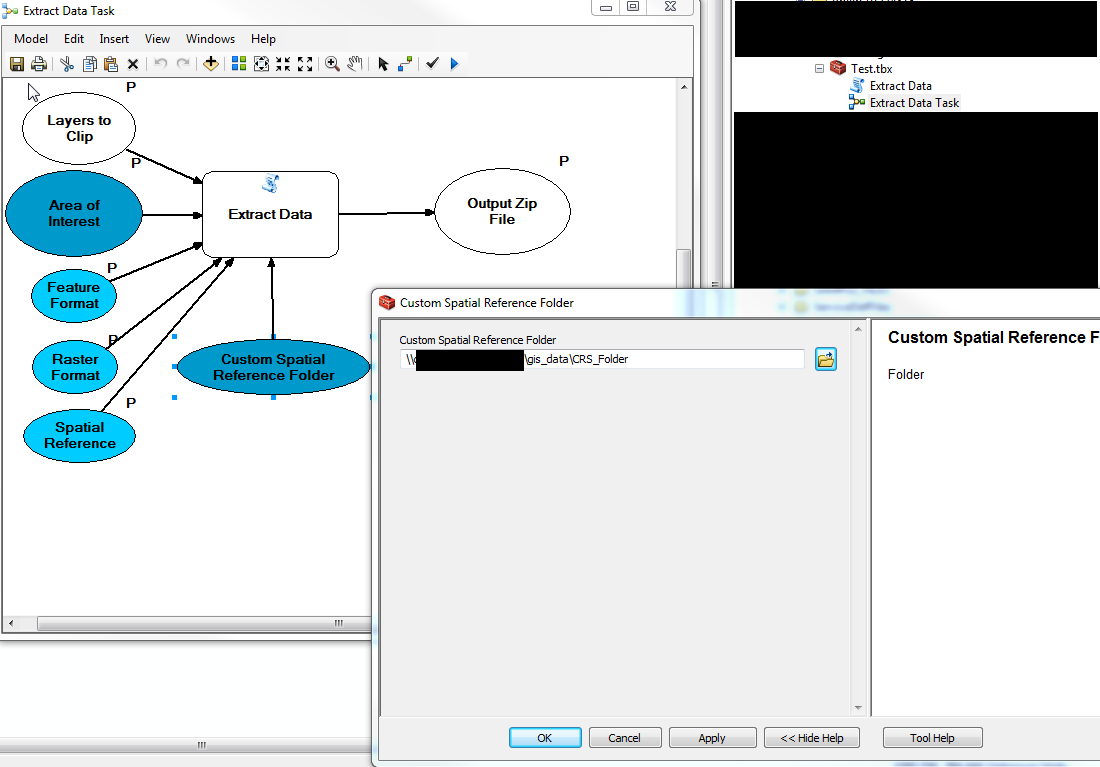
9. Use the "Connect" tool to link the following parameters (Layers to clip, Feature Format, Raster Format and "Custom Spatial Reference Folder") to the Script
10. Double click on the "Custom Spatial Ref Folder" and set the path to the folder with the Projection files you want to use.
I used a UNC path to the folder. Click "OK" when done.
11. Save the model. Ignore the Spatial "Spatial Reference" variable for now.
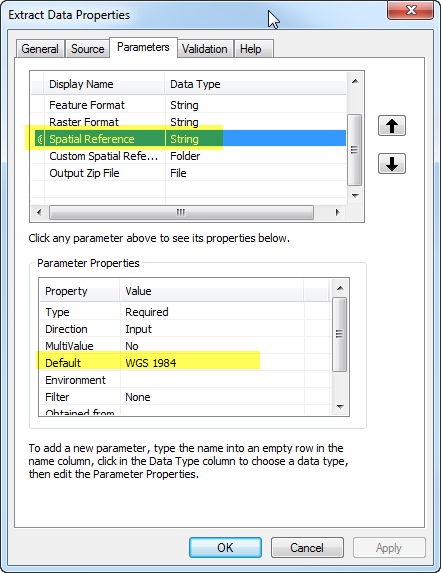
12. Right click on the "Extract Data" Script and select Properties--Parameters.
13. Choose the "Spatial Reference" Parameter and set the default to one of the custom projections you will be using. Use the exact projection file name.
Click "OK" .
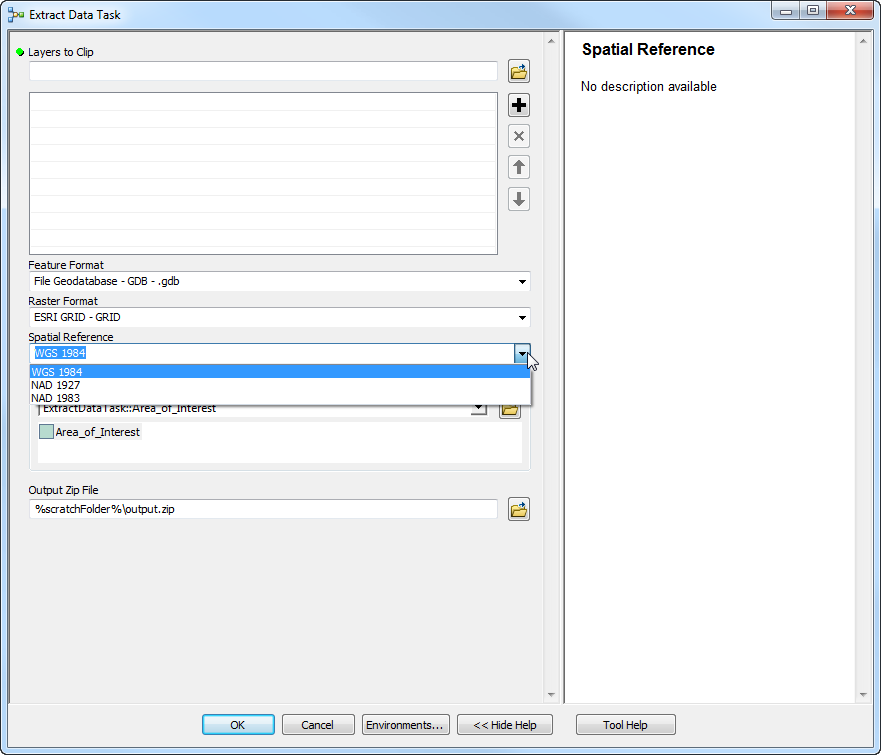
14. Right click on the model and select "Properties"--Parameters. Choose "Value List" for the Spatial Reference Filter.
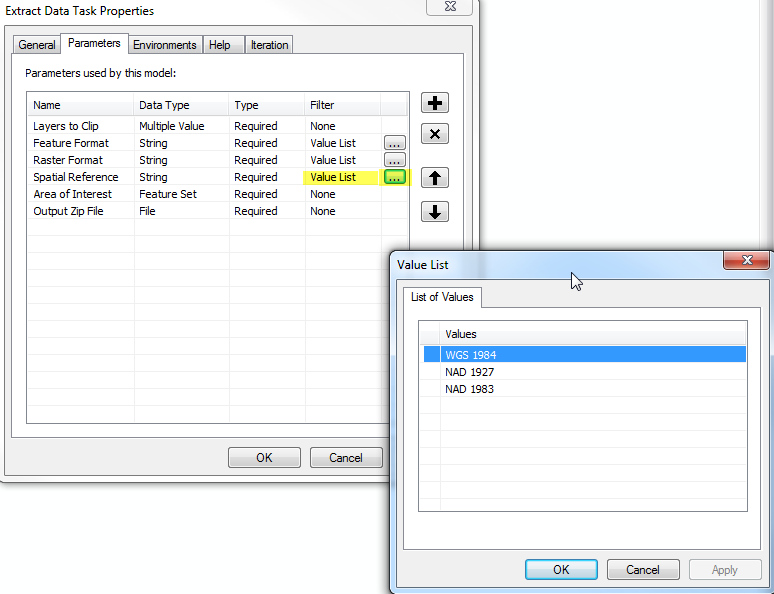
15. Next, click on the 3 dots and type in all the custom Spatial References (match the names exactly) you have in the folder in Step 10. Click "OK" twice to save and exit the properties window.
16. Right click on the model to edit it. You should be able to use the "Connect" tool to link the "Spatial Reference" variable to the "Extract Data" Script in the model
17. Finally, set the "Output Zip File" as a Model Parameter, double click on it and set the path as shown below.
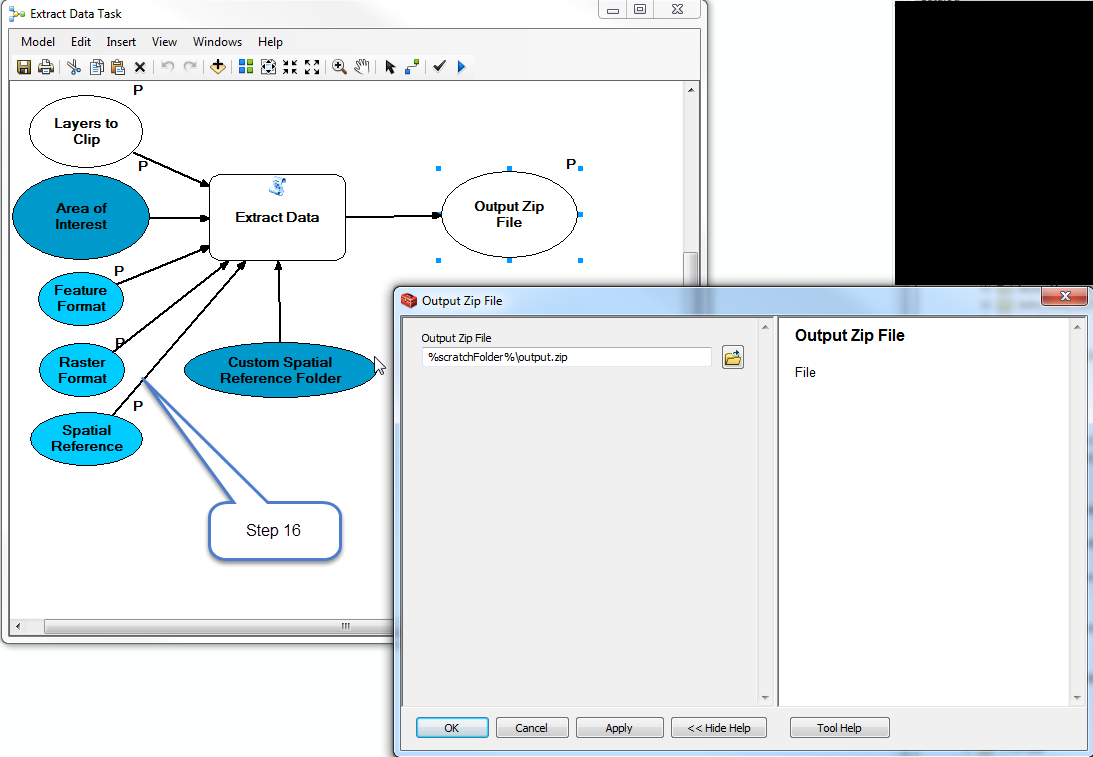
18. That's it.
Thanks