- Home
- :
- All Communities
- :
- Products
- :
- ArcGIS AppStudio
- :
- ArcGIS AppStudio Blog
- :
- Introducing AppStudio Player Custom Profile
Introducing AppStudio Player Custom Profile
- Subscribe to RSS Feed
- Mark as New
- Mark as Read
- Bookmark
- Subscribe
- Printer Friendly Page
Do you want to quickly and easily customize AppStudio Player without writing any code? Well, we have great news for you. With AppStudio 4.2 release, you can now create a custom profile (beta) for AppStudio Player and then deliver the custom profile experience to others with an Http URL link. The custom profile lets you control the contents and appearance of the Player and is managed by configuring a group in your ArcGIS organization. The custom profile will show the end-user only the apps that are shared within the group, either AppStudio native apps or web apps created in your ArcGIS organization. You can also add tags in the group to control the Player appearance such as branding color, app header title, and feedback email address.
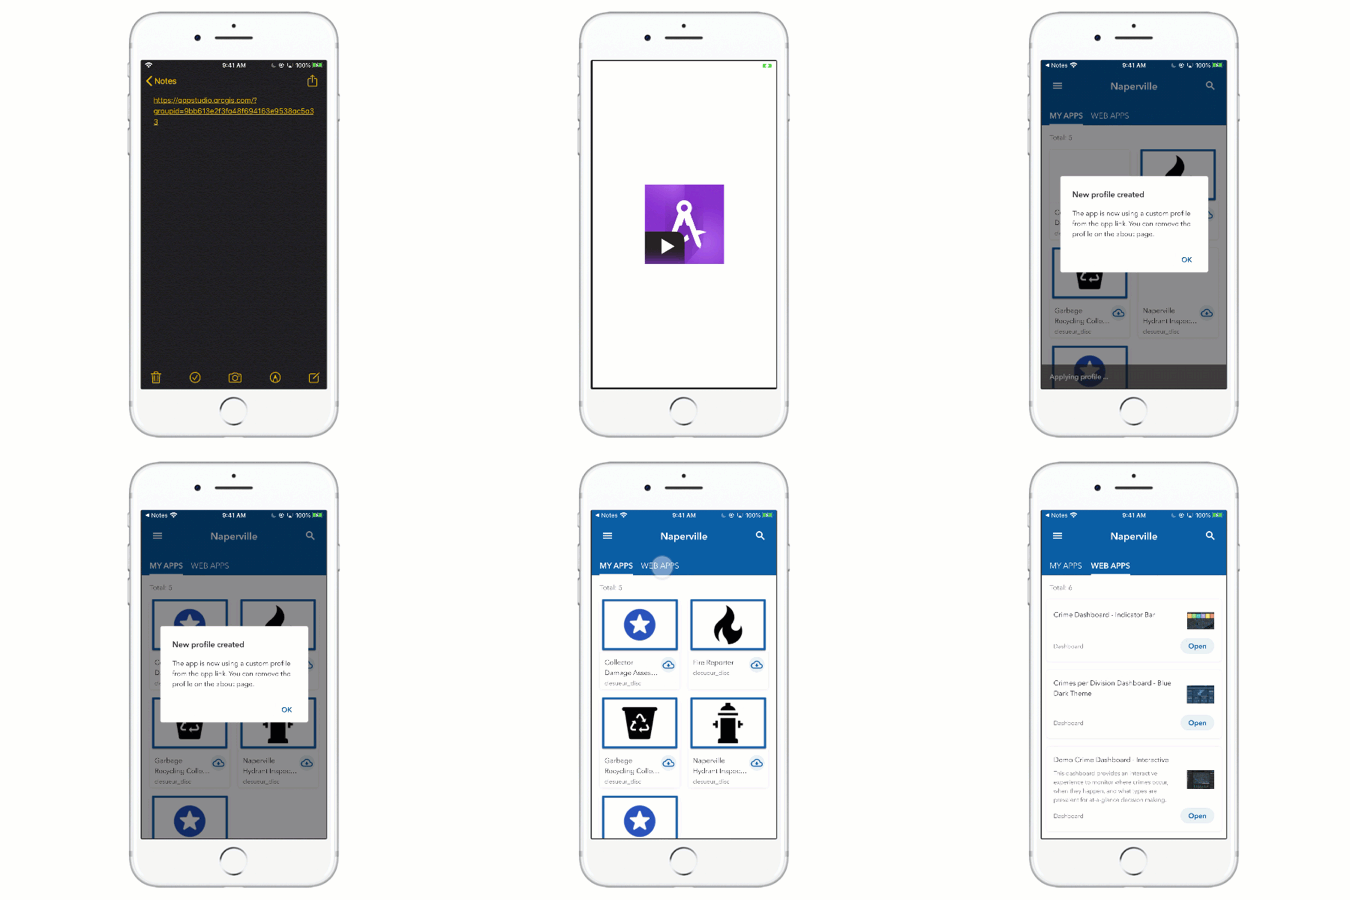
How to set up a custom profile
Watch the tutorial video or follow the steps below to learn how to create a custom profile.
Step 1. Create a group in ArcGIS Online or Enterprise
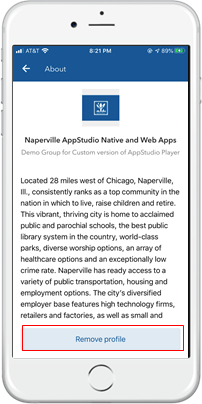
Sign in to your ArcGIS organizational account and create a group. Then provide title, thumbnail, summary, and description to the group. These contents will be displayed in the custom profile About page
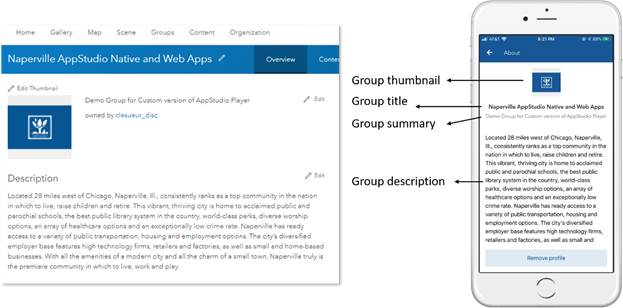
Step 2. Share AppStudio native apps and web apps
Select the AppStudio native apps and web maps that you would like to be displayed in the Player and share them with the group created from step 1.
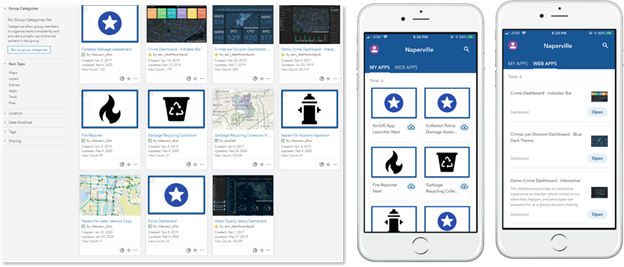
Step 3. Add tags for the group
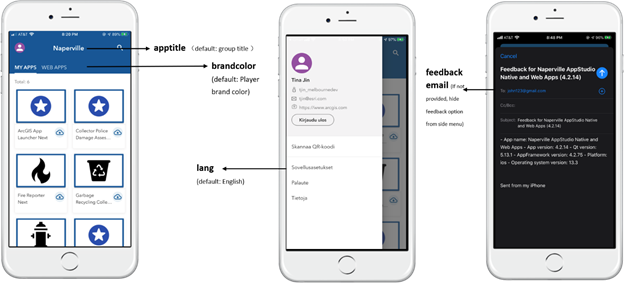
You can add tags in the group to configure AppStudio Player. As of AppStudio 4.2 release, we support the following four tags:
- brandcolor:6e2f2f (Player branding color, the value is the hex code of the color)
- apptitle:Naperville (Text on the app header)
- feedbackemail:1234John@gmail.com (Feedback email address)
- lang:en (Player language, the value is the four-letter LCID string language code)
Note:
- please replace the value with your own
- AppStudio Player supported languages
Step 4. Create a Player link
You can now create a link that will launch Player with your custom profile on either iOS and Android. This allows you to immediately open and pass specified content (parameters) from the link to the app. Follow the below format to create a Player link that includes the group ID.
https://appstudio.arcgis.com?groupid=<enter-group-id-here>
i.e. https://appstudio.arcgis.com?groupid=9bb613e2f3fa48f694163e9538ac5a33
Step 5. Launch Player with the custom profile
The last step is to send the Player link to your mobile device and tap on it to launch the Player with the custom profile. If you want to remove the custom profile, you can tap on the menu > About page > Remove profile button
Note: Make sure you have the latest AppStudio Player version 4.2 or above, it is available from Apple App Store or Google Play store.
Custom profiles provide a new way to re-brand Player and distribute a curated set of apps, and we can’t wait to see how our users adopt this new deployment option. We would like to receive feedback or suggestions to better support your needs. Please leave your comment below or reach out to us at appstudiofeedback@esri.com.
- New to AppStudio? Check out this website to learn more about what AppStudio for ArcGIS can do to you and your organization.
- Become an AppStudio for ArcGIS developer! Watch this video on how to sign up for a free trial.
- Follow us on Twitter @AppStudioArcGIS to keep up-to-date on the latest information and let us know about your creations built using AppStudio to be featured in the AppStudio Showcase.
- The AppStudio team periodically hosts workshops and webinars; please sign up for the AppStudio newsletter if you are interested in information regarding AppStudio events.
You must be a registered user to add a comment. If you've already registered, sign in. Otherwise, register and sign in.