- Home
- :
- All Communities
- :
- Products
- :
- ArcGIS AppStudio
- :
- ArcGIS AppStudio Blog
- :
- Add GNSS device discovery to your app
Add GNSS device discovery to your app
- Subscribe to RSS Feed
- Mark as New
- Mark as Read
- Bookmark
- Subscribe
- Printer Friendly Page
Have you made a great app for outdoor use, that would benefit from high accuracy location? Do your users want to improve the location that they capture or report in your app, by using an external receiver? Do you want to report a location in your app that is being fed from a receiver that is remote to you but available over a network? In each of these cases, you will want to add the ability to search for, and connect to, an external GNSS receiver in your app.
We have recently added this ability to a number of our apps – Trek2There, Survey123, QuickCapture – and now we have made that work available to you, as a small collection of custom components, so you can drop them into your own app.
There are a few considerations you need to evaluate before adding GNSS device discovery to your app – what hardware are you intending your app to be used on, what receivers you want to support – jump to the end of this post to explore those.
For now, I want to show you the mechanics of making this work. The code that you can add to your app is available as an AppStudio sample called GNSS Discover. You can download this directly to your computer and copy and paste contents of it to your app.
The following steps will demonstrate how to add GNSS device discovery to the Hello World (Runtime) starter app. I’ve deliberately chosen this lightweight app so you can see the few steps that it takes to add this complex functionality.
- Launch and sign in to AppStudio Desktop Edition.
- Search for and download, the GNSS Discover sample app.
- Click New App, choose Hello World (Runtime) and click Create.
- Select the app you just created in the AppStudio gallery, and from the side menu choose Files. This will launch a file browser showing you the files created for your new app.
- In the AppStudio gallery, select the GNSS Discover app that you downloaded already, and from the side menu choose Files. This will launch another file browser showing you the files of the sample app.
- Copy the subfolder called GNSSPlugin, from the sample app to the folder of your new app.
- Close both file browsers.
- In the AppStudio gallery, select your new app (created from the Hello World starter app) and from the side menu select Edit. Your app will now launch in your default code editor. You will make edits to the MyApp.qml file only.
- After the existing import statements at the top of the file, add the following reference for your app to be able to use the contents of the folder that you just copied to your project:
import "./GNSSPlugin"
- Scroll to the bottom of the MyApp.qml file. Before the last curly brace, you need to add the following code. This code is also in the GNSSDiscover.qml of the GNSS Discover sample app. You can open this file and copy and paste from there if you prefer.
// Manage connections to GNSS providers
GNSSManager {
id: gnssManager
gnssSettingsPages: gnssSettingsPages
}
// GNSS settings UI
GNSSSettingsPages {
id: gnssSettingsPages
gnssManager: gnssManager
}
// GNSS status UI
GNSSStatusPages {
id: gnssStatusPages
gnssManager: gnssManager
gnssSettingsPages: gnssSettingsPages
}
- The GNSSManager that you have just added provides a new position source that will communicate with both your internal position source and any configured external position source. To use this, change the positionSource of the existing locationDisplay component, to be gnssManager. It should look like this:
locationDisplay {
positionSource: gnssManager
}
Save your work. If you choose to run your app at this stage (Alt+Shift+R), you will see the map launch and it will have two buttons, a home
 and location
  button.
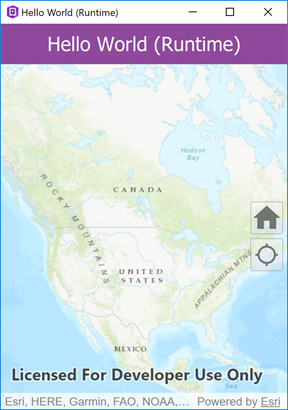
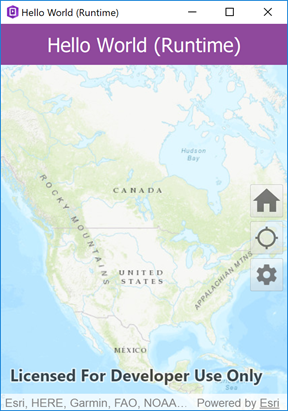
Click the location button and see that the map will center on your current location. By default, the app is using your devices internal position source. To be able to use an external receiver, you need to be able to select one. We will next add a settings
 button , so you have somewhere to select a new receiver.
 - Copy the existing locationButton component and paste a copy of it immediately below the original one.
- Change the id of the copied component to be settingsButton.
- Change the source to be
"./GNSSPlugin/images/round_settings_white_24dp.png"
- Change the name of the parameters in the onHoveredChanged event of this button to be
settingsButton
- Remove the contents of the onClicked event and replace with
gnssSettingsPages.showLocationSettings()
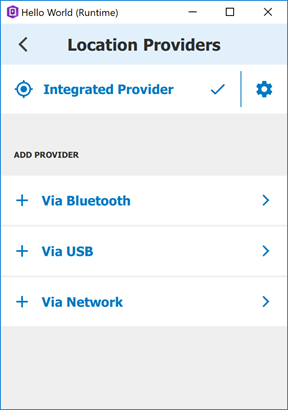
Run your app. See that there is now an additional button with the settings icon. Click on this button and see the settings page. On this page you can choose to connect to a GNSS receiver that is connected to your device.
- As an optional bonus – would you like to make the color of the settings button match the others? You can do this with a color overlay.Start by adding the Qt Graphic Effects plugin so you can use the color overlay component.
- At the top of the file where the other import statements are, add the following:
import QtGraphicalEffects 1.12
- Add an id of settingsButtonImage to your button image component.
- Add the following code immediately after your button image component:
ColorOverlay {
anchors.fill: settingsButtonImage
source: settingsButtonImage
color: "black"
}
Ensure that the name for anchors.fill and source is the same as the name that your gave your settings button image in the previous step.
- Save your work and run your app. See that the settings button is now the same color as the other buttons.
Instead of cloning and modifying an existing button, there is a settings button component in the GNSS Discover sample that you also could have used. Steps 12-17 show how you add new functionality to your app whilst maintaining the existing presentation of tools.
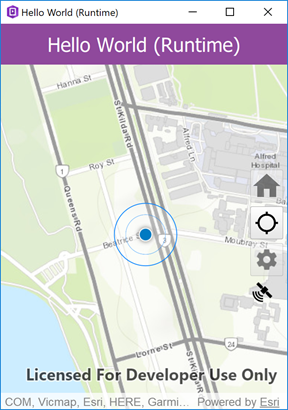
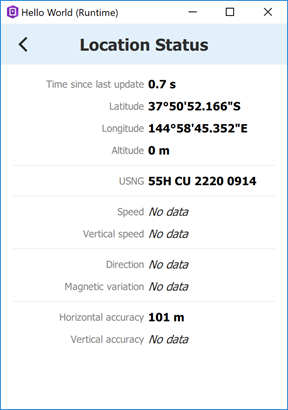
Also included in the GNSS Discover sample is a status button that indicates when the position source is connected, and when clicked, displays information coming from that position source. In the next step, we will add this button as is.
- After the last button in your app, paste the following (this code is also in the GNSS Discover sample)
GNSSStatusButton {
gnssStatusPages: gnssStatusPages
}
Save your work and run your app. The status button is only visible when the location is active, so first click the location button for the status button to appear. See that the status button has different styling to your other buttons. You can choose to style it as you wish. Click on the status button to see information coming from the position source.
You can add the components from the GNSS Discover sample to any other app in a similar way. Just include the GNSSPlugin folder in your app and reference the GNSS Manager, GNSS Settings and GNSS Status pages in your app. You can choose how to launch the settings and status pages to suit your needs. For alternative examples on how to launch those pages, take a look at the code for the GNSS Discover sample itself. This sample shows buttons for the status and settings pages, that appear on the toolbar of the sample app.
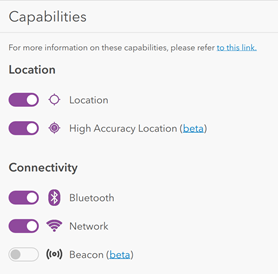
Things to consider
An app that needs to communicate with external GNSS hardware needs the high accuracy location and Bluetooth capabilities to be set.
Also, to be able to work on iOS devices, the receiver must be part of the MFi program as well as support the output of NMEA sentences.
Whilst building your app, we recommend you test in AppStudio Player. Player already has many GNSS receivers whitelisted so you can test your app on iOS before whitelisting your own app.
To learn more about using GNSS receivers with your apps see https://doc.arcgis.com/en/appstudio/api-guide/apihighaccuracygps.htm
You must be a registered user to add a comment. If you've already registered, sign in. Otherwise, register and sign in.