- Home
- :
- All Communities
- :
- Developers
- :
- ArcGIS API for Python
- :
- ArcGIS API for Python Questions
- :
- J'ai une couche d'entités polygonale que je voudra...
- Subscribe to RSS Feed
- Mark Topic as New
- Mark Topic as Read
- Float this Topic for Current User
- Bookmark
- Subscribe
- Mute
- Printer Friendly Page
J'ai une couche d'entités polygonale que je voudrais numeroter automatiquement mais en spiral (En escargot). De facon à avoir une continuité par voisinage. je suis un debutant en python, merci de m'aider. Merci
- Mark as New
- Bookmark
- Subscribe
- Mute
- Subscribe to RSS Feed
- Permalink
Ned a good example of what is going on conceptually is given here https://stackoverflow.com/questions/36834505/creating-a-spiral-array-in-python
You can think of your problem in terms of blocks.
Pictorally it makes more sense of the blocks have an odd number of rows and columns.
The only difference in what is shown here is that the dx (change in x) can be different in the dy (change in y) perstep
So here is a sample of a study area with each 'cell' numbered from 1 to 49
# ---- 7 rows by 7 cols, number from 1 to 49
a = np.arange(1, 7*7+1).reshape(7, 7)
array([[ 1, 2, 3, 4, 5, 6, 7],
[ 8, 9, 10, 11, 12, 13, 14],
[15, 16, 17, 18, 19, 20, 21],
[22, 23, 24, 25, 26, 27, 28],
[29, 30, 31, 32, 33, 34, 35],
[36, 37, 38, 39, 40, 41, 42],
[43, 44, 45, 46, 47, 48, 49]])Conceptually, if you wanted to move in the above array in a clockwise order starting at the top left, your steps would be in the form of
spiral_cw(a)
array([ 1, 2, 3, 4, 5, 6, 7, 14, 21, 28, 35, 42, 49, 48, 47, 46, 45, 44,
43, 36, 29, 22, 15, 8, 9, 10, 11, 12, 13, 20, 27, 34, 41, 40, 39, 38,
37, 30, 23, 16, 17, 18, 19, 26, 33, 32, 31, 24, 25])where you begin at position 1, move to 7, drop down to 14 then 21, 28, 35, 42, 49 then left to 43, then up through 36, 29, 22, 15, 8 etc etc
This information (see the code implementation) enables you to construct a clockwise spiral.
And you want to translate it into this form of a clockwise set of block
print(to_spiral(a)) # using the code from the reference
[[43 44 45 46 47 48 49]
[42 21 22 23 24 25 26]
[41 20 7 8 9 10 27]
[40 19 6 1 2 11 28]
[39 18 5 4 3 12 29]
[38 17 16 15 14 13 30]
[37 36 35 34 33 32 31]]So you can either build your study area divisions by knowing the coordinates of the top left 'cell' and proceeding in a logical order changing your position at the end of the line...
OR ... by beginning in the middle and spiraling outward in a clockwise direction (
So how the block coordinates are build can be done many ways. All you need is a start coordinated and a dx, dy to make your step moves.
- Mark as New
- Bookmark
- Subscribe
- Mute
- Subscribe to RSS Feed
- Permalink
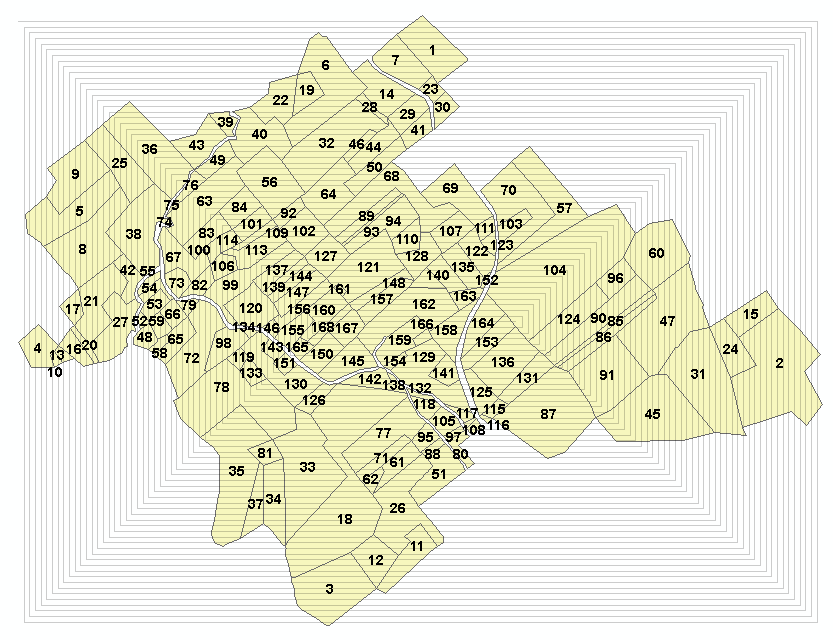
So I just downloaded your data and had a go at it and this is the result:
To do that I changed the following settings in the first script:
# settings
fc_parcels = r'C:\GeoNet\Spiral\Python.gdb\Data\PARCELS'
fc = r'C:\GeoNet\Spiral\Python.gdb\rectangle_spiral_v01'
sr = arcpy.Describe(fc_parcels).spatialReference
spacing = 10.0- change the path to the input fc_parcels and define the output path to the fc with the "rectangle spirals"
- I defined a small spacing, but you could use a larger value. Just make sure that every parcels is crossed.(use a select by location to validate this)
After this there are two steps that I did not include in the code.
First intersect the parcels with the rectangle spiral

The I did a multi part to single part to make sure that every part is a single feature:

For the second script I defined the following settings:
fc = r'C:\GeoNet\Spiral\Python.gdb\intersect_spiral_parcels_mp2sp_v01'
fld_id = 'FID_Parcels'
fc_spiral = r'C:\GeoNet\Spiral\Python.gdb\rectangle_spiral_v01'
fc_parcels = r'C:\GeoNet\Spiral\Python.gdb\Data\PARCELS'
fld_out = 'Result'- change the paths to the input single part feature class, point to the correct spiral featureclass (the one before the intersect), point to the parcels featureclass and define the name for the output field.
- Make sure that Parcels featureclass is not loaded (locked) by ArcMap
See the result attached below.
- Mark as New
- Bookmark
- Subscribe
- Mute
- Subscribe to RSS Feed
- Permalink
Thank you very much dear Xander.
Life is worth living, it is because there are people like you!
Many thanks!
- Mark as New
- Bookmark
- Subscribe
- Mute
- Subscribe to RSS Feed
- Permalink
The answer to your question would be yes, since you can simply read out the extent of a polygon instead of the extend of the featureclass. However, after looking at the image I get the idea that you are looking for something else ... which could require rotation of each "side" and could involve a parallelogram rather than a rectangle:
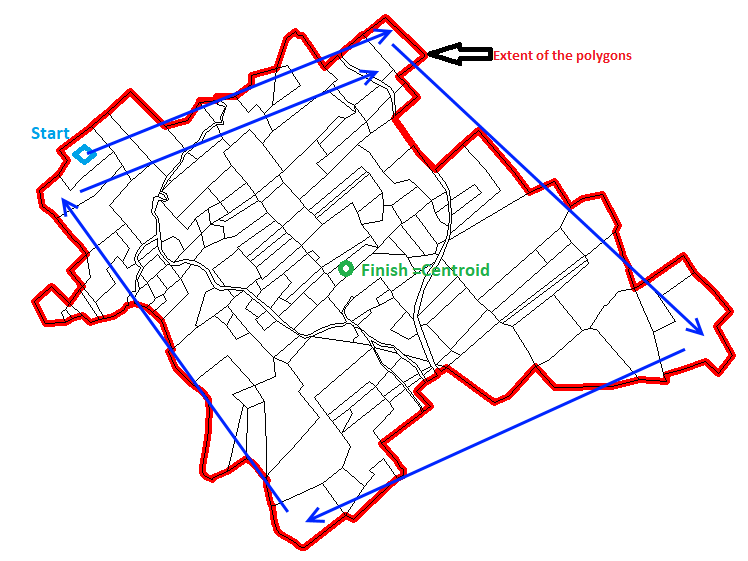
This will be more complex to create...
- Mark as New
- Bookmark
- Subscribe
- Mute
- Subscribe to RSS Feed
- Permalink
Just tried something using an internal multiring buffer so irregular shapes can be used in combination of the start angle and taking into account in which ring the maximum area of the parcel falls:

However this still creates some odd result (though explainable due to the angle). See labels 5 to 10:
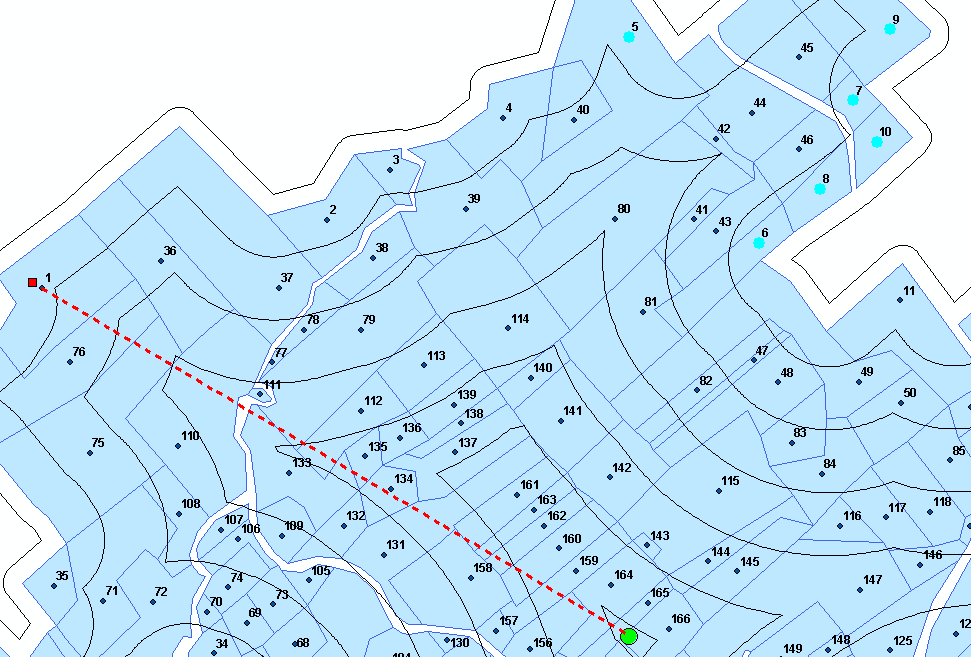
Might be interesting to know what you exactly trying to achieve and why this is necessary.
- Mark as New
- Bookmark
- Subscribe
- Mute
- Subscribe to RSS Feed
- Permalink
While the OP snoozes away, I have gone down another avenue... extent centroid to polygon centroid, angle and distance calculations and ranking... lacking sufficient coffee, I will pack in for now 
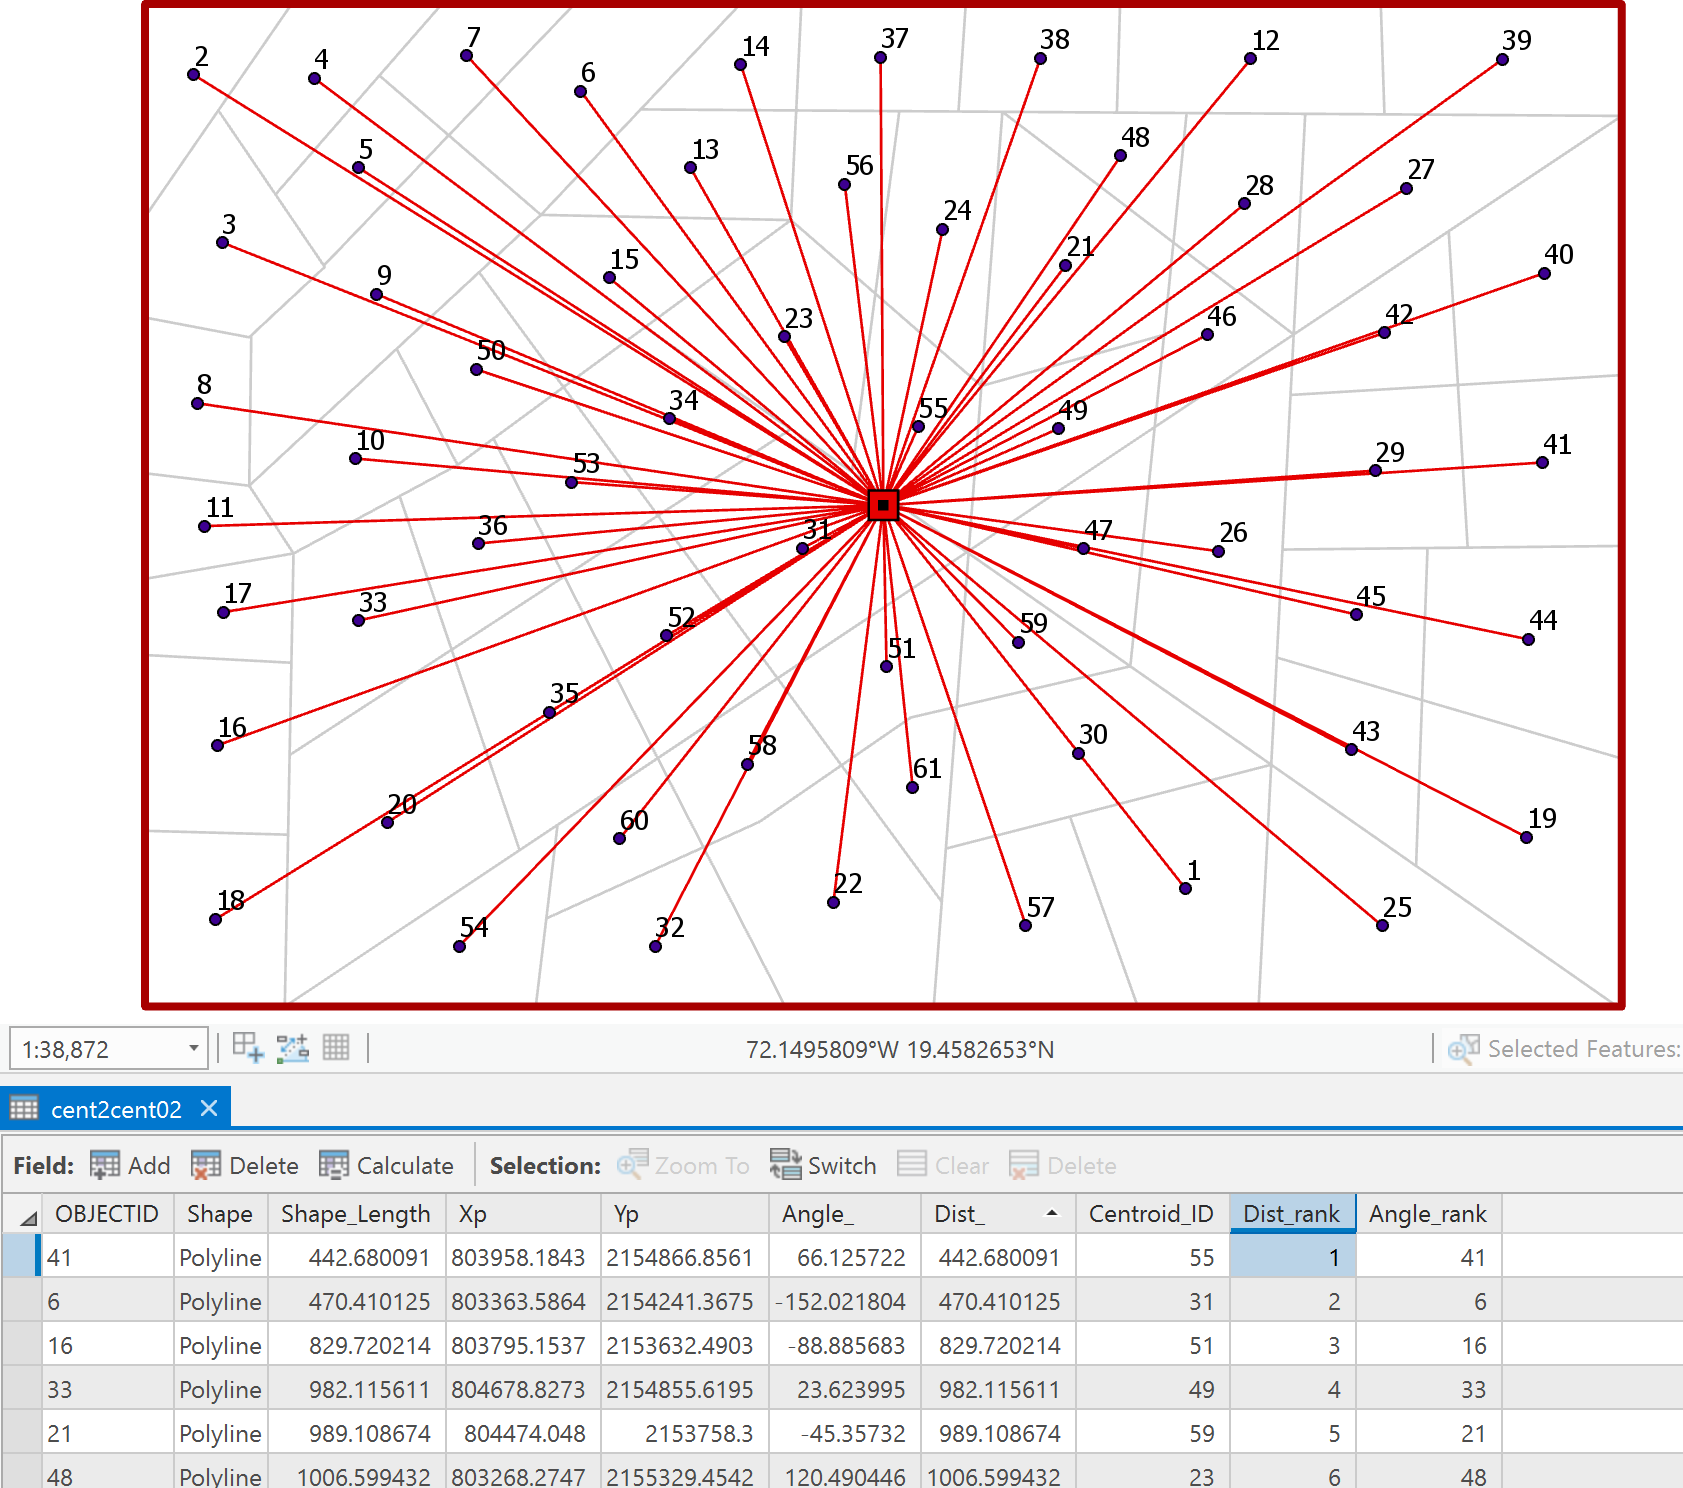
If only it were a fishnet... it would be so easy
- « Previous
- Next »
- « Previous
- Next »