- Home
- :
- All Communities
- :
- Products
- :
- ArcGIS Survey123
- :
- ArcGIS Survey123 Blog
- :
- Automating workflows with Survey123 and Microsoft ...
Automating workflows with Survey123 and Microsoft Power Automate (fomerly known as Microsoft Flow)
- Subscribe to RSS Feed
- Mark as New
- Mark as Read
- Bookmark
- Subscribe
- Printer Friendly Page
[Last update: June 16, 2020]
Starting with our July 2018 update, Survey123 supports working with Microsoft Power Automate (formerly known as Microsoft Flow). Microsoft Power Automate is a cloud-service that lets you easily build workflows to automate repetitive tasks across multiple applications and services. Here are some examples of the type of things you can do with Survey123 and Power Automate:
- Notify a supervisor via e-mail and/or SMS, when a new high priority incident is reported through Survey123.
- Add a reminder to an e-calendar 6 months after a new installation is submitted via Survey123.
- Add a new row into a spreadsheet, sharepoint list or SQL Server database when a new survey is submitted.
In this ArcNews story, you can learn about how the Massachusetts Department of Conservation and Recreation’s Office of Watershed Management is leveraging Survey123 and Power Automate to streamline boat inspections.
To get you started I will describe, step by step, how you can automate e-mail notifications after one of your surveys is submitted. This is a simple scenario, but going through it, you will quickly realize how to build your own different flows to do entirely new things.
The Survey123 Microsoft Flow connector is available in all Office365 regions except in US Government (GCC)
As of July 10, the connector is ALSO available in US Government Cloud (GCC)
Getting Started with Microsoft Power Automate
Microsoft Power Automate is included with Office 365. The free version has limited capabilities, but you can upgrade to premium subscriptions. For details check the Microsoft Power Automate pricing page. You can also create a 90-day free trial.
Unless your subscription to Office 365 already shows Microsoft Power Automate in the main page, you will need to launch it from the Office 365 App Switcher as shown in this animation:
Within Power Automate, go into My flows and select Create from blank. This will present a gallery of Connectors, from which you will be able to trigger your Flow.
Setting up a Survey123 trigger in your Flow:
The very first step in every flow you create is to define a trigger. Search for Survey123 in the gallery of connectors. You will notice that Microsoft includes many connectors out of the box. That is the beauty of it!
As you can see, the Survey123 Power Automate connector has only one trigger: When a survey response is submitted. After selecting the When a survey response is submitted trigger, you will be prompted for your ArcGIS credentials. This is because you will need to select among the surveys that you own, the one that will trigger your flow when a record is submitted. Once logged in with your Survey123 credentials, Power Automate will keep your ArcGIS connection for later use.
In my case, I selected the survey called Incident Report. My Incident Report survey has a few questions such as the location of the incident, a photo, comments and priority, which can be High, Medium or Low.
Adding condition logic and actions
Once your survey trigger is set, you can start adding conditions, actions and loop statements to your flow. In this example I will add a condition to check if the value of the Priority question in the survey response is equal to High.
The survey data is exposed within Flow, so you can dynamically extract values from the survey submitted and use them in your condition expression.

Next, I will add an action in the event that the condition (Priority is equal to High) is true. I want my action to send an e-mail to someone. I will choose the Gmail connector, and sign in to grant Microsoft Power Automate permission to use my Gmail account to send e-mails.
E-mail connectors will let you define the recipient, subject, body and attachments in the message. Again, bringing values from the survey response is possible too when defining actions. Note how in the subject and body of the e-mail for example, you can include values from the submitted data, such as the Date, Priority, Comments etc. If you get creative, you can do other things such as building a link to a map centered at the Incident's location.
The body of the e-mail is made out of HTML tags. This helps you format your email, by highlighting certain text in bold, or adding breaklines when appropriate. To create a map link illustrating the location of the incident I looked at the ArcGIS Use URL parameters to modify maps—ArcGIS Help | ArcGIS help topic. Note how the X and Y coordinates of the submitted incident, can be dynamically added to the link in the e-mail.
In a later section in this blog post I will describe some tips to dynamically get data from your submitted survey.
While you could keep adding additional conditions and actions, I will leave it here, and save the Flow. I encourage you to explore the many connectors included with Power Automate.
Testing your Flow
Now that your Flow is saved, it will be triggered by Survey123 every time a survey response is submitted. Do the test yourself: submit data with your survey from either the Survey123 web or field apps and your recipient will receive an email.
Learning more about Microsoft Power Automate
Power Automate provides many capabilities that are out of the scope of this post. If you would like to learn more about Flow I suggest the following:
Handling Dynamic Content from Survey123. A few tips.
One of the great features in Microsoft Power Automate is that you can process incoming data submitted through your survey response. For example, in the scenario above I processed the values in the Priority question to build a condition. I also used the values in the Comment and Location question for the subject of the e-mail.
Data from your form is exposed through the Dynamic Content dialog in Microsoft Flow. You can directly bring values or apply additional expressions to them.
When you bring data from the submitted survey into your Flow using Dynamic Content, keep the following in mind:
- If you have hidden questions in your survey (or metadata questions such as start, end, username etc), you will not see them exposed in the Dynamic Content dialog. However, you can always add them manually into Flow following this syntax:
?['feature']?['attributes']?['yourhiddenquestioname']
- Date and DateTime questions from Survey123 are exposed in Microsoft Flow using the UNIX time format. If you want to convert UNIX time into a readable date string, use the addseconds function. For example:
addseconds('1970-1-1', Div(triggerBody()?['feature']?['attributes']?['mydate'],1000) , 'yyyy-MM-dd')
- The output of a select_one question in Microsoft Flow will not be the label of your choice, but its name. If you want to include the labels of your selected choices in the payload of the webhook, so you can use them through the Dynamic Content in Flow, then use the jr:choice-name() function to extract the label in a calculate or hidden question.
jr:choice-name(${activity},'${activity}')
The first parameter represents the choice name. In the example above, I am passing the choice name selected in the 'activity' question. The second parameter is the question in the form using the list where the choice has been made. Very often, the first and second parameters will reference the same question, but note that the second parameter is enclosed with quotes, because it does not refer to the value (response) of the question, but to the actual question itself.
Some additional technical details
Technically, when you save your Flow, Microsoft Flow registers a webhook in your own survey. Webhooks are the foundation for having Survey123 communicate with Flow to make all the steps described above work.
A webhook is simply a URL Callback. That is, a URL that is invoked by an app when a particular event occurs, to pass some data to another app. In our case, the apps are Survey123, which invokes the URL, and Microsoft Flow, which is the receiver of the webhook.
In the initial steps described above, when the trigger was setup by selecting the survey, Microsoft Flow created a unique URL representing your Flow. This url was registered as the webhook URL in your own survey when you saved the Flow.
If working with the Survey123 field app, it is important to remember that users will need to download the survey into the app after the webhook URL has been registered.
If you want to look at the webhooks registered in a particular survey, simply follow these steps:
- Log into survey123.arcgis.com and select a survey
- Switch to the Settings tab of the survey
- Open the Webhooks section.
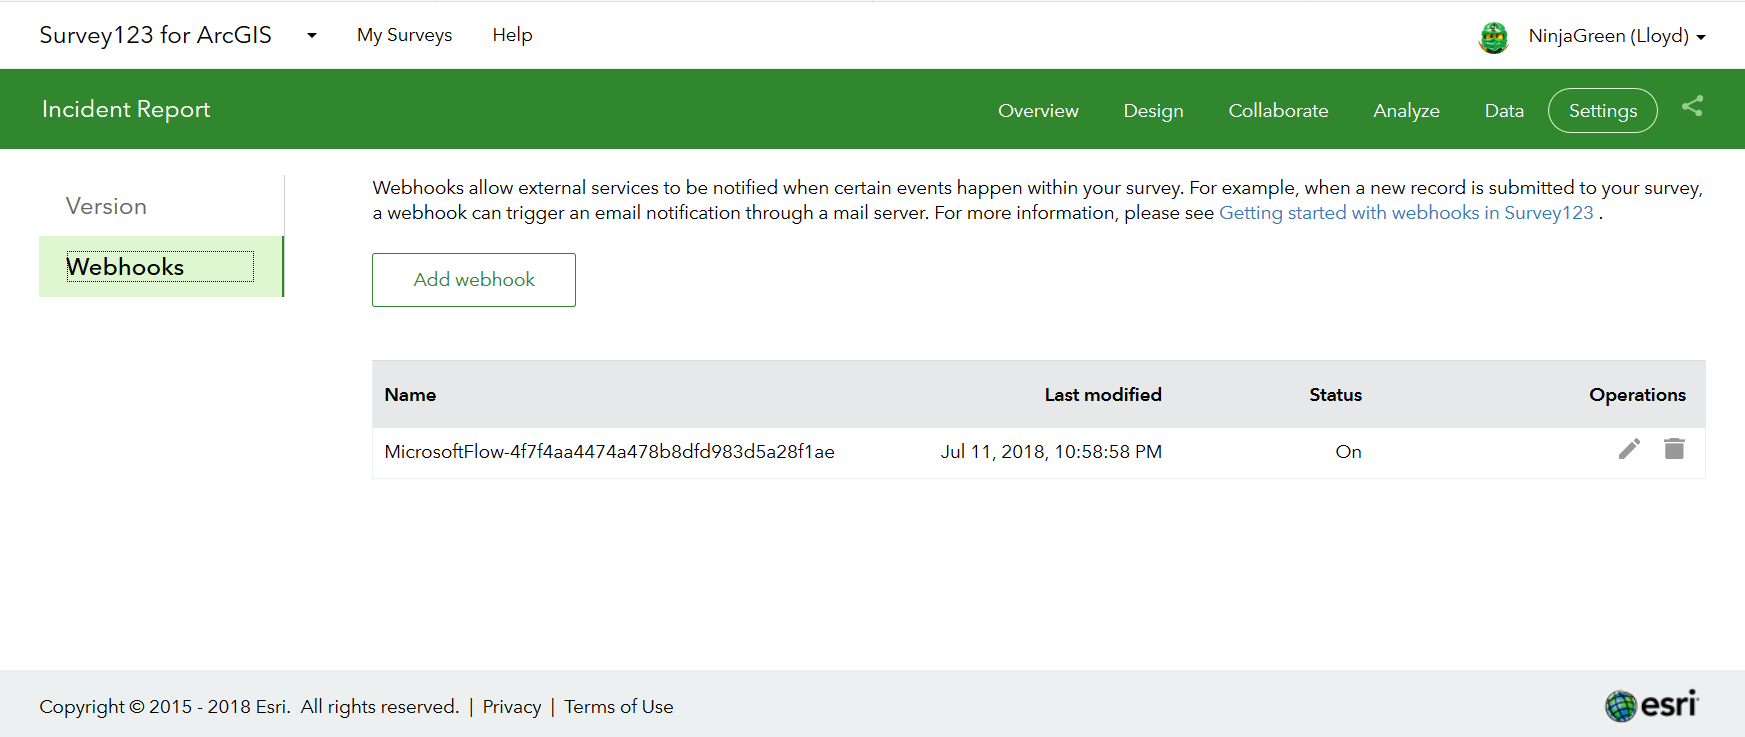
You really do not need to setup webhooks manually when using Power Automate but the webhook dialog can be of interest in case you are working with other Workflow Automation services or with your own custom developed web service end points.
Known limitations and roadmap:
I believe that with this first implementation of the Survey123 Connector you will be able to do quite a bit, but there are some known limitations I want to highlight:
- Attachments are not going to be exposed in the Dynamic Content dialog. You cannot reference attachments manually either. We are working towards enabling access to attachments within Flow in a future release (planned for version 3.10). Implemented in 3.10.
- Data from repeats will also be missing in your Flow at the moment (planned for version 3.10). Implemented in 3.10.
- The Microsoft Automate connector is not compatible with ArcGIS Enterprise (tentatively planned for Q4 2020)
- « Previous
-
- 1
- 2
- 3
- Next »
You must be a registered user to add a comment. If you've already registered, sign in. Otherwise, register and sign in.