- Home
- :
- All Communities
- :
- Products
- :
- ArcGIS Maps for Adobe CC
- :
- ArcGIS Maps for Adobe CC Blog
- :
- Fantasy Maps in Illustrator with Maps for Creative...
Fantasy Maps in Illustrator with Maps for Creative Cloud
- Subscribe to RSS Feed
- Mark as New
- Mark as Read
- Bookmark
- Subscribe
- Printer Friendly Page
Cartography and data visualization are fed by the confluence of art and science. For this reason, it should be no surprise that many of us cartographers also spend a lot of time drawing, painting, and illustrating. Personally, I find partaking in fine arts to be an important exercise in becoming a better map maker. Oftentimes, when I blog or tweet about a map that I'm working on that takes on a more whimsical or artistic expression, people will ask me "Have you ever made a gaming or fantasy map?" In fact, I've been asked whether or not I've made a fantasy map so many times, that I decided to make one.
A preview of the Kystfjell fantasy map

The land in my fantasy map is called "Kystfjell" (pronounced kist-fyell, but feel free to say kist-fell), which translates from Norwegian to "coastal mountains." Kystfjell exists in a story that I began writing about two years ago. In this post, you'll learn about the tools I used to make the Kystfjell map. I'll share some initial considerations that I took, and how you can use the ArcGIS Maps for Adobe® Creative Cloud® (Maps for CC, or m4cc for short) to make your own map, fantasy or real, in Adobe Illustrator. I also wrote this Part II post about my design of the Kystfjell map, along with some free Adobe Illustrator assets based upon this map that you can use to design your own map!
Becoming a location scout and set decorator for your fantasy map
Location scouting is an important part of film making. A film's location needs to stay true to the story's ambience, weather, topography, and other environmental characteristics. Once a location scouting team finds the right spot for filming, set decorators can use props, costumes, lighting and other design elements to transform the location into the story's appropriate time period, or even into a fantasy world. While creating the Kystfjell map, I felt like a location scout for the fantasy world that I began writing two years ago. To find the right place on realistic Earth, I imagined the local features and activities like mountain climbing, universities, houses, rivers, and battles that made sense in the fantasy world of Kystfjell. I then took on the role of set decorator when designing the map to transform this real geographic data into the land of Kystfjell. For more about Kystfjell's design process, stay tuned for part two of this blog series.
Kystfjell's setting is inspired by the combination of the Pacific Northwest - which is where I call home - and Norway. The ecology and landscape considerations are heavily influenced by Washington state's coastline, western rainforests, glaciated peaks, and dry eastern plateaus and valleys. However, Kystfjell needed to be constructed out of islands. Since many people compare the glacially carved, deep-lake gorges of British Columbia and Washington - like that of Lake Chelan - to the fjords of Norway, I made Kystfjell from coastal Norwegian islands. I then took the liberty of rearranging and manipulating the shapes of some of these islands, and even removing others. In the next section, I'll show you how I was able to take map data from those coastal Norwegian islands using the Maps for CC extension, and download them into Adobe Illustrator so that I could turn them into the fantasy setting for Kystfjell.
Now you might be wondering to yourself, "Why not just draw the islands from scratch in Illustrator?" That's a great question! That is a totally valid approach to making a fantasy map, and one that I will explore someday. Here are a few reasons you might want to leverage the power of real and free geographic data in a fantasy map:
- Real geography provides the shapes of land that were formed by real geologic processes. Using it as a starting point for my very first fantasy map felt like a good way to prevent my map from looking contrived. I wanted it to be fake, but look real.
- Getting loads of free map data into Illustrator potentially meant that I didn't need to spend time drawing a bunch of roads and other features. I could get all of these things in one single download.
- This is my favorite reason! You may actually want to transform an actual place into a fantasy world. For example, let's say you wanted to illustrate your city as a dystopian futuristic world. It would be much easier to do this using real data that makes up the streets, buildings, and neighborhoods of your city that you are hoping to dystopify. In fact, as I type out this reason, it sounds so appealing to me that perhaps this is my next mapping pursuit!
Using Maps for Creative Cloud to build your map
To build your map using the M4CC app, you'll first have to download it from the new-and-improved Adobe Add-on page. You can also find a lot of detailed documentation on Esri's M4CC help page for getting started.
The M4CC app makes mapping really easy, even for graphic designers who have never before made a map. Like a lot of mapping software, how you use it depends on the map you are trying to make. With the M4CC app, the first step in actually building the map is to draw a mapboard. A mapboard is the area that you are mapping, which will download into your Artboard in Illustrator. So, if you're building your mapboard as an 11x17-inch tabloid over Peru, your downloaded map will have an 11x17-inch Artboard in Illustrator. But, you could also use what Esri calls a webmap to build your map, in which case you can allow that webmap to inform your mapboard's size. For more info about using a webmap in M4CC, watch this video on the new features in the 1.2 version.
Mapboard Window
For my mapboard, I used the Mapboards tab to zoom into the coastal area of Kristiansund, Norway. One of the new features in the 1.2 version of M4CC is the ability to choose preset mapboard sizes. This is really useful when you're making a map to fit a specific area. I did not use the presets for my Kystfjell map, but instead used a custom 16x24-inch size and also selected to increase the level of map detail.
Note: Increasing map scale will also increase your map download time.

Defining the map area for Kystfjell
Compilation Window
After defining my map area, I needed to add data to my map in the Compilation window. By "data" I mean vector and raster map layers that will be converted into editable artwork in Illustrator. My approach for finding the right map data for Kystfjell was pretty exploratory, but I also wanted to use the VectorStreetMap available for free to M4CC users. This is a rich collection of roads, cities, parks, waterbodies, and many other things that can be used to make a map. You can find it in the Compilation Window's Search and Add Layers when browsing from Maps for Creative Cloud.
Loads of Vector Data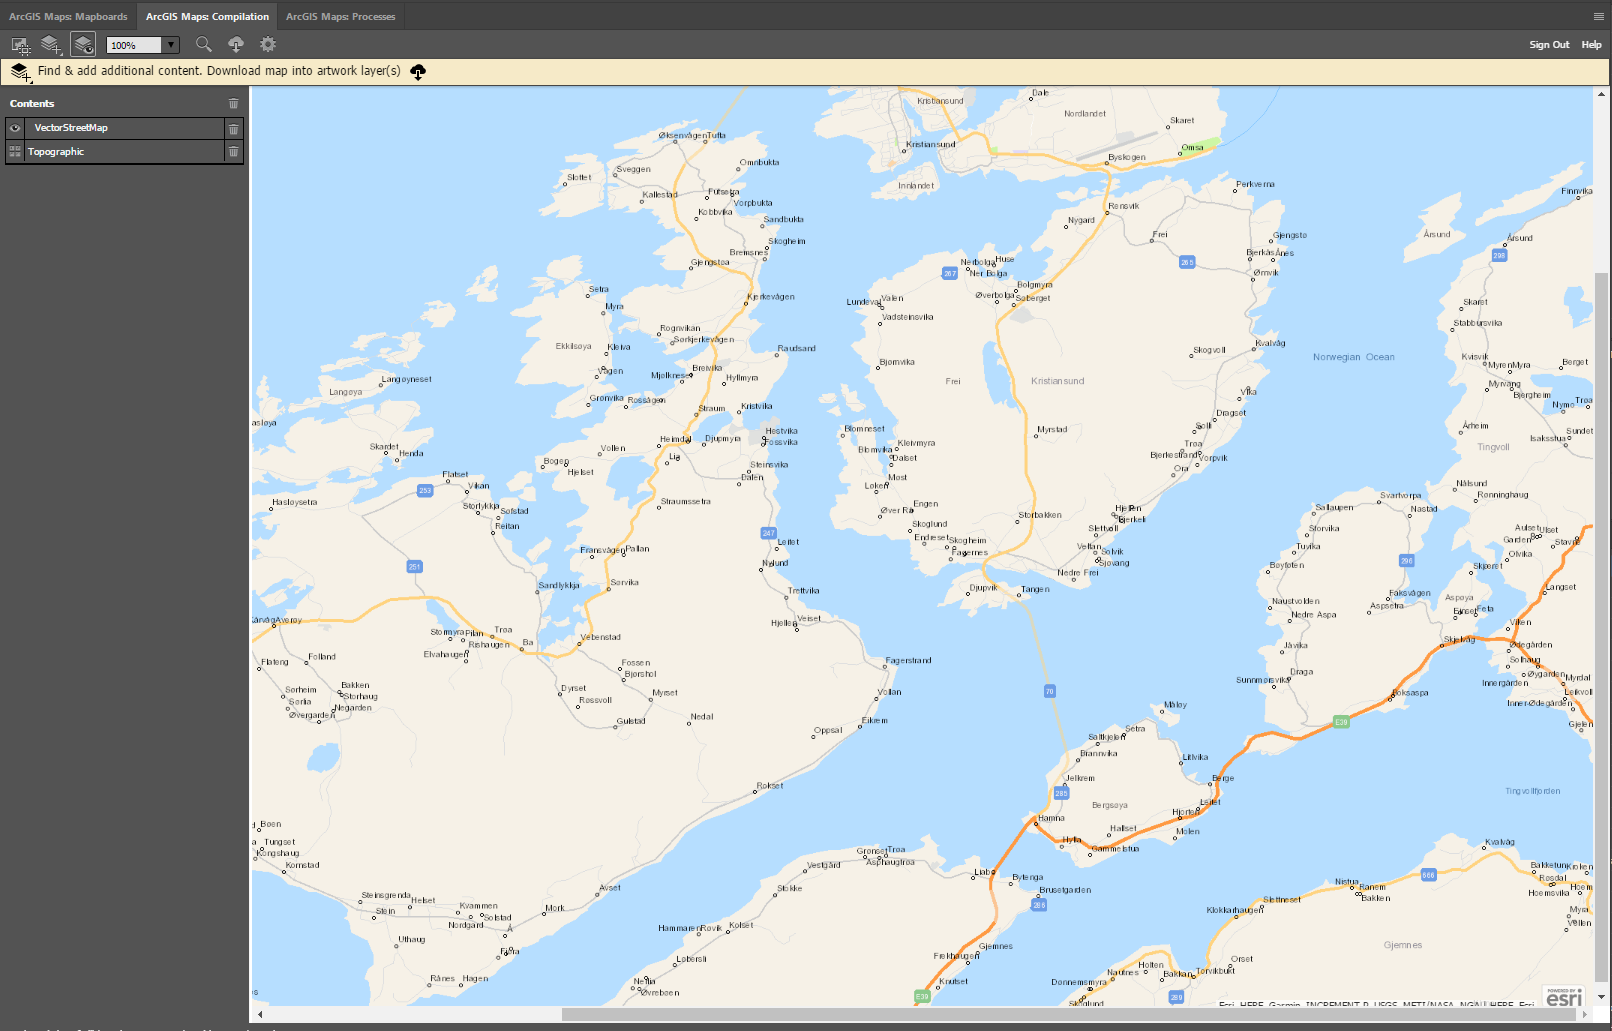
VectorStreetMap data added to the Kystfjell mapboard in the Compilation window
Now that I added the VectorStreetMap data, I used the Search and Add Layers to explore more layers that were available in this region of the world. When adding data to the Compilation window as you're building your maps, in addition to the Maps for Creative Cloud layers, you can also browse available map data on ArcGIS Online and Esri's Living Atlas of the World. The coolest part about searching for map layers with the M4CC app is that you can find these map layers while never leaving Illustrator. If you are part of an ArcGIS Online organization, you can also host and add data from there as well. Check out this page to learn more about adding data to the Compilation window.
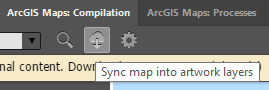
After I added what I felt was sufficient data for designing a my map, I downloaded it into Illustrator, by clicking the Sync button at the top of the Compilation window.
Processes Window
For my Kystfjell map, I did not take advantage of the useful processes in the Processes window, which is the third and final tab of the M4CC app. Briefly, the Processes window is a place to set up the M4CC app to automatically apply your own custom swatch, brush, and symbol libraries to your map as it downloads! You can also use the Processes window to customize your symbology automatically, after you've downloaded the map as well.
The downloaded map prior to designing it
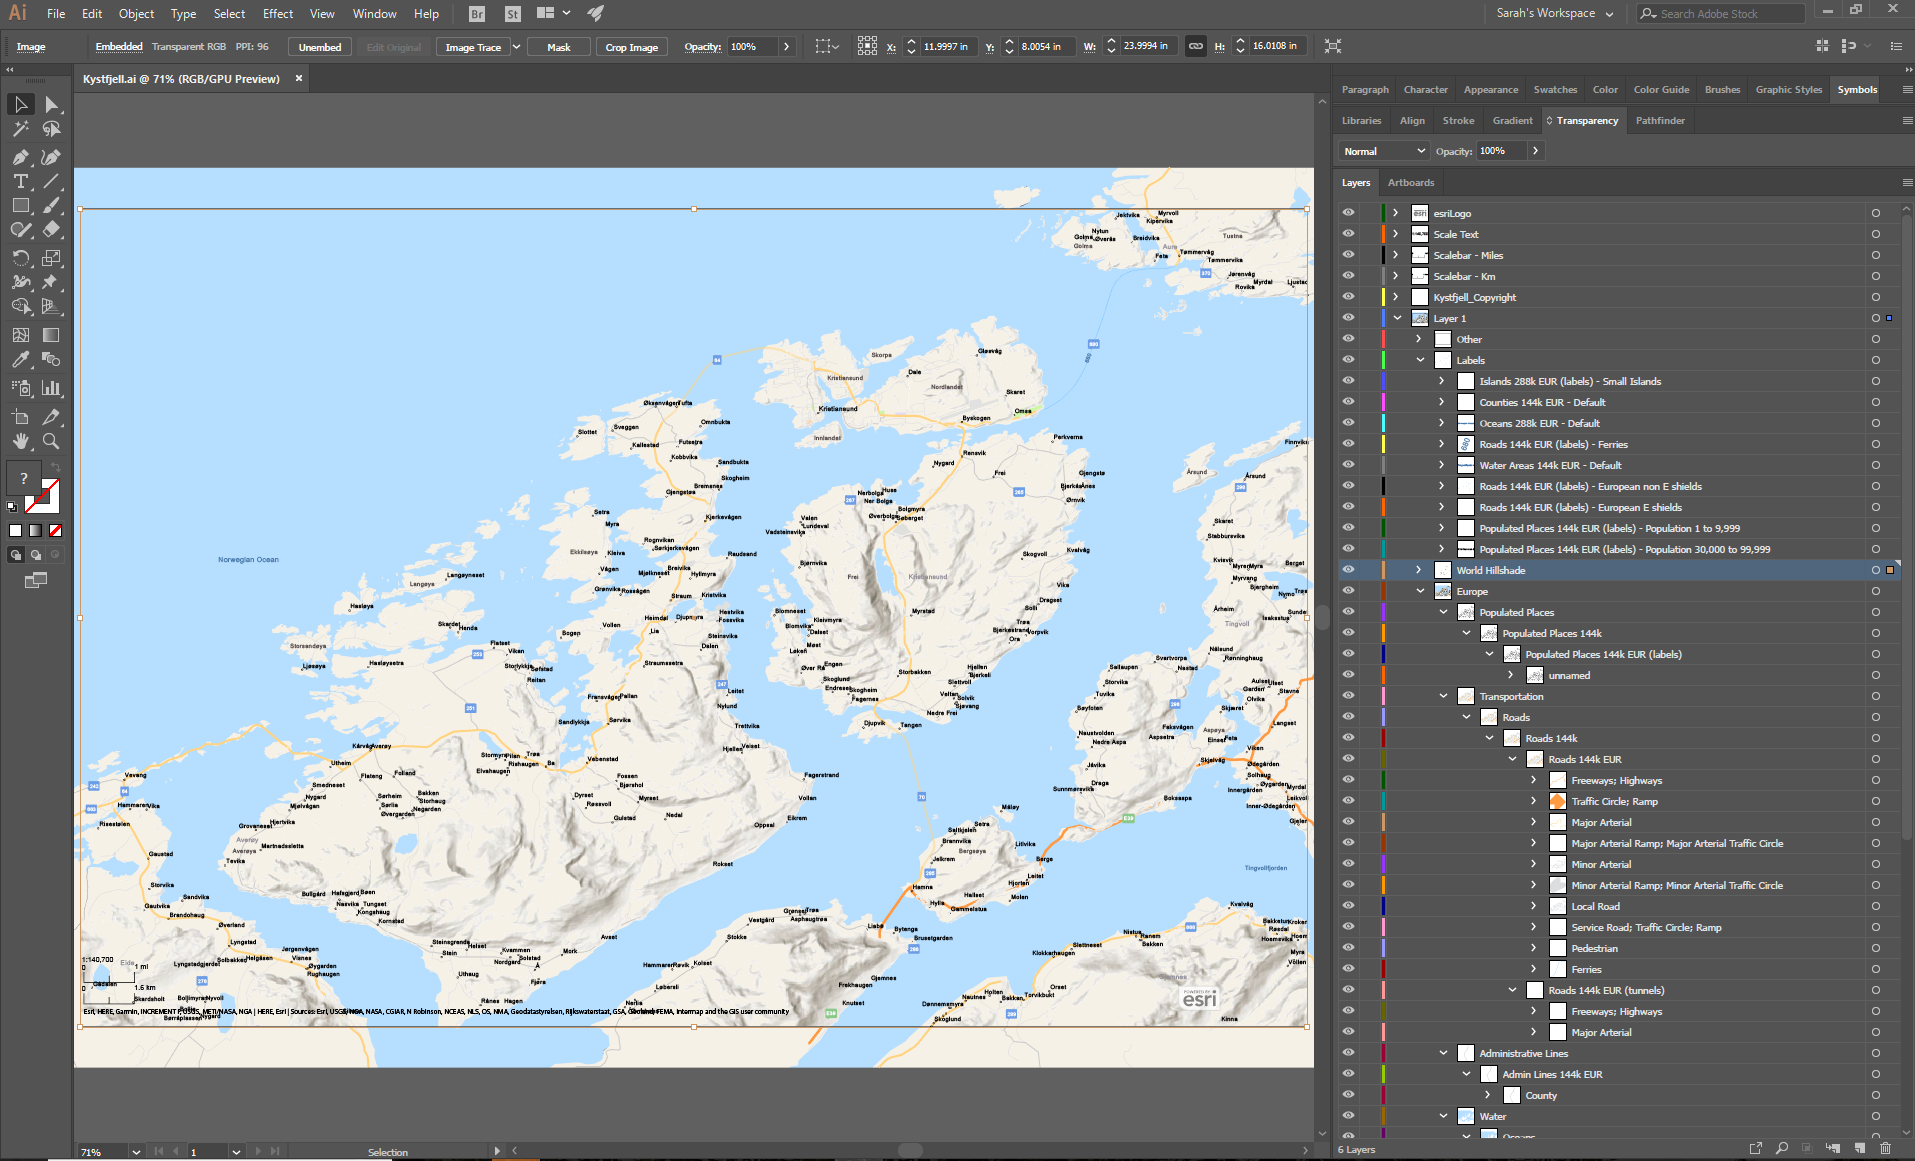
The image above shows basically what the Kystfjell map looked like in Illustrator before I started styling it. Notice that it has a convenient organized layer structure. All the city points are in one layer, and all the city labels are in their own layer as well. In fact, every data type has its own layer. This makes it really easy to get started on styling any map that you're making. Maps downloaded with the Maps for Creative Cloud extension also come with a layer of data source credits, so you don't have to spend time tracking down that information. Check out Part II, where I show which land I kept, which I moved, and which I removed to make this fantasy map.
Preview
In the next post, I also share the details about how I designed the Kystfjell map, including font choices, language and place name choices, texture, and character illustrations! For now, here is a preview of the land of Kystfjell. Enjoy!
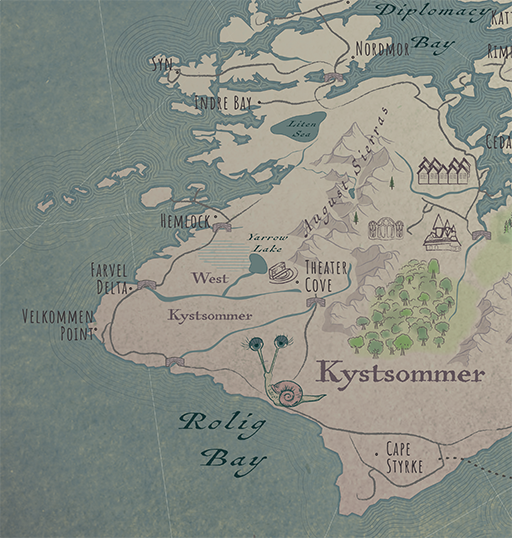
Helga the Pink, a wise gossipy snail that lives in a well traveled road intersection near Rolig Bay.
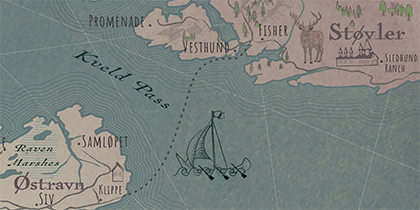
Kveld Pass, the waterway between Støvler and Østravn.
You must be a registered user to add a comment. If you've already registered, sign in. Otherwise, register and sign in.