- Home
- :
- All Communities
- :
- Products
- :
- ArcGIS AppStudio
- :
- ArcGIS AppStudio Blog
- :
- Create a Custom Version of AppStudio Player and Di...
Create a Custom Version of AppStudio Player and Distribute Apps in your Organization
- Subscribe to RSS Feed
- Mark as New
- Mark as Read
- Bookmark
- Subscribe
- Printer Friendly Page
AppStudio Player for ArcGIS is a great testing tool, it lets you instantly view AppStudio apps on a real device without requiring a full build and deployment cycle. But did you know that you can also use Player to distribute apps into your organization? And the source code of Player is available as an enterprise template in AppStudio Desktop. You can easily customize Player by configuring properties in the App Settings tool, or by editing the source code. Over the past releases, we have exposed more configuration options, such as the ability to change portal URL, branding color, and Font file, hiding certain pages, and more to help you rebrand Player easier and faster without writing any code.
Why distribute apps using Player?
Getting your app prepared for app stores is not a trivial process, with numerous steps and prerequisites involved. On top of that, it takes time for your app to be approved, and the app approval process can be a little tricky because of restrictive submission policies and need to keep updated with the latest store review guidelines and design criteria. However, if you don’t intend to make an app publicly available, and they will only be used by members of your organization, you can use AppStudio Player as your own “enterprise app store”. Just as you can share maps and data stored in your ArcGIS Organization (ArcGIS Online or Enterprise) with others, you can also share apps built with AppStudio. The end user can simply log in to AppStudio Player, download and use the app on their device. This is a safe and efficient solution for distributing apps without publishing to app stores, and it gives the app developer control of how the app is distributed.
As was mentioned early the source code for AppStudio Player is included with AppStudio as an Enterprise Templates, this means you can create your own version of Player to distribute in your organization. There are many reasons you might want to customize player; somewhat an app that includes their own branding (colors, logos, etc.), you may want to remove some of the default feature and tools, and others might go as far as adding completely new functionality through code.
Here are some key points we want you to remember:
- It’s easy to customize Player
- Support for ArcGIS Online and Enterprise
- Simple process to install a customized Player over-the-air through a hyperlink
- Utilize Groups to share apps with organization members
- Any ArcGIS User Types with essential app bundle can log into Player
- Includes support for iOS, Android, Windows, MacOS and Linux platforms
The goal of this tutorial
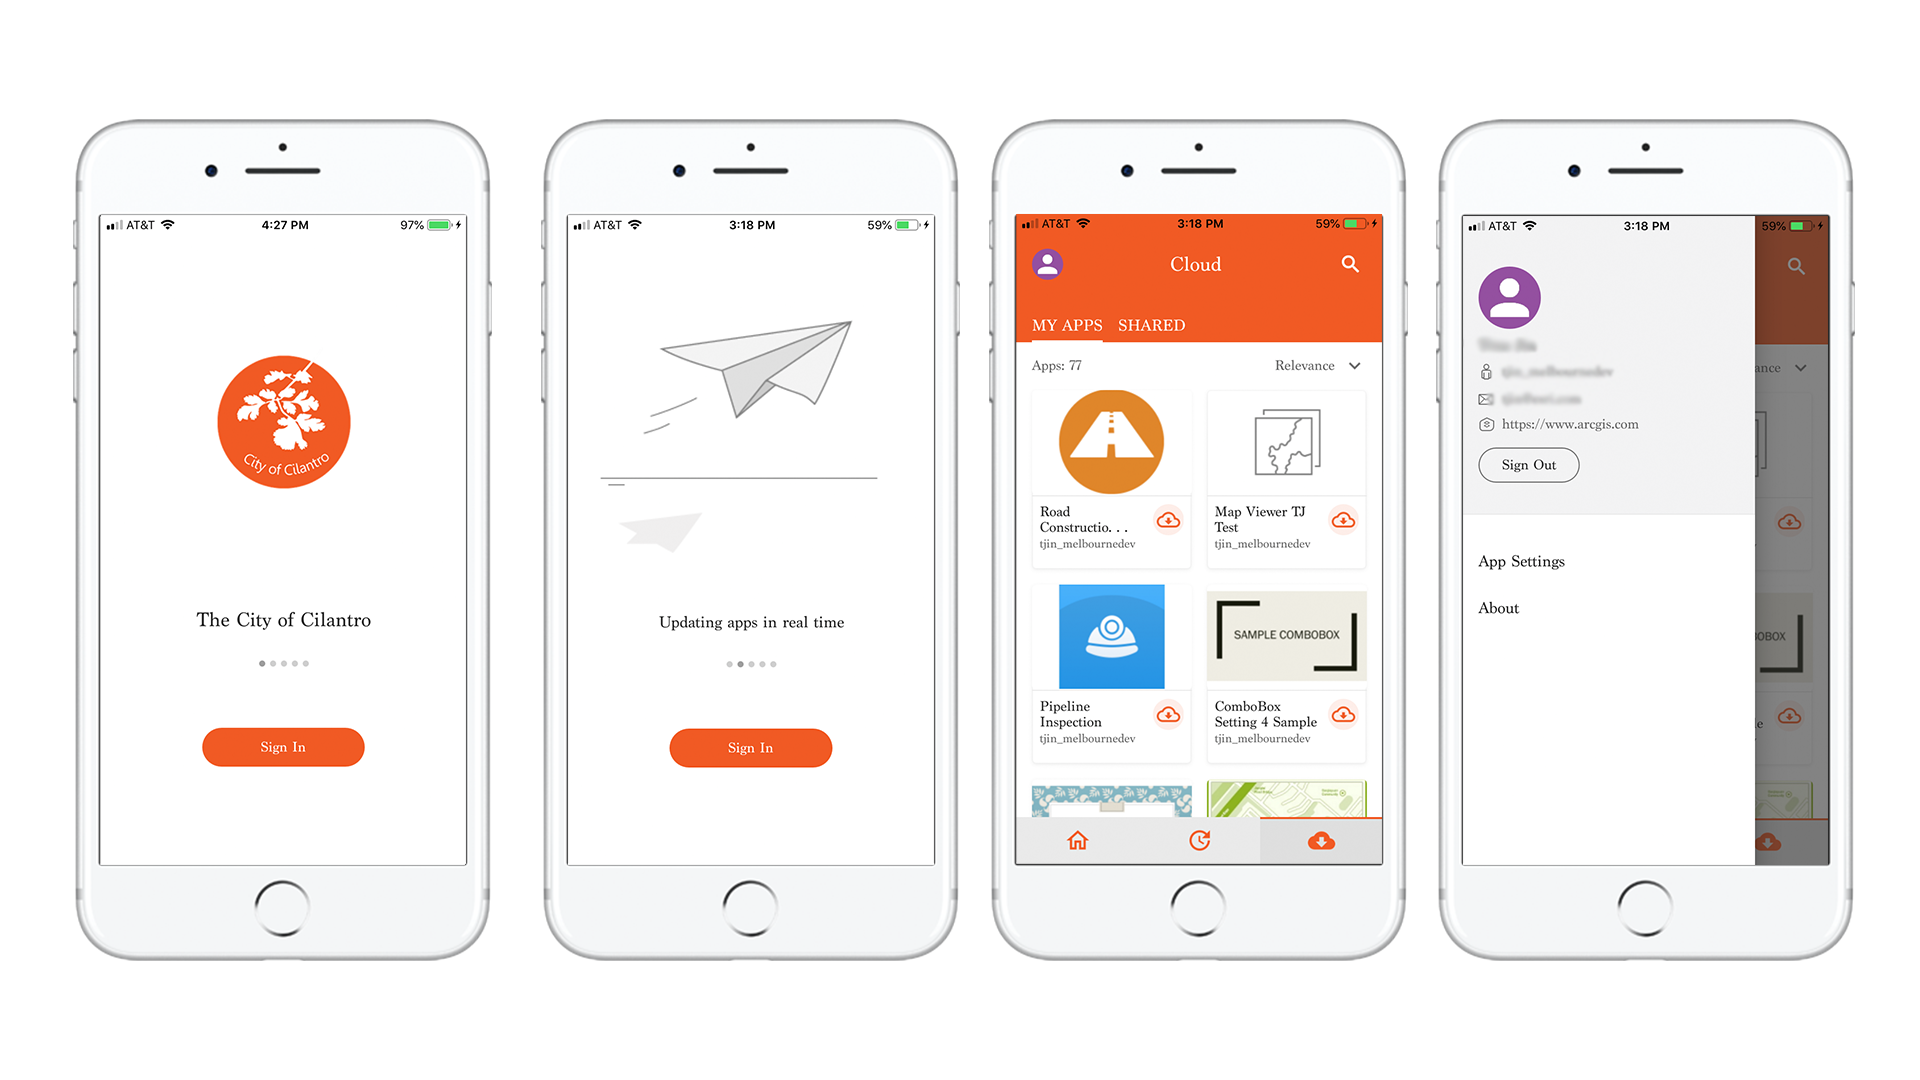
In this blog, we are going to configure the Player for the City of Cilantro with the following changes:
- Changing app icon and title
- Changing branding colors
- Changing onboarding images and messages
- Hiding the Skip button on the onboarding page
- Hiding the Samples page
- Hiding Capabilities, Devices, and Licensing sections in the App Details page
- Hiding Scan QR code, Diagnostics, and Remote Console options in the side menu
- Hiding the Dark Mode option in the App Settings tool
The final app will look like the images below.
Time: 15 minutes
Note: An AppStudio Standard License is required for this tutorial. If you don't have one, please follow this video to register a trial account.
How to configure AppStudio Player?
Step 0. Downloading AppStudio Desktop and attached resources folder
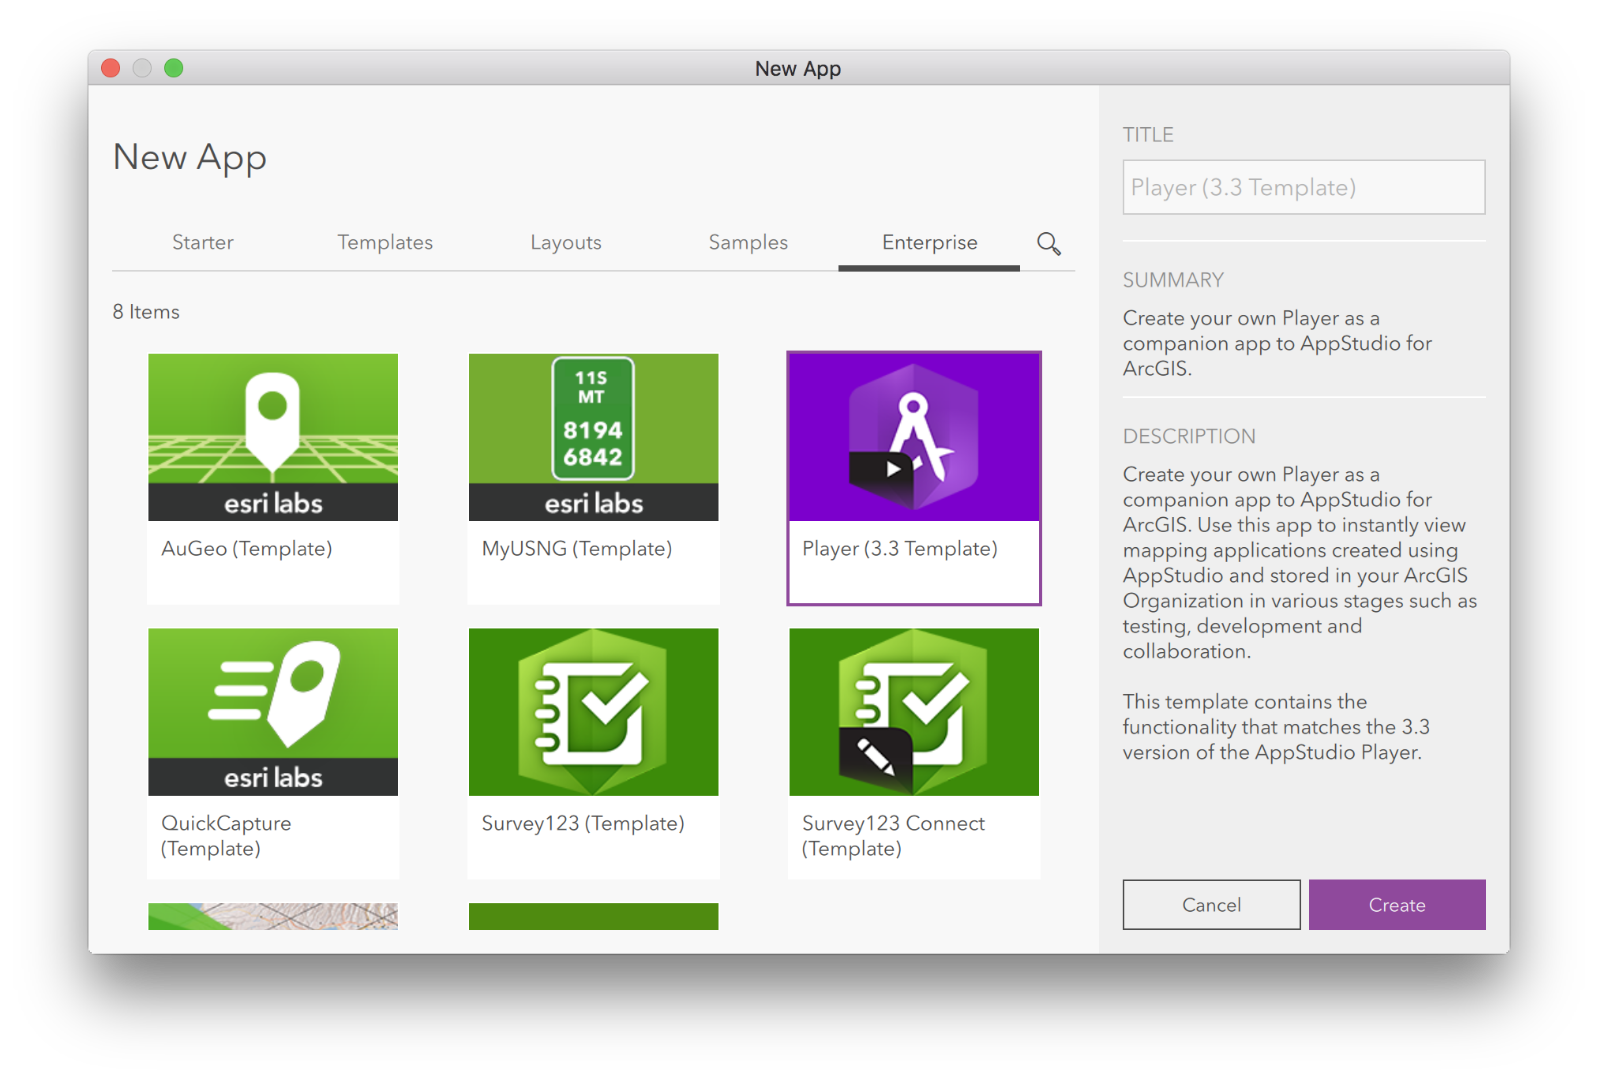
Step 1. Creating a new app using the Player enterprise template
- Open AppStudio Desktop
- Click on the “New App” button
- Go to the Enterprise tab
- Double click on the Player (3.3 Template) thumbnail to create a new Player enterprise template app
- Click on the Edit Title icon on the side panel to rename the app to “The City of Cilantro"
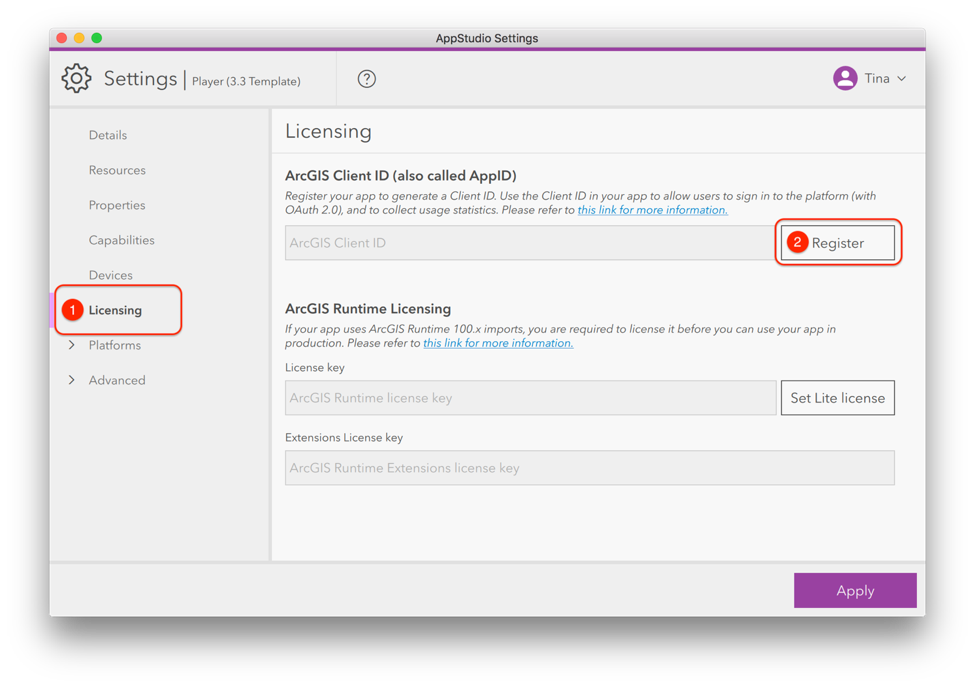
Step 2. Registering your application
To allow users to sign in to your app with OAuth 2.0 (a standardized authorization framework), you will need to register your app to generate an ArcGIS Client ID (or App ID). To do this:
- Select your app and click on the Upload button to upload your app to ArcGIS Online or ArcGIS Enterprise
- Click on the Settings tool on the side panel
- Click on the Licensing from the left-hand side navigation menu
- Click on the Register button and Apply button
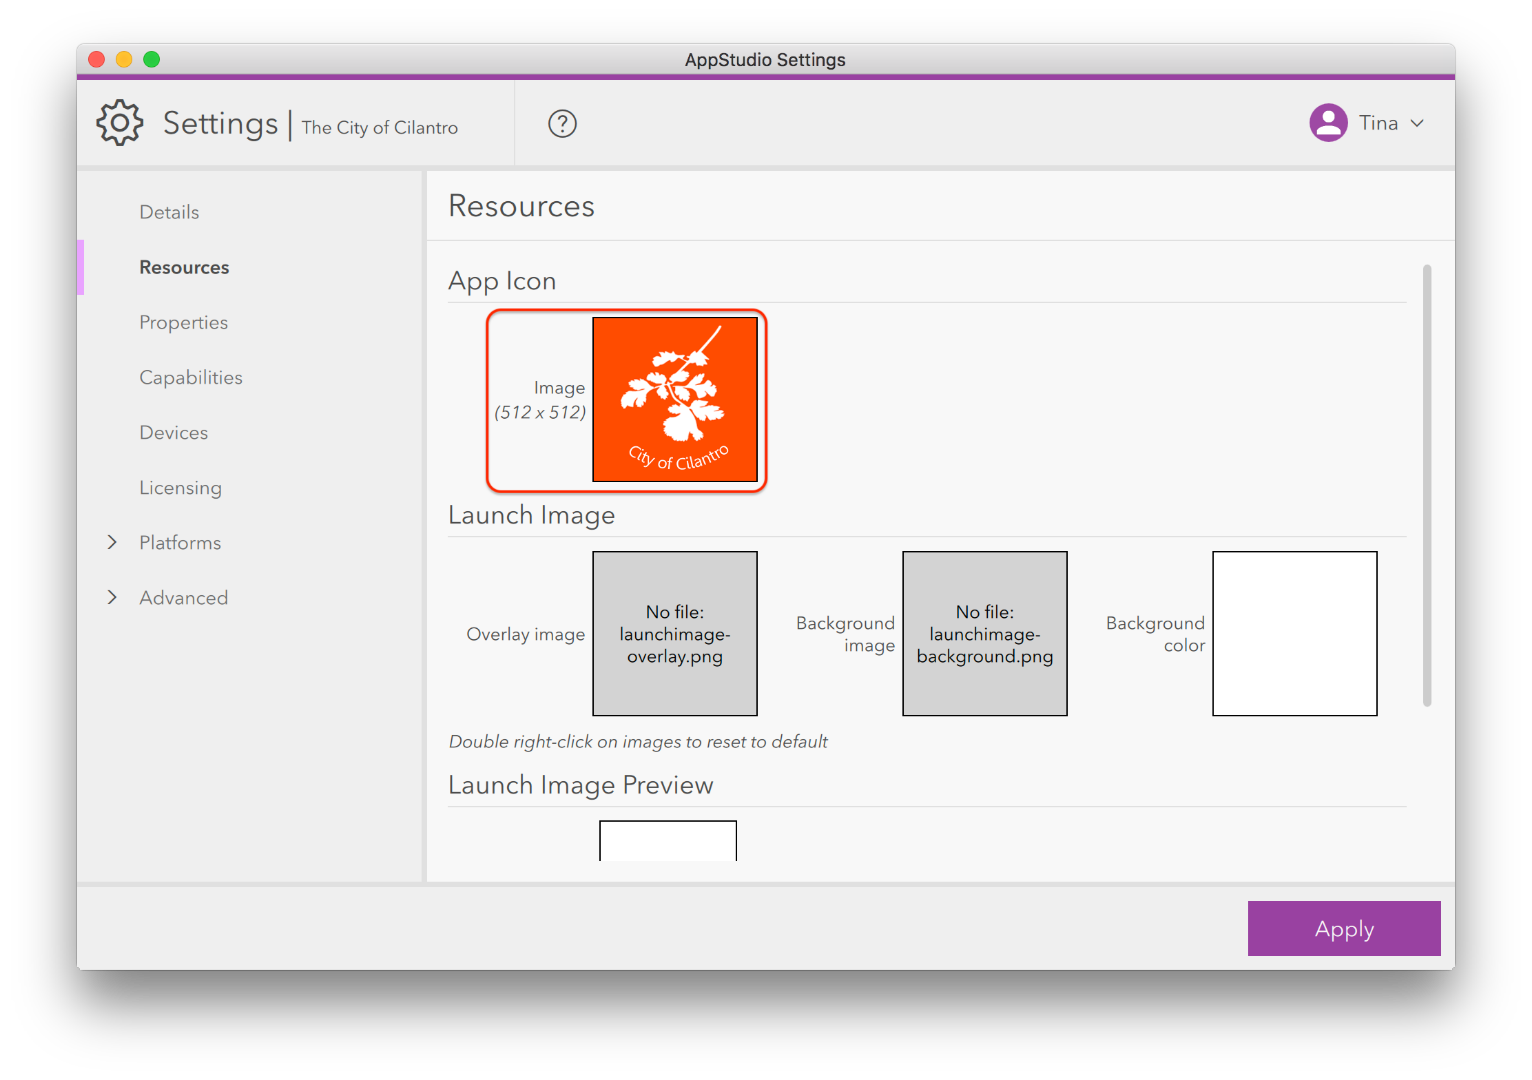
Step 3. Configuring Player Enterprise Template
- Select the app you have created from Step 1, then click on the Settings tool.
- Click on the Resources from the left-hand side navigation menu and change the App Icon into the Icon - City of Cilantro.png from the attached resources folder.
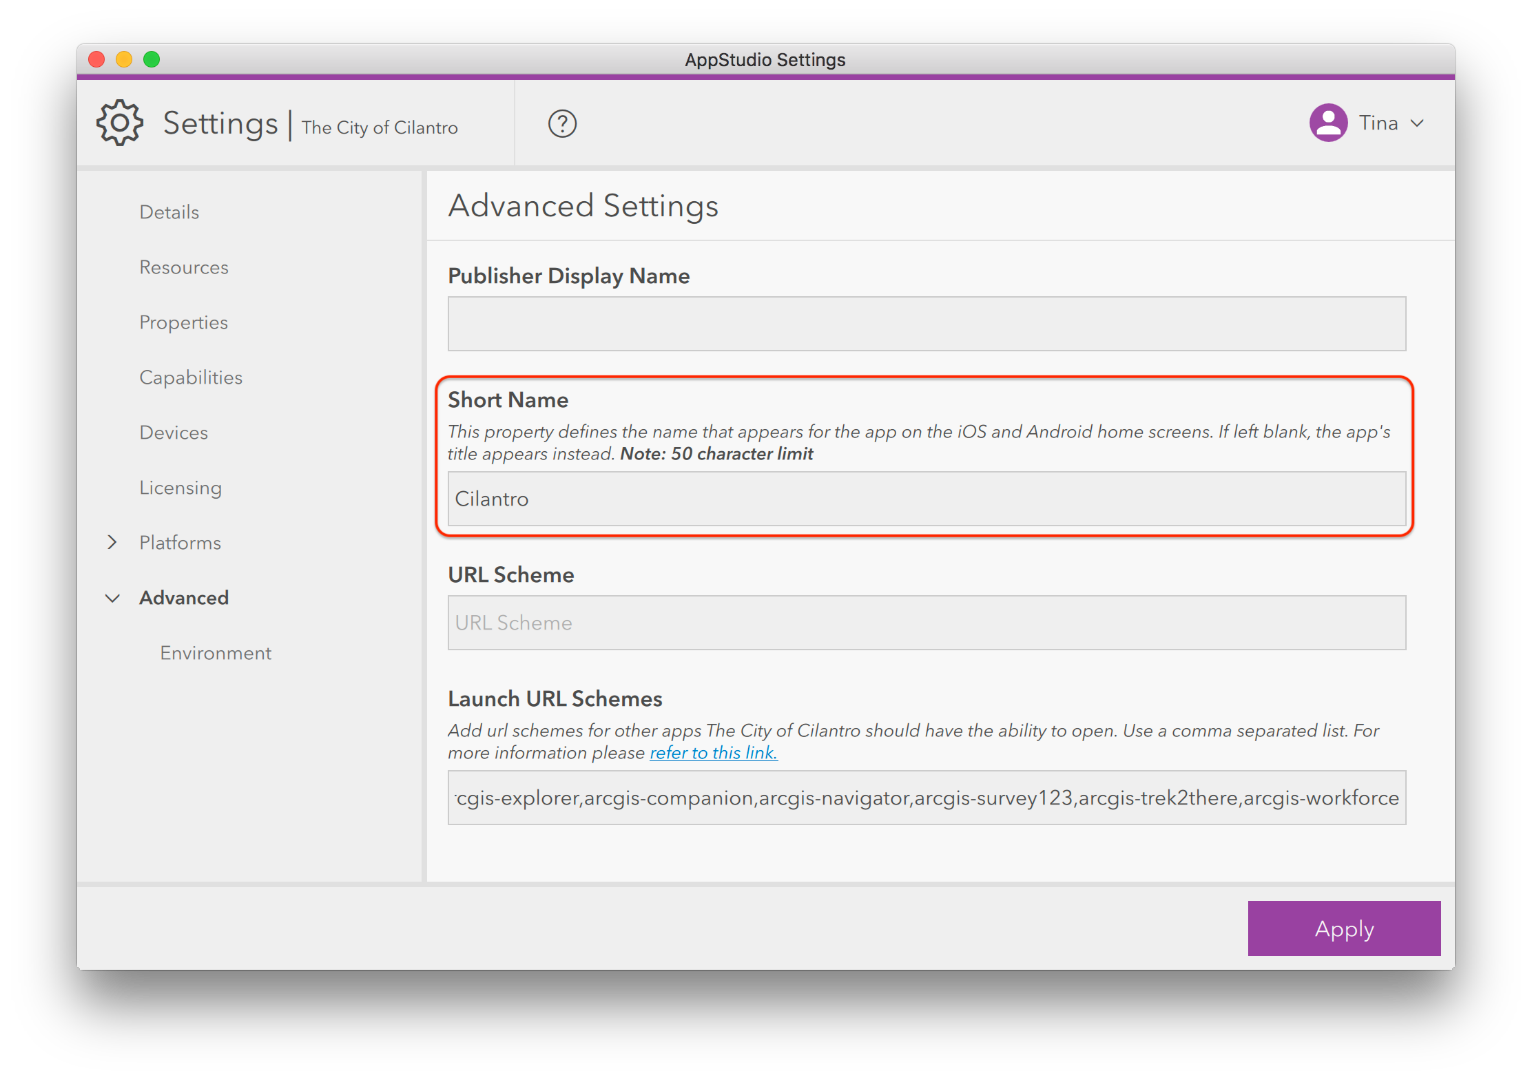
- Click on the Advanced from the left-hand side navigation menu and add “Cilantro” in the Short Name field.
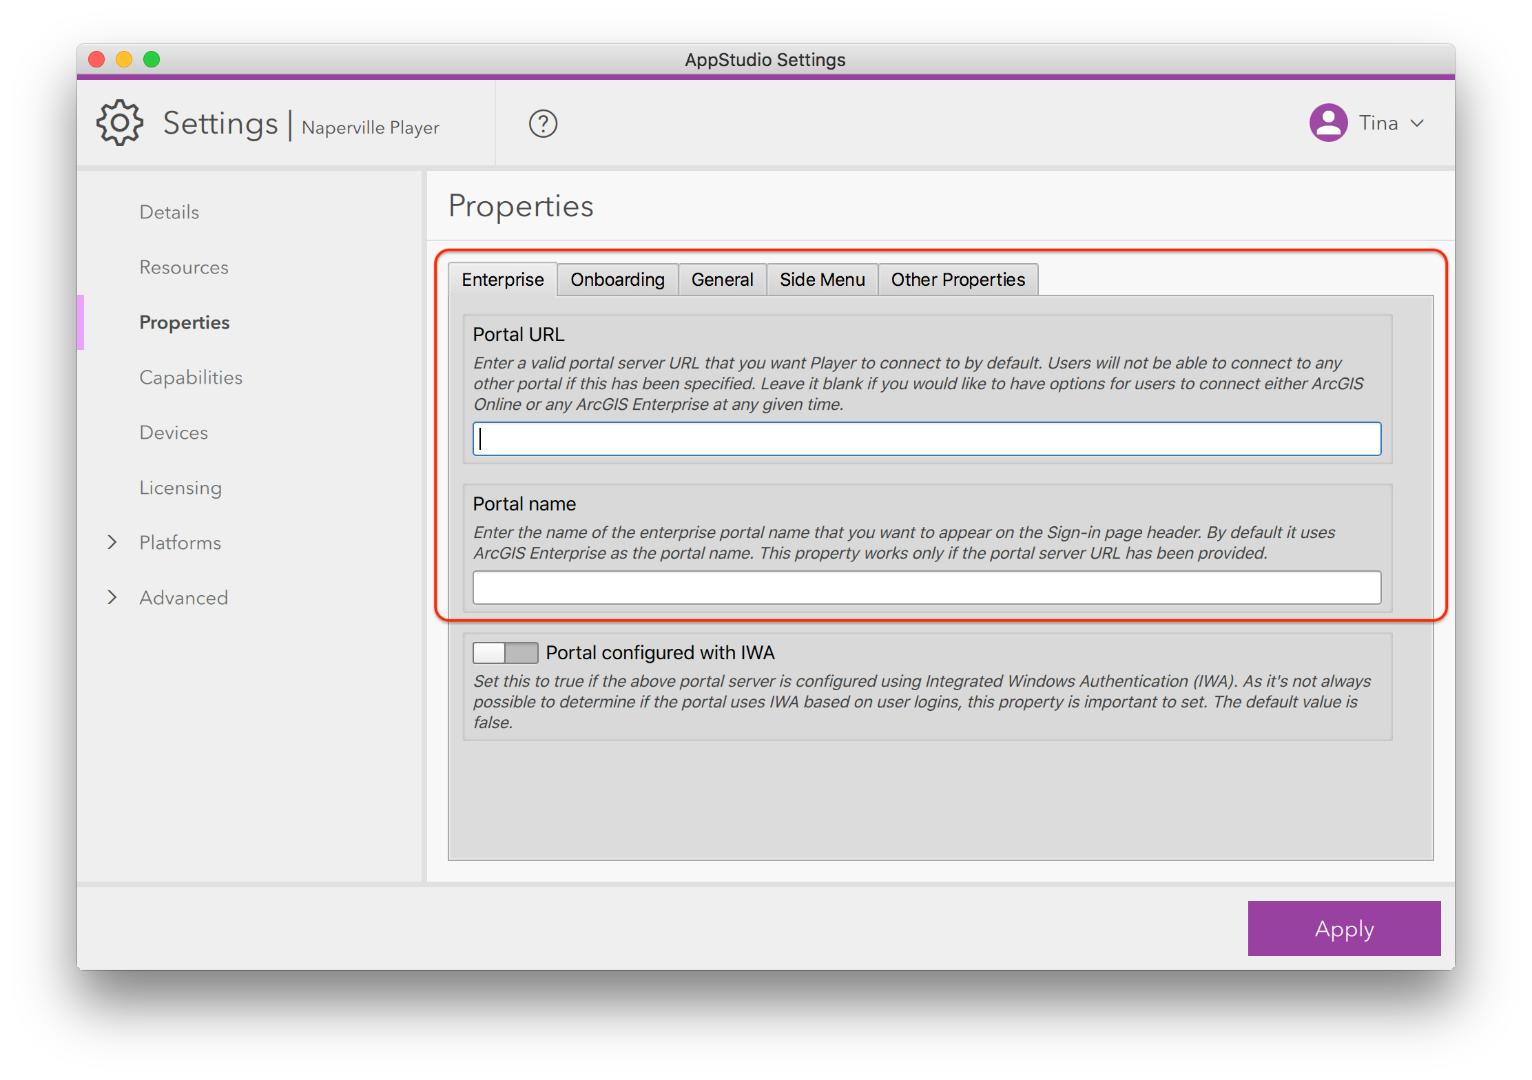
- Click on the Properties from the left-hand side navigation menu, and then Enterprise tab.
- If you have a portal, you can add your own portal URL and name in the Portal URL and Portal name You can skip this step if you don’t have a portal
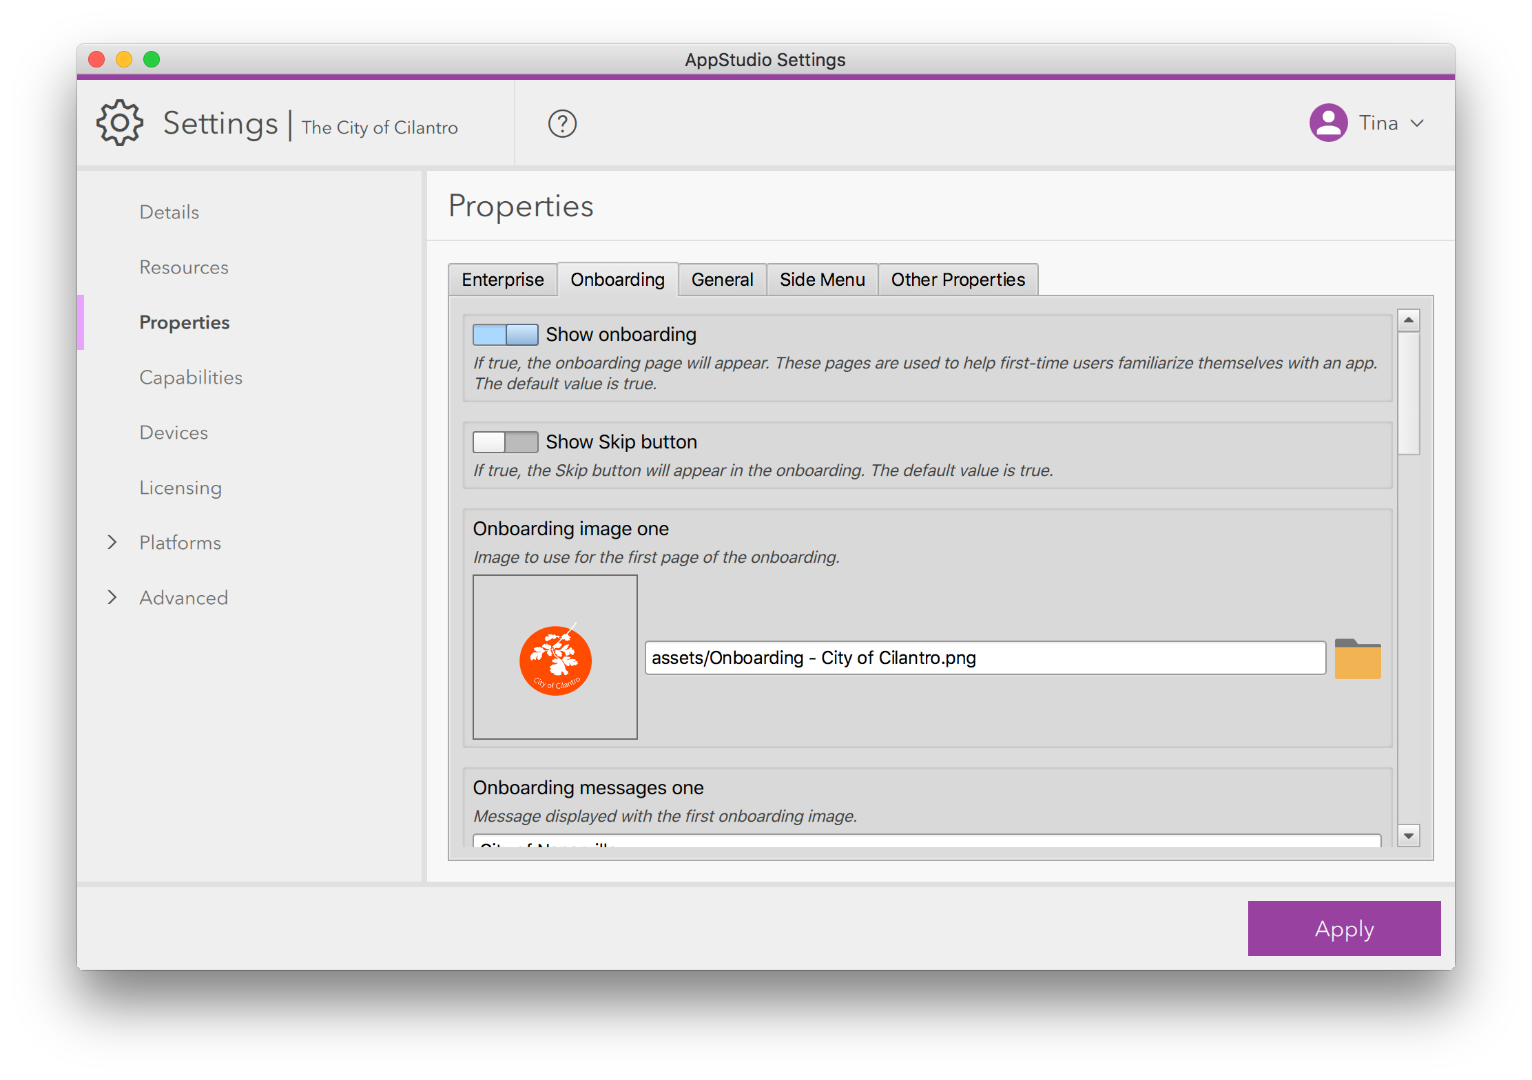
- Go to the Onboarding tab and turn off the Show Skip button. Select the onboarding_Cilantro.png image from the attached resources folder as the Onboarding image one and enter “The City of Cilantro” into the Onboarding messages one field. Provide your own images and messages for the rest onboarding pages.
- Go to the General tab, enter the hex code of the brand color #f15a24. Turn off Show Sample Page and Show Capabilities, Devices, and Licensing sections.
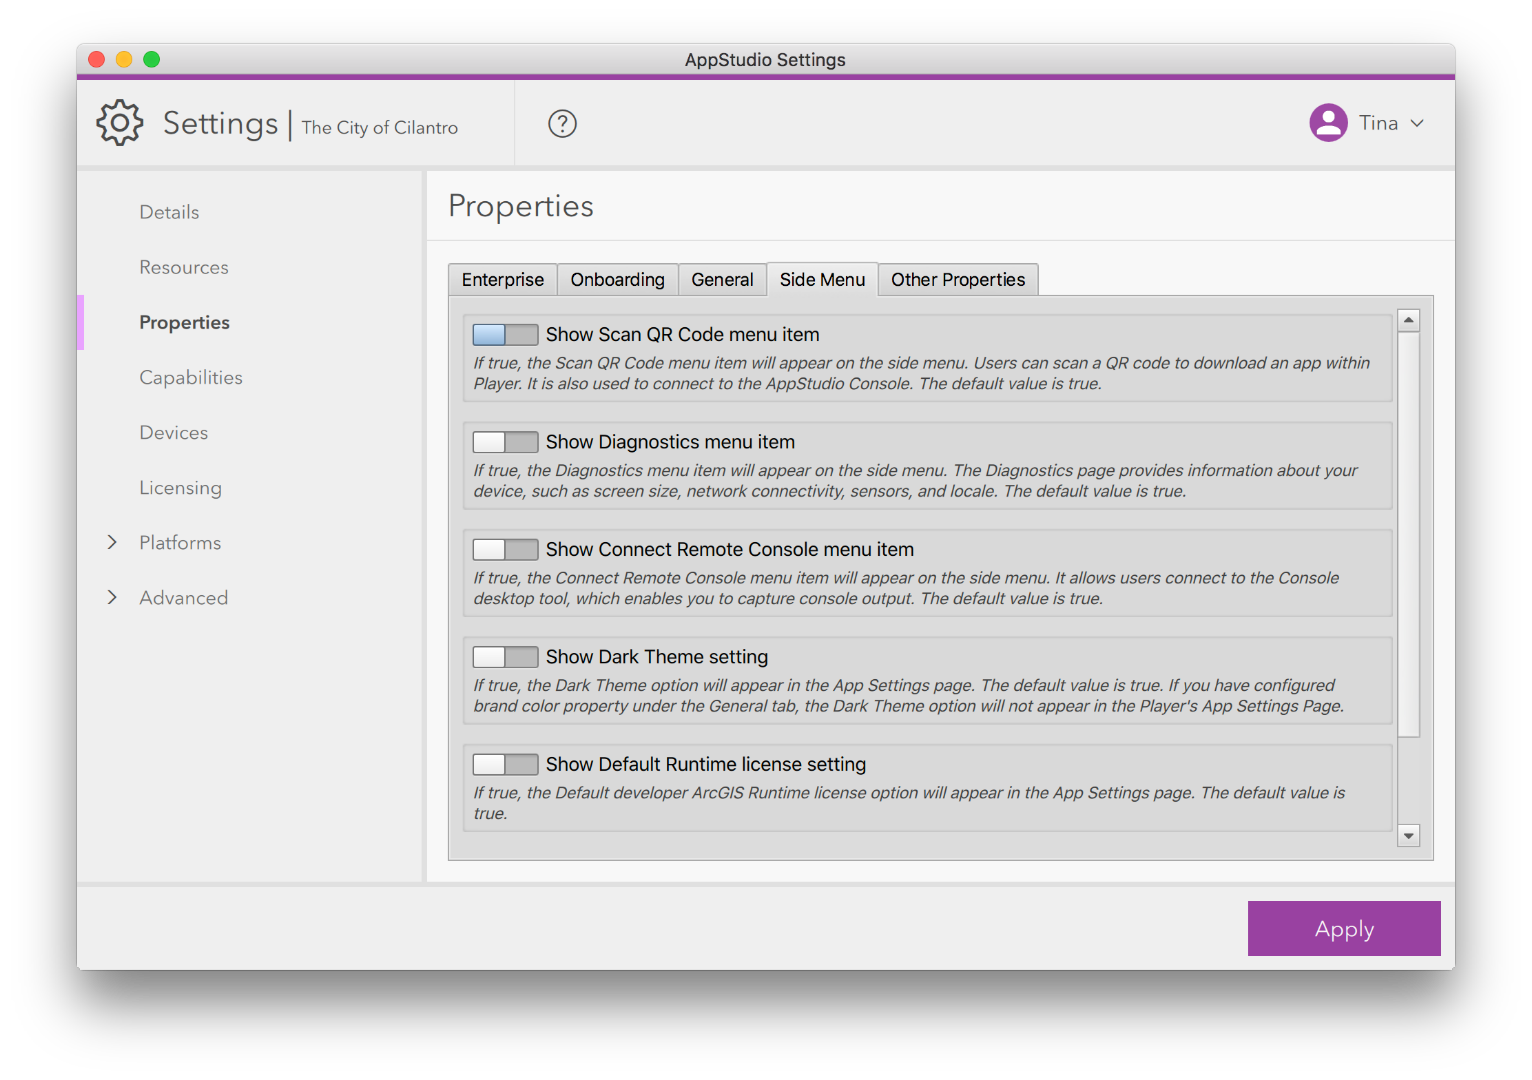
- Go to Side Menu, turn off all the properties and enter a preferred email into the Feedback.
- Click on the Apply button and run the app to see if your customized Player recognizes your settings.
Note: Please do not download and test your configured Player in AppStudio Player. If you wish to test on a mobile device, use the Make to create app installation files. This requires an Apple Developer account if you are going to create a build for iOS.
Step 4 Editing Player’s source code
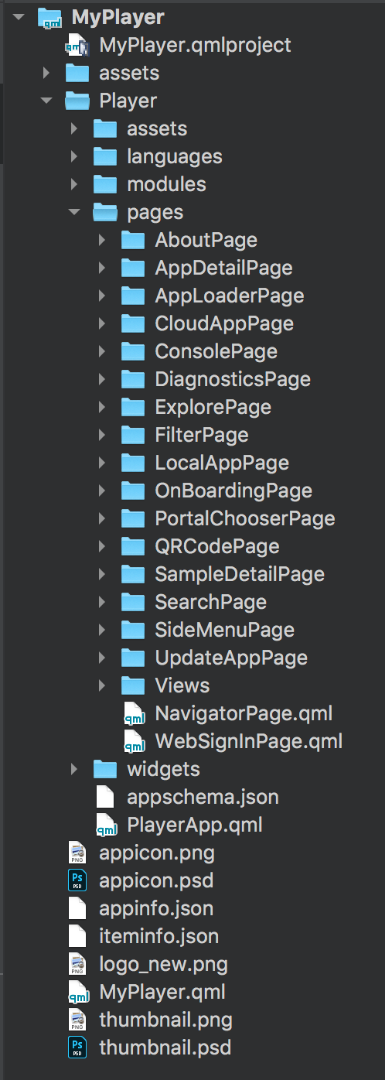
If you wish to customize Player further, you can edit the source code of the Player by clicking on the Edit icon in the side panel to open the Qt Creator IDE. Then expand the MyPlayer folder on the left-hand panel to open the structure of the Player app. You can navigate to the desired files and modify the source code.
We hope you find this blog helpful. We want to hear from you and continue to improve Player’s configuration experience to make it as easy as possible. Don't hesitate to email your feedback to [email protected].
Become an AppStudio for ArcGIS developer! Watch this video on how to sign up for a free trial.
Follow us on Twitter @AppStudioArcGIS to keep up-to-date on the latest information and let us know about your creations built using AppStudio to be featured in the AppStudio Showcase.
The AppStudio team periodically hosts workshops and webinars; please click on this link to leave your email if you are interested in information regarding AppStudio events.
You must be a registered user to add a comment. If you've already registered, sign in. Otherwise, register and sign in.