- Home
- :
- All Communities
- :
- Industries
- :
- Water Utilities
- :
- Water Utilities Documents
- :
- 3D Tools for Sewer
- Subscribe to RSS Feed
- Mark as New
- Mark as Read
- Bookmark
- Subscribe
- Printer Friendly Page
3D Tools for Sewer
3D Tools for Sewer
What are 3D Tools for Sewer?
3D Tools for Sewer simplifies and automates the process of creating 3D visualizations of sewer systems. Visualizing sewer data in 3D helps organizations gain a better understanding of their sewer systems and serves as a quality control check for GIS data. For assets that do not have elevation data or have inconsistent 3D data, interpolation can be used to create 3D representations.
Benefits
The following are some benefits of using 3D Tools for Sewer:
- Get beyond missing or inconsistent data —Many utilities often lack full elevation data or when available there are inconsistencies in the data. The 3D Tools for Sewer helps to improve the process for creating 3D features by providing multiple options to generate 3D features based on the best available data.
- Reduced time to generate 3D features— Saves time and simplifies the process to create 3D features for a sewer network, such as, mains, manholes, and laterals.
- Packaged project file—Get immediate hands-on experience with the 3D Tools for Sewer project file, which includes sample data and tasks to guide you through creating 3D features for sewer.
A quick tour of 3D Tools for Sewer
This solution contains the Interpolate Z values tool, Calculate Z from slope tool, and a project file with embedded tasks.
- Interpolate Z values—The Interpolate Z values tool allows you to create 3D point and line features such as mains and manholes using existing elevation data and by configuring the tools interpolation methods. These interpolation methods include specifying existing elevation fields in data to create a triangulated irregular network (TIN) and using an elevation surface with an offset value.
- Calculate Z from Slope— The Calculate Z from slope tool allows you to create 3D service line features, which can be difficult to create since they often lack elevation information. To create these features, the tool uses a specified slope and a known z-value from the nearest main.
- Project file with tasks— The 3D Tools for Sewer project file contains tasks that help guide you through how to use the solution to create 3D features.
Get started with 3D Tools for Sewer
Follow the steps below to get started with 3D Tools for Sewer:
1. System requirements
Before you begin working with 3D Tools for Sewer, the following software is required:
- ArcGIS Pro 2.2 (Standard or Advanced)
- ArcGIS 3D Analyst extension
2. Install the 3D toolset
To install the 3D toolset, follow the steps below:
Create a new environment
- Start ArcGIS Pro and create or open a project.
- On the Project tab, click Python to access the Python Package Manager.
- Under Project Environment, click Manage Environments.
- Click New to open the Create New Environment dialog box.
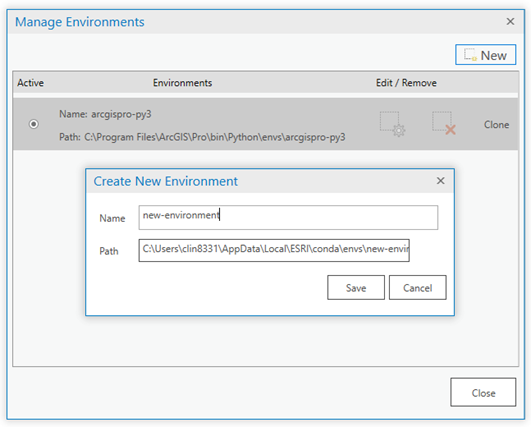
- Give your new environment a name and click Save.
- Note: Creating a new environment for the first time will take a few minutes to complete.
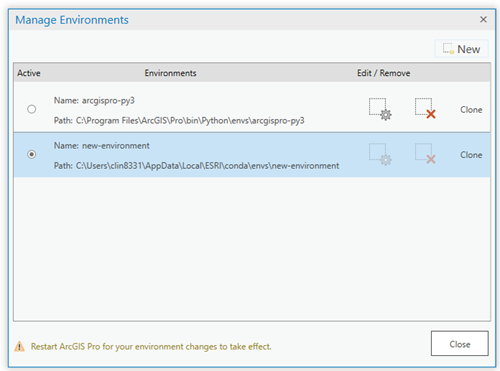
- Toggle the new environment to Active, and click Close.
Install tools
- In the Windows Start menu, browse to the ArcGIS
- Click the drop-down arrow next to ArcGIS and click Python Command Prompt to open the window.
- Verify that the first line of code displays the name of your cloned environment before continuing. Once confirmed, type
conda install -c solutionsdev/label/beta utilsolutions and click Enter.
- When the install is complete, close the Python Command Prompt and open ArcGIS Pro to confirm that the Utility Solutions Tools toolbox has been added.
3. Get started with the 3D Tools for Sewer project
Download the 3D Tools for Sewer.ppkx file provided on GeoNet. After downloading the project file, open and browse to the 3D Tools for Sewer tasks to follow a guided workflow or use the 3D toolset in the Utility Solutions Tools toolbox to get started without a guided workflow.