- Home
- :
- All Communities
- :
- Products
- :
- ArcGIS Navigator
- :
- ArcGIS Navigator Blog
- :
- Transforming Polylines into Route Layers Tutorial
Transforming Polylines into Route Layers Tutorial
- Subscribe to RSS Feed
- Mark as New
- Mark as Read
- Bookmark
- Subscribe
- Printer Friendly Page
In this step-by-step tutorial, you will learn how to turn polylines into route layers that can be used in the upcoming release of Navigator for ArcGIS. You will need both ArcGIS Pro and Navigator at the ready.
Find other workflows for the next release of Navigator here.
The Situation
Someone recently approached our team with the desire to turn school bus routes into ArcGIS route layers. Using their own bus scheduling solution, they were able to create polylines representing the routes. They were also able to produce turn-by-turn directions; however, these were only available in print format.
In this tutorial, you’ll take two polylines, similar to what this scheduling solution produced, and convert them into route layers that can be used in Navigator for ArcGIS. Navigator will provide drivers with turn-by-turn directions on their mobile devices, even in a disconnected environment.
The Scenario
It’s summer in Portland, Maine, and two local schools have partnered up to offer students a week-long camping trip to Peaks Island. King Middle School and Jack Middle School students will board a bus at their respective schools, and then they will be driven to the Peaks Island Ferry for drop-off. You, as the school bus dispatcher, are to create the bus routes the two bus drivers will follow. You already have two existing polylines, so now it’s time for you to turn them into route layers that can be used in the field and on a mobile device.
The Solution
- Prepare a stops layer using the polyline vertices
- Create a route analysis layer and solve the routes
- Share the route layers in ArcGIS Online
- Access the route layers in Navigator for ArcGIS
Prepare your project
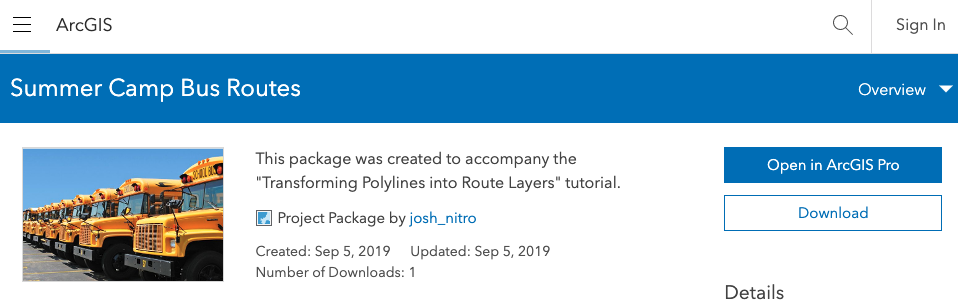
1. Download the Summer Camp Bus Routes project from ArcGIS Online.
2. Open this file in ArcGIS Pro
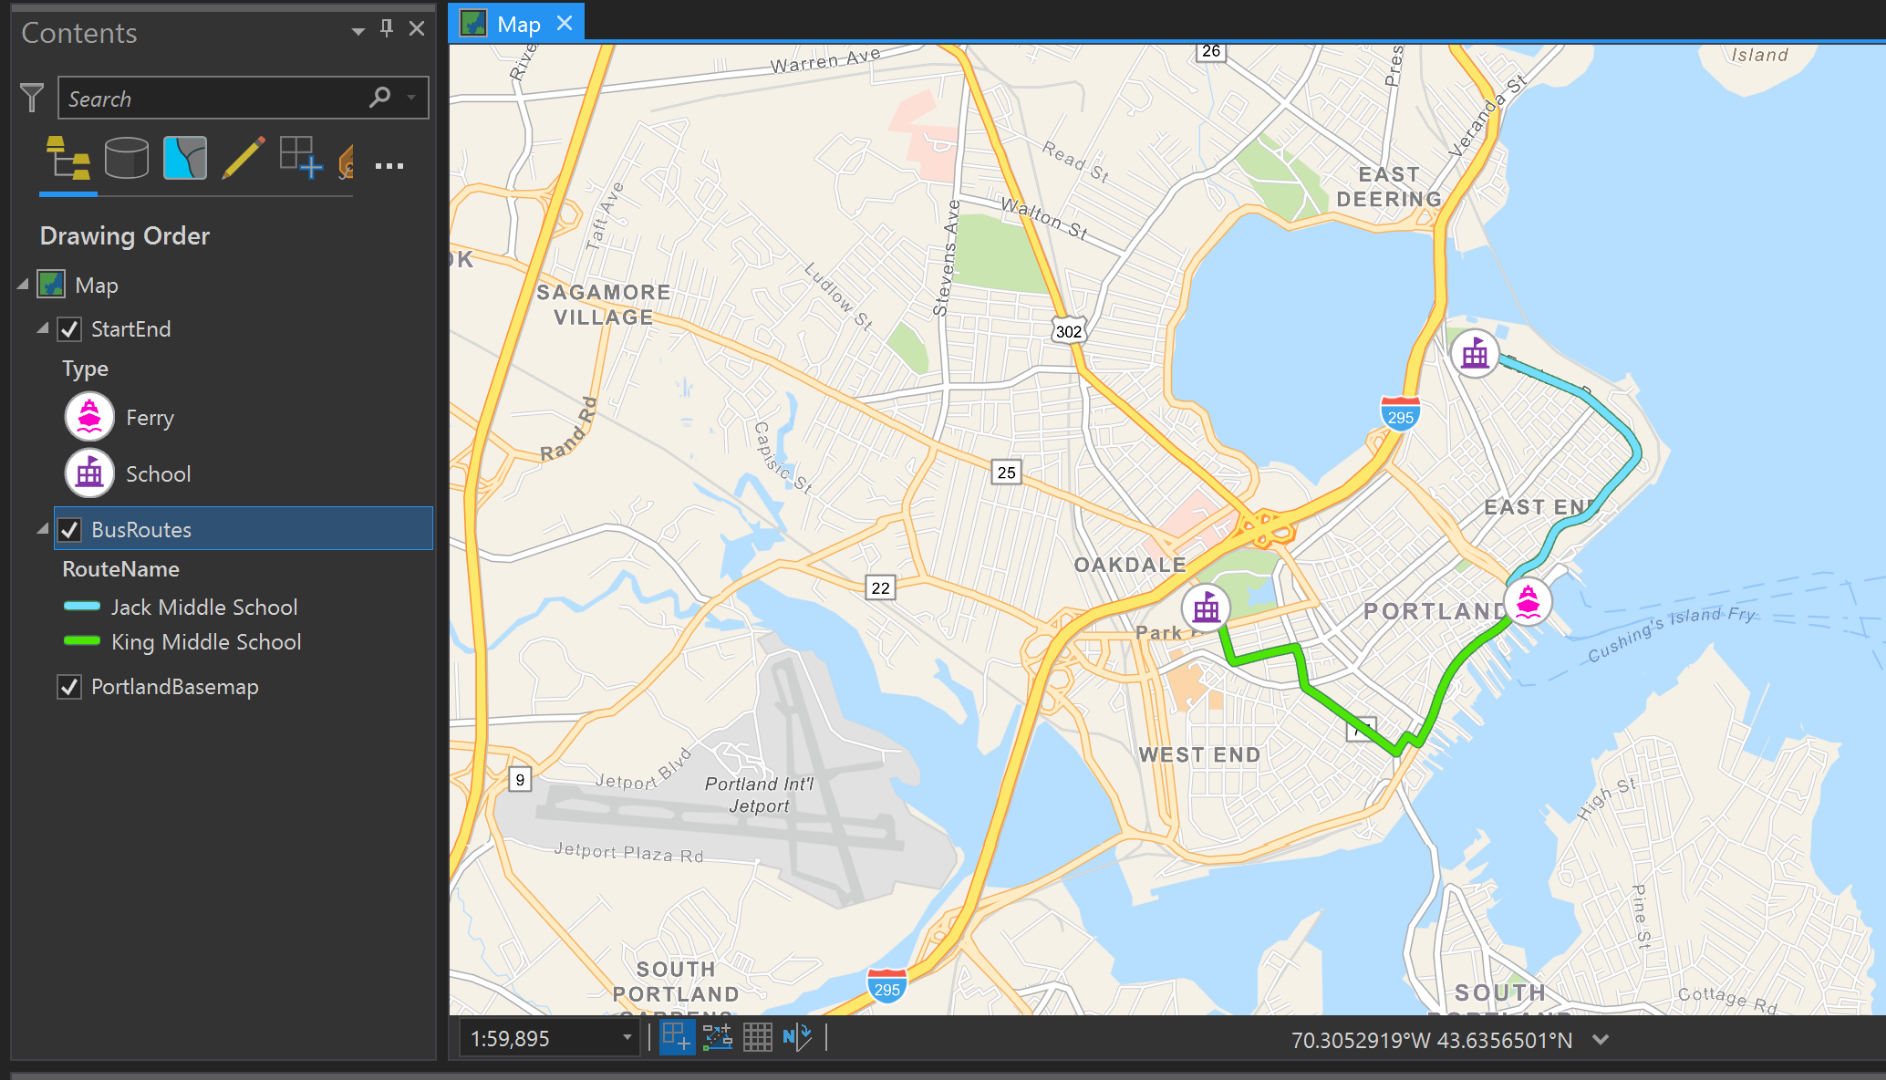
A map of Portland appears with a point layer representing the start and stop locations and a polyline layer representing the bus routes.
Convert polyline vertices into points
Every polyline is made up of vertices that generate its shape and direction. You will take the vertices that were used to create the bus route polylines and convert them into a point feature layer that can be imported into a route.
By deriving this layer from the polyline geometry, you are maintaining the integrity of the original routes created using the bus scheduling solution.
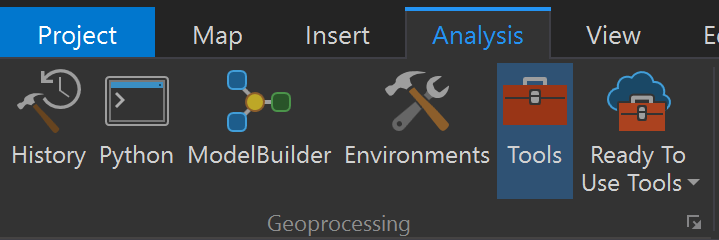
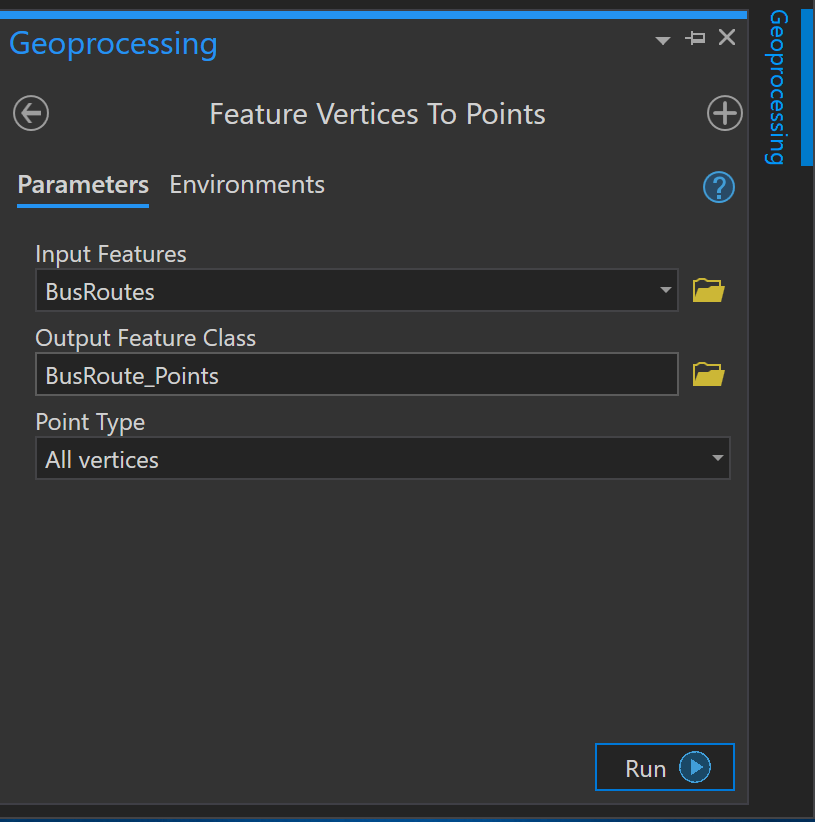
1. On the Analysis tab, in the Geoprocessing group, click the Tools button.
2. Begin typing Feature Vertices to Points until the tool appears. Click on it.
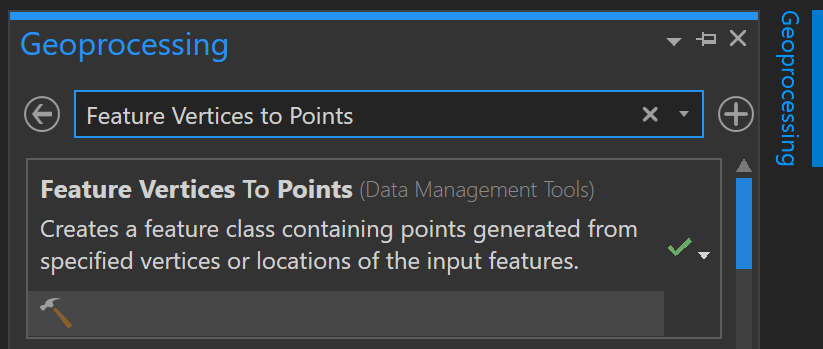
3. You’re converting vertices from your BusRoutes polyline, so that will be your input layer. Name your output layer something that makes sense, like “BusRoute_Points”
Click Run
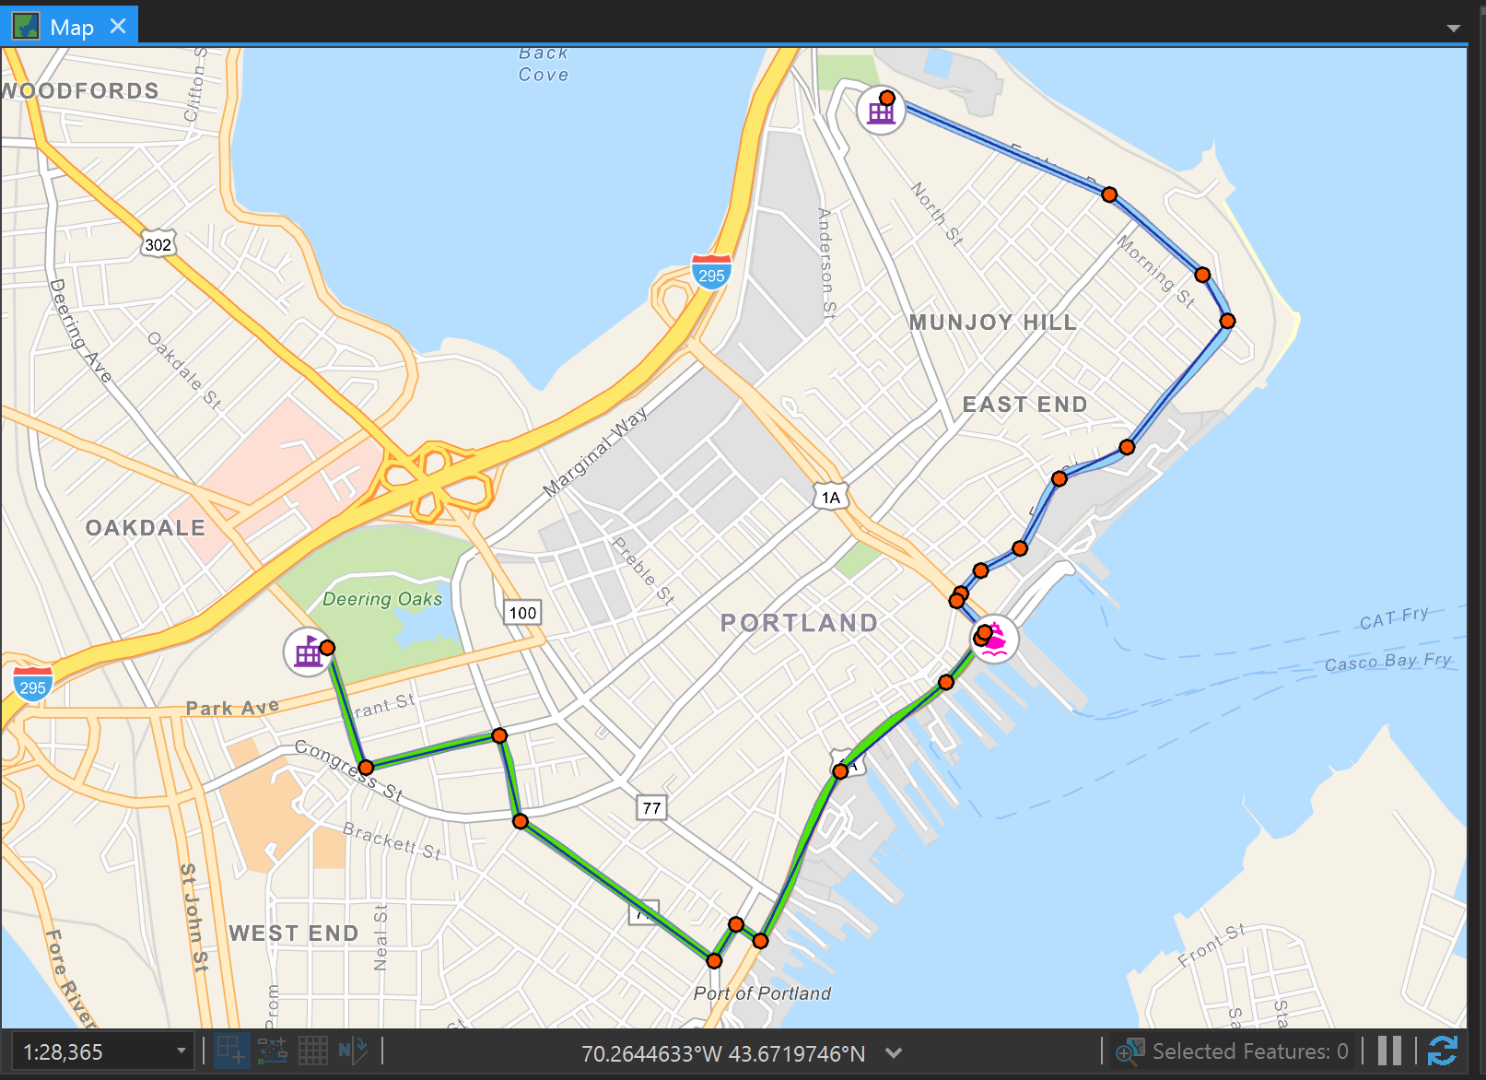
The new point feature layer appears on the map. These points will serve as the stops and waypoints that will solve the final route layers.
Tip: There are fewer points on this map than what you currently see in your ArcGIS Pro project. The original
polylines have been simplified here using the simplify lines tool. This is a tool you can run to avoid creating an
excessive number of stops for your route layer. You may also want to densify your routes to ensure an even distribution of waypoints.
Now that we have our stops layer it’s time to …
Create a route analysis layer
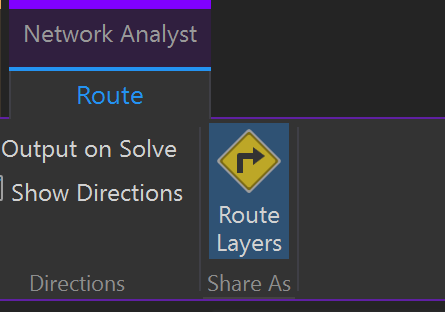
1. On the Analysis tab, in the Tools group, click the Network Analysis button, then click Route.
**Note that the Network Data Source defaults to ArcGIS Online unless you add your own network to the project.
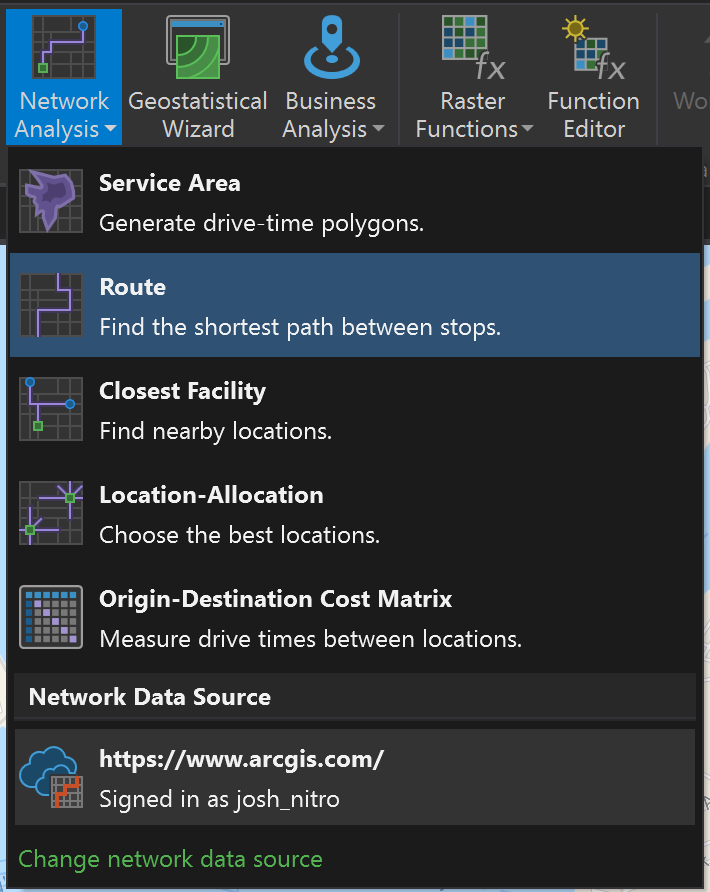
An empty route layer appears in your Contents pane.
2. Under Network Analyst, on the Route tab, in the Input Data group, click Import Stops.
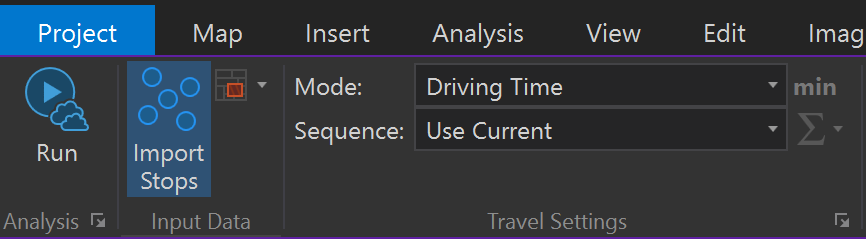
The Add Locations tool appears in the Geoprocessing pane.
3. Enter the tool parameters
a. Under Input Locations, click the drop-down arrow and select BusRoute_Points.
b. Under Field Mappings, in the Property list, click on RouteName. This tells the Add Locations tool to create a unique bus route for each school.
c. Under Sort Field, click the drop-down arrow and select OBJECTID. The stops are ordered based on their object id, which is in sequence with the direction of the bus routes.
**Note: This will not always be the case. OBJECTID is only reliable when it correlates with the direction in which
the route should go. Be sure to create your own polylines or check the ones you are working with before using OBJECTID to sort stops.
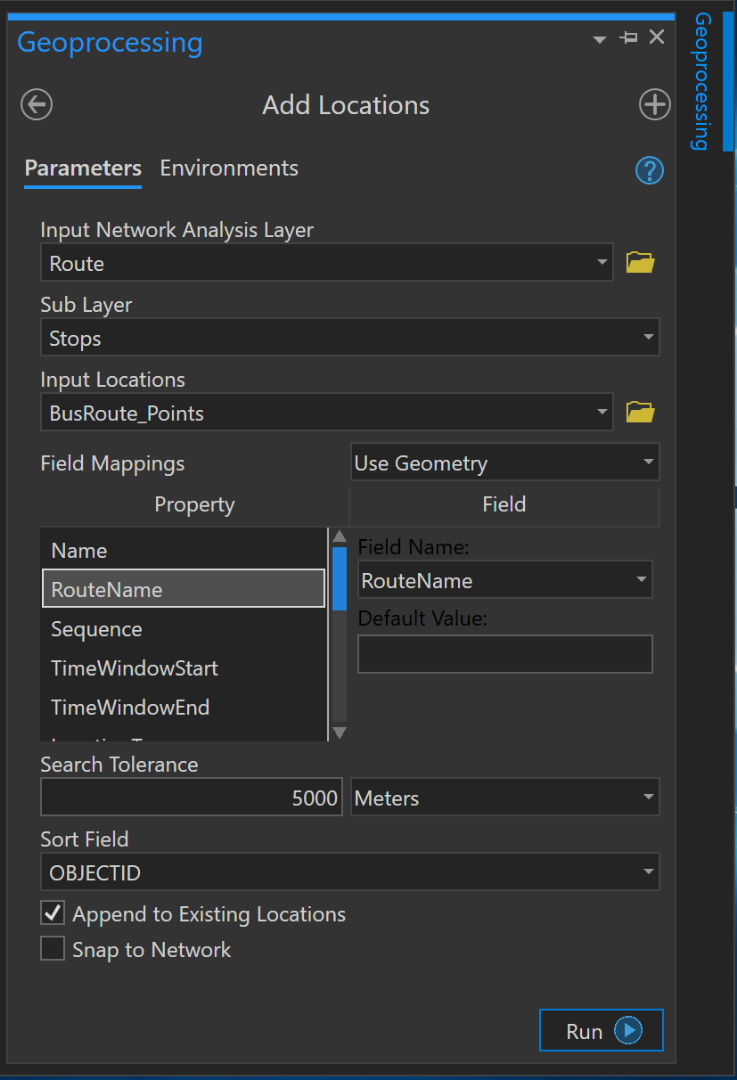
d. Click Run.
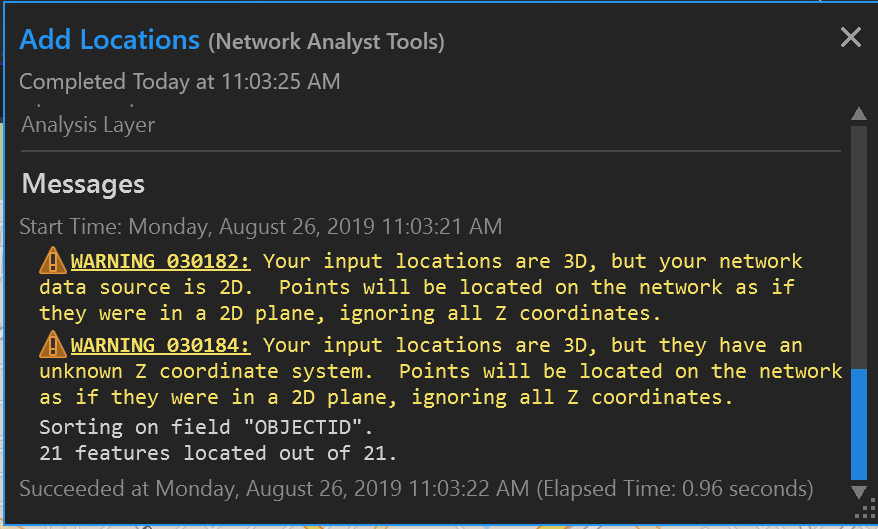
You may have two warnings appear (see below). These bus points have a Z coordinate assigned to them, and ArcGIS is simply telling you that this attribute will be ignored when using this tool. This will not affect your workflow, so you can dismiss these warnings.
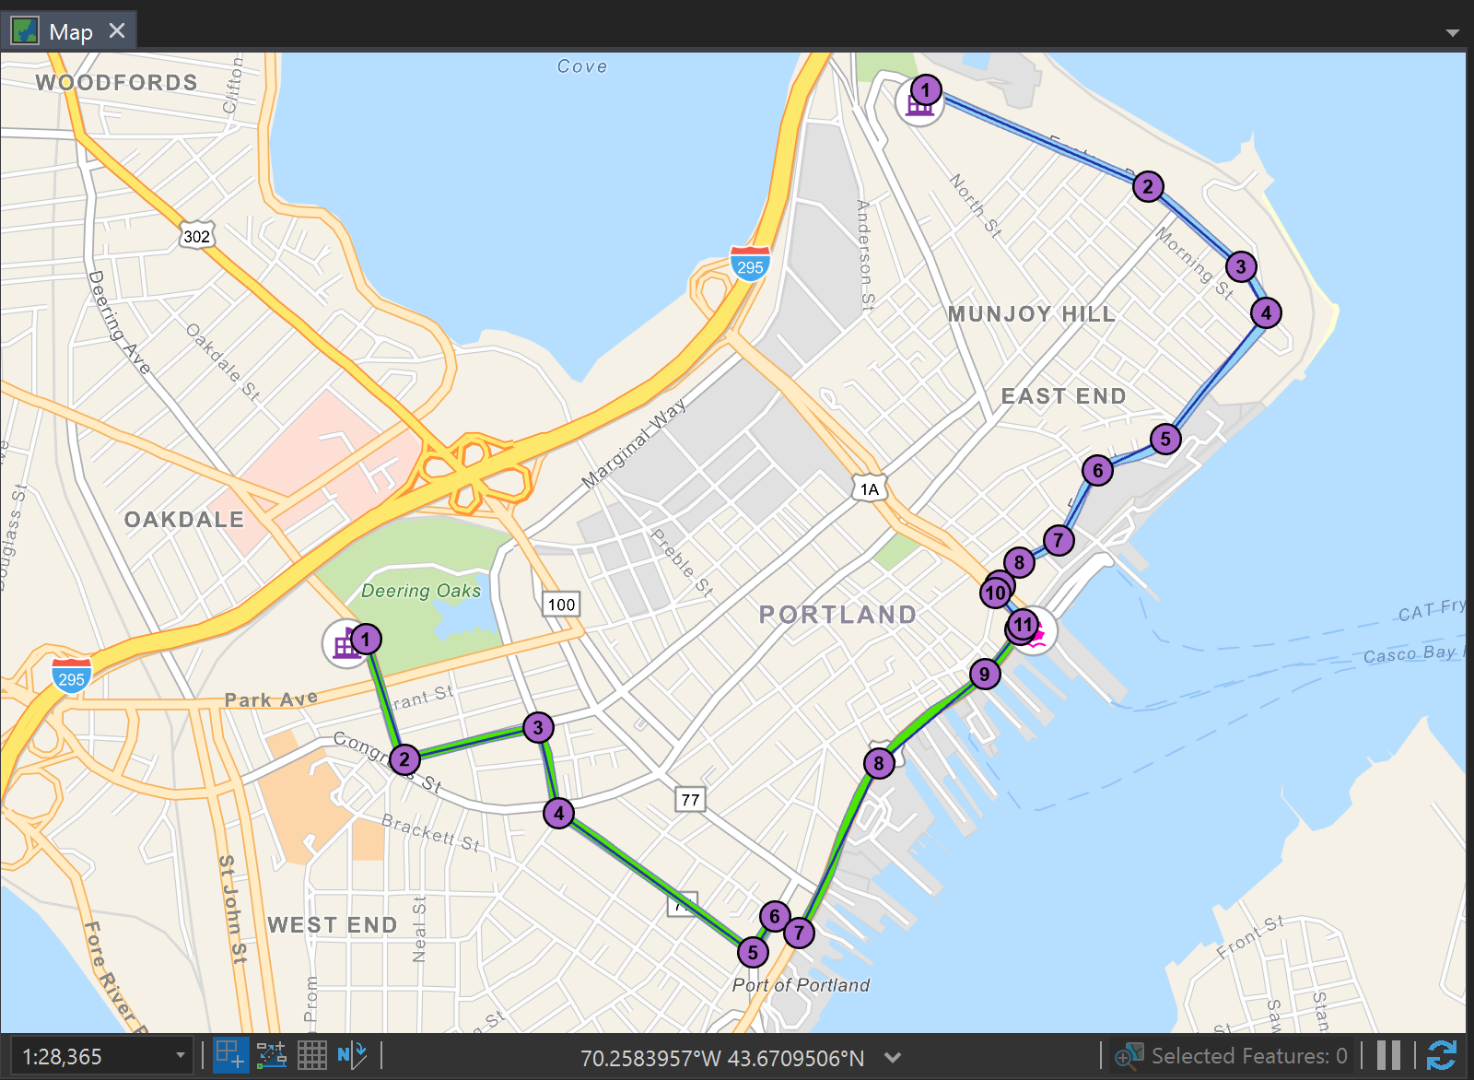
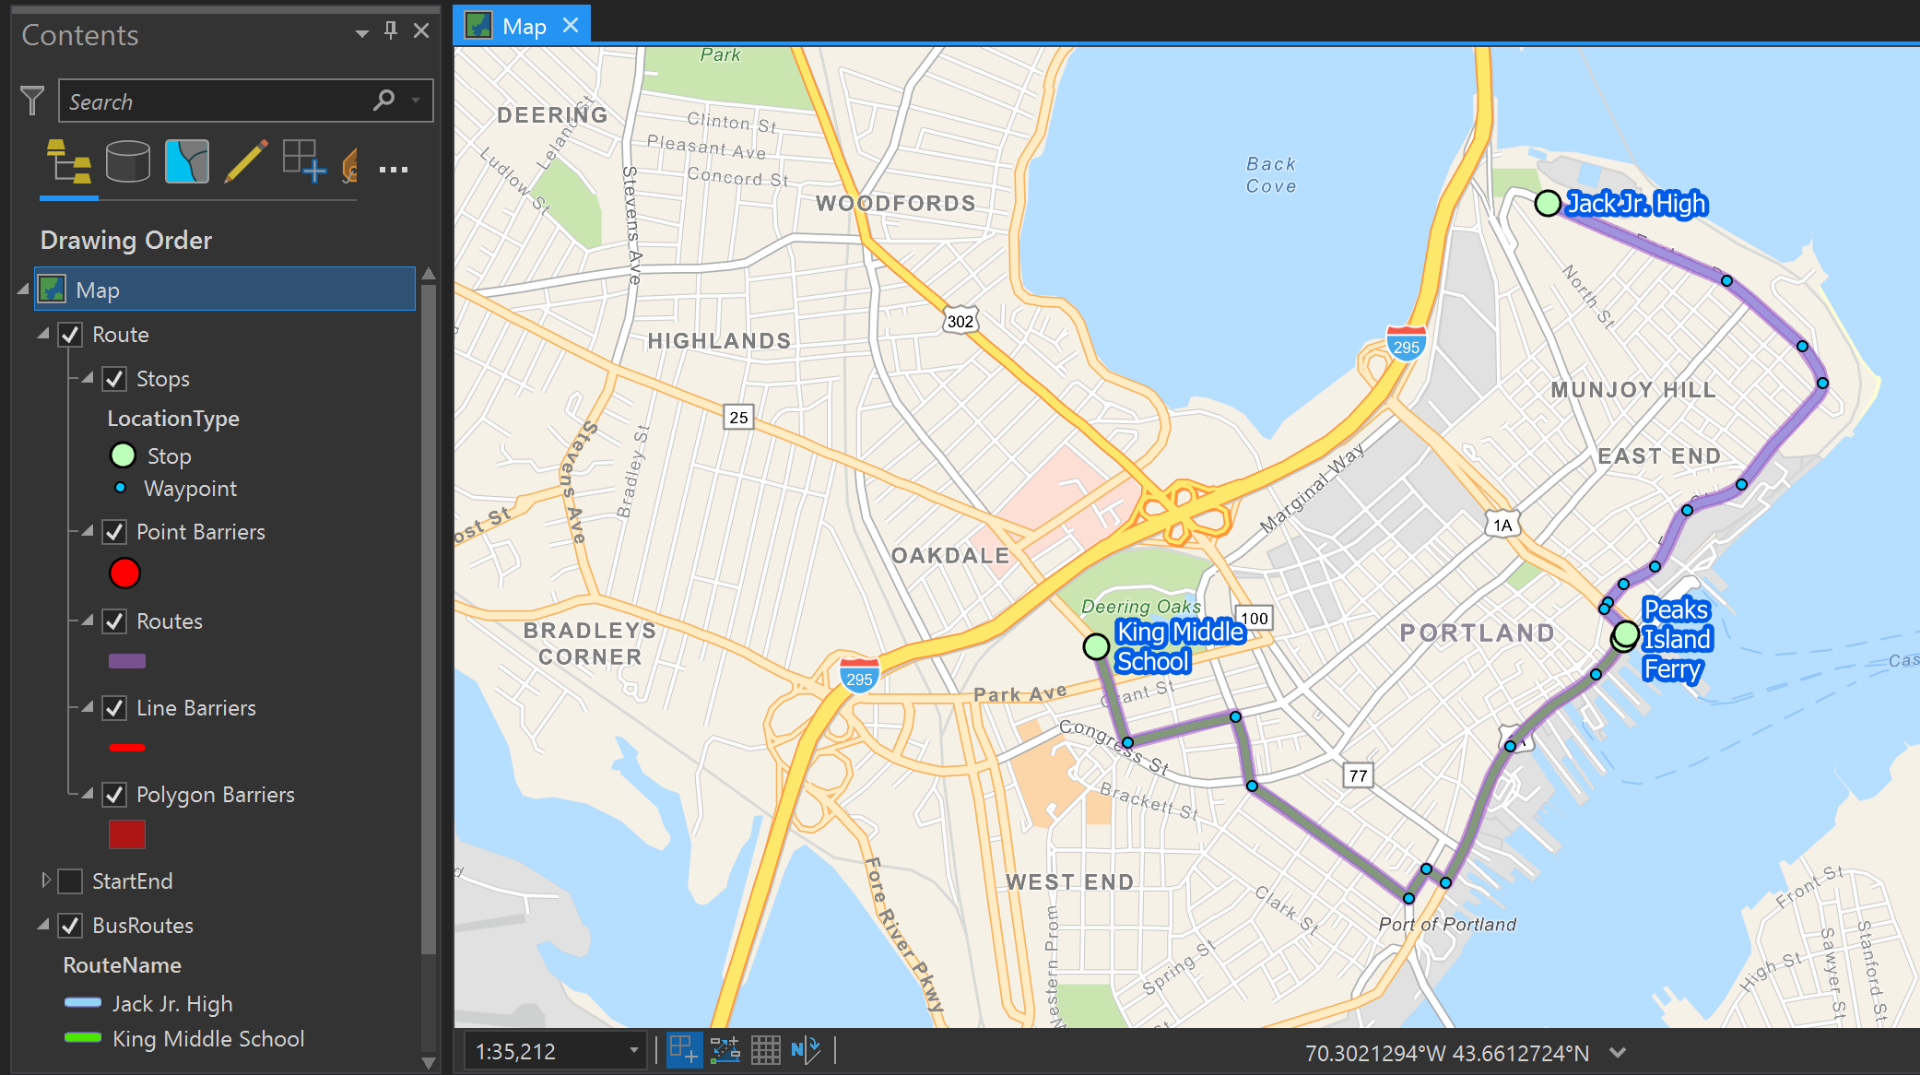
Notice that the route layer sequences the stops in order of OBJECTID for each unique route, resulting in a set of stops for each middle school.
Convert intermediate stops into waypoints
A stop within a route layer can have one of three location types, each one assigned a unique value.
Location Type | Value | Description |
Stop | 0 | A location that the route should visit. This is the default. |
Waypoint | 1 | A location that the route should travel through without making a stop. Waypoints can be used to force the route to take a specific path without making a stop. |
Break | 2 | A location where the route stops for the driver to take a break. |
All of the points within your current stops layer have a value of 0. If this route were to be shared in Navigator as-is, your bus drivers would receive arrival notifications for each stop. So, if you were going to Peaks Ferry from King Middle School you would “arrive” at 9 destinations before actually arriving at the dock.
Turning these intermediary stops into waypoints eliminates this problem.
1. Right-click on the stops layer and click Attribute Table.
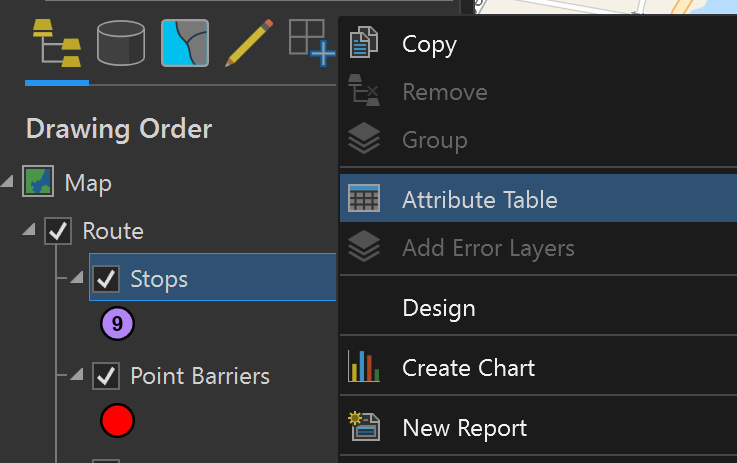
You want to change all but four of these stops into waypoints. In order to do this, we will reverse select them.
2. Ctrl+click each row that you want to save as a stop.


You should have 4 rows highlighted in total.
3. Click the switch button on the field toolbar to reverse the point selection and select all of the other points, leaving your four stops un-selected.
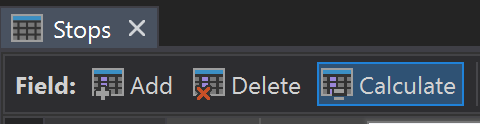
4. On the field toolbar, click Calculate.
5. Enter parameters in the Calculate Field
a. Under Field Name, click the drop-down arrow and select Location Type.
b. Under LocationType =, type 1
c. Click Run.
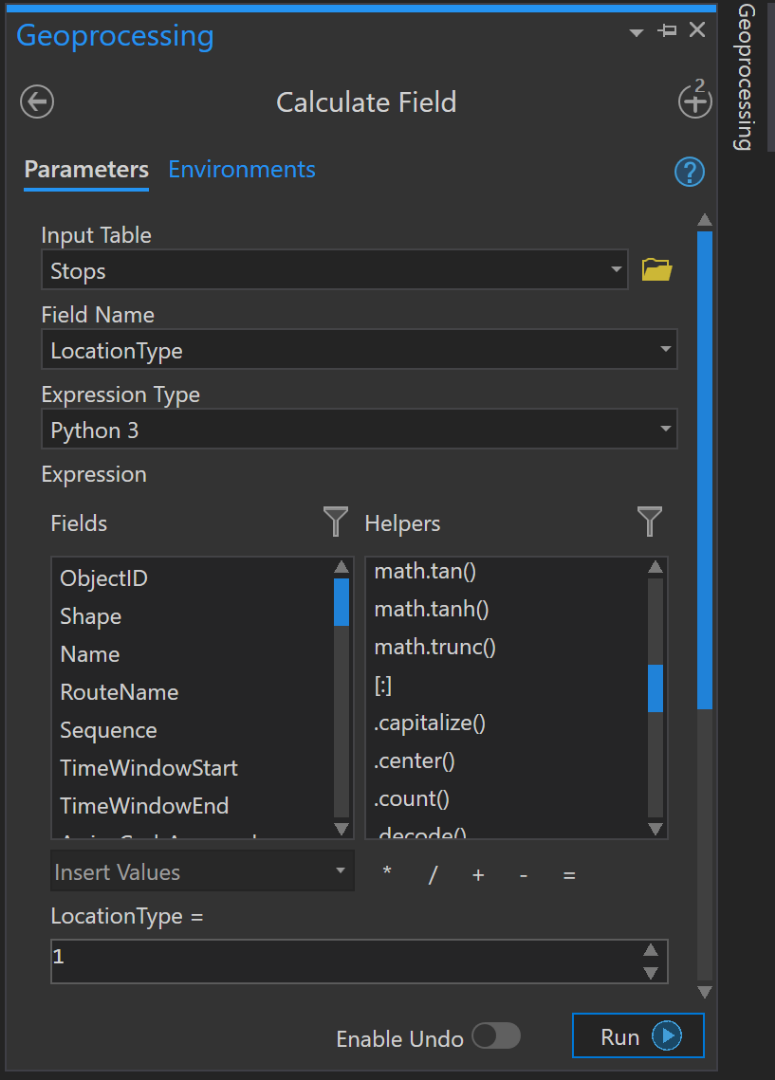
All of your intermediate points now have a Location Type value of 1, meaning they are now waypoints.
Solve route analysis layer
On the Route tab, in the Analysis group, click Run.
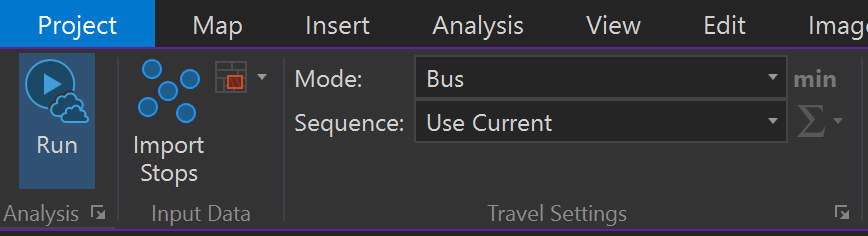
Tip: Your default travel mode is “Driving Directions”, but you can create a custom travel mode in ArcGIS Pro and ArcGIS Online. That’s what we’ve done with this bus mode that does not allow U-Turns in route analysis.
A new layer representing the solved routes appears on your map.
Tip: Check out the symbology tab if you want to assign unique values to your stops layer. That’s what I’ve done here with the differences in color and size between stops and waypoints.
Share route layers to ArcGIS Online
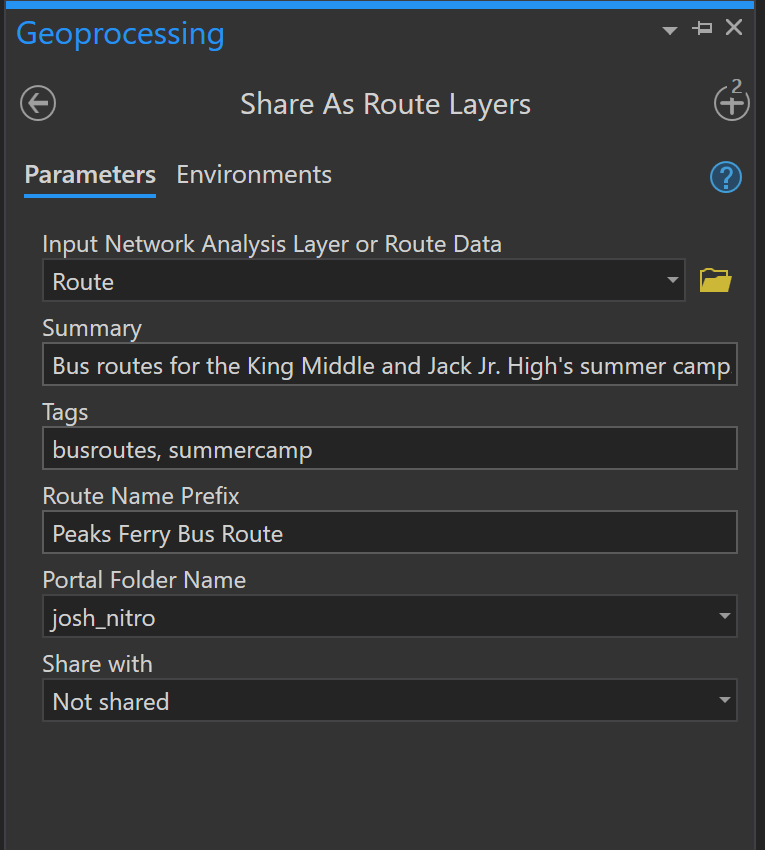
1. On the Route Tab, in the Share As group, click Route Layers.
2. Enter Share as Route Layers parameters
a. Under Summary, type a brief description of your route layers
b.Under Tags, type some unique terms for this route
c.Under Route Name Prefix, type a name you want to appear before each of your route layers in ArcGIS Online.
d.Under Portal Folder Name and Shared With, specify where you want your route layers to be shared.
3. Click Run.
You can now sign into ArcGIS Online and view your newly created route layers.

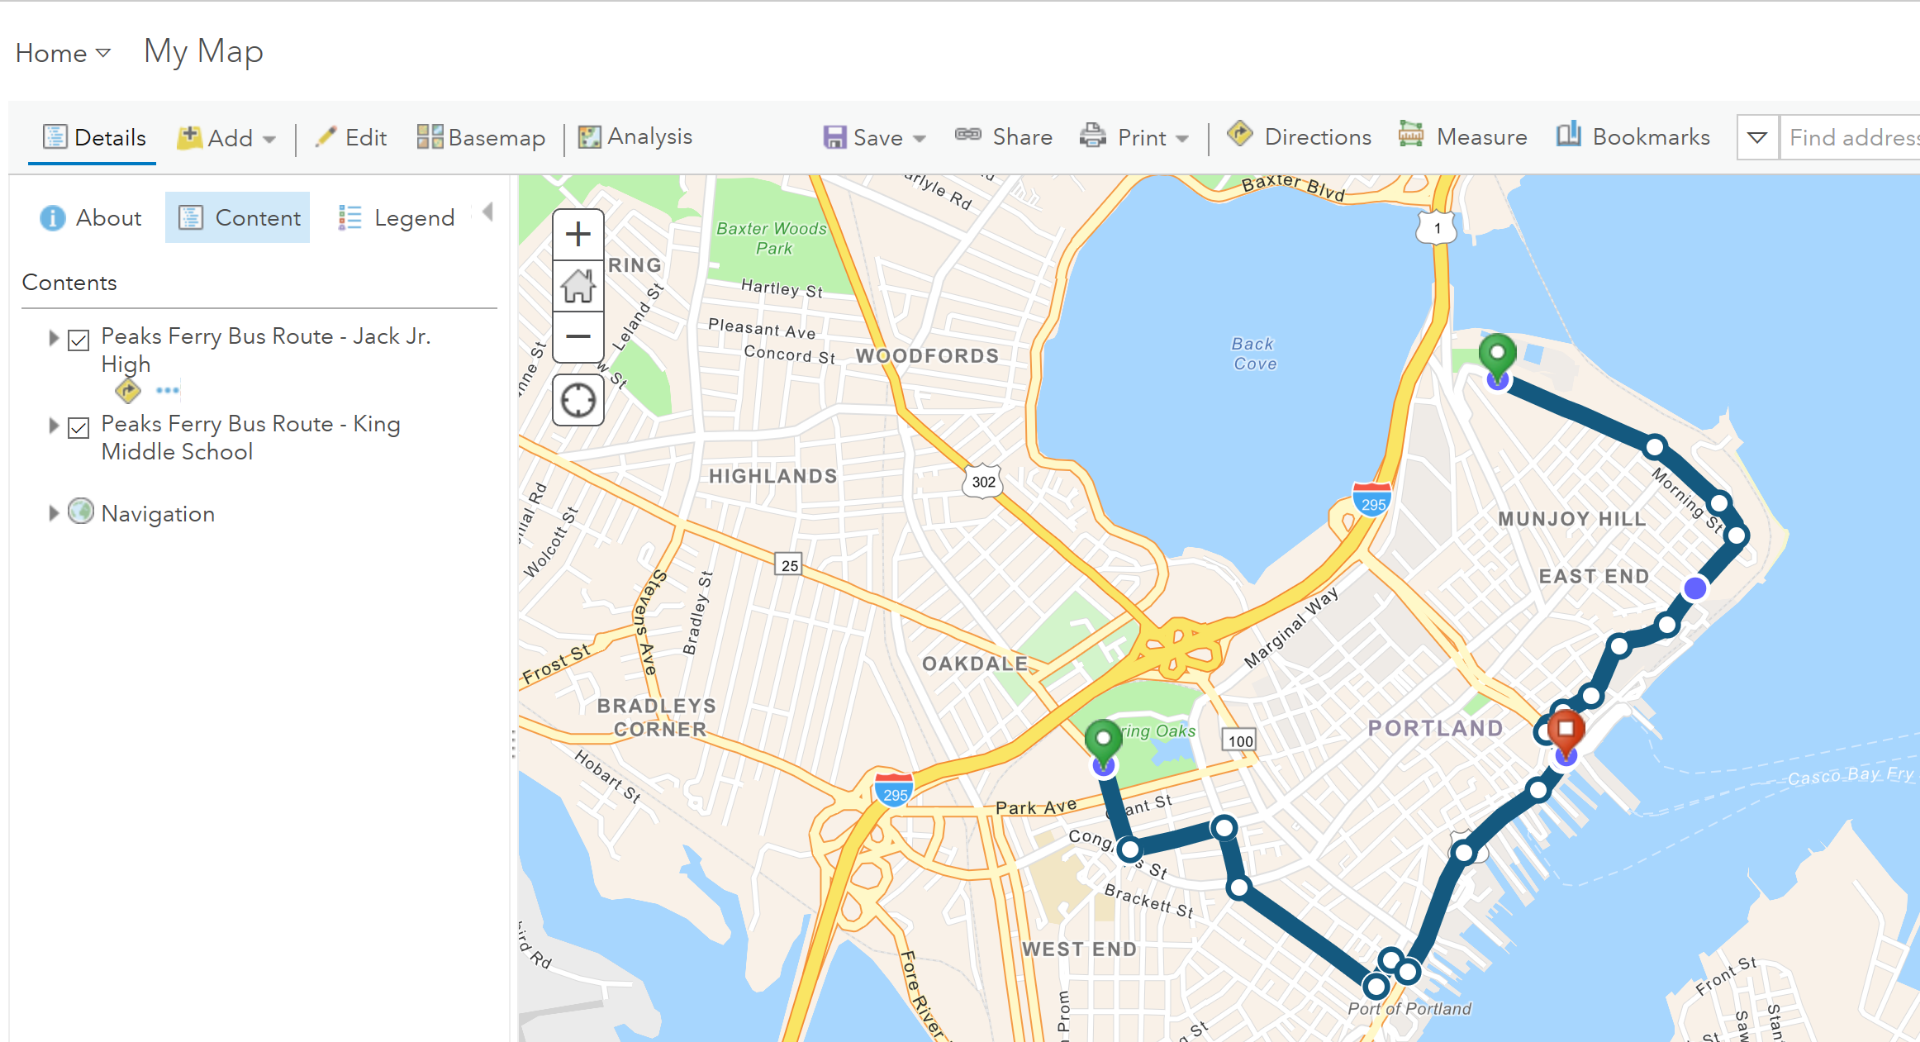
Open route layers in Navigator for ArcGIS
1. Sign into Navigator for ArcGIS on your mobile device.
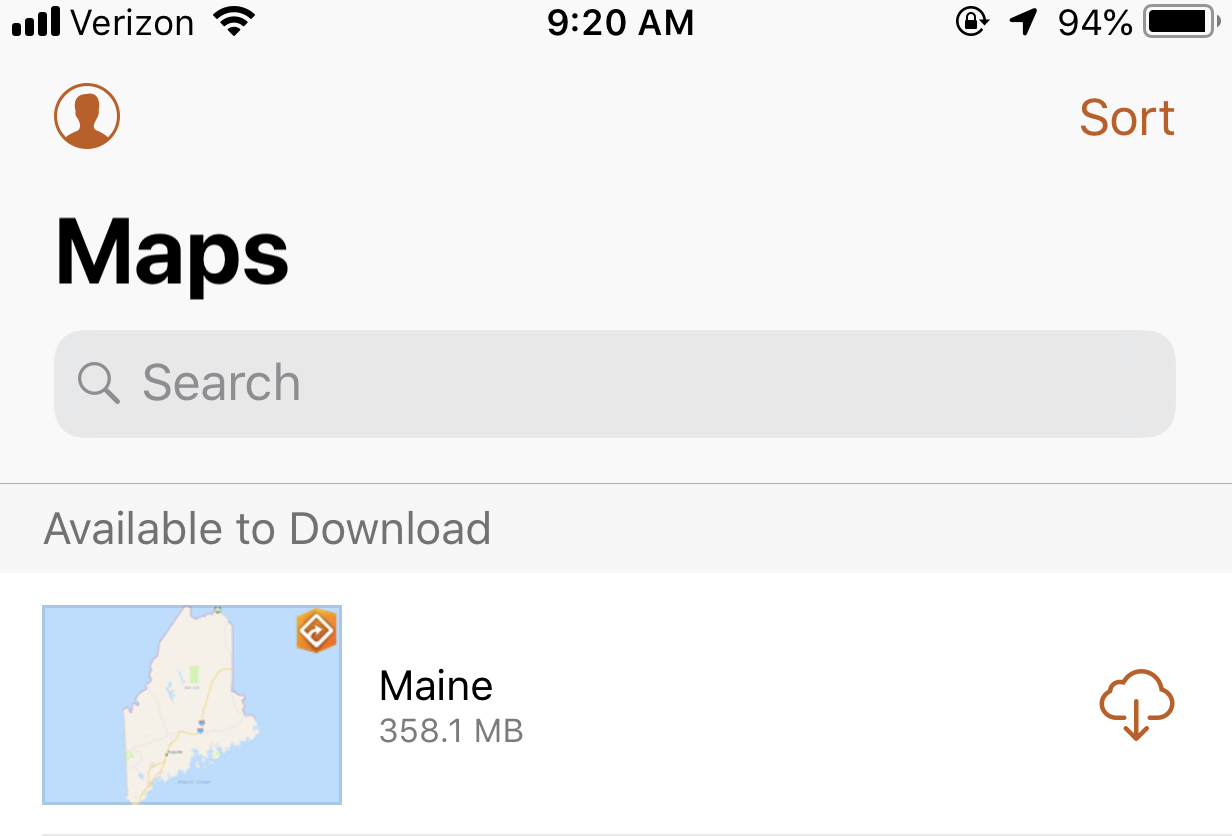
2. Search for the Esri owned Maine Mobile Map Package (mmpk), download, and open it.
You will generate your routes using this map.
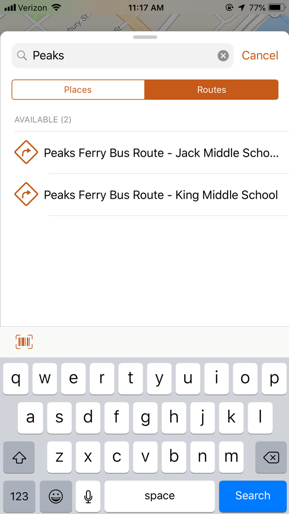
3. Once the map has rendered, you can search for and open the routes you just created.
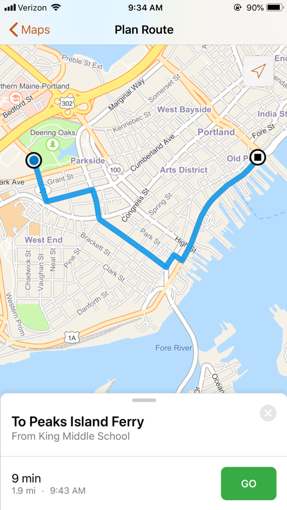
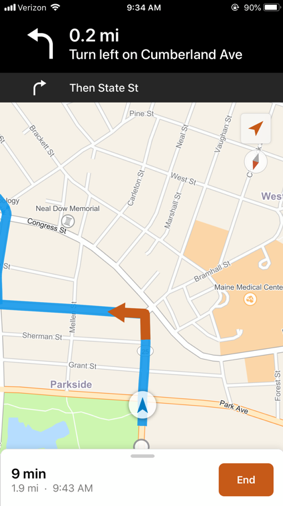
You have successfully transformed two polylines into route layers! Now you can whisk the kids off to summer camp and think about all the other routes you can create with this workflow.
Want to explore some more Navigator for ArcGIS exercises? Check out the following:
You must be a registered user to add a comment. If you've already registered, sign in. Otherwise, register and sign in.