- Home
- :
- All Communities
- :
- Products
- :
- ArcGIS Survey123
- :
- ArcGIS Survey123 Blog
- :
- Creating Power Automate (aka MS Flow) webhooks for...
Creating Power Automate (aka MS Flow) webhooks for Survey123 surveys in ArcGIS Online - Part 3
- Subscribe to RSS Feed
- Mark as New
- Mark as Read
- Bookmark
- Subscribe
- Printer Friendly Page
- Report Inappropriate Content
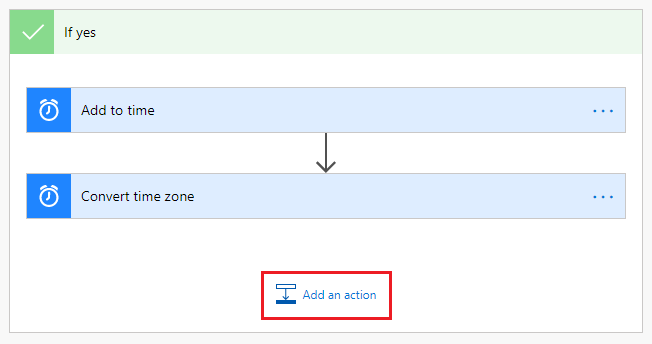
2. Search for ‘send an email’ and select the action from the result list.

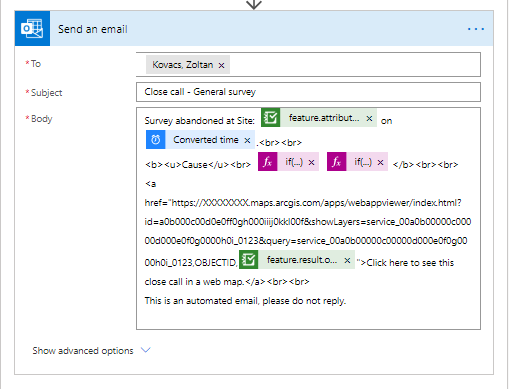
3. Complete the To and Subject fields (you should be able to search for your O365 contacts).

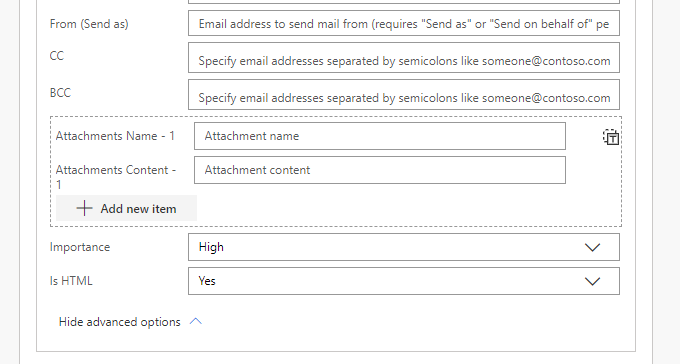
4. Compose the message
- Open a saved app
- Set layer's visibility
- Query a feature
Where to find the values required?
- itemId: Open the item's page in AGOL and look at the end of the URL in your web browser or scroll down to URL on the item's page and copy the hash value.

- layerID: You can retrieve the layer ID from the content of the web map item:
https://<your portal url>/sharing/rest/content/items/<webmapItemID>/data/?f=pjson
(Layer names are also acceptable, but they can be changed which would break the link.) Tip: If you cannot access the service url (because the API is restricted by your AGOL admin in your organisation), you can use the ArcGIS Online Assistant to view the JSON of your web map and find the layer ID.
- queryField: this is the field from your layer to use for the query. (We use the OBJECTID in our example.)
- queryValue: value coming from your survey data, so your link is dynamic and will work with any close calls. (For testing purposes you can use a static value.)
It is highly recommended to test your URL in a web browser to make sure your web map application loads with the layers you need and shows the queried feature. It would look something like this:
Once the URL is tested and you are happy with the results, it can go in to the email message with the rest of the dynamic content (change to 'Yes' under Is HTML first in advanced options). An example can be seen below.
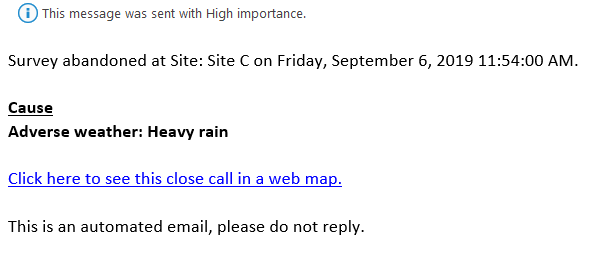
The sent email would look like this:
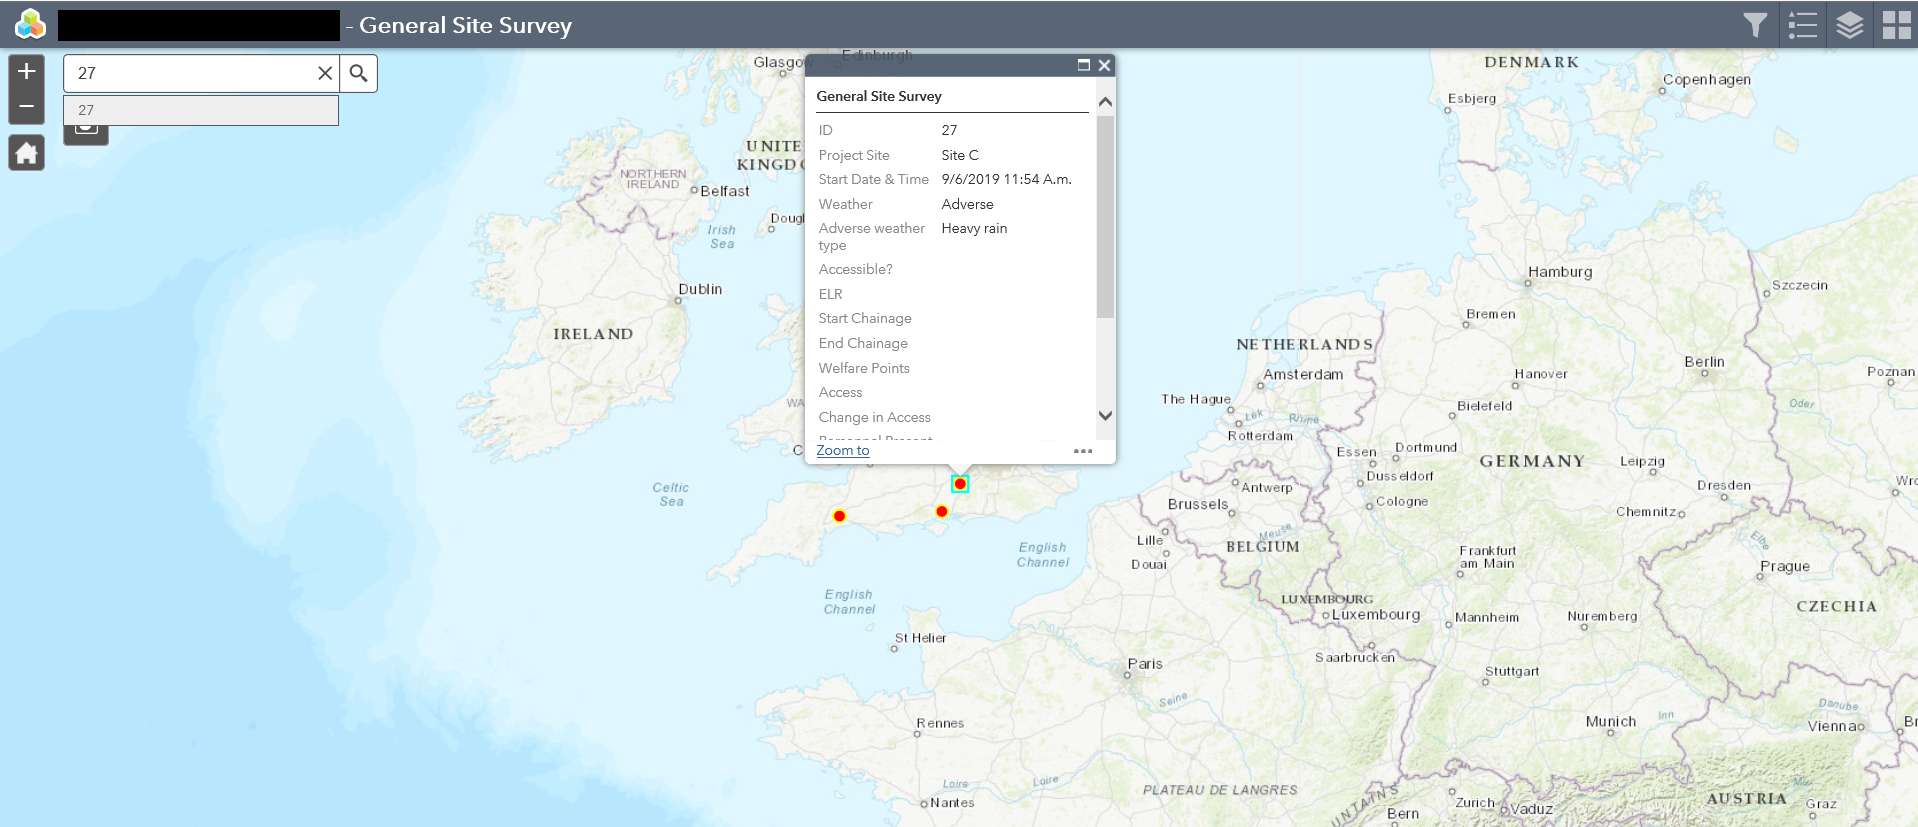
Clicking on the hyperlink opens the web map application, pans to the feature and displays a pop-up:
With using dynamic content in custom functions in the body of your message you can create a template that could be dynamically updated with the correct close call reason for example: 
Additional webhook settings on the Survey123 website
Most of your webhook settings can be controlled in your Power Automate (aka MS Flow) account, but there are a few settings that can only be accessed on the Survey123 website.
1. Open your web browser and go to https://survey123.arcgis.com
2. Log in and find the survey with the webhook in question
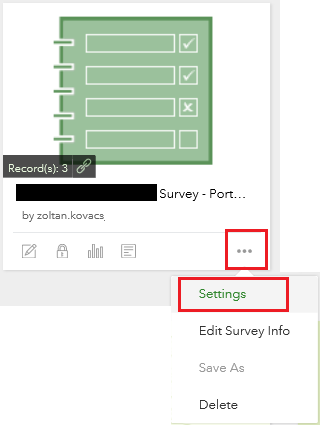
3. Click on the ellipsis (...) button and select Settings
4. Click on Webhooks on the left-hand side to see all webhooks for your survey
5. Click on Edit (the pencil icon) under Operations to see more details 
6. On the new page you can make changes to your webhook:
- Edit its name
- Change when it should be triggered: new records submitted, existing records edited
- Event data: information included in the payload. Hover over the grey '?' icon after each item to see the information they include
- Turn the webhook off or back on
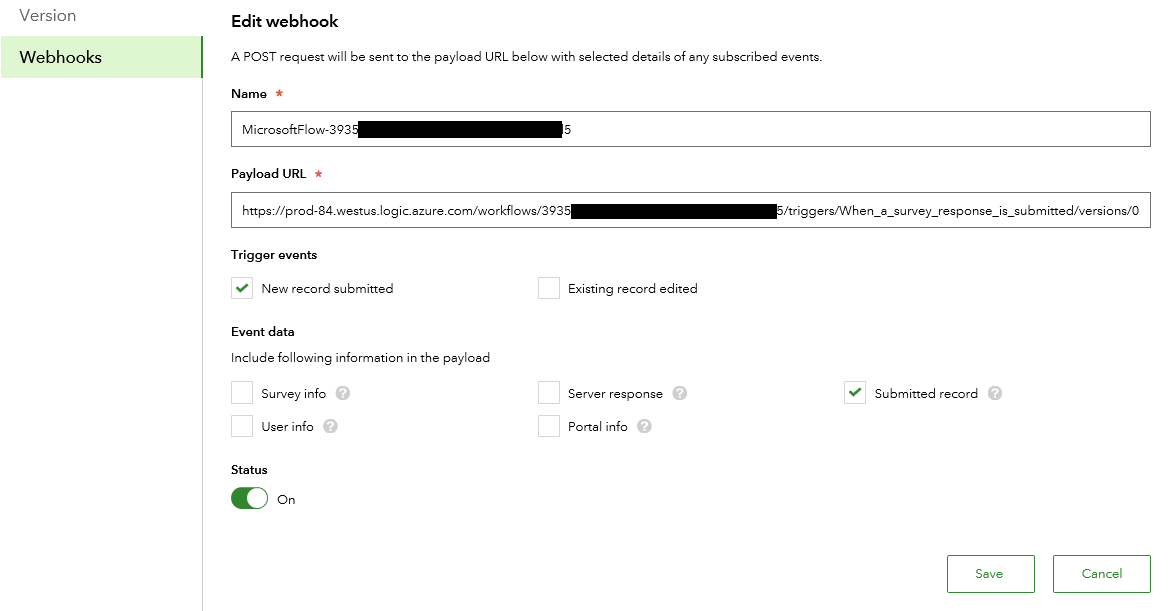
NB: Changing the payload URL can break your webhook, only do it if you are sure you know what you're doing.
Summary
In this series of articles you learnt how to
- Create a new webhook in Power Automate (MS Flow) for a Survey123 survey
- Add conditions, convert and format the survey time
- Send a notification email with dynamic content as part of the webhook
- Find additional settings for your webhook
I hope you enjoyed the series! Feel free to share the articles with your network, leave feedback or message.
You can download the article series in PDF format from here.
You must be a registered user to add a comment. If you've already registered, sign in. Otherwise, register and sign in.