Unlock Data Insights
Integrating spatial data with your Excel workbooks has never been easier, thanks to the seamless connection between ArcGIS and Microsoft Excel. By using the combined tools in ArcGIS for Excel such as adding geographic data and using copilot for data analysis, you can enrich your datasets and streamline your workflow—all without the need for complex coding or technical expertise. This guide walks you through the essential steps to link, manage, and keep your data synchronized. Essentially, our workflow can mimic the pulldata function to retrieve the values as seen in other ArcGIS products (i.e., Survey123).
Adding ArcGIS Data to Your Excel Workbook
Start by opening your Excel workbook and logging into your ArcGIS account using the "ArcGIS" tab. In the ArcGIS for Excel interface, select "+Add" to proceed. Utilize the search bar to input relevant keywords and identify the appropriate layer containing the necessary ArcGIS data for your analysis. Additionally, geocode your data within the open Excel workbook.
After identifying the appropriate layer, look for the table icon next to the layer name. Click on this icon to add the selected layer of data directly into your Excel workbook. This action will import the ArcGIS data, enabling you to work with it alongside your existing Excel data.
Please note that the data will be placed on a separate sheet in Excel. To keep things organized, you can rename this sheet as the "ArcGIS Data Sheet."
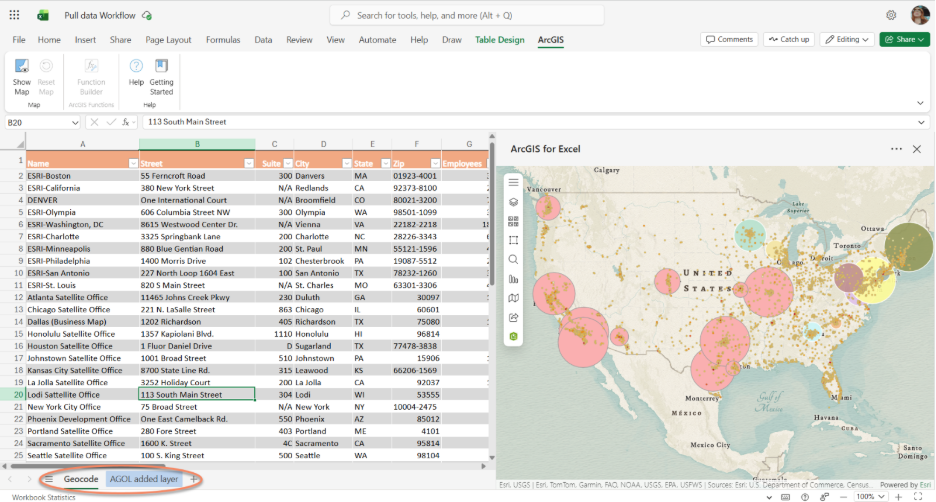
For this example, we use office locations to major cities. The goal is to create a column in the Geocode sheet that can be used to link records to the AGOL added layer sheet.
Return to the geocoded points sheet and use Copilot to match it with the ArcGIS location entries.
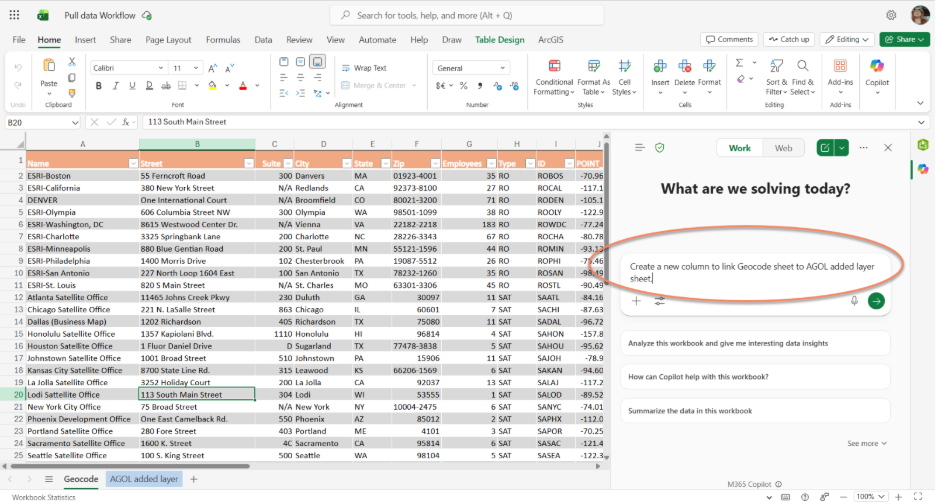
For this example, you may ask Copilot a request
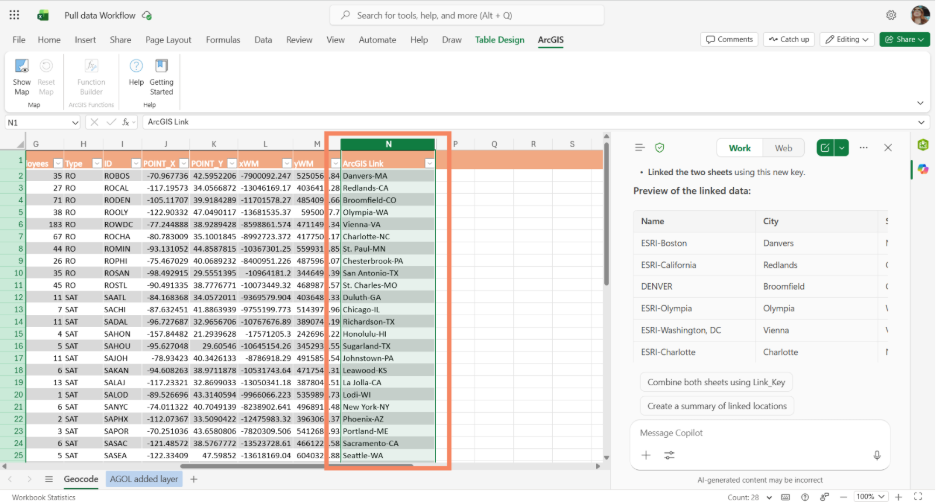
For this example, the results will be added in a new column titled ArcGIS Link
Please note, if there is no match, the cell will display #N/A. Alternatively, you can use cell references (such as =sheetName!cellName) to create a new column that links data from the ArcGISdata sheet. To link sheets in Excel using a formula, type an equal's sign (=) in the destination cell, then click the source sheet tab, choose the cell you want to reference, and press Enter. Excel will automatically generate a formula in the format =SheetName!CellReference.
Syncing and Maintaining Linked ArcGIS Data in Excel
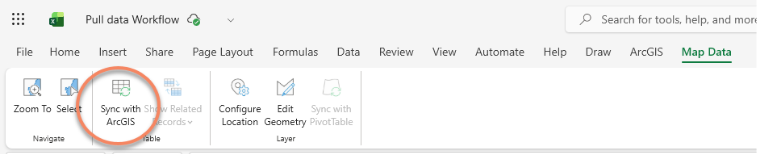
Once you have successfully linked the geocoded points of data to the ArcGIS data on the "ArcGIS Data Sheet," it is important to ensure that your data remains up to date. To synchronize the latest updates from ArcGIS, navigate to the "ArcGIS Data Sheet" and place the Excel cursor on any cell containing ArcGIS data. This action will activate the "Map Data" tab in Excel. Click the "Sync with ArcGIS" button in this tab to automatically retrieve and update your data from ArcGIS, ensuring your workbook reflects the most current information.
Efficient Data Management
By following this workflow, you can seamlessly connect, enrich, and manage your Excel data using ArcGIS. This process eliminates the need for complicated formulas or coding, allowing you to take full advantage of ArcGIS capabilities directly within your Excel workbook. As a result, your data analysis becomes more efficient and effortless, while maintaining organized and synchronized datasets.
Until next time!
References
Excel for ArcGIS use Pulldata function to get attribute from REST api
Use existing data in your survey, the Pulldata function
