<\/HEAD>
PostgreSQL DBMSおよびRed Hat Enterprise Linux上での実装<\/STRONG><\/SPAN><\/P><\/P>1. PostgreSQLのインストール<\/SPAN><\/H1><\/H1>以下のコマンドを発行してインストーラーを起動します<\/SPAN><\/LI><\/OL><\/P>.\/postgresql-9.2.2-1-linux-x64.run<\/SPAN><\/EM><\/P>注意事項.<\/SPAN>上記の*.runファイルに755の権限が必要です<\/SPAN><\/LI>rootユーザーとしてインストールする必要があります<\/SPAN><\/LI><\/UL><\/LI><\/OL>PostgreSQLインストーラーが起動します <\/SPAN><\/P> <\/SPAN><\/P>クリック Next<\/EM><\/STRONG><\/SPAN><\/P><\/P>2. インストールディレクトリ<\/P>
 <\/P>クリック Next<\/EM><\/STRONG><\/SPAN><\/P>3. データディレクトリ<\/P>
 <\/P>クリック Next<\/EM><\/STRONG><\/SPAN><\/P><\/SPAN>4. PostgreSQLスーパーユーザーパスワード<\/P>
 <\/P>クリック Next<\/EM><\/STRONG><\/SPAN><\/P>5.Port<\/P>
 <\/P>クリック Next<\/EM><\/STRONG><\/SPAN><\/P><\/P>6. ロケール設定<\/P>
クリック
Next
7.
インストール準備完了
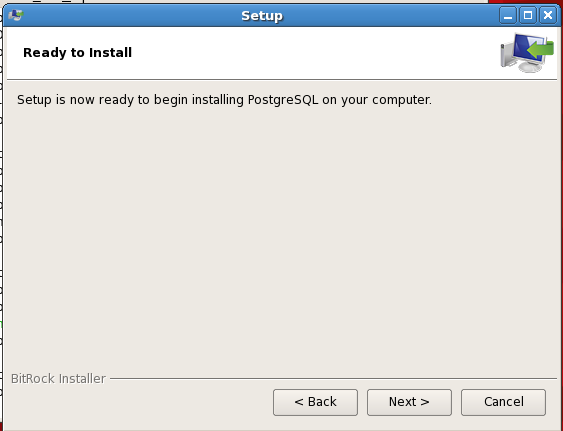
クリック
Next
8.
インストール進行状況
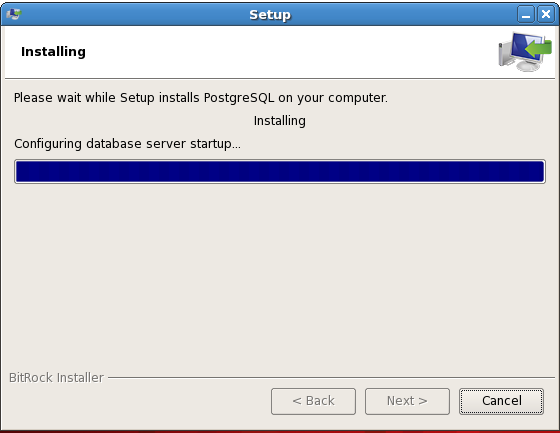
9.
スタックビルダー
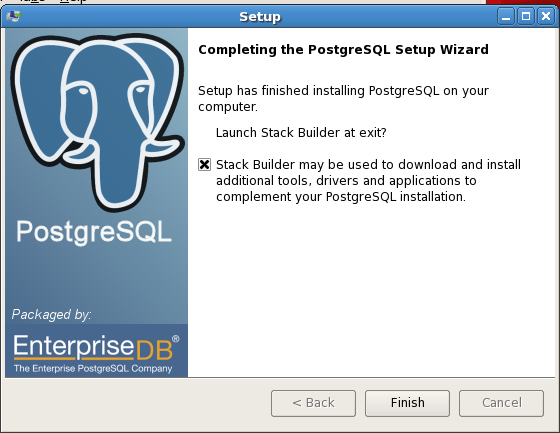
または、後で「Application Stack Builder」を起動するには、Applications >
PostgreSQL
9.2 >
Application Stack Builderに移動してください。
今は、スタックビルダーを起動してアドオンのインストールを続行するために、
Finishをクリックしてください。
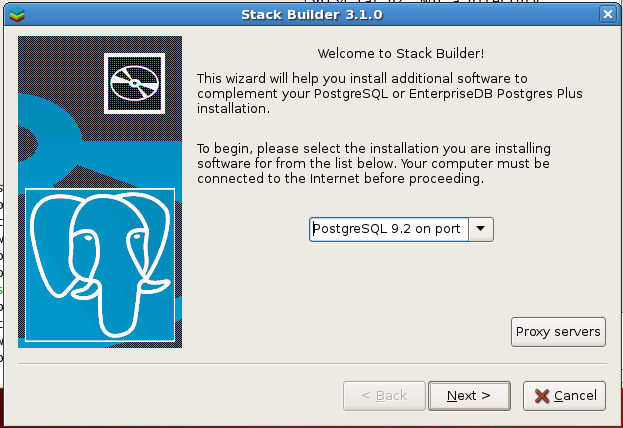
クリック
Next
ドロップダウンから5432ポートのPostgreSQL
9.2を選択してください。
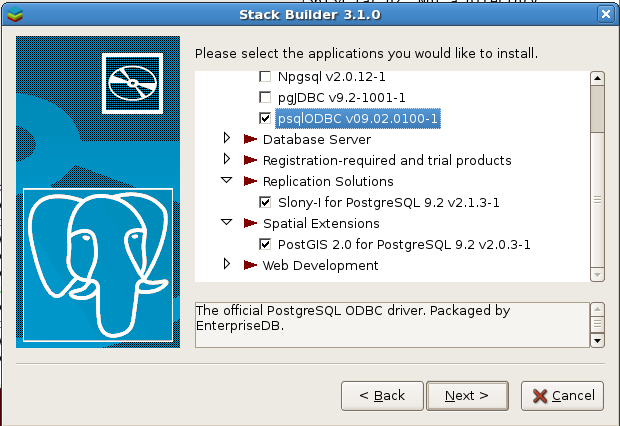
the span
lang = 'en'
sty le = 'font - size : eleven . pt ;'>Click Next </ em ></ span ></ p >
p >< img
__ j ive _ id = '3184'
al t = ' a . png '
c lass = ' j ive - image image -12 '
h eight = '287'
s rc = ' https : / / us . v - cd n . net /6038851 / uploads / legacy fs / online /3184 _ a . png '
sty le = ' display : block ; margin - left : auto ; margin - right : auto ; width : four hundred fourteen px ; height : two hundred eighty seven point three eight eight three four nine five one four five six three zero six px ; '
w idth = '414'/ > </ p >
p sty le = ' margin - bottom : ten . pt ; '>Accept default “tmp” directory . This is the location where all the downloads will be placed .</ p >
p sty le = ' margin - bottom : ten . pt ; margin - left : thirty - six . pt ; '>Click < strong >< em > Next </ em >< / strong >.< / p >
p sty le = ' margin - bottom : ten . pt ; margin - left : thirty - six . pt ; '> < img
__ j ive _ id = '3185'
al t = ' a . png '
c lass = ' image -13 j ive - image '
h eight = '146'
s rc = ' https : / / us . v - cd n . net /6038851 / uploads / legacy fs / online /3185 _ a . png '
sty le = ' display : block ; margin - left : auto ; margin - right : auto ; width : three hundred eighty three px ; height : one hundred forty five point six nine zero one nine six zero seven eight four three one three seven px ; '
w idth = '383'/ > </ p >
p sty le = ' margin - bottom : ten . pt ; '>Wait until the downloads complete .</ p >
p sty le = ' margin - bottom : ten . pt ; '> < img
__ j ive _ id = '3186'
al t = ' a . png '
c lass = ' image -14 j ive - image '
h eight = '272'
s rc = ' https : / / us . v - cd n . net /6038851 / uploads / legacy fs / online /3186 _ a . png '
sty le = ' display : block ; margin - left : auto ; margin - right : auto ; width : three hundred ninety six px ; height : two hundred seventy two point three seven zero seven three one seven zero seven three one seven one px ; '
w idth = '396'/ > </ p >
p sty le = ' margin - bottom : ten . pt ; '>Click < strong >< em > Next </ em >< / strong >.< / p >
p >< / p >
p >< / p >
p >10.PostGIS2.0Installation (Optional)< / p >
p sty le = ' margin - bottom : ten . pt ; '>Installation of PostGIS enables the use of PG_Geometry spatial type in addition to the Esri supported ST_Geometry geometry type.< / p >
p sty le = ' margin - bottom : ten . pt ; '> < img
__ j ive _ id = '3187'
al t = ' a . png '
c lass = ' j ive - image image -15 '
h eight = '309'
s rc = ' https : // us.v-cdn.net/6038851/uploads/legacyfs/online/3187_a.png'
sty le =' display:block;margin-left:auto;margin-right:auto;width:'404px';height:'309.'3237924865832px';'
w idth ='404'/ >< br clear ='all'/ > < / span >< / p >
p align ='center'style ='margin-bottom:'10.'0pt;text-align:center;'>
the span
lang ='en'style ='font-size:'11.'0pt;'>Click < strong >< em > Next </ em >< / strong >< / span >< / p >
p align ='center'style ='margin-bottom:'10.'0pt;text-align:center;'>
the span
lang ='en'style ='font-size:'11.'0pt;'> < strong >< em >< img
__ j ive _ id ='3188'
al t ='a.png'
c lass ='j ive-image image-16'
h eight ='313'
s rc ='https://us.v-cdn.net/6038851/uploads/legacyfs/online/3188_a.png'
sty le ='width:'409px';height:'313.'49376114081997px';'
w idth ='409'/ >< / em >< / strong >< / span >< / p >
p align ='center'style ='margin-bottom:'10.'0pt;text-align:center;'>
the span
lang ='en'style ='font-size:'11.'0pt;'>Click < strong >< em > Next </ em >< / strong >< / span >< / p >
p>11.Database Authentication< / p >
p> < img
__ j ive _ id ='3189'
al t ='a.png'
c lass ='image-17 j ive-image'
h eight ='326' src="https:\/\/us.v-cdn.net\/6038851\/uploads\/legacyfs\/online\/3189_a.png" style="display: block; margin-left: auto; margin-right: auto; width: 421px; height: 325.93548387096774px;" width="421" \/><\/P>クリック Next<\/EM><\/STRONG><\/SPAN><\/P>インストール準備完了ダイアログボックスで、Next<\/EM><\/STRONG>をクリックします。<\/SPAN><\/P>テンプレート空間データベースが作成されるまで待ちます。<\/SPAN><\/P> <\/P>PostGISセットアップウィザードで「Finish」をクリックします。<\/SPAN><\/P><\/P><\/P>12 PSQLODBCセットアップ。<\/P>
 <\/P>ODBCドライバーのインストールを可能にするインストール手順のウィザードに従ってください。<\/SPAN><\/P>13. Slonyのセットアップ<\/P>
 <\/P>クリック Next<\/EM><\/STRONG><\/SPAN><\/P>インストール準備完了ダイアログボックスで Next<\/EM><\/STRONG> をクリックします。レプリケーションツールが正常にインストールされるまでインストールウィザードに従ってください。<\/SPAN><\/P>アドオンの正常なインストール<\/SPAN><\/P>クリック Finish<\/EM><\/STRONG> を押し、ターミナルウィンドウでrootとしてコマンドを発行してサーバーを再起動します。<\/SPAN><\/P>再起動<\/SPAN><\/EM><\/P>2. 設定<\/H1><\/P>1. <\/SPAN>PostgreSQLアカウントのパスワードを変更する。<\/SPAN><\/STRONG><\/P>a) <\/SPAN>以下のコマンドを発行してください。<\/SPAN><\/P> passwd postgres<\/EM><\/SPAN><\/P>
 <\/EM><\/SPAN><\/P> <\/> <\/> <\/><\/><\/><\/><\/><\/><\/><\/><\/><\/><\/><\/><\/><\/><\/><\/><\/><\/> <\/> <\/> <\/> <\/> <\/> <\/> <\/> <\/> <\/> <\/> <\/> <\/> <\/> <\/> <\/> <\/> <\/> <\/> <\/> <\/> <\/> <\/> <\/> <\/>
style="font-size: 11.0pt;"> 1. <\/SPAN>
<\/SPAN>ターミナルを開きます。<\/SPAN><\/P> <\/SPAN>2. <\/SPAN>ユーザーpostgresとして以下のコマンドを発行します。pg_hba.confとpostgresql.confのバックアップを取ります。<\/SPAN><\/P>cd data<\/SPAN><\/EM><\/P>vim pg_hba.conf<\/SPAN><\/EM><\/P> <\/SPAN><\/EM><\/P> 3. <\/SPAN>有効なパスワードを提供するすべてのユーザーが、例えば192で始まるアドレスからPostgreSQLインスタンス上の任意のデータベースに接続できるようにするには、pg_hba.confファイルに以下のような行を追加します:<\/SPAN><\/P>host all all 192.0.0.0\/8 md5<\/SPAN><\/EM><\/P> 4. <\/SPAN>編集モードを終了するためにescキーを押した後、コマンドを発行してvimを終了し保存します<\/SPAN><\/P>:wq<\/SPAN><\/EM><\/P>c) <\/SPAN>postgresql.confファイルの「Connections and Authentications」セクションが以下のエントリと類似していることを確認します<\/SPAN><\/P>
 <\/SPAN><\/P>5. <\/SPAN>セキュリティウォールとファイアウォール<\/SPAN><\/STRONG><\/P>a) <\/SPAN>rootユーザーとしてLinuxディストリビューションのファイアウォールにポート5432を追加します。<\/SPAN><\/P>
 <\/SPAN><\/P>6. <\/SPAN>ArcGIS Client<\/SPAN><\/STRONG><\/P><\/SPAN><\/STRONG><\/P>a) <\/SPAN>Windows上で、ジオデータベースを作成するために使用するArcGISクライアントをインストールします。<\/SPAN><\/P><\/SPAN><\/P>b) <\/SPAN>PostgreSQLクライアントライブラリ(ArcGISクライアントがWindowsの場合)またはRPM(ArcGISクライアントがLinuxの場合)をEsri Customer Careポータルからダウンロードし、前のステップでインストールしたArcGISクライアントのbinディレクトリに配置します。<\/SPAN><\/P><\/SPAN> c)&amp;amp;amp;amp;amp;amp;amp;amp;amp;amp;amp;amp;amp;amp;amp;amp;amp;amp;amp;amp;amp;amp;amp;amp;amp;amp;amp;amp;amp;amp;amp;amp;amp;amp;amp;amp;amp;amp;amp;amp;amp;amp;amp;amp ; Copy the 32 bit files from "..\ArcGIS 3rd Party\PostgreSQLClientLibs922\32bit " to the bin folder of your ArcGIS for Desktop 10 .2 installation.< /span>
 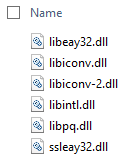 d)& ;amp ;amp ;amp ;amp ;amp ;amp ;amp ;amp ;amp ;amp ;amp ;amp ;amp ;amp ;amp ;amp ;amp ;amp ;amp ;amp ;amp ;amp ;amp ;amp ;amp ;amp ;amp ; 同様に、サーバー用の "..\ArcGIS 3rd Party\PostgreSQLClientLibs922\64bit " ライブラリ内の64ビットクライアントを ArcGIS for server の bin フォルダーにコピーします。
 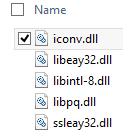 e)& amp amp amp amp amp amp amp amp amp amp amp amp amp amp amp amp amp amp amp amp amp amp amp amp 詳細については、「Setting up a connection to PostgreSQL」を参照してください。 f)& amp amp amp amp amp amp amp amp amp amp amp amp amp amp amp セキュリティとファイアウォール Windowsファイアウォールまたはアンチウイルスでポート5432を除外してください。 7 .& nbsp;< span lang ='en'style =' font - size :11 pt;'>接続テスト </ p > < p > < strong > < span lang ='en'style =' font - size :11 pt;' > & nbsp;</ span > </ strong > </ p > < p > < span lang ='en'style =' font - size :11 pt;' > a) & nbsp & nbsp & nbsp & nbsp & nbsp & nbsp & nbsp & nbsp & nbsp & nbsp & nbsp & nbsp & nbsp & nbsp & nbsp & nbsp & nbsp & nbsp & nbsp & nbsp & nbsp & nbsp & nbsp & nbsp & nbsp & nbsp & nbsp Run Create Enterprise Geodatabase tool in ArcToolbox > Geodatabase Administration ></ span > </ p > < p align ='center'> < img alt ='a.png'class ='image-30 jive-image'height ='307'src ='https://us.v-cdn.net/6038851/uploads/legacyfs/online/3204_a.png'style ='display:block;margin-left:auto;margin-right:auto;width :388 px;height :307 .27096774193546 px;'width ='388'/>クリック< span style ='text-align:left;'> < strong > OK</ strong > </ span > </ p > < p > < img alt ='a.png'class ='jive-image image-31'src ='https://us.v-cdn.net/6038851/uploads/legacyfs/online/3205_a.png'style ='height:auto;display:block;margin-left:auto;margin-right:auto;'/> </ p > < p > < span lang ='en'style =' font - size :11 pt;' > b) & nbsp & nbsp & nbsp & nbsp & nbsp & nbsp Process of creating an ArcSDE geodatabase . Close the dialog showing the geodatabase has been created .</ span > </ p > < p > < span lang ='en'style =' font - size :11 pt;' > </ span > </ p > < p > c) Create database connection .</ p >
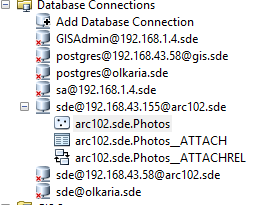
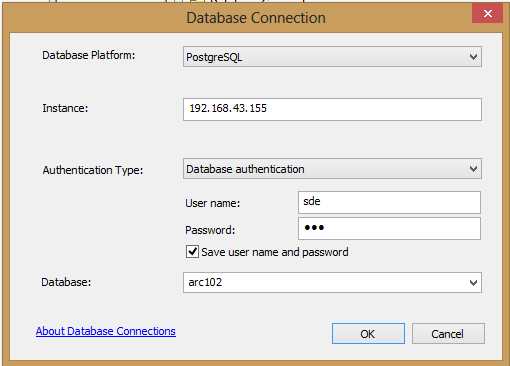 d) Load data through the connection to the database
 < /BODY >< /HTML >