Trabajar con un GIS a veces resulta en flujos de trabajo, modelos y demás bastante avanzados. El siguiente paso podría ser: ¿Cómo compartir estas herramientas para que otras partes y personas puedan trabajar con ellas? Hay múltiples enfoques para hacerlo:<\/P>
En esta publicación del blog me gustaría describir el último enfoque y crear un Widget personalizable para el Web AppBuilder.<\/P>
WAB se ejecuta en
Una vez descomprimido y configurado con tu cuenta de ArcGIS (conéctate con Portal for ArcGIS, crea una App en tu Portal, registra la App con tu Portal) estarás listo para comenzar:<\/P>
<\/P>
Sigue los pasos definidos en la
<SPAN class=\"token tag\"><SPAN class=\"token tag\"><SPAN class=\"punctuation token\"><<\SPAN>div<\SPAN></SPAN>><\SPAN></SPAN></SPAN> <SPAN class=\"token tag\"><SPAN class=\"token tag\"><SPAN class=\"punctuation token\"><<\SPAN>div<\SPAN> <SPAN class=\"attr-name token\">class<\SPAN>=<SPAN class=\"punctuation token\">\"</SPAN>title<SPAN class=\"punctuation token\">\"</SPAN></SPAN>><\SPAN></SPAN></SPAN>Nivel de Zoom Info<SPAN class=\"token tag\"><SPAN class=\"token tag\"><SPAN class=\"punctuation token\"></</SPAN>div<SPAN></SPAN>><\SPAN></SPAN></SPAN> <SPAN class=\"token tag\"><SPAN class=\"token tag\"><SPAN class=\"punctuation token\"><<\SPAN>div<SPAn class=\"attr-name token");class=<SPAn value=")row")><SPAn></SPAn></SPAn> <SPAn class=)token tag")<input type=")checkbox") id=")ZoomSetCheckbox")></SPAn> <SPAn class=")token tag")<p style=")display:inline")>Mostrar Info Zoom</p> </div> <div class=")row")> <input type=")checkbox") id=")ScaleSetCheckbox")> <p style=")display:inline")>Mostrar Escala Aproximada</p> </div> </div> <span class=")line-numbers-rows"><span </span><span </span><span </span><span </span><span </span><span </span><span </span><span </span><span </span><span </span><span </span></span>
<<\/SPAN>div<\/SPAN>><\/SPAN><\/SPAN> <<\/SPAN>div<\/SPAN> class<\/SPAN>=<\/SPAN>"<\/SPAN>title"<\/SPAN><\/SPAN>><\/SPAN><\/SPAN>Información del Nivel de Zoom<\/<\/span>div<\/span>><\/span><\/span> <<\/span>div<\/span> class<\/span>=<\/span>"<\/span>row"<\/span><\/span>><\/span><\/span> <<\/span>input<\/span> type<\/span>=<\/span>"<\/span>checkbox"<\/span><\/span> id<\/span>=<\/span>"<\/span>ZoomSetCheckbox"<\/span><\/span> data-dojo-attach-point<\/span>=<\/span>"<\/span>ZoomSetCheckbox"<\/span><\/span>(<\/SPAN>config)<\/SPAN>{<\/SPAN>\n this<\/SPAN>.<\/SPAN>config =<\/SPAN> config;<\/SPAN>\n this<\/SPAN>.<\/SPAN>ZoomSetCheckbox.<\/SPAN>checked =<\/SPAN> config.<\/SPAN>settings.<\/SPAN>ZoomSetCheckbox;<\/SPAN>\n this<\/SPAN>.<\/SPAN>ScaleSetCheckbox.<\/SPAN>checked =<\/SPAN> config.<\/SPAN>settings.<\/SPAN>ScaleSetCheckbox;<\/SPAN>\n console.<\/SPAN>log<\/SPAN>(<\/SPAN>"configuración leída del archivo: "<\/SPAN>)<\/SPAN>;<\/SPAN>\n console.<\/SPAN>log<\/SPAN>(<\/SPAN>config)<\/SPAN>;<\/SPAN>\n \n },\n getConfig:<\/SPAN> function(){\n settings = this.config.settings;\n if (this.ZoomSetCheckbox) {\n settings.ZoomSetCheckbox = this.ZoomSetCheckbox.checked;\n }\n if (this.ScaleSetCheckbox) {\n settings.ScaleSetCheckbox = this.ScaleSetCheckbox.checked;\n }\n this.config.settings = settings; console.log(<.string.token> token">"<\/SPAN><\/SPAN> data-dojo-attach-point<\/SPAN>=<\/SPAN>"<\/SPAN>scaleInfo"<\/SPAN><\/SPAN>><\/SPAN><\/SPAN><\/<\/SPAN>p<\/SPAN>><\/SPAN><\/SPAN><\/<\/SPAN>div<\/SPAN>><\/SPAN><\/SPAN><\/<\/SPAN>div<\/SPAN>><\/SPAN><\/SPAN><\/SPAN><\/SPAN><\/SPAN><\/SPAN><\/SPAN><\/CODE><\/PRE>Puedes ver un enfoque similar como en el Setting.html<\/EM>: Usamos data-dojo-attach-points para acceder al elemento div y modificar el contenido de este div. Podríamos hacer esto en línea pero nos apegamos a la estructura y definimos la parte de JavaScript en el Widget.js.<\/EM><\/P>define<\/SPAN>(<\/SPAN>[<\/SPAN> 'dojo\/_base\declare'<\/SPAN>,<\/SPAN> 'dojo\/_base\lang'<\/SPAN>,<\/SPAN> 'jimu\/_BaseWidget'<\/SPAN>,<\/SPAN> 'dojo\/_on'<\/SPAN>,<\/SPAN> //como modificamos el div cuando el mapa se desplaza "on.extent-change"<\/SPAN> 'esri\/_map'<\/SPAN> //como interactuamos con el mapa<\/SPAN>]<\/SPAN>,<\/Span> function<\/span>(<\/span>declare,<\/span> lang,<\/span> BaseWidget,<\/span> on,<\/span> Map)<\/span> {<\/span> return<\/span> declare<\/span>(<\/span>[<\/span>BaseWidget]<\/span>,<\/span> {<\/span> baseClass:<\/span> 'jimu-widget-zoomlevelinfo'<\/span>,<\/span> postCreate:<\/span> function<\/span>(<\/span>)<\/span> {<\/span> this<\/span>.<\/span>inherited<\/span>(<\/span>arguments)<\/span>;<\/span> this<\/span>.<\/span>own<\/span>(<\/span>on<\/span>(<\/span>this<\/span>.<\/span>map,<\/span> 'extent-change'<\/span>,<\/span> lang.<\/span>hitch<\/span>(.inherited(arguments); }, _ewZoomInfo: function() { scale = esri.geometry.getScale(this.map); var json = this.config; //leer la configuración if (json.settings.ZoomSetCheckbox) { //mostrar Información de Zoom configurada en true this.MapZoomInfo.innerHTML = this.map.getZoom(); //modificar el HTML interno con la Información de Zoom } else { dojo.destroy(this.zoomInfoDiv); //eliminar el div para que se vea limpio si no se desea } if (json.settings.ScaleSetCheckbox) { this.scaleInfo.innerHTML = "1:" + Math.round(this.map.getScale() / class="number token">1000<\/SPAN>)<\/SPAN>*<\/SPAN>1000<\/SPAN> ;<\/SPAN> }<\/SPAN> else<\/SPAN> {<\/SPAN> dojo.<\/SPAN>destroy<\/SPAN>(<\/SPAN>this<\/SPAN>.<\/SPAN>scaleInfoDiv)<\/SPAN>;<\/SPAN> }<\/SPAN> }<\/SPAN> }<\/SPAN>)<\/SPAN>;<\/SPAN>}<\/SPAN>)<\/SPAN>;<\/SPAN><\/SPAN><\/SPAN><\/SPAN><\/SPAN><\/SPAN><\/SPAN><\/SPAN><\/SPAN><\/SPAN><\/SPAN><\/SPAN><\/SPAN><\/SPAN><\/SPAN><\/SPAN><\/SPAN><\/SPAN><\/SPAN><\/SPAN><\/Span >< < EM O J I _ 20 > > < / S P A N > < S P A N > < < E M O J I _ 21 > > < / S P A N > < S P A N > < < E M O J I _ 22 > > < / S P A N > < S P A N > < < E M O J I _ 23 > > < / S P A N > < S P A N > < < E M O J I _ 24 > > < / S P A N > < S P A N > < < E M O J I _ 25 > > < / S P A N > < S P A N > < < E M O J I _ 26 > > < / S P A N > < S P A N > < < E M O J I _ 27 > > < / S P A N > < S P A N > < < E M O J I _ 28 > > < / S P A N > < S P A N > < < E M O J I _ 29 > > < / S P A N > < S P A N > < < E M O J I _ 30 > > < / S P A N > < S P A N > < < E M O J I _ 31 > > < / S P A N > < S P A N > < < E M O J I _ 32 > > < / S P A N > < S P A N > < < E M O J I _ 33 > >< /S PAN >< /C O D E >< /P R E >< H3 id = "toc-hId--800563879" id = "toc-hId--800563879" > El Manifest.json
define<\/SPAN>(<\/SPAN>[<\/SPAN> 'dojo\/_base\declare'<\/SPAN>,<\/SPAN> 'dojo\/_base\lang'<\/SPAN>,<\/SPAN> 'jimu\/_BaseWidget'<\/SPAN>,<\/SPAN> 'dojo\/_on'<\/SPAN>,<\/SPAN> //como modificamos el div cuando el mapa se desplaza "on.extent-change"<\/SPAN> 'esri\/_map'<\/SPAN> //como interactuamos con el mapa<\/SPAN>]<\/SPAN>,<\/Span> function<\/span>(<\/span>declare,<\/span> lang,<\/span> BaseWidget,<\/span> on,<\/span> Map)<\/span> {<\/span> return<\/span> declare<\/span>(<\/span>[<\/span>BaseWidget]<\/span>,<\/span> {<\/span> baseClass:<\/span> 'jimu-widget-zoomlevelinfo'<\/span>,<\/span> postCreate:<\/span> function<\/span>(<\/span>)<\/span> {<\/span> this<\/span>.<\/span>inherited<\/span>(<\/span>arguments)<\/span>;<\/span> this<\/span>.<\/span>own<\/span>(<\/span>on<\/span>(<\/span>this<\/span>.<\/span>map,<\/span> 'extent-change'<\/span>,<\/span> lang.<\/span>hitch<\/span>(.inherited(arguments); }, _ewZoomInfo: function() { scale = esri.geometry.getScale(this.map); var json = this.config; //leer la configuración if (json.settings.ZoomSetCheckbox) { //mostrar Información de Zoom configurada en true this.MapZoomInfo.innerHTML = this.map.getZoom(); //modificar el HTML interno con la Información de Zoom } else { dojo.destroy(this.zoomInfoDiv); //eliminar el div para que se vea limpio si no se desea } if (json.settings.ScaleSetCheckbox) { this.scaleInfo.innerHTML = "1:" + Math.round(this.map.getScale() / class="number token">1000<\/SPAN>)<\/SPAN>*<\/SPAN>1000<\/SPAN> ;<\/SPAN> }<\/SPAN> else<\/SPAN> {<\/SPAN> dojo.<\/SPAN>destroy<\/SPAN>(<\/SPAN>this<\/SPAN>.<\/SPAN>scaleInfoDiv)<\/SPAN>;<\/SPAN> }<\/SPAN> }<\/SPAN> }<\/SPAN>)<\/SPAN>;<\/SPAN>}<\/SPAN>)<\/SPAN>;<\/SPAN><\/SPAN><\/SPAN><\/SPAN><\/SPAN><\/SPAN><\/SPAN><\/SPAN><\/SPAN><\/SPAN><\/SPAN><\/SPAN><\/SPAN><\/SPAN><\/SPAN><\/SPAN><\/SPAN><\/SPAN><\/SPAN><\/SPAN><\/Span >< < EM O J I _ 20 > > < / S P A N > < S P A N > < < E M O J I _ 21 > > < / S P A N > < S P A N > < < E M O J I _ 22 > > < / S P A N > < S P A N > < < E M O J I _ 23 > > < / S P A N > < S P A N > < < E M O J I _ 24 > > < / S P A N > < S P A N > < < E M O J I _ 25 > > < / S P A N > < S P A N > < < E M O J I _ 26 > > < / S P A N > < S P A N > < < E M O J I _ 27 > > < / S P A N > < S P A N > < < E M O J I _ 28 > > < / S P A N > < S P A N > < < E M O J I _ 29 > > < / S P A N > < S P A N > < < E M O J I _ 30 > > < / S P A N > < S P A N > < < E M O J I _ 31 > > < / S P A N > < S P A N > < < E M O J I _ 32 > > < / S P A N > < S P A N > < < E M O J I _ 33 > >< /S PAN >< /C O D E >< /P R E >< H3 id = "toc-hId--800563879" id = "toc-hId--800563879" > El Manifest.json
Para implementar la nueva aplicación personalizada en una aplicación web necesitamos crear un archivo llamado manifest.json.< / EM> Este archivo contiene la información básica sobre el nombre y la configuración principal:< /P >{ "name": "ZoomLevelInfo", "platform": "HTML", "version": "2.8", "wabVersion": "2.8", "author": "Esri Deutschland GmbH // Riccardo Klinger", "description": "Este es un widget para mostrar la escala y el nivel de zoom del mapa subyacente.", "copyright": "", "license": "http://www.apache.org/licenses/LICENSE-2.0", "properties": { & nbsp; & nbsp; & nbsp; "inPanel": false, // ya que está fuera del panel & nbsp; & nbsp; & nbsp; "hasUIFile": true, // tenemos un archivo de interfaz de usuario de configuración & nbsp; & nbsp; & nbsp; "supportMultiInstance": falseb4// solo permitimos una instancia del widget. } }< EMOJ I _34 >< / SPAN >< SPAN >< EMOJ I _35 >< / SPAN >< SPAN >< EMOJ I _36 >< / SPAN >< SPAN >< EMOJ I _37 >< / SPAN >< SPAN >< EMOJ I _38 >< / SPAN >< SPAN >< EMOJ I _39 >< / SPAN >< SPAN >< EMOJ I _40 >< / SPAN >< SPAN >< EMOJ I _41 >< / SPAN >< SPAN >< EMOJ I _42 >< / SPAN >< SPAN >< EMOJ I _43 >< / SPAN >< SPAN >< EMOJ I _44 >< / SPAN >< SPAN >< EMOJ I _45 >< / SPAN >< SPAN >< EMOJ I _46 >< / SPAN >< SPAN >< EMOJ I _47 >< / SPAN >< SPAN >< EMOJ I _48 >< / SPAN > Ahora podemos probar el widget.< /P> Probando el Widget Como creamos el widget principal, ahora deberíamos probarlo en nuestra instalación de WAB Developer. Por lo tanto, coloque toda la carpeta (en nuestro caso ZoomLevelInfo) en la carpeta de widgets del cliente de WAB (en mi caso "C:\WebAppBuilderForArcGIS\client\stemapp\widgets").
{
  "name": "ZoomLevelInfo",
  "platform": "HTML",
  "version": "2.8",
  "wabVersion": "2.8",
  "author": "Esri Deutschland GmbH // Riccardo Klinger",
  "description": "Este es un widget para mostrar la escala y el nivel de zoom del mapa subyacente.",
  "copyright": "",
  "license": "http://www.apache.org/licenses/LICENSE-2.0",
  "properties": {
  & nbsp; & nbsp; & nbsp; "inPanel": false, // ya que está fuera del panel
  & nbsp; & nbsp; & nbsp; "hasUIFile": true, // tenemos un archivo de interfaz de usuario de configuración
  & nbsp; & nbsp; & nbsp; "supportMultiInstance": falseb4// solo permitimos una instancia del widget.
  }
}< EMOJ I _34 >< / SPAN >< SPAN >< EMOJ I _35 >< / SPAN >< SPAN >< EMOJ I _36 >< / SPAN >< SPAN >< EMOJ I _37 >< / SPAN >< SPAN >< EMOJ I _38 >< / SPAN >< SPAN >< EMOJ I _39 >< / SPAN >< SPAN >< EMOJ I _40 >< / SPAN >< SPAN >< EMOJ I _41 >< / SPAN >< SPAN >< EMOJ I _42 >< / SPAN >< SPAN >< EMOJ I _43 >< / SPAN >< SPAN >< EMOJ I _44 >< / SPAN >< SPAN >< EMOJ I _45 >< / SPAN >< SPAN >< EMOJ I _46 >< / SPAN >< SPAN >< EMOJ I _47 >< / SPAN >< SPAN >< EMOJ I _48 >< / SPAN >
Ahora podemos probar el widget.< /P>
 Probando el Widget
Como creamos el widget principal, ahora deberíamos probarlo en nuestra instalación de WAB Developer. Por lo tanto, coloque toda la carpeta (en nuestro caso ZoomLevelInfo) en la carpeta de widgets del cliente de WAB (en mi caso "C:\WebAppBuilderForArcGIS\client\stemapp\widgets").
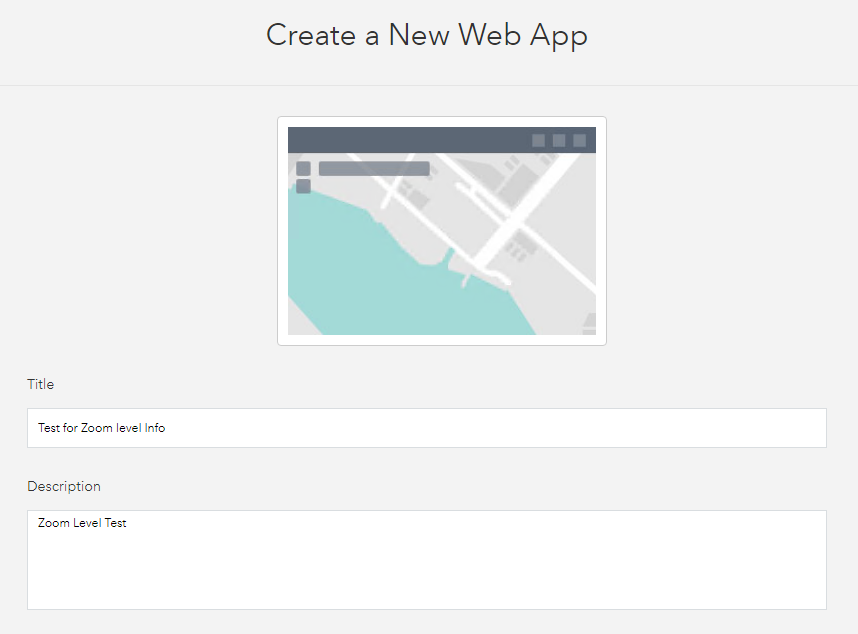
Para la prueba, reinicie Web AppBuilder y cree una nueva aplicación:< /P>
< /P>
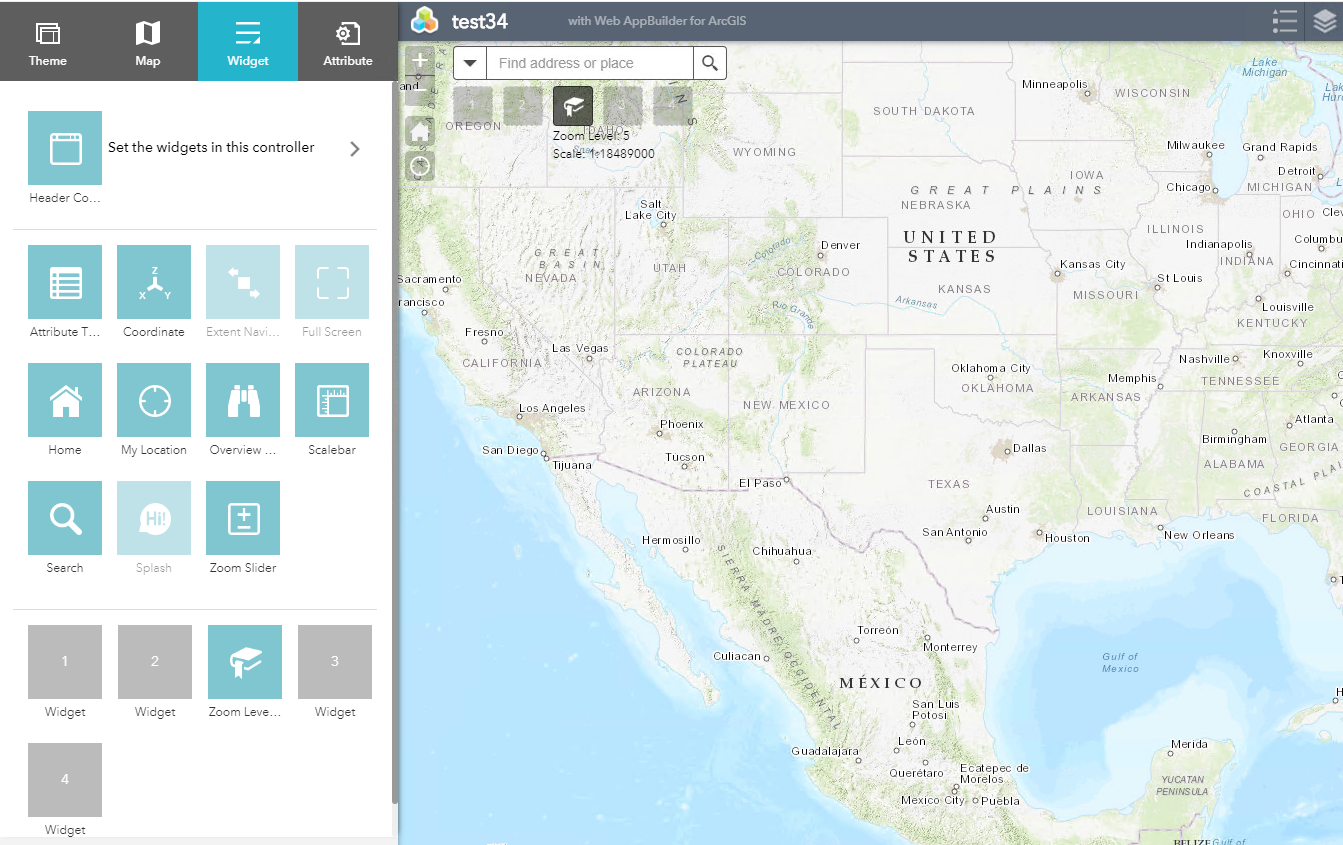
El widget ahora es parte de Web AppBuilder y puede seleccionarse como un widget:< /P>
Si sus pruebas fueron exitosas, puede alojar el widget en un servidor e implementarlo en ArcGIS Online o su entorno ArcGIS Enterprise (>10.5) como unwidget personalizado. Si posee el portal, también podría querer agregar la carpeta dentro del WAB del portal (en mi caso "C:\Program Files\ArcGIS\Portal\apps\webappbuilder\stemapp\widgets").
Si desea usar el ejemplo, use githubaquí. O descárguelo directamente a continuación.< /P>
Los miembros registrados pueden publicar, seguir actualizaciones y más. ¿Nuevo aquí? Regístrate gratis.
Find useful guides, FAQs, and documents to help you navigate and make the most of Esri Community.