<\/HEAD>
During my project internship at Esri Nederland, I worked on the Christmas card<\/A><\/SPAN> that can be used as a base map. By changing the colors and patterns on the Topo RD map into Christmas style, a beautiful Christmas card was created. With the Topo RD raster base map, colors and patterns cannot be adjusted, but with the Topo RD vector base map they can. This is because this base map consists of vector tiles to which sprites, objects that can be customized, are linked. In the ArcGIS Vector Tile Style Editor<\/A> these objects can be customized. <\/SPAN>Besides customizing the style, the vector base map has more advantages compared to the raster base map, Willem Jan Vierbergen<\/A> <\/SPAN>explains more about this in his webinar<\/A><\/SPAN> about vector base maps.<\/SPAN><\/P><\/P>
Preparation<\/STRONG><\/SPAN><\/P>First, I made a
copy of the vector base map<\/A> in ArcGIS Online.<\/SPAN> I found the Light Gray Canvas RD vector base map useful to use because the colors, which you can adjust per layer, were clearly visible on the gray background. <\/SPAN>After making the copy, I could start creating the creative vector base map in the ArcGIS Vector Tile Style Editor<\/SPAN>.<\/SPAN><\/P><\/P>Choosing colors<\/STRONG><\/SPAN><\/P>Before we start giving patterns to the sprites, it is wise to begin by selecting the colors that will be used in the map so that it becomes clear whether the chosen colors match each other. I used the website coolors<\/A><\/SPAN> and Adobe Illustrator to see which colors go well together. <\/SPAN><\/P>After I finished choosing the colors, I adjusted the colors in the map using Edit Layer Styles<\/EM>. <\/SPAN><\/P>The code of the color I chose from coolors, <\/SPAN>or Adobe Illustrator, I copy and paste into the color code of the layer where I want to change the color. I noticed that I started experimenting with colors to see which colors matched best. Sometimes I changed certain colors during the process because I felt another color fit better with the whole than the original color. For example, at one point I made the line color red with white to emphasize the Christmas theme extra.<\/SPAN><\/P><\/P> <\/SPAN><\/P><\/P>Patterns <\/STRONG><\/SPAN><\/P>Next, we get started with adding patterns to the map. First, I thought about which patterns could fit which areas. For example, for the green color of the forest, the color remains green, but a green pattern does add something extra to the map. I also used a dark blue color for the sea, which I set in the previous step. I took this color into Adobe Illustrator and then pasted snowflakes on it from
Freepik<\/A><\/SPAN> and saved the image as a PNG file with a transparent background. If you use Freepik<\/SPAN>, do not forget that images contain copyrights.<\/SPAN><\/P>I chose to have snowflakes appear more often on the map to give an extra Christmas feeling to the map. The only adjustment I had to make for this was changing the background color of the snowflakes. This can be done in Adobe Illustrator or another program that can edit photos.<\/SPAN><\/P> <\/SPAN><\/P>


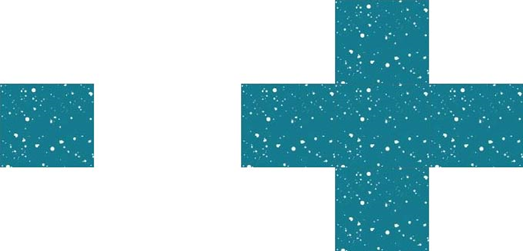
& nbsp ; </ P > < P > < span style = ' font - size : 11 . 0 pt ; ' > The pattern for the sprite will be duplicated horizontally and vertically on the map . To ensure that the pattern fits nicely together , I tested it in Adobe Illustrator . This can also be done in a similar program , or by loading it five times in Word to see if images align well . How a misaligned pattern looks is shown in the image below . < / span > < / p > < p > < span style = ' font - size : 11 . 0 pt ; ' > & nbsp ; < / span > < / p > < p > < span style = ' font - size : 11 . 0 pt ; ' > & nbsp ; < img __jive_id = "431953 " class = "image-5 j-img-centered jive-image " src = "https : / / us.v-cdn.net /6038851/uploads/legacyfs/online/431953_pastedImage_13.png " style = "display : block ; margin-left : auto ; margin-right : auto ; " /> < / span > < / p > < p > < span style = ' font - size : 11 . 0 pt ; ' > & nbsp ; < / span > < / p > < p > < span style = ' font - size : 11 . 0 pt ; ' > & nbsp ; < / span > < / p > < p > < span style = ' font - size : 11 . 0 pt ; ' > & nbsp ; & nbsp ; & nbsp ; & nbsp ; & nbsp ; & nbsp ; & nbsp ; & nbsp ; & nbsp ; & nbsp ; & nbsp ; & nbsp ; & nbsp ; & nbsp ; & nbsp ; & nbsp ; & nbsp ; & nbsp ; & nbsp ; & nbsp ; & nbsp ; & nbsp ; & nbsp ; & nbsp ; & nbsp ; & nbsp ; & nbsp ; & nbsp ; & nbsp ; & nbsp ; & nbsp ; & nbsp ; & nbsp ; & nbsp ; & nbsp ; & nbsp ; & nbsp ; & nbsp ; & nb sp; </ span > </ p > < p > To make images fit well together , I cropped the original image in a photo editing program . If cropped correctly , no white lines will be visible as shown in previous image . </ p >
The image can be added via the Edit Icons and Patterns button in ArcGIS Vector Tile Style Editor . After uploading images , they can be added per layer with Edit Layer Styles button .
At some point , I found the Christmas tree pattern too busy . To make this pattern less busy , I adjusted its brightness via Opacity.
&nb sp;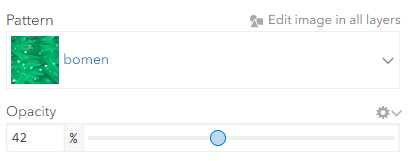
&nb sp;&nb sp;
&nb sp;
Icons for labels
Besides patterns , icons can also be used . For example , for this Christmas card , I gave place , country , district , and neighborhood names an icon shaped like a ribbon where text fit inside.&nb sp;
&nb sp;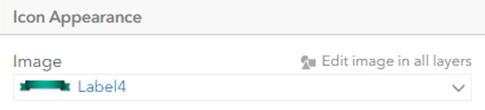
&nb sp;
style="font-size: 11.0pt;">The ribbon turned out to be too large, so I changed the size using
Size <\/EM>. With Icon Translate<\/EM>, I changed the X and Y positions so that the text was centered on the ribbon.<\/SPAN><\/P><\/P>I still had a number of nice eye-catching icons left over. Placing these on a very common layer seemed a bit too much. Therefore, I chose to place these icons on layers that were less common and had a deep zoom level.<\/SPAN><\/P>  <\/SPAN><\/P> <\/P> <\/STRONG><\/SPAN><\/P> <\/STRONG><\/SPAN><\/P>Replacing existing icons<\/STRONG><\/SPAN><\/P>I wanted to replace the tree icons with Christmas balls. I did this via Edit Icons and <\/EM> then clicked on Replace Icon\/Pattern. <\/EM>This way I could replace all the tree icons with Christmas balls at once.<\/SPAN><\/P>
 <\/SPAN><\/P> <\/P> <\/EM><\/SPAN><\/P>Extras <\/STRONG><\/SPAN><\/P>For the finishing touch, I adjusted the font colors and gave the text a nice effect by adding a white blurry cloud as an icon to the text. <\/SPAN><\/P> <\/SPAN><\/P>
  <\/SPAN><\/P> <\/SPAN> <\/SPAN><\/P> <\/SPAN><\/P>For sharing the creative vector base map, I used the Web App Builder for ArcGIS<\/EM> because almost everything could be changed there.<\/SPAN><\/P> <\/SPAN><\/P>Result<\/STRONG><\/SPAN><\/P>Sometimes it was a bit of a puzzle to find the right patterns without making the map too busy. Also, there are so many map layers that sometimes layers had to be made bright red to find the right layer. But that does mean that all those layers can also be customized to your own style. Precisely because of all the possibilities that the ArcGIS Vector Tile Style Editor offers, you can unleash your creativity and try out everything until a beautiful final result emerges that you yourself, your friends, family, and colleagues will be proud of!<\/SPAN><\/P> <\/STRONG><\/SPAN><\/P>Merry Christmas! View the Christmas card here<\/<A>.<\/<EM>\/<\/<span>\/

