This article was made with CityEngine 2022.1 and Twinmotion 2022.2.
Prepare your CE Terrain for Twinmotion
Before you start exporting the terrain layer, some preparations are needed.
Export all Models and Shapes to Unreal Datasmith
Export your scene geometry using the Datasmith Exporter
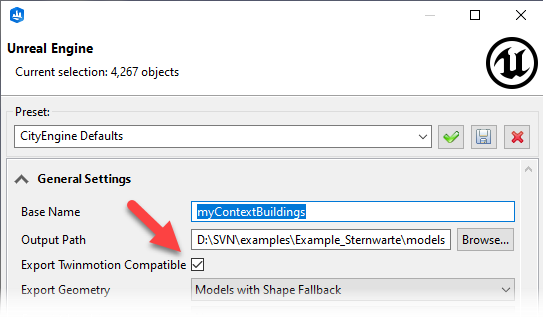
- IMPORTANT: Enable the Twinmotin compatibility mode.
- In the Geometry Settings section press Center. Note down the offset values. This will help you to align the terrain in the Twinmotion scene later.
Please consult the Export DATASMITH (Unreal and Twinmotion)—ArcGIS CityEngine Resources | Documentation for more details.
Setting the optimal Terrain resolution
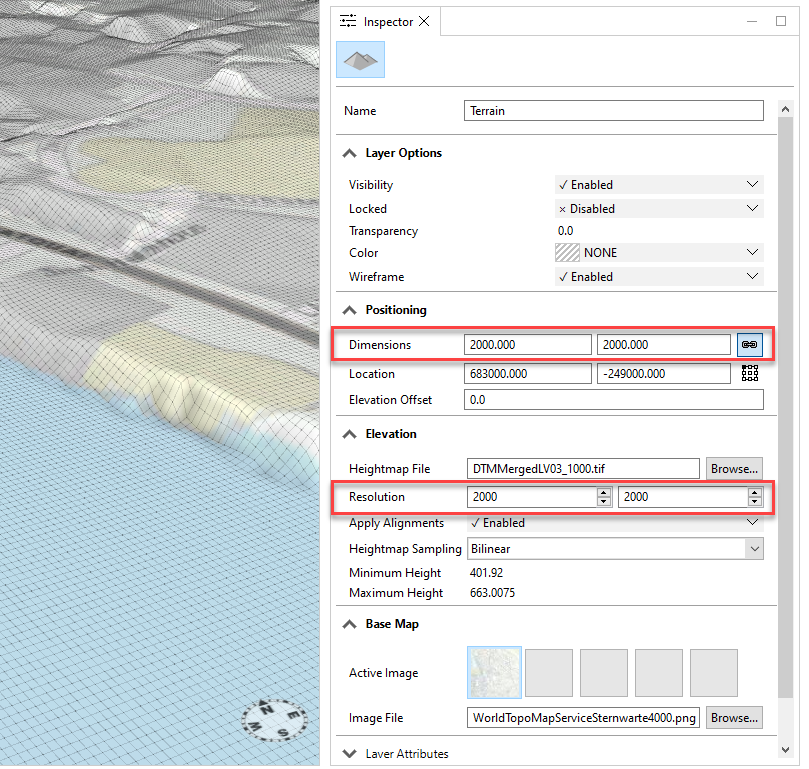
Select the Terrain and open the Inspector. Increase the elevation resolution until the grid is approximately 1- by -1 meter. Additionally, write down the amplitude of the terrain (Maximum Height - Minimum Height value), since it is later needed for the import in Twinmotion.
Water areas
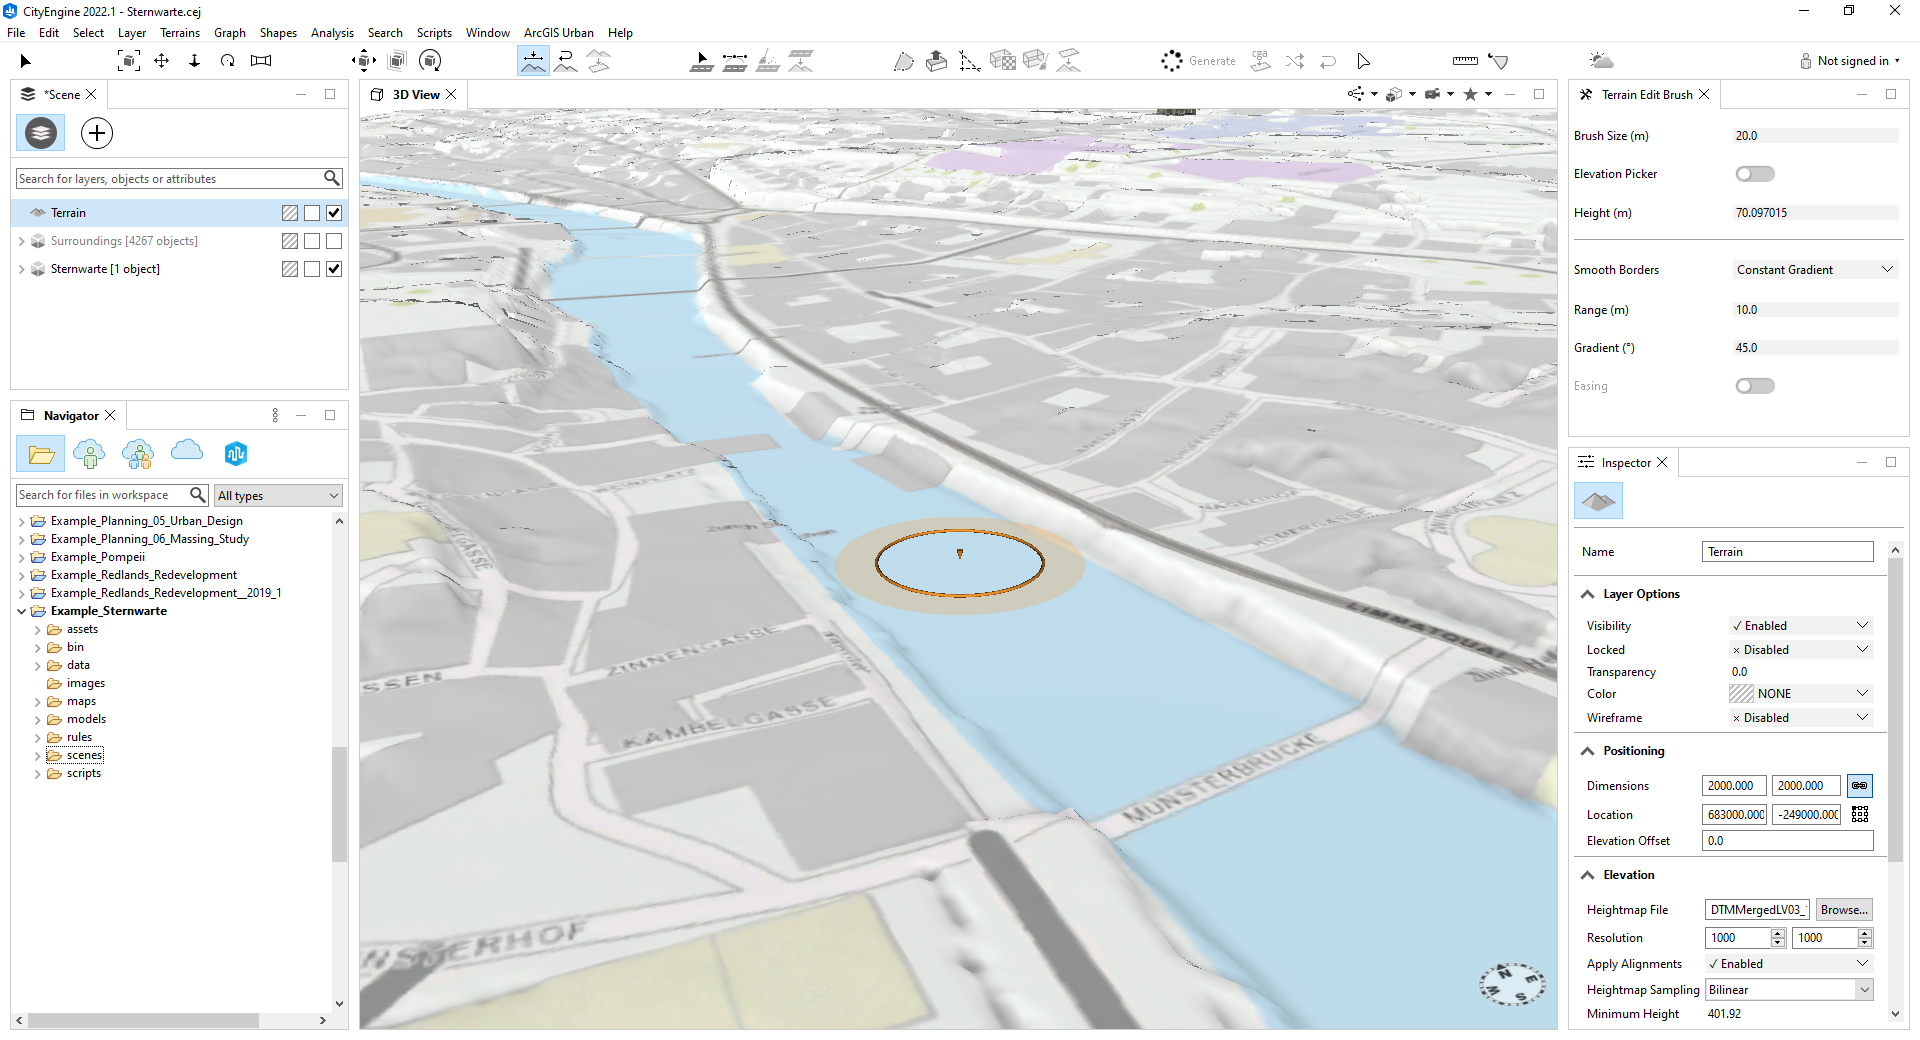
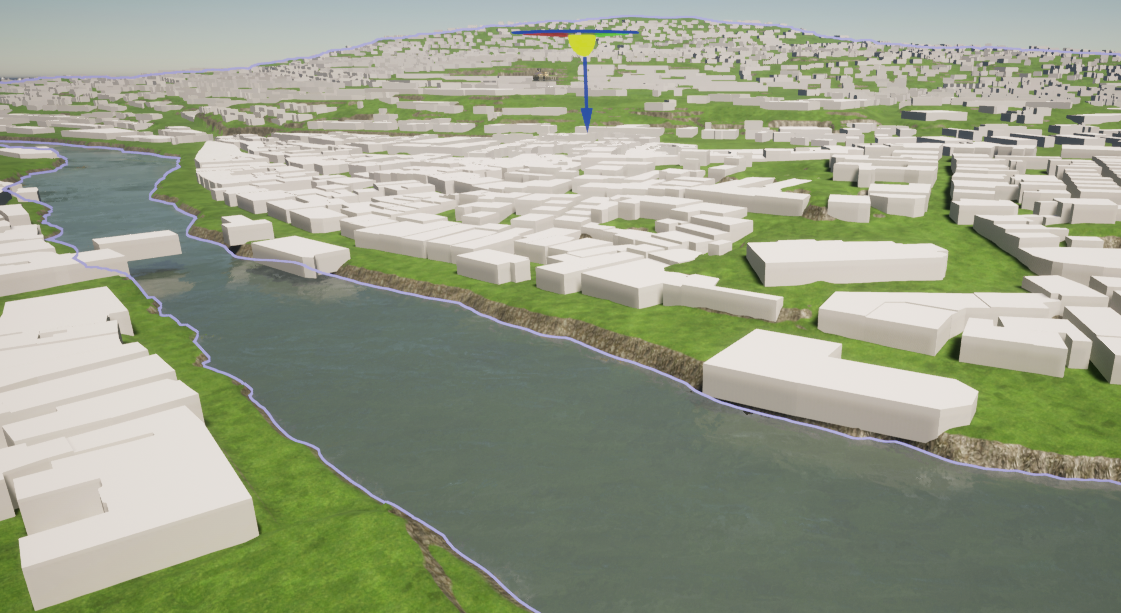
Does your scene contain an ocean, lake, or slow-flowing river? Then use Twinmotion for realistic water visualization. Most likely your terrain data represents the surface of the water body. For the visualization in Twinmotion, water bodies need some depth to look good. Use the CityEngine terrain edit brush to increase the depth of the terrain in the water areas.
Export your CE Terrain
There are two methods to transfer terrain data from CityEngine to Twinmotion. You can either choose to export a heightmap image or terrain mesh.
Export as Heightmap image
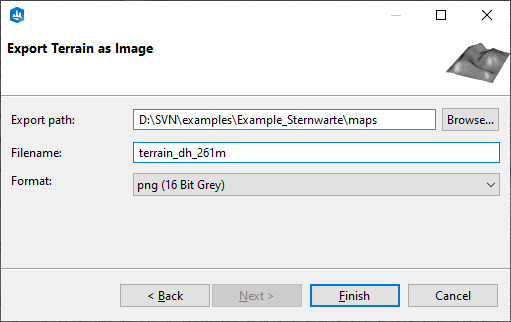
Select the terrain in the Scene Editor and go to Menu > Export... > Export Selected Terrains as Image. Then choose the png (16 Bit Grey) format.
Export as Mesh
Select the terrain in the Scene Editor and go to Menu > Export Models... and select Autodesk FBX.
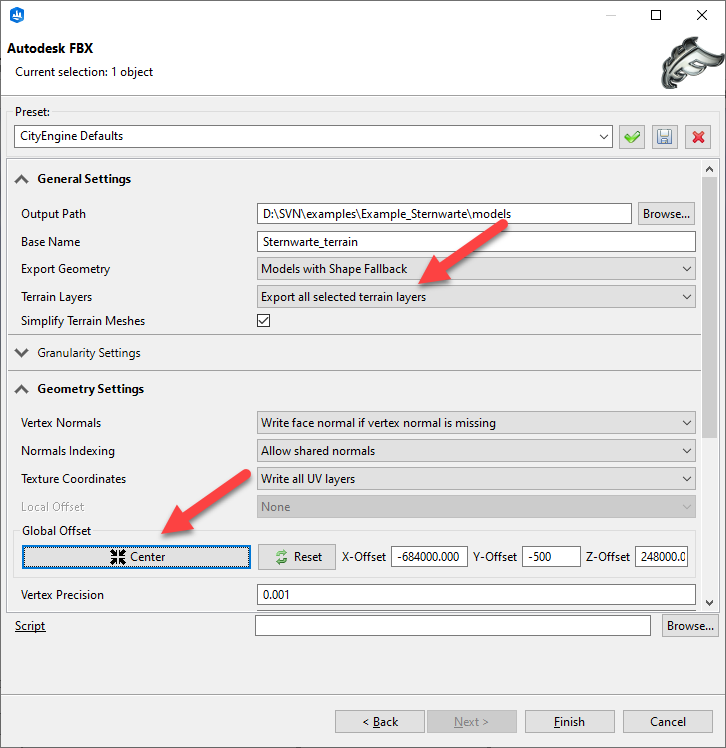
- Go to Geometry Settings and use the same offset values (the values you wrote down earlier) as you did for the Datasmith export (alternatively, click Center). This helps to align the terrain in your Twinmotion scene after import.
Prepare your Twinmotion Scene
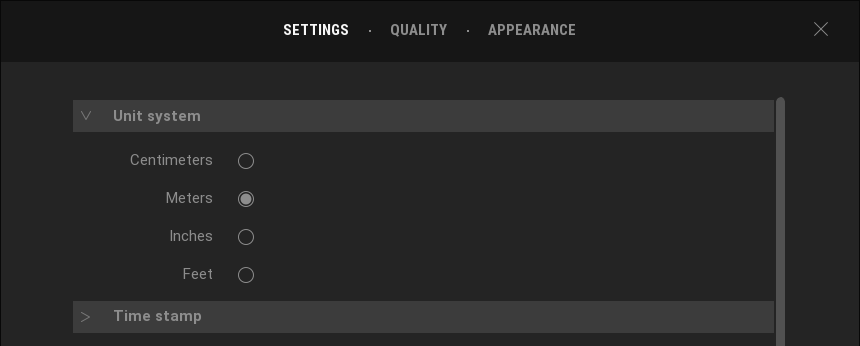
First, make sure your Twinmotion scene is set to meters:
Datasmith Import
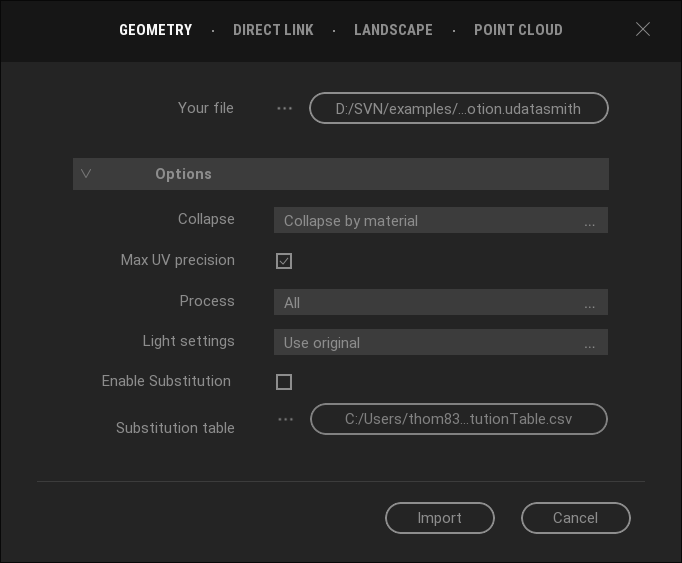
Open the Twinmotion geometry import dialog to import your scene geometry stored int the Datasmith exchange format.
Import your Terrain in Twinmotion
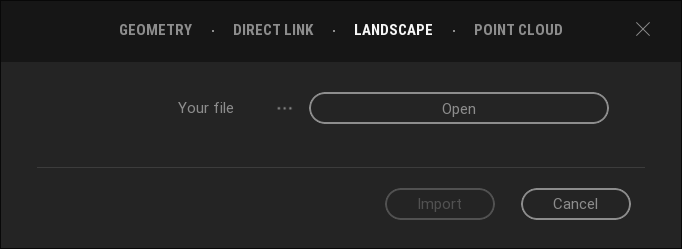
In Twinmotion, terrains are called Landscapes. Open the import dialog and select the Landscape tab. On import, landscapes get materials assigned automatically.
You have three different options to add the terrain:
1: Landscape from a Heightmap image
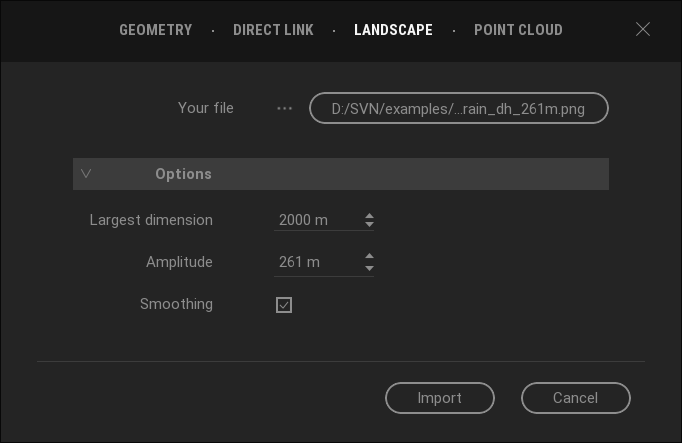
- Set the Largest dimension to the largest dimension of the image file. Remember: the elevation resolution was set to 1-by-1 meters prior to export in CityEngine.
- The amplitude is the Maximum Height - Minimum Height value in the CityEngine Inspector (The same amplitude values you wrote down earlier).
- Optionally enable Smoothing.
2: Landscape from Mesh
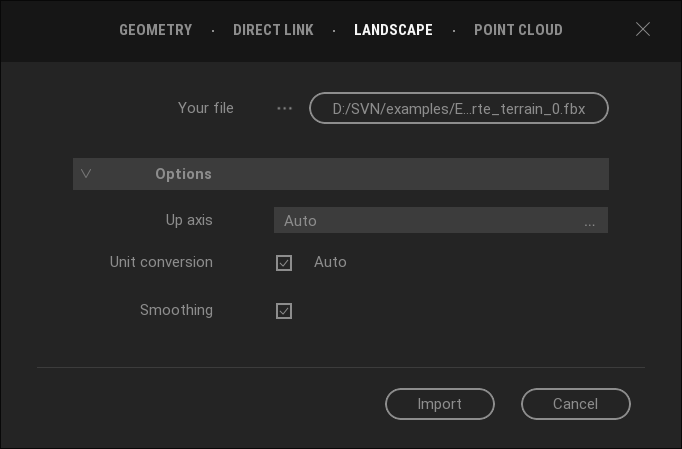
- The up-axis and the distance unit are defined by the CE exporter.
Keep both options set to Auto. - Optionally enable Smoothing.
3: Import Terrain Mesh as Geometry
The third option is to import the terrain mesh as geometry. This allows you to keep the texture (e.g., satellite image) of your CityEngine terrain.
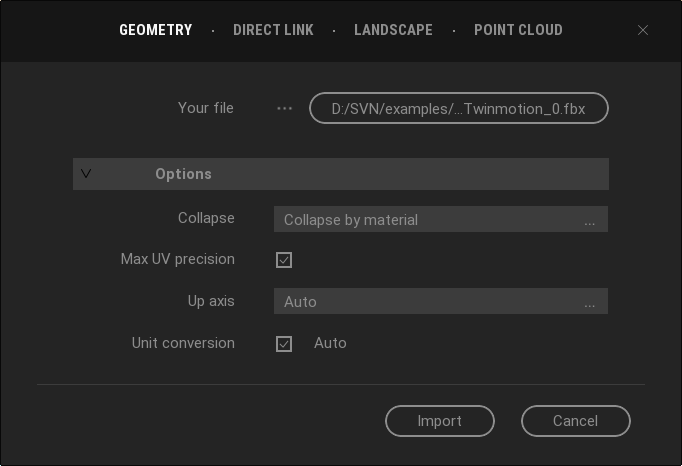
- Keep the default settings
Add Water to the Landscape
Optionally, enable Water in the Twinmotion scene.
- Settings > Weather > Effects > Ocean
- Enable
- Adjust the height
- In Aspect select the water type
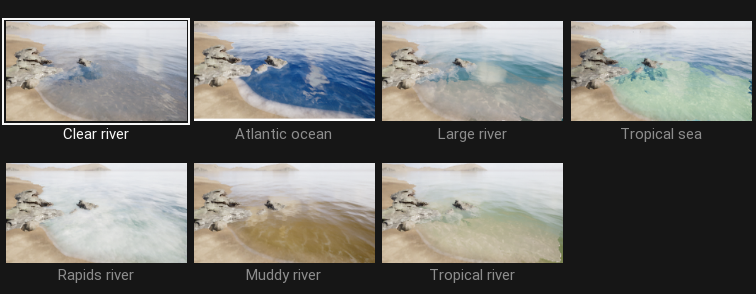
Move all elements into place
Use the rotate/translate tool for aligning your building geometry to the terrain.
____________________________________________________________________________
Get a Free 21-Day Trial of ArcGIS CityEngine | Sign Up Today (esri.com)
and try Twinmotion for free for as long as you need for non-commercial use, or upgrade to the full-featured version for yourself or your company.
