Safety First
Seconds matter. When you enter a building, will you know the quickest way to evacuate and get to safety? Will you know where the nearest safe zone is once you leave the building?
With safety in mind, I began to look at ArcGIS Indoors with even greater potential.
How could facilities managers or safety planners leverage an extended ArcGIS Indoors network to find the shortest path to safety from each building exit?
Optimal Evacuation Analysis
I first added the designated safe areas to my map. The Indoors information model in this example covers the buildings, routing, and parking lots.
After adding the safe zones, there needed to be entryway points where people would enter the safe areas.
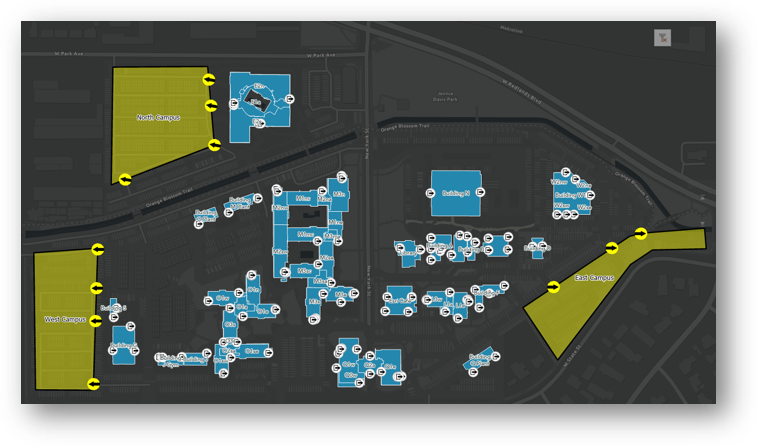
The analysis will try to find the shortest path between each exit door of each building to any entry to a safe zone.
First, the route should be extended to connect each pathway to the evacuation entryways.
A few things to consider when working through this:
- Snap Exit points to pathways on the correct level.
- Ensure Exit points have correct Z values based on their floor level.
- Snap the extended pathways to the safe zone entryway points.
This will ensure that the network is correctly connected to the point features needed for optimizing evacuations.
Once I extended walking routes to connect to the evacuation zones, I rebuilt the network. The next step was to run the Make OD Cost Matrix Analysis Layer tool, for Origin-Destination analysis.
I want the lowest cost to be determined by the shortest length of the route, which will, in turn, provide the shortest path to safety. The Origins are the Exits, and the Destinations are the Safe Entrances.
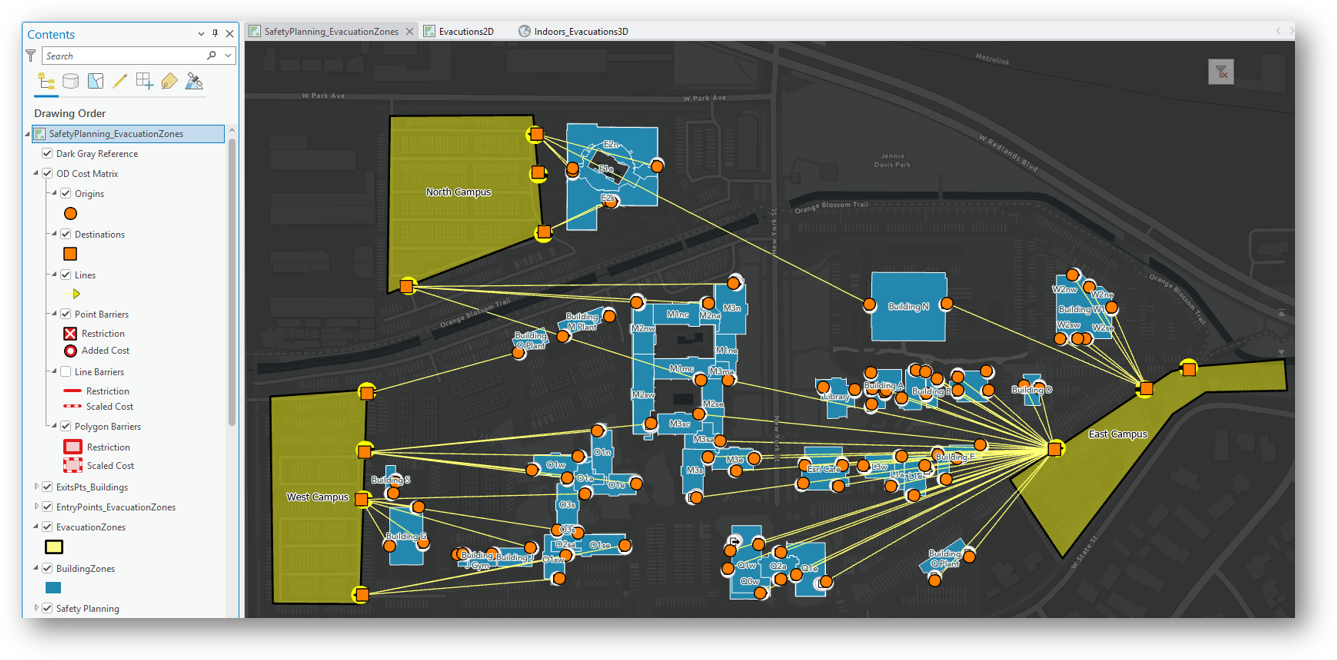
This analysis accomplished the goal of finding the shortest route, but the visualization draws a straight line “as the crow flies” from building to safety.
While this approach identifies the right destination, it doesn’t show the route a person would actually take to get there.
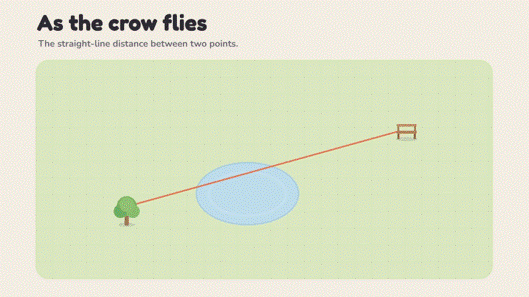
The buildings aren’t evacuating flying crows, they’re evacuating walking people.
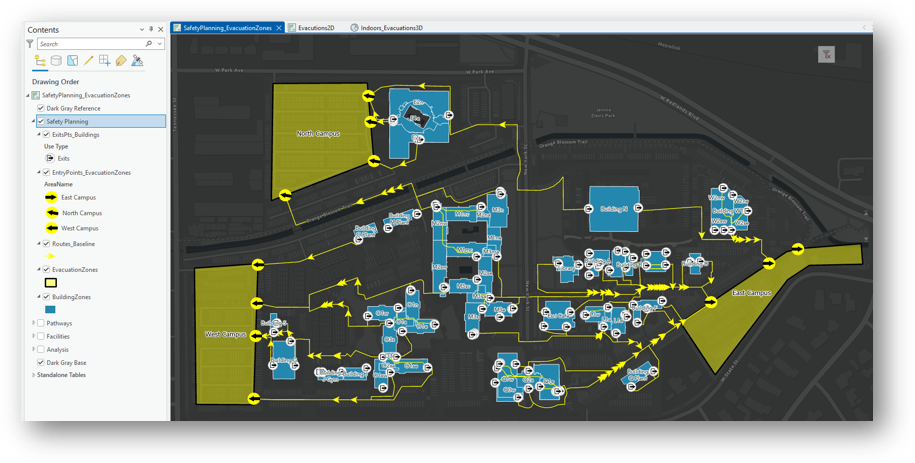
I needed a line drawn to follow a viable path that represents the actual route a person would need to take to get from where they are to safety.
To do this, I used the Make Closest Facility Analysis Layer tool. This tool takes you from Incident to Facility, or place of exit to place of entry. The Incidents, for my example, are the building exit points, and the Facilities are the safe entrance points.
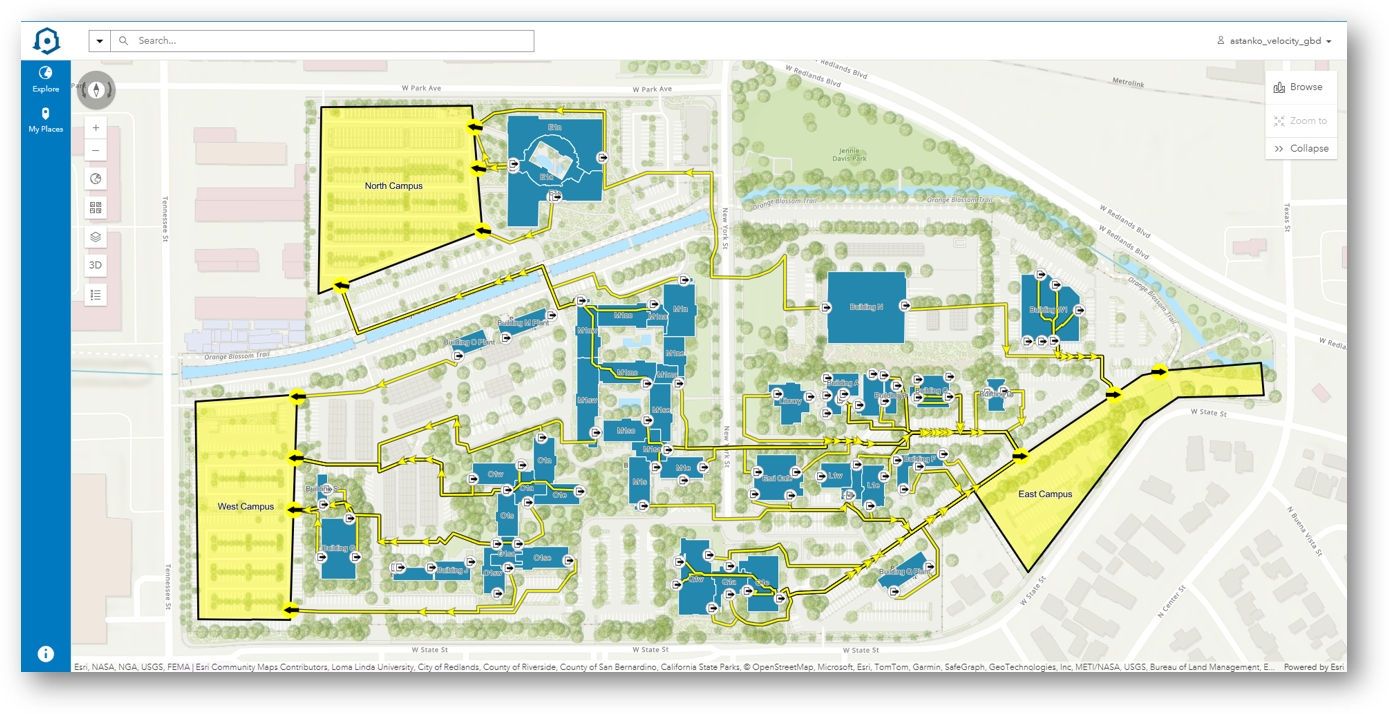
Once those locations are loaded in, the analysis runs and the shortest walking path from each exit to the nearest safe zone entrance is visualized as an actual walking route.
Extending the data model
Here's the payoff that makes the next bit of data wrangling worth it: a safety coordinator opens the map, filters to Floor 2, and instantly sees every Floor 2 exit route. Nothing else. That floor-aware filtering only works if your layers share the same unique IDs under the hood — so it's worth understanding how they connect.
Pay attention to the unique IDs of your data. The Facilities have Levels, the Levels are divided into Sections, and there are offices, restrooms, conference rooms that are combined as the building's Units. All these features are connected by unique IDs per feature. It is helpful to carry over those unique IDs to the new dataset when applicable.
For example, Exits come from the POI – Points of Interest – feature class in the data model.
I extracted the Exits as my analysis points, and gave each exit an Exit ID.
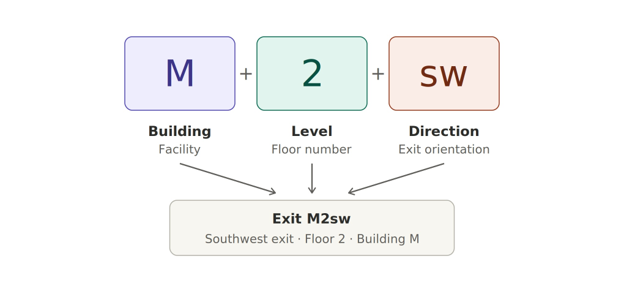
Each Section is a smaller part of the Level of a Facility, which makes it feasible to use the Section ID with direction for Exit IDs.
Each Exit ID combines the building Section ID with a directional indicator - for example, a southwest exit on Floor 2 of Building M becomes Exit M2sw.
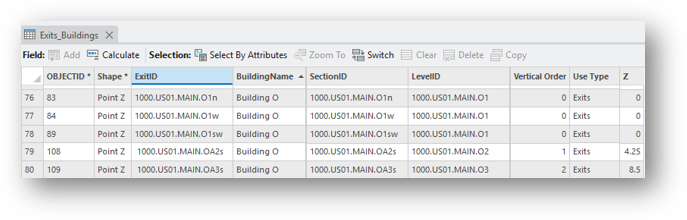
By carrying over the Level ID, you can then make the map floor aware with multi-level buildings being filtered through for each floor’s evacuation plan within the ArcGIS Indoors Viewer application.
ArcGIS Indoors Viewer
When publishing a map for ArcGIS Indoors, the Facilities and Levels layers are required layers in the map. Any additional layers can be made floor-aware if they have a connecting Level ID field that coincides with the Floors and Levels layers. Once you have the Level IDs in your layer, it can connect to the floor filter and become floor aware data.
3D Maps and Visualization
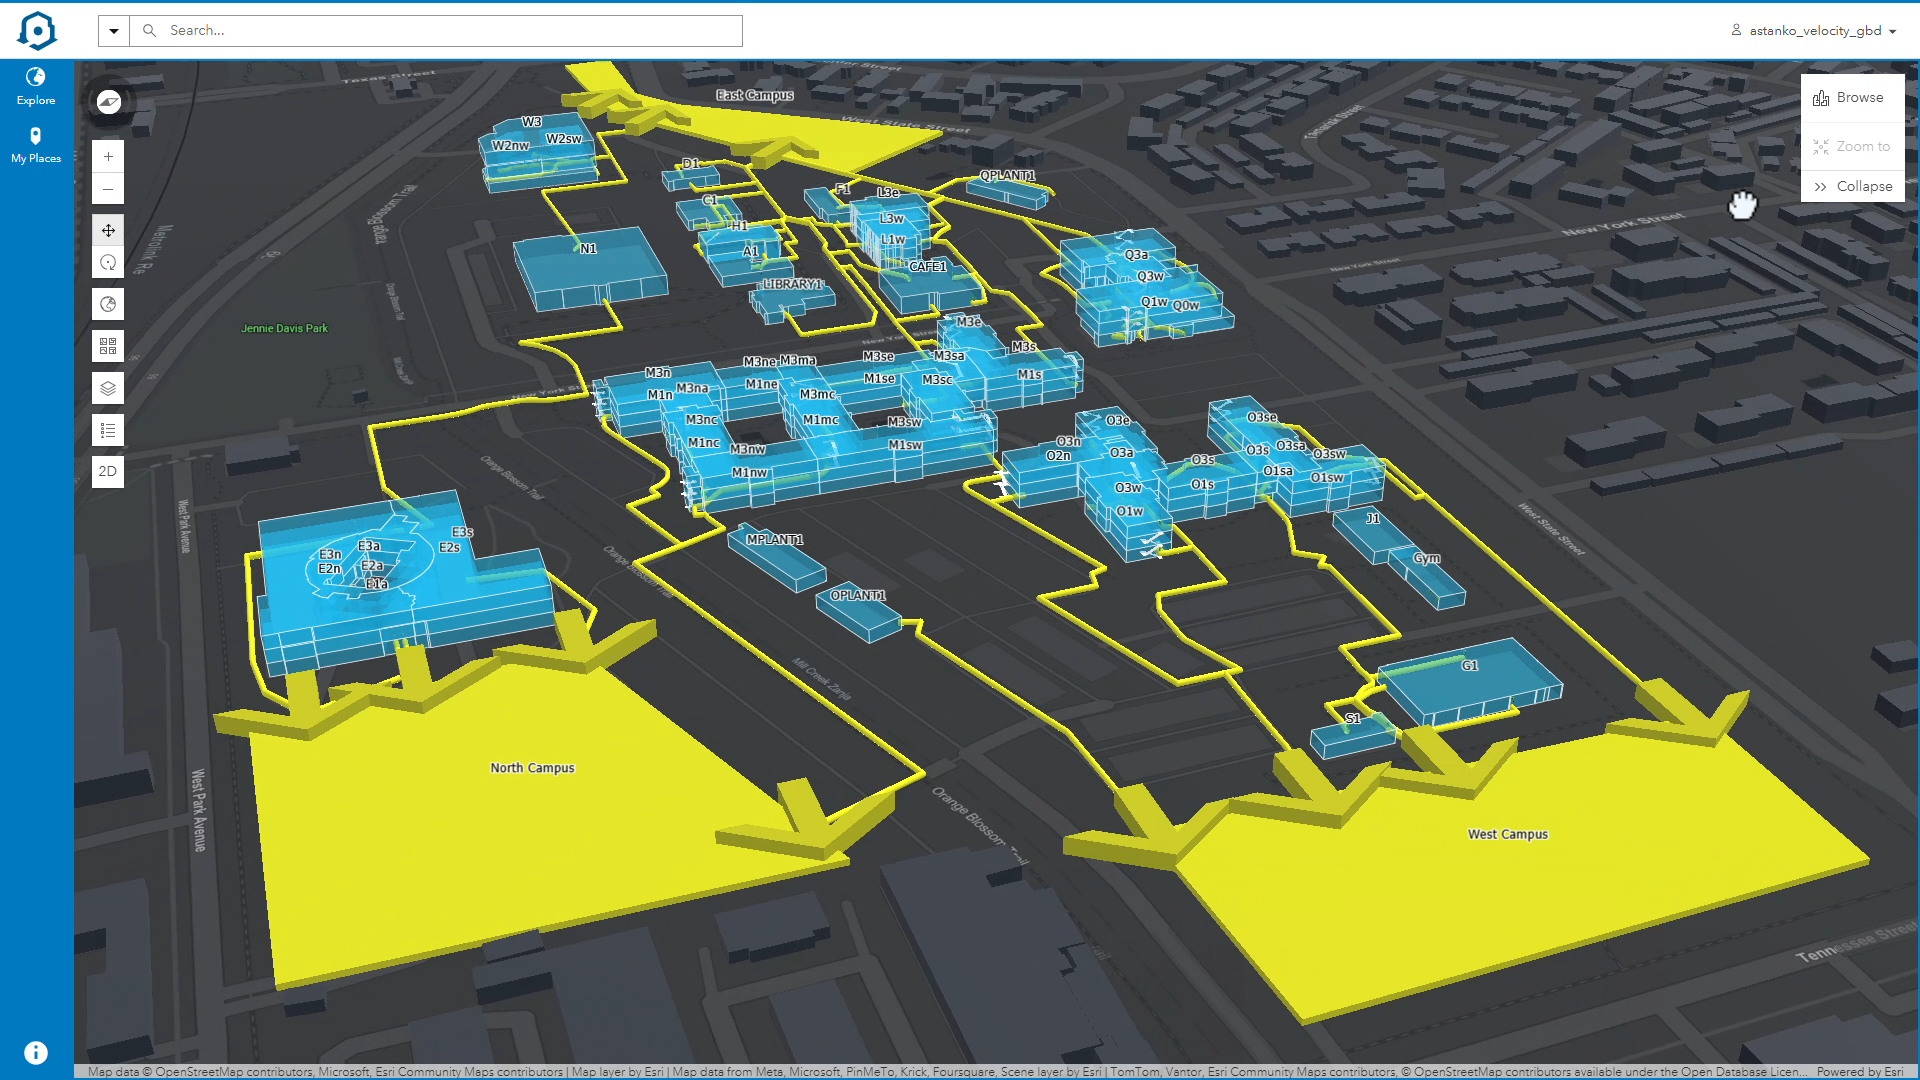
Since many of the buildings in my dataset have more than a ground floor level, I also published the layers in 3D. This is why having the correct Z values for your Exits is especially important and is very noticeable when they’re off. You don’t want your ground floor exits inaccurately visualizing on the 3rd floor of the building. It’s worth checking your data by running the Add Z Information tool to know for sure where your Exits are projected in the Z axis. If you need to adjust them, select the features to adjust then run the Adjust 3D Z tool to correct them.
Follow the documentation for publishing ArcGIS Indoors 3D to get the rest of the features ready for 3D visualization in ArcGIS Indoors Viewer.
Once published, you can then add it to the same application and switch from 2D to 3D with a simple button click.
Building Evacuation Operations
This workflow, and its analytical tools, provides an optimal evacuation plan. However, if an incident occurs in a specific campus location, that building may need to be avoided. For example, if there is a fire in the café, routes should keep evacuees away from the affected building.
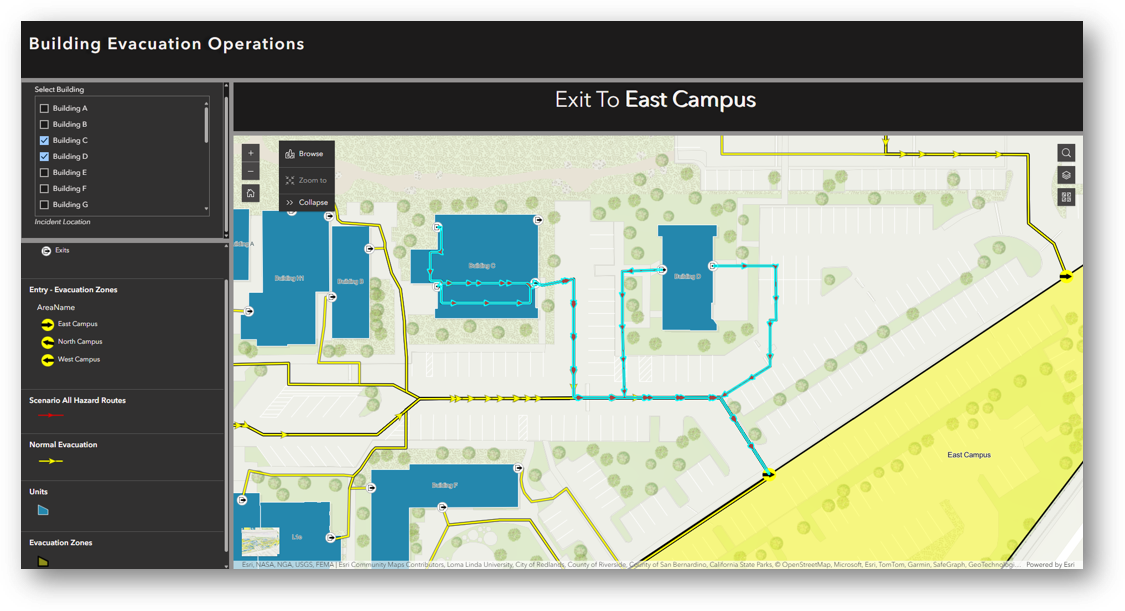 For the many possible scenarios, I used a custom scenario planning tool that allowed me to isolate each building’s evacuation routes. I created a simple application in ArcGIS Experience Builder that allows me to select one or more buildings of issue then show the evacuation for the selected buildings. The result is a pre-computed set of evacuation routes for every possible single or multi-building hazard scenario — ready to display instantly without re-running the analysis.
This saves precious time in the event of an ongoing crisis. Having the analysis finalized first, then having a fast, simple way to highlight impacted buildings allows us to operationalize the analysis into an actionable application.
Next is developing a way to alert occupants when an issue occurs, tell them when and how to evacuate, and direct them to the appropriate safe location. That could depend on where they are in the moment of an emergency – maybe at their desk, maybe in a conference room, or even en route to another building. It’s good to have a baseline evacuation plan, but we also need to know what to do if the issue happens when we’re away from our designated spaces.
Virtual Reality
 Exploring a map in 3D in Virtual Reality (VR) gives you the opportunity to orient yourself within the scene. By ensuring my 3D web scene is VR-ready, this becomes a training tool on its own.
With VR, safety training can happen as soon as day one. Employees and students can put on a VR headset and explore the evacuation plan on their own to immediately understand what to do and where to go if an emergency were to arise.
Inside Out
None of us ever want to encounter an emergency like this in real life. But unpredictable events will happen all the time. That’s part of life.
It’s all about how we react in the moment. If we don’t know the plan, how will we react when an emergency happens? Scared, confused, worried, rushed. If we are prepared for potential issues, then our reaction will be ingrained in us. To go from Inside Out on the shortest route possible - the fastest path to safety.
