- Home
- :
- All Communities
- :
- Products
- :
- ArcGIS Survey123
- :
- ArcGIS Survey123 Questions
- :
- Combine earlier surveys into current version
- Subscribe to RSS Feed
- Mark Topic as New
- Mark Topic as Read
- Float this Topic for Current User
- Bookmark
- Subscribe
- Mute
- Printer Friendly Page
Combine earlier surveys into current version
- Mark as New
- Bookmark
- Subscribe
- Mute
- Subscribe to RSS Feed
- Permalink
- Report Inappropriate Content
Hello,
I am looking for the best way to migrate survey data from 3 earlier survey versions into the current Survey123 hosted feature layer. The surveys were similar and I have renamed and added fields as appropriate to make them all the same. I then used the "Append" tool in ArcGIS Pro to combine into the current survey hosted feature layer. That all worked swell EXCEPT that the Creator and CreationDates have all been overwritten to my login and todays date. I then tried to use "Calculate" to copy the original data into the appropriate fields. However editing is not possible. I did try the "Disable Editor Tracking" tool but it can't "see" the hosted feature layer in question as it wants feature class, table, or mosaic dataset as the input dataset. I also unchecked the "Read Only" buttons in the "Fields" View. But that didn't work either. And if I use the drop down to select "Data Source" there is nothing configurable. Sooooo, how can I fix this?
Thanks!
Lori
- Mark as New
- Bookmark
- Subscribe
- Mute
- Subscribe to RSS Feed
- Permalink
- Report Inappropriate Content
Hi Loretta,
You will first want to download the data from all surveys that will not be the final to a file geodatabase using the steps listed here...View your results—Survey123 for ArcGIS | ArcGIS
You can then use the steps listed below to preserve the editor tracking information contained within the downloaded datasets when using the Append geoprocessing tool in ArcGIS Pro.
1. Login to ArcGIS Online or your portal in ArcGIS Enterprise and select 'Content' from the top panel of choices
2. Select the survey folder which contains the feature layer and form of the survey which you will be appending data to
3. Select the feature layer within the folder > Settings > disable 'Keep track of who created and last updated features' > Save
4. Open ArcGIS Pro
5. Add the previously downloaded file geodatabase data and any table containing attachments to the Current Map
6. Run the Disable Editor Tracking geoprocessing tool against your File Geodatabase data.
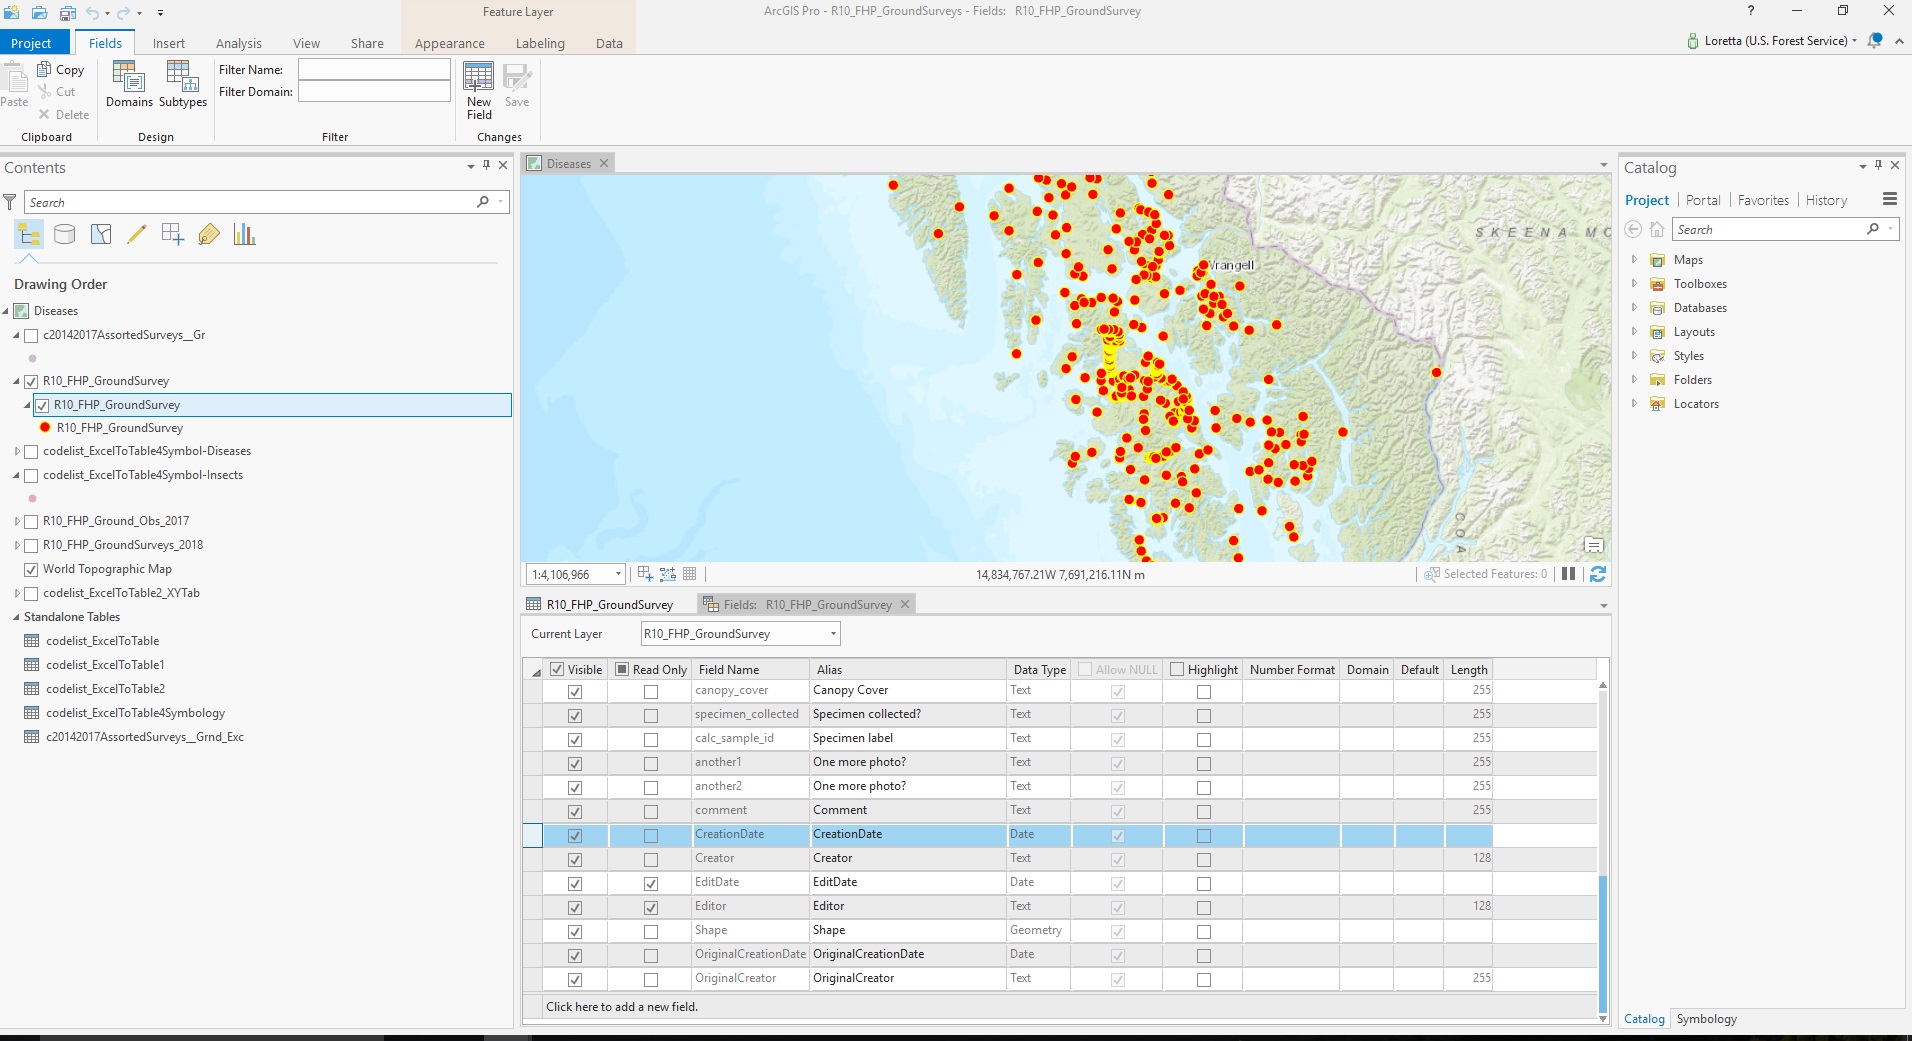
7. From the Contents pane—Right-click the feature class from your downloaded dataset > Design > Fields.
8. Check 'Read-Only' for all editor tracking fields (CreationDate, Creator, EditDate, Editor) > Save
9. Run the Append geoprocessing tool with your file geodatabase dataset as the input and the feature layer as the target
10. Login to ArcGIS Online and navigate to feature layer to ensure that all editor tracking information from file geodatabase has been preserved
11. Re-enable the option to 'Keep track of who created and last updated features' from the Settings of the feature layer > Save
The editor tracking information from the appended data should now reflect it's original information and any new records will record the appropriate editor tracking information at time of collection.
Please let me know if this works for you!
Brandon
- Mark as New
- Bookmark
- Subscribe
- Mute
- Subscribe to RSS Feed
- Permalink
- Report Inappropriate Content
Hi Brandon,
Thanks for your reply. I followed your instructions faithfully. Unfortunately this did not work. Now all the values are blank for the fields Creator, CreationDate, Editor, EditDate, instead of filling them with my userid and todays date. Therefore it did not preserve the original values.
Any other ideas?
Thanks!
- Mark as New
- Bookmark
- Subscribe
- Mute
- Subscribe to RSS Feed
- Permalink
- Report Inappropriate Content
Hi Lori,
After speaking with you over the phone and then doing some additional testing, we found the following workflow to successfully append the data from your exported file geodatabase to the existing feature layer referenced by your survey while maintaining the Editor Tracking information.
These steps start after data from all previous surveys have been exported to file geodatabase format using ArcGIS Online...
1. Login to ArcGIS Online or your portal in ArcGIS Enterprise and select 'Content' from the top panel of choices
2. Select the survey folder which contains the feature layer and form of the survey which you will be appending data to
3. Select the feature layer within the folder > Settings > disable 'Keep track of who created and last updated features' > Save
4. Open ArcGIS Pro
5. Add the previously downloaded file geodatabase data and any table containing attachments to the Current Map
IMPORTANT: Instead of using Field Mapping in the Append gp tool options, ensure that the source field(s) have the same name as the target field they will be appended too. For instance, if Field_1 of the source dataset (file geodatabase feature class) will be going to Field_2 of source dataset (feature service), rename Field_1 within feature class, to Field_2 prior to proceeding.
6. Run the Disable Editor Tracking geoprocessing tool against your File Geodatabase data.
7. From the Contents pane—Right-click the feature class from your downloaded dataset > Design > Fields.
8. Check 'Read-Only' for all editor tracking fields (CreationDate, Creator, EditDate, Editor) > Save
9. Run the Append geoprocessing tool with your file geodatabase dataset as the input and the feature layer as the target
10. Login to ArcGIS Online and navigate to feature layer to ensure that all editor tracking information from file geodatabase has been preserved
11. Re-enable the option to 'Keep track of who created and last updated features' from the Settings of the feature layer > Save
The editor tracking information from the appended data should now reflect it's original information and any new records will record the appropriate editor tracking information at time of collection.