- Home
- :
- All Communities
- :
- Industries
- :
- Land Records and Valuation
- :
- Land Records and Valuation Questions
- :
- Is there a Proper way to Build Parcels in Parcel F...
- Subscribe to RSS Feed
- Mark Topic as New
- Mark Topic as Read
- Float this Topic for Current User
- Bookmark
- Subscribe
- Mute
- Printer Friendly Page
Is there a Proper way to Build Parcels in Parcel Fabric?
- Mark as New
- Bookmark
- Subscribe
- Mute
- Subscribe to RSS Feed
- Permalink
- Report Inappropriate Content
Building parcels in fabric has been something I've been trying to understand for the last year. While I consider myself to be fairly confident in my ability migrate and build parcels directly in fabric, there are processes I cannot seem to fully understand when building directly in fabric. I've been doing a lot of work from scratch, building lots and parcels using control points. Parcels outside of our city limits are fairly easy to construct, since they are just divisions of a section (ex. W 1/2 of NE quarter). Or, if the section is fully developed with large subdivisions that have recorded maps.
Here's some of the questions I have regarding building from scratch in the fabric:
- Is it wise to divide quarter sections into smaller sections (alioquots)? I feel like doing this focuses your work to a very particular spot by giving you something to join to. Also adding in custom monuments where aliquot sections intersect (ex. at a minimum dividing the quarter section into quarter quarter sections).
- Right of way dedications - Is it better to build off of the section lines (ex. 30' original ROW around a quarter section)? Subsequently filling in additional ROW dedications by documents/maps? Road dedications get really tricky when they cut through parcels that are already joined to the fabric.
- Parcel remainder function - Unless you subdivide a section into many equal parts, I find this very difficult to use. Only works perfectly well when you are splitting parcels that both have a 1:100000 misclose ratio and 1.000000 scale. Otherwise, trying to create remainders from parcels that have different scales/misclose ratios only create new parcels that look fine, but have really large misclose ratios.
- With the issues noted above, is this why migrating is favored? Everything is then 1:1. We don't keep COGO dimensions in CAD lines, so once migrated everything in fabric is considered to be perfect because the COGO dimensions are populated from the geometery. I'm not sure how that would change things if we did manage COGO attributes.
- How do I add sub-layers to the fabric? For instance, I want to add a Second Divisions sub-layer for creating the half quarter, half section, aliquots, etc. I want these to also be managed within the fabric. I see these layers exist in the PublicLandSurveyingEditing example fabric.
- Is running a least square adjustment really necessary? LSA seems to be hit or miss for me, there's always some sort of underlying issue why it doesn't work. Sometimes I get errors that parcels aren't connected, but I can't seem to find where that is.
I'm really trying to find my groove in using parcel fabric, but it sometimes seems the issues I have create roadblocks for me. Just looking for some general direction/process on building directly in fabric.
Thanks
- Mark as New
- Bookmark
- Subscribe
- Mute
- Subscribe to RSS Feed
- Permalink
- Report Inappropriate Content
I believe I have figured out how to accurately build a parcel fabric from scratch. It is necessary to have all your section and quarter sections control points added in the fabric. Without it, you don’t really have a base to build your fabric. Side note - I still am curious as to how you go about adding in new sub-layers to the fabric. If anyone has information regarding this, it would be really helpful!
Beginning with a full section for instance…
Using the Cadastral Framework template, build a PLSS Section. Connect at each section and quarter section monument (I recommend zooming in at each point). Join the PLSS Section. You won’t be able to select any monuments to join to in the Join dialog box because the monuments floating in space don’t have any Associated Network PointID’s.
Click the Match Control Point button in the Parcel Editor toolbar. This will bring up the Control dialog window. Zoom into each section corner (1:1000 or so) and double click the control point. An Associated Network PointID should be assigned. Continue doing this to all the control points surrounding the PLSS Section polygon. Select the polygon using the Select Parcel Features button. Right click > Rejoin.... Now you can use the Create Join Links button to select the section corners (I always keep Fabric points held fixed, line points move to lines). X & Y Residuals should be 0.000. If they aren’t, verify that your PLSS Section snapped to the control point(s).
Build your quarter sections using the PLSS Quarter section template. Join it to the fabric. At the join dialog window, the center section control point cannot be selected because it doesn’t have an Associated Network PointID. Join the PLSS Quarter Section to the fabric with the 3 selected control points. Associate the center control point to the fabric using the steps from above. Once the center control point is associated, right click the PLSS Quarter Section and rejoin, select that point using the Create Join Link button. Again, residuals should be 0.000. Build the other three PLSS Quarter Sections.
Once you have created the PLSS Section and PLSS Quarter sections, we can look into how to subdivide. What I like to do is divide the quarter sections into quarter quarter sections. I select the PLSS Quarter Section, right click > Construct from Parent. I continue to use the PLSS Quarter Section template here (I haven’t created a template yet for quarter quarter sections).
Using breakline function on the quarter section, I break all 4 boundaries equally by dividing the overall distances by 2. Connect the points, click the Build Parcels button.
I like to place control points at the boundaries of the quarter quarter sections. Click the Maintain Control Points button, choose the appropriate control point template, zoom close enough to see the lot points and click the lot point. Click update. Control points should now be placed and will have Associated Network PointID’s.
When it comes to subdividing, I’ve come to the conclusion that before you put in any type of recorded information, it’s important to build all surrounding parcels first. These are the types of parcels where the description may read: “The west ½ of the northwest ¼ of the northwest ¼ of section X, Township X, range X, excepting the south xxx feet thereof.” Since we have isolated most of this description in the PLSS layer, we only need to construct the tax parcels.
Build all tax parcels using the description above to the centerline of the road. Why? Because this will allow you to create your right of way. Also, because the description above does not describe right of way exceptions. In this case, right of way is either prescriptive, or dedicated later by a separate document. I prefer to put a right of way polygon at each tax parcel. This will save headaches in the future when it comes time for me to associate them to a document.
Some parcels (like the one in adjacent to the tract in the images below) are exceptions to the subdivision. I recommend you traverse those in prior to building the subdivision. My rational to all of this is that you need to isolate your boundaries for your subdivisions. If you don’t, more issues will occur.
Create a plan for your subdivision and then create a new parcel using the Subdivision template. Traverse your subdivision boundary and when complete, join its corners to the fabric. Auto-join any other points found along the boundary.
Construction from parent on the subdivision boundary. Change your template to lots and construct your lots per the recorded information from the subdivision map.
Create tax parcels by construction from parent of all the lots.
Subdivide any other remaining parts of your quarter quarter section that you isolated.
Now, while there’s a lot more that goes into this than just the steps mentioned above, I believe it’s a good base to get someone started. There are a lot of variables that go into building the fabric. Most of it you will learn as you repeat the process and find better ways to input data. I do believe it all begins with subdividing the section down to quarter quarter section level.
If everything is joined properly, you should be able to run least squares adjustment (LSA). Depending on your residuals, you may need to play with the settings a bit.
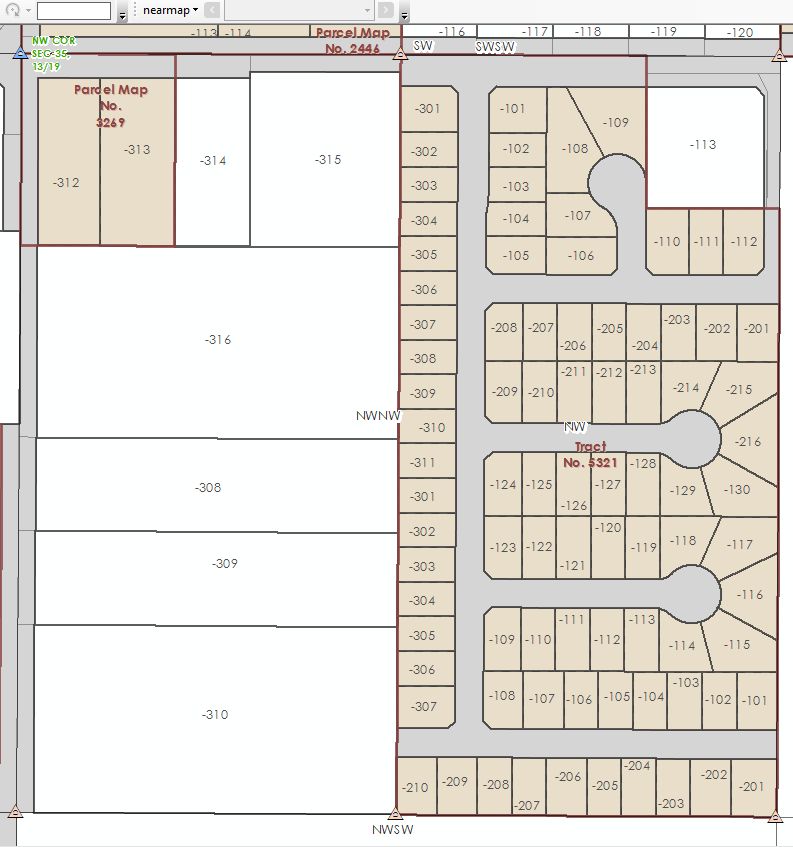
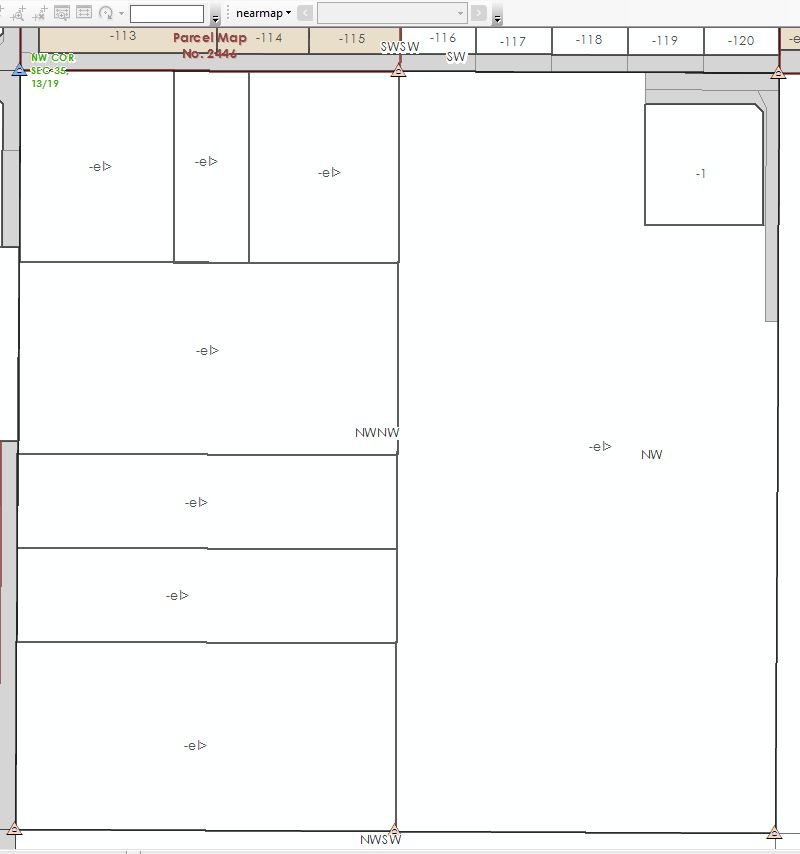
Below shows the process of building the parcels.
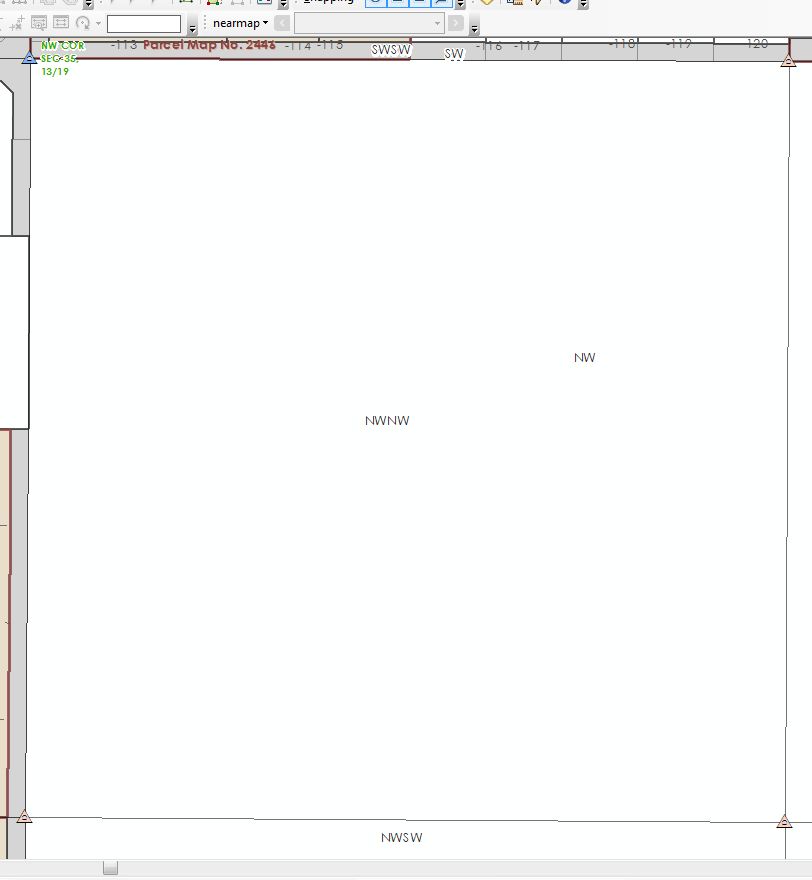
Step 1: Isolate quarter quarter section.
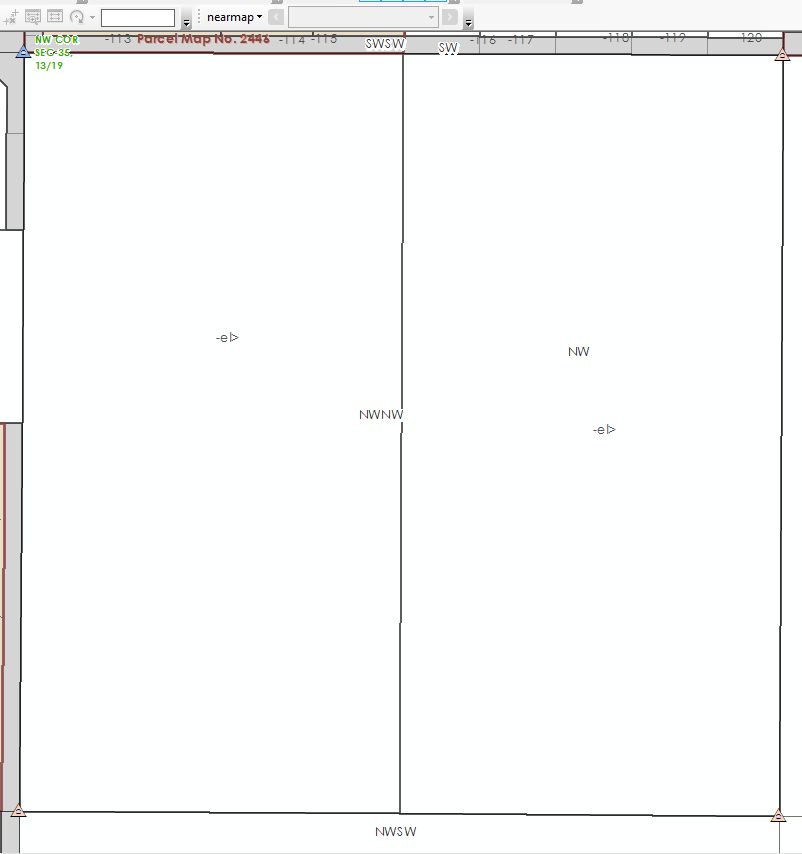
Step 2: Split quarter quarter section into E and W half's (or quarter quarter sections depending on how tax parcels are laid out)
Step 3: Using property descriptions as described in step 5, construct the tax parcels. Note that the parcels go to the center of the road.
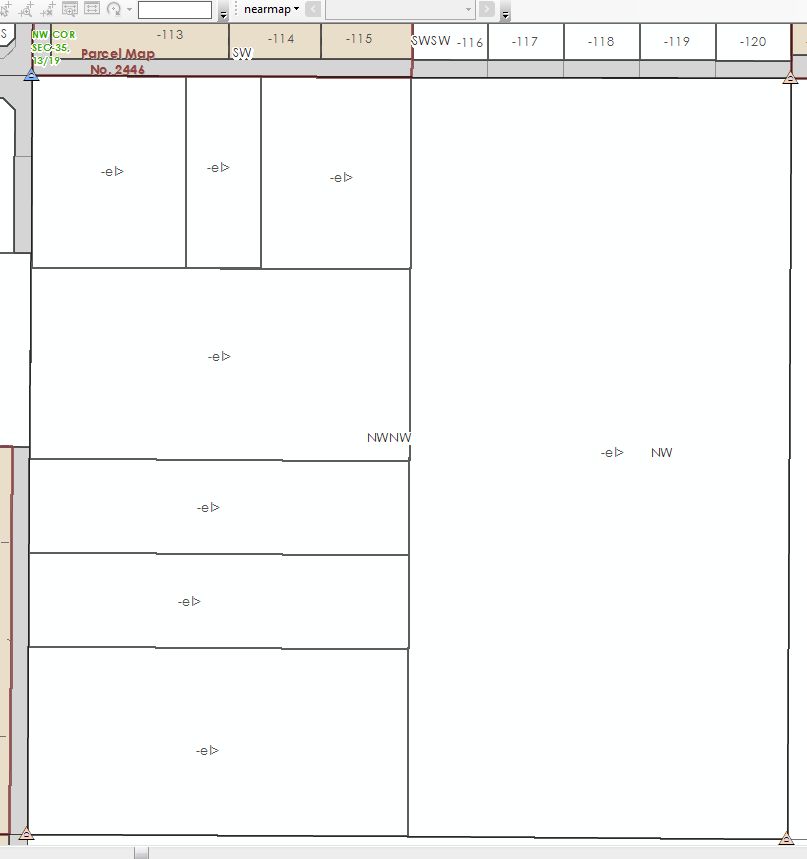
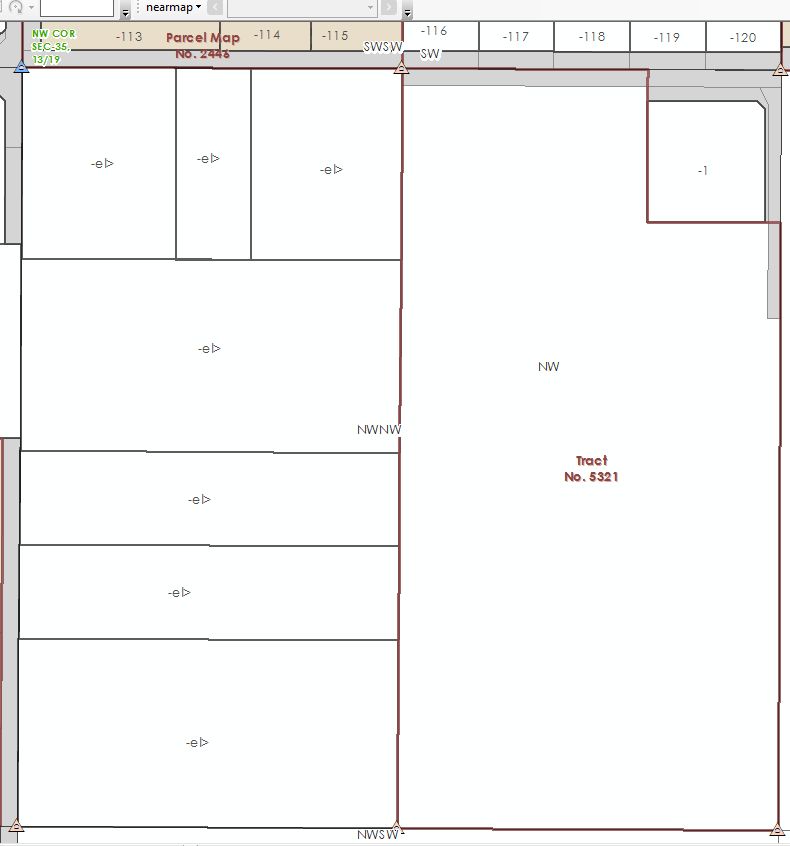
Step 4: Build exception (upper right parcel). I had to also construct additional right of day dedications.
Step 5: Construct subdivision boundary
Step 6: Build lots
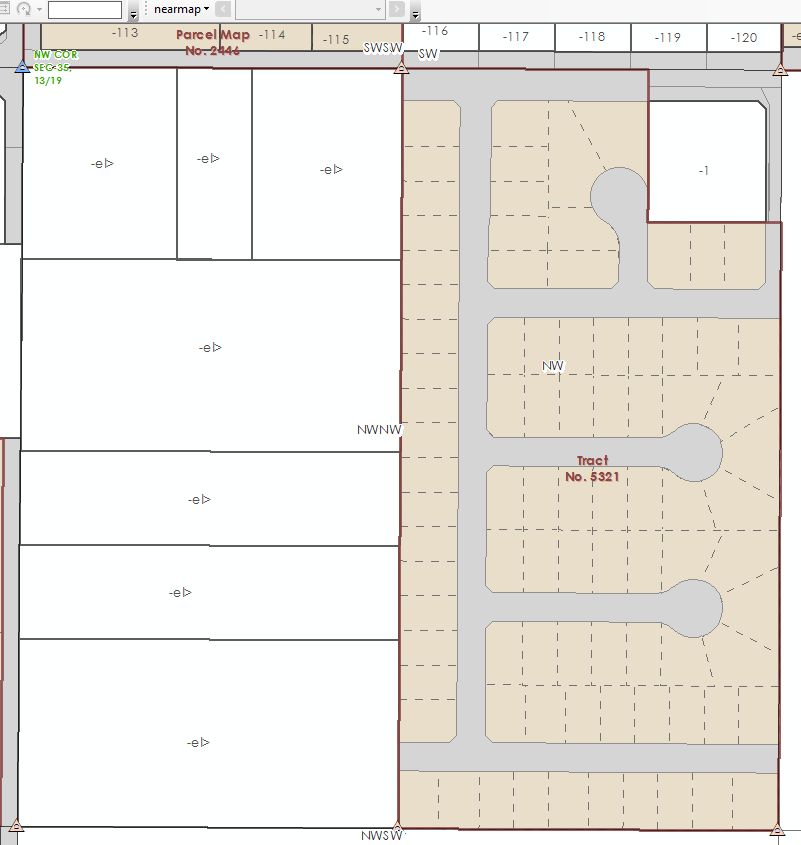
Step 7: Add in remaining record maps, construct right of ways on tax parcels where needed, and construct parcels within the subdivision.