- Home
- :
- All Communities
- :
- Products
- :
- Imagery and Remote Sensing
- :
- Imagery Questions
- :
- Large value range after project raster
- Subscribe to RSS Feed
- Mark Topic as New
- Mark Topic as Read
- Float this Topic for Current User
- Bookmark
- Subscribe
- Mute
- Printer Friendly Page
Large value range after project raster
- Mark as New
- Bookmark
- Subscribe
- Mute
- Subscribe to RSS Feed
- Permalink
- Report Inappropriate Content
I projected an elevation raster in WGS84 UTM meters to NAD83 using bilinear resampling.
The resulting raster shows up in the right spot and when I info click around has values similar to the original raster (accounting for a difference resulting from resampling).
However, the range of values went from {-56m to -9m} to {-3.4...e038 to -9m} so that when i view the raster in ArcMap it shows up completely black.
Is there a way to adjust the range so that the stretch applies to the actual data values?

- Mark as New
- Bookmark
- Subscribe
- Mute
- Subscribe to RSS Feed
- Permalink
- Report Inappropriate Content
Hi Alexa,
Try running the Calculate Statistics tool on the raster dataset.
- Mark as New
- Bookmark
- Subscribe
- Mute
- Subscribe to RSS Feed
- Permalink
- Report Inappropriate Content
Nope, I thought of that and it didn't help 😕
- Mark as New
- Bookmark
- Subscribe
- Mute
- Subscribe to RSS Feed
- Permalink
- Report Inappropriate Content
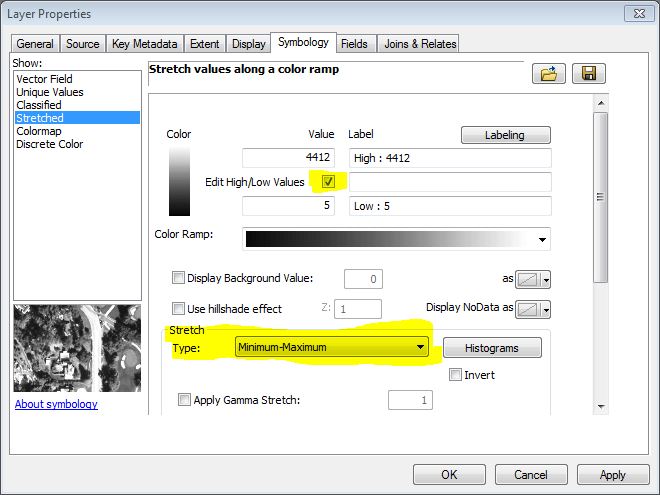
Alexa,
- Go into the raster's layer properties
- Select 'Minimum-Maximum' for the stretch type
- Check the 'Edit High/Low Values' box and edit the low value to -56.2776
- Mark as New
- Bookmark
- Subscribe
- Mute
- Subscribe to RSS Feed
- Permalink
- Report Inappropriate Content
So this works for a single map instance but the next time i bring this raster into a new MXD it goes back to the original range. Is there a way to make this a permanent adjustment?
- Mark as New
- Bookmark
- Subscribe
- Mute
- Subscribe to RSS Feed
- Permalink
- Report Inappropriate Content
Alexa,
I think your best bet is to save the symbology to a layer file and add the layer file to future projects instead of the DEM.
The stretch symbology will adjust to the pixel value range of the raster by default, so unless the pixel range is the same with the "before" and "after" DEMs, I think it'll be difficult to make a permanent adjustment within the raster itself. I've gotten unfavorable results when I've tried to permanently "embed" the custom symbology into the raster, such as pixel value changes and new min/max label values.
This may not help in your current case, but another thing to check into is changing how ArcGIS treats images when they are added to an MXD. In Customize menu>>ArcMap Options>>Raster tab>>Raster Layer tab>>there is a checkbox for "Enable Custom Rendering Defaults". Check this box and anytime a raster is added it will automatically change the display settings to what you have selected so all the rasters have the same rendering. Unchecked and all rasters in the MXD could potentially have different rendering because they will be rendered using the properties of just that file. It only affects raster display, so the original raster values are still intact.
- Mark as New
- Bookmark
- Subscribe
- Mute
- Subscribe to RSS Feed
- Permalink
- Report Inappropriate Content
Would you be able to zip and upload your IMG?