- Home
- :
- All Communities
- :
- Products
- :
- ArcGIS StoryMaps
- :
- Classic Esri Story Maps Questions
- :
- Re: How to add hyperlinks and hard returns in stor...
- Subscribe to RSS Feed
- Mark Topic as New
- Mark Topic as Read
- Float this Topic for Current User
- Bookmark
- Subscribe
- Mute
- Printer Friendly Page
How to add hyperlinks and hard returns in story map tour side panel?
- Mark as New
- Bookmark
- Subscribe
- Mute
- Subscribe to RSS Feed
- Permalink
- Report Inappropriate Content
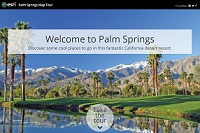
I would like to add hyperlinks, hard returns, and other styling as seen in this snapshot below from the slick, new Palm Springs Map Tour. Is it possible to do it out-of-the-box or do I need to host the code on my server? Any tips would be appreciated. Thanks!

Solved! Go to Solution.
Accepted Solutions
- Mark as New
- Bookmark
- Subscribe
- Mute
- Subscribe to RSS Feed
- Permalink
- Report Inappropriate Content
Actually, the Map Tour that Alison shared uses the new Side Panel layout: it's not a custom story map or customized story. (We host the source code for many of the stories our team produces on our own server to add additional analytics and social media support, which is the why the URL for the Palm Springs Map Tour above is on storymaps.esri.com. and these sometimes contain customizations, but in this case the Map Tour isn't customized: it's the standard app).
The Side Panel layout option in Story Map Tour was released on April 12th. See our latest What's New blog post for more info.
The formatting in the caption is done by entering HTML tags into the text when you edit in the Story Map Tour Builder. That is supported in all three Map Tour layouts. If you are using the option to define your tour in a CSV file and then import that CSV file into the Story Map Builder, you can also include HTML tags in the captions you define in the CSV file. It is a limitation of the Story Map Tour's text editor currently that you can't author hyperlinks and other formatting interactively when editing narrative text, like you can in most other Esri Story Map app templates. Here's an FAQ about using HTML in Map Tour captions.
Here's the text for the caption shown above, including the HTML tags that provide the formatting and define the hyperlink:
At the back of this cool coffee bar at the start of the Uptown Design District there's a secret garden courtyard known only to locals. With its beautiful mountain vista, it's a great place to hang out. The excellent art and design shop 'Just Fabulous' is next door where you can browse their big collection of books. <a href="http://www.kofficoffee.com" style="color:green" target="_blank">More Info</a><br><hr><font size="1">1700 South Camino Real, Palm Springs, CA 92264. On the corner of South Camino Real and East Palm Canyon Drive.</font><br><font size="1" color="Grey"><i>Photo: Rupert Essinger/Esri</i></font>
Note that there are some restrictions on the HTML tags you can use in a Map Tour. See the FAQ mentioned above for details. These restrictions also vary based on how you are authoring your Map Tour: if you are uploading your images into the Map Tour Builder, this uses a feature service behind the scenes to store your tour data, and feature services have additional restrictions. For example the hr tag I used to get the horizontal ruler in the example below is not supported in feature services, so it can't be used if you are uploading your images instead of importing them from Flickr or referencing them directly via URLs.
It can get a bit fiddly manually entering HTML tags to define lots of formatting for all your places, especially if you have a large number of places or if you change your mind about how it all looks after entering them. For this reason it can be handy to use an Excel spreadsheet to assemble the text for your tour captions. This is an advanced workflow but I thought it would be good to mention for folks who know Excel well and want to do a lot of Map Tour caption formatting. In Excel I define the different parts of the caption, like the text at the beginning, the website, the address, and the photo credit, in different columns in the spreadsheet and then use the Excel CONCATENATE formula to bring that text together in a single field along with the HTML tags I want to use. In this way, I just need to define the HTML formatting once in that formula and can just fill it down in the spreadsheet. This also makes it easier if I change my mind about the formatting because I can just change it in that formula and fill it down again. You can save your Excel file as CSV and copy and paste those captions into the Map Tour Builder from the CSV file.
You also have the option to import the CSV file directly into the Story Map Tour Builder when you first create a new tour, via the Advanced Options in the Welcome dialog you see when you start the builder. If you have a lot of HTML formatting you want to apply to your places, and especially if you can use the CONCATENATE formula method from the previous paragraph, this can save a lot of time, because you can just import a CSV file directly into the builder: there's no copying and pasting required. Your CSV file defines all your tour's content. However, this workflow does require that your images are referenced via URLs specified in the CSV, along with lat, long values for each point, as you can see in the sample CSV template you can download from the Welcome dialog Advanced Options in the Story Map Tour Builder. This workflow can't be used if you are uploading your images directly into the Map Tour Builder. Here's an FAQ about assembling a Map Tour this way.
Here's the Excel file I used to define the Palm Springs Map Tour. The field called DESCRIPTION is generated from a CONCATENATE formula. You'll see the formula in Excel if you click on one of the cells in the DESCRIPTION field and look at the editor at the top of the Excel UI. This file does specify the images via URLs because I have all these pics already on a web server and has the required lat/long coordinates, so you can save this Excel file out as a CSV and then recreate the Palm Springs Map Tour with it.
Rupert
- Mark as New
- Bookmark
- Subscribe
- Mute
- Subscribe to RSS Feed
- Permalink
- Report Inappropriate Content
Alison,
Are you referring to this story map:
http://storymaps.esri.com/stories/demo/map_tour/?webmap=7190edafe7464cb19c1caf1360cd6ee5
- Mark as New
- Bookmark
- Subscribe
- Mute
- Subscribe to RSS Feed
- Permalink
- Report Inappropriate Content
- Mark as New
- Bookmark
- Subscribe
- Mute
- Subscribe to RSS Feed
- Permalink
- Report Inappropriate Content
Alison,
Thanks for sharing the link. That is a custom story map and would need to be hosted on your own server with custom configuration.
- Mark as New
- Bookmark
- Subscribe
- Mute
- Subscribe to RSS Feed
- Permalink
- Report Inappropriate Content
Actually, the Map Tour that Alison shared uses the new Side Panel layout: it's not a custom story map or customized story. (We host the source code for many of the stories our team produces on our own server to add additional analytics and social media support, which is the why the URL for the Palm Springs Map Tour above is on storymaps.esri.com. and these sometimes contain customizations, but in this case the Map Tour isn't customized: it's the standard app).
The Side Panel layout option in Story Map Tour was released on April 12th. See our latest What's New blog post for more info.
The formatting in the caption is done by entering HTML tags into the text when you edit in the Story Map Tour Builder. That is supported in all three Map Tour layouts. If you are using the option to define your tour in a CSV file and then import that CSV file into the Story Map Builder, you can also include HTML tags in the captions you define in the CSV file. It is a limitation of the Story Map Tour's text editor currently that you can't author hyperlinks and other formatting interactively when editing narrative text, like you can in most other Esri Story Map app templates. Here's an FAQ about using HTML in Map Tour captions.
Here's the text for the caption shown above, including the HTML tags that provide the formatting and define the hyperlink:
At the back of this cool coffee bar at the start of the Uptown Design District there's a secret garden courtyard known only to locals. With its beautiful mountain vista, it's a great place to hang out. The excellent art and design shop 'Just Fabulous' is next door where you can browse their big collection of books. <a href="http://www.kofficoffee.com" style="color:green" target="_blank">More Info</a><br><hr><font size="1">1700 South Camino Real, Palm Springs, CA 92264. On the corner of South Camino Real and East Palm Canyon Drive.</font><br><font size="1" color="Grey"><i>Photo: Rupert Essinger/Esri</i></font>
Note that there are some restrictions on the HTML tags you can use in a Map Tour. See the FAQ mentioned above for details. These restrictions also vary based on how you are authoring your Map Tour: if you are uploading your images into the Map Tour Builder, this uses a feature service behind the scenes to store your tour data, and feature services have additional restrictions. For example the hr tag I used to get the horizontal ruler in the example below is not supported in feature services, so it can't be used if you are uploading your images instead of importing them from Flickr or referencing them directly via URLs.
It can get a bit fiddly manually entering HTML tags to define lots of formatting for all your places, especially if you have a large number of places or if you change your mind about how it all looks after entering them. For this reason it can be handy to use an Excel spreadsheet to assemble the text for your tour captions. This is an advanced workflow but I thought it would be good to mention for folks who know Excel well and want to do a lot of Map Tour caption formatting. In Excel I define the different parts of the caption, like the text at the beginning, the website, the address, and the photo credit, in different columns in the spreadsheet and then use the Excel CONCATENATE formula to bring that text together in a single field along with the HTML tags I want to use. In this way, I just need to define the HTML formatting once in that formula and can just fill it down in the spreadsheet. This also makes it easier if I change my mind about the formatting because I can just change it in that formula and fill it down again. You can save your Excel file as CSV and copy and paste those captions into the Map Tour Builder from the CSV file.
You also have the option to import the CSV file directly into the Story Map Tour Builder when you first create a new tour, via the Advanced Options in the Welcome dialog you see when you start the builder. If you have a lot of HTML formatting you want to apply to your places, and especially if you can use the CONCATENATE formula method from the previous paragraph, this can save a lot of time, because you can just import a CSV file directly into the builder: there's no copying and pasting required. Your CSV file defines all your tour's content. However, this workflow does require that your images are referenced via URLs specified in the CSV, along with lat, long values for each point, as you can see in the sample CSV template you can download from the Welcome dialog Advanced Options in the Story Map Tour Builder. This workflow can't be used if you are uploading your images directly into the Map Tour Builder. Here's an FAQ about assembling a Map Tour this way.
Here's the Excel file I used to define the Palm Springs Map Tour. The field called DESCRIPTION is generated from a CONCATENATE formula. You'll see the formula in Excel if you click on one of the cells in the DESCRIPTION field and look at the editor at the top of the Excel UI. This file does specify the images via URLs because I have all these pics already on a web server and has the required lat/long coordinates, so you can save this Excel file out as a CSV and then recreate the Palm Springs Map Tour with it.
Rupert
- Mark as New
- Bookmark
- Subscribe
- Mute
- Subscribe to RSS Feed
- Permalink
- Report Inappropriate Content
Thanks so much, Rupert Essinger. If I have made a story map tour already, can I edit the
html in the description field of the hosted feature layer? It seems to let me type
text but not cut and paste html.
- Mark as New
- Bookmark
- Subscribe
- Mute
- Subscribe to RSS Feed
- Permalink
- Report Inappropriate Content
Thanks Rupert, that's great to know!
- Mark as New
- Bookmark
- Subscribe
- Mute
- Subscribe to RSS Feed
- Permalink
- Report Inappropriate Content
I was able to make all html edits in the feature layer except for <hr>. That syntax never seemed to save.
- Mark as New
- Bookmark
- Subscribe
- Mute
- Subscribe to RSS Feed
- Permalink
- Report Inappropriate Content
If particular HTML syntax doesn't take when you edit data in ArcGIS Online it is because it is not supported in ArcGIS Online. For security and other reasons, some HTML is not supported. Feature services (which is the format that the Story Map Tour uses if you upload images directly into a tour) are more restrictive in terms of what HTML tags they support. So if you author a Map Tour by uploading images there are some HTML tags that are not supported, but which are supported if you are authoring your tour using Flickr images or images referenced elsewhere on the web.
My bad on that: I should have mentioned in my comment above that <hr>, which I use in the Palm Springs Map Tour and others, is one of those tags that are not supported in feature services. For example in the Story Map Tour builder, if you are authoring your tour by uploading images, if you add <hr> into the description for one of your places, and then press Save, the builder will give you an error message "Save failed due to an invalid html tag in a name or description". You can do paragraph breaks with <br> but not ruler lines with <hr>.
So the Palm Springs Map Tour has the ruler lines because the images aren't uploaded into the Map Tour, they are referenced via URL, so the Map Tour didn't create a feature service to store the places in. The same would be true if I was using Flickr images for that tour.
--
You should edit the descriptions for your places directly in the Story Map Tour builder. It sounds like you are perhaps going directly into the feature service in ArcGIS Online that your Map Tour is managing for you and making edits there. There's no need to do that. There are some workflows where it is possible to automate some of the authoring of tours behind the scenes by generating or updating the data that the Map Tour uses to store the places (see this link for info about that). But unless you are doing that, it is much easier to do all your edits in the builder, and let Map Tour automatically manage and update the feature service for you.
Rupert
- Mark as New
- Bookmark
- Subscribe
- Mute
- Subscribe to RSS Feed
- Permalink
- Report Inappropriate Content
Gotcha. Thanks for telling me about that nuance - especially on the weekend. Good to know.