- Home
- :
- All Communities
- :
- Developers
- :
- JavaScript Maps SDK
- :
- JavaScript Maps SDK Blog
- :
- Starting ArcGIS JavaScript API: Authenticating App...
Starting ArcGIS JavaScript API: Authenticating Applications through a Proxy
- Subscribe to RSS Feed
- Mark as New
- Mark as Read
- Bookmark
- Subscribe
- Printer Friendly Page
- Report Inappropriate Content
When using the ArcGIS JavaScript and REST APIs for building an app to target public users (as opposed to ArcGIS named users), it is common to want to use credit consuming services such as routing, geoenrichment, batch geocoding. In order to do this you must authenticate your application with the target service. The recommended way of doing this is through OAuth2 and application credentials.
<script>

      var map;

      require(["esri/map", "dojo/domReady!"], function(Map) {
            map = new Map("map", {
                  basemap: "topo",
                  center: [-122.45, 37.75], // longitude, latitude
                  maxZoom: 4, // Minimum zoom level
                  minZoom: 15, // Maximum zoom level
                  sliderStyle: "small", // Small slider, other option is large
                  zoom: 13 // Zoom level
            });
      });

      // Setup the proxy rule
      urlUtils.addProxyRule({
            proxyUrl: "/proxy/proxy.ashx",
            urlPrefix: "route.arcgis.com"
      });


</script>
Here you can see a standard ArcGIS JavaScript API ‘Hello World’ map. However we set it up to use the urlUtils to redirect through a proxy to attach our credentials for authentication. The location of the proxy can be seen in the proxyURL value (line 18). The service we want to use it for can be seen in the urlPrefix (line 19).
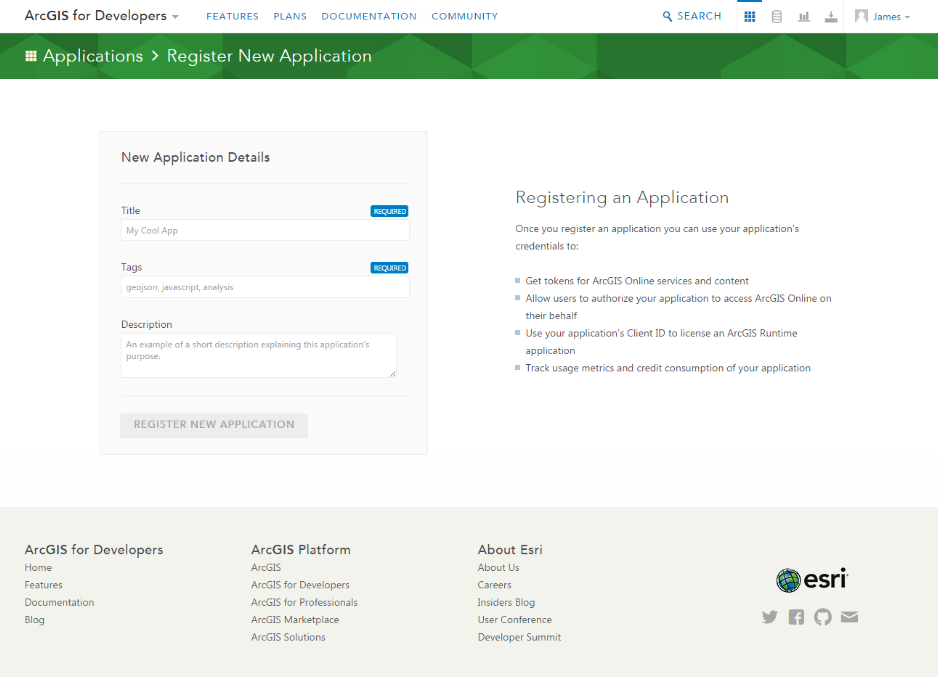
In order to authenticate our request for credit consuming services (routing, geoenrichment, etc) we need to register for a developer account, and register a new application. You can register for a developer account at http://developers.arcgis.com .
Once you have registered your free developer account, you can create a set of application credentials from your control panel, by clicking the applications tab.
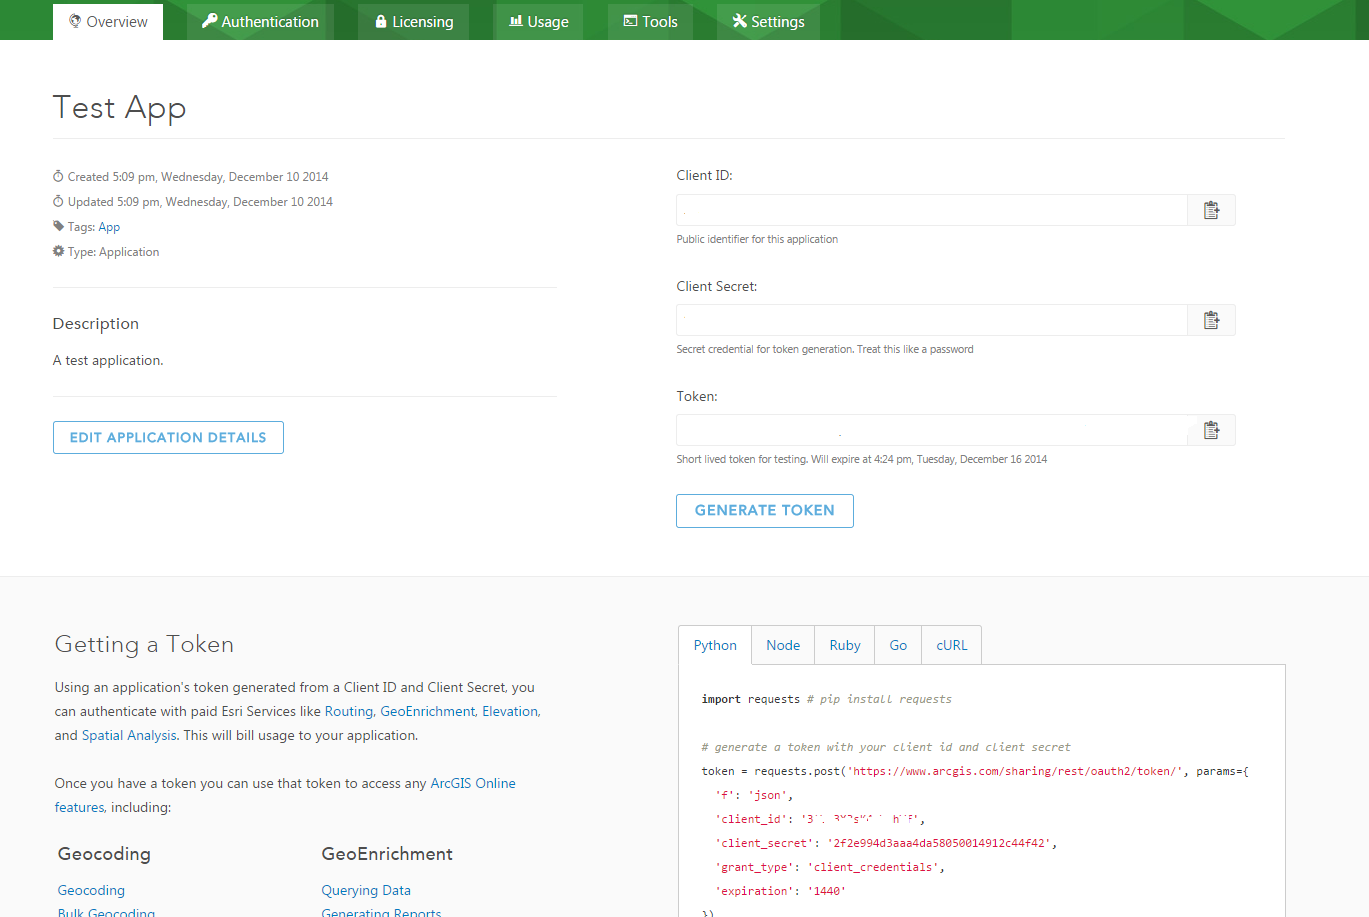
When you do this you will receive a Client ID and a Client Secret (also a Token however this will expire). We can also get some nicely auto generated code for server side REST requests using Python, Node.js, Ruby, Go, cURL. You may also be interested in the ‘Usage’ tab that gives you a dashboard about credit usage.
As the JavaScript API wraps around the REST API, we could potentially go about appending credentials to REST API calls (via AJAX) in your JavaScript. However this is considered bad practice and a security vulnerability as someone could easily steal these by looking at your plain text JavaScript which is downloaded by the client.
Instead it’s best to append them to the requests server side, through a proxy. A proxy runs on your web server and allows you to have you traffic come through the file proxy. The proxy can append the Client ID and Client Secret to the URL and thus saves you putting the application credentials in your client side code.
Esri maintains three file proxies for you to use, with fitting documentation for their usage. The file proxies are available in PHP, .Net and Java, all hosted for download on GitHub under an Apache License.
As an example let’s imagine you are a web developer running IIS on as your localhost web server. You can simply put the proxy in your route file folder (normally something like C:\inetpub\wwwroot) and update the proxy to deal with REST requests made from the JavaScript API.
The only file we are directly interested is the proxy.config. The config is an XML file that we can update to choose specific URLs to apply our credentials too. For example (fill in your own clientId and clientSecret):
<serverUrl url="//geoenrich.arcgis.com"
                  clientId="XXXXXXXXX"
                  clientSecret="XXXXXXXXXXXXXXXXXXXXXXXXX"
                  rateLimit="600"
                  rateLimitPeriod="60"
                  matchAll="true">
Notice how we use a http agnostic // instead of https: or http:. There are a couple parameters we can change including rate limiting (limiting the number of requests, to prevent overusage). And also “matchAll” which “when true all requests that begin with the specified URL are forwarded. Otherwise, the URL requested must match exactly”.
From here we can use the proxy in our JavaScript code via the urlUtils module and this code snippet
urlUtils.addProxyRule({
                  proxyUrl: "/proxy/proxy.ashx",
                  urlPrefix: "http://route.arcgis.com"
            })
You can also change your config to always use a proxy for ArcGIS REST endpoints using:
     esriConfig.defaults.io.proxyUrl = "/proxy/proxy.ashx";
     esriConfig.defaults.io.alwaysUseProxy = true;
Now that we have configured the proxy we can begin to start using credit consuming services in our JavaScript application. In my next post I will explain how we can use routing services using our application credentials.
You must be a registered user to add a comment. If you've already registered, sign in. Otherwise, register and sign in.