- Home
- :
- All Communities
- :
- Products
- :
- ArcGIS QuickCapture
- :
- ArcGIS QuickCapture Blog
- :
- Simulating your location in the ArcGIS QuickCaptur...
Simulating your location in the ArcGIS QuickCapture mobile app
- Subscribe to RSS Feed
- Mark as New
- Mark as Read
- Bookmark
- Subscribe
- Printer Friendly Page
- Report Inappropriate Content
Ever wondered if you could simulate your own location when using the QuickCapture mobile app? It is possible with version 1.6 or newer. Best of all, you can even play a simulation that makes you move around. This can be quite handy for proof of concept demonstrations and for testing purposes. Here is how you do it:
Use a File Location Provider to simulate locations in QuickCapture
As you may already know, the QuickCapture app can be configured with a custom location provider. This is typically used to connect QuickCapture to external GNSS receivers via Bluetooth or a network connection. These connections feed the app with NMEA messages, carrying location information from the GNSS receiver.
You can also configure a location provider from a file, which is exactly what you need to do to simulate locations in QuickCapture. The file format QuickCapture expects is a NMEA log file. Most GNSS receivers can export NMEA logs, so if you get out in the field and want to replay your locations in QuickCapture, you can easily use those files as a location provider. If you do not have a GNSS receiver, there are a handful of utilities that you can use to create a NMEA file.
How to create a custom NMEA file using nmeagen.org
One particular tool I like to use to create NMEA files is https://nmeagen.org/. Here is a video showing how easy it is:
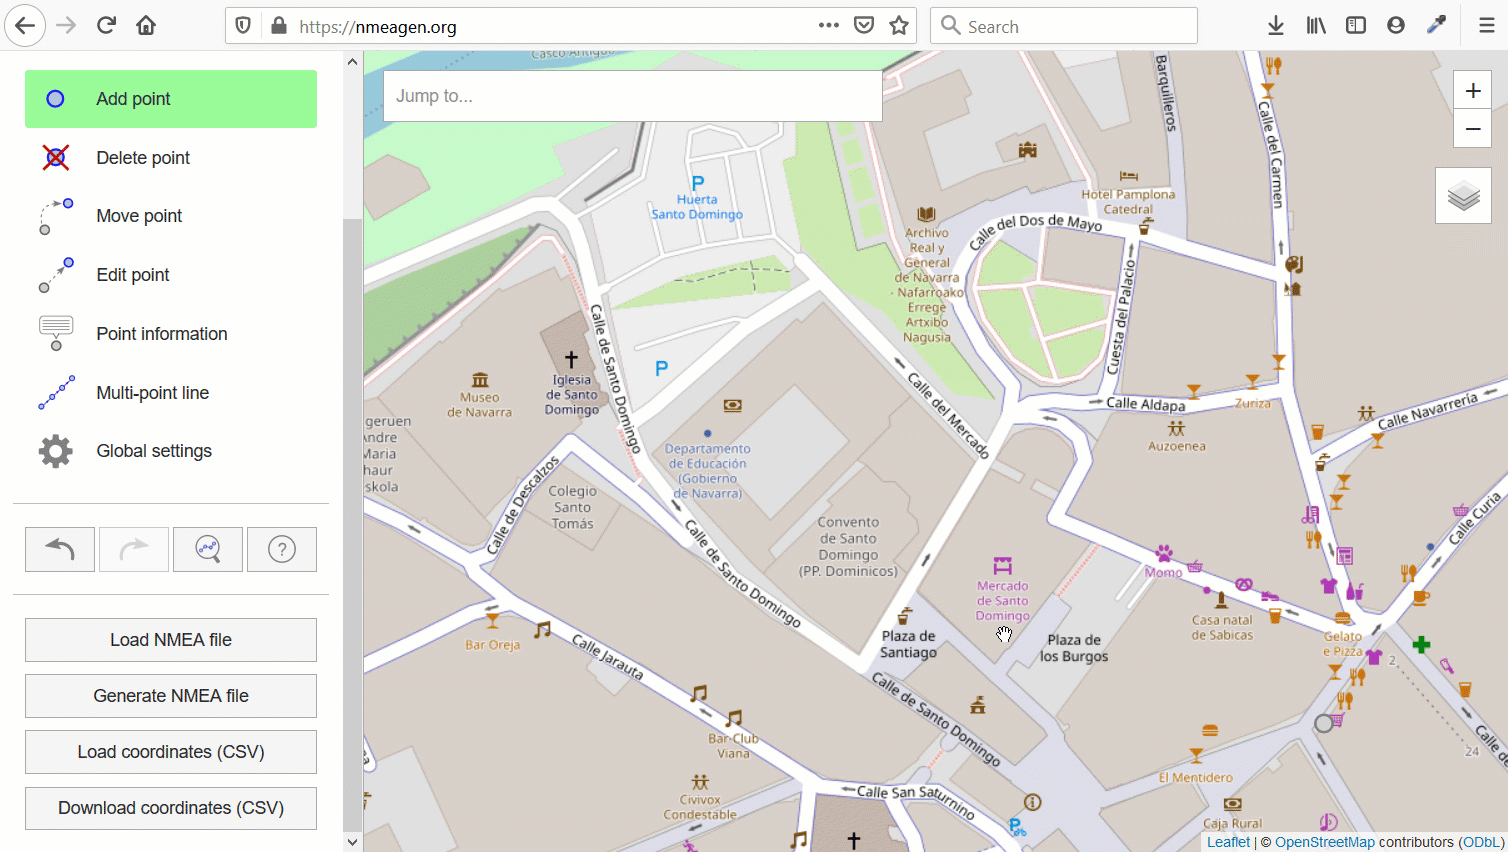
If you have a shapefile with a line representing a path, you can use the Feature Vertices To Points—Data Management toolbox | Documentation tool in ArcGIS Pro to create a point layer, then run the Add Geometry Attributes—Data Management toolbox | Documentation tool and export the coordinates to a CSV file. The CSV file can then be transformed into a NMEA file using nmeagen.org.
Moving your NMEA file into your device
If you plan to run QuickCapture on Windows or macOS, keep your file in a known folder so you can browse to it in the field app. If you plan to use an Android or iOS mobile device, then you need to copy your file onto the device.
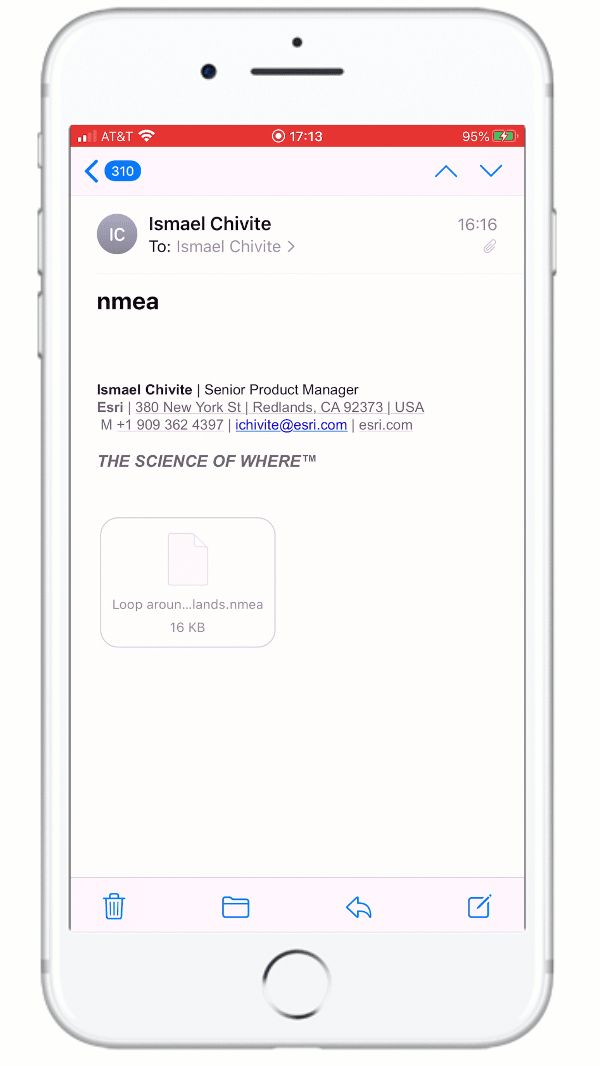
In iOS, the easiest way to transfer the NMEA file is via e-mail, as an attachment:
- Add your NMEA file to an email as an attachment and send it to yourself.
- In your email client, select the attachment file and swipe up
- Select Save to Files and move the file to the QuickCapture directory.
The animation on the right side shows the steps. You simply need to use the operating system 'Save to Files' option and select as the destination the QuickCapture folder in your device.
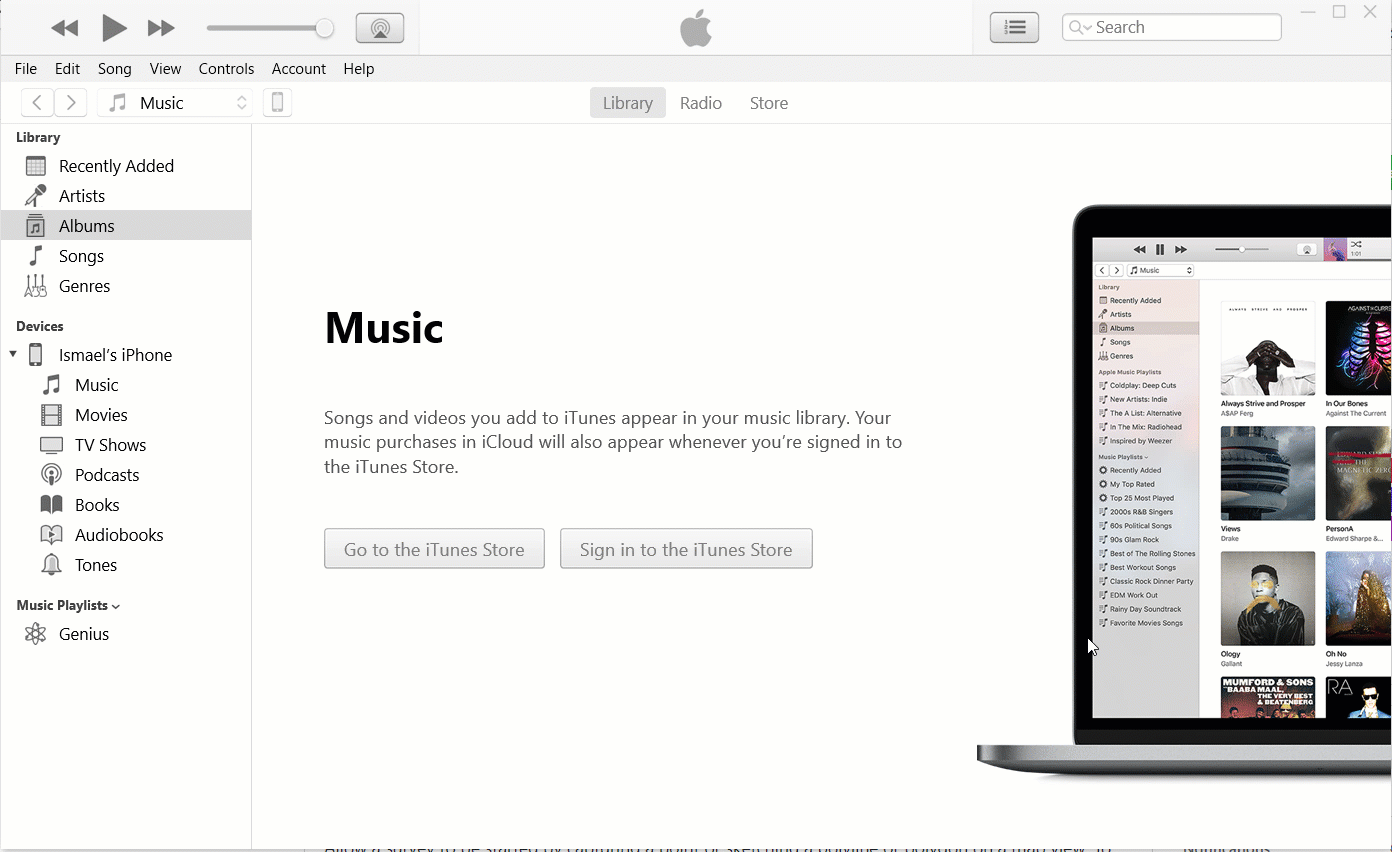
Alternatively, you can also connect your iOS device to your laptop and use iTunes as shown in the animation below:
You can also Transfer files between your computer & Android device - Android Help.
Configuring the File Location Provider in the QuickCapture field app
All that's left to do now is target your NMEA file from the QuickCature app. Here is how:
- While in the project gallery, tap on your profile icon.
- Go to Settings
- Open the Location Provider section
- Tap on Via File
- Browse for your NMEA log file
- Tap on Add (IMPORTANT!)
- Return to the project gallery and open your project
Once the file location provider has been set, your location will loop through the coordinates in your NMEA file. Speed, direction of travel, fix time and other properties will be honored.
This may not be something you need to use every day, but if you do, I hope these instructions will help you!
You must be a registered user to add a comment. If you've already registered, sign in. Otherwise, register and sign in.