- Home
- :
- All Communities
- :
- Products
- :
- Mapping
- :
- Mapping Blog
- :
- A Method to Convert Google Building Outlines to Po...
A Method to Convert Google Building Outlines to Polygons
- Subscribe to RSS Feed
- Mark as New
- Mark as Read
- Bookmark
- Subscribe
- Printer Friendly Page
- Report Inappropriate Content
Google has added 25 million buildings in the United States this year to their Map view. These building outlines can be converted to polygons in ArcGIS if you have Photoshop and do the following steps:
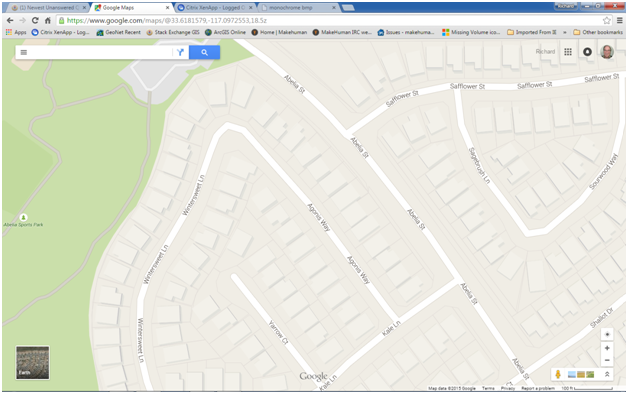
1. Locate an area with buildings in Google Maps with the Map view on. Maximize the browser window. Zoom until you are at least at the second level zoom above the minimum level to make the buildings appear to get enough resolution.
2. Press the Alt+Prt Scr buttons on the keyboard to get a screen shot (or use your favorite screen shot software).
3. Open Photshop and create a new project (on the menu use File -> New or press Ctrl+N).
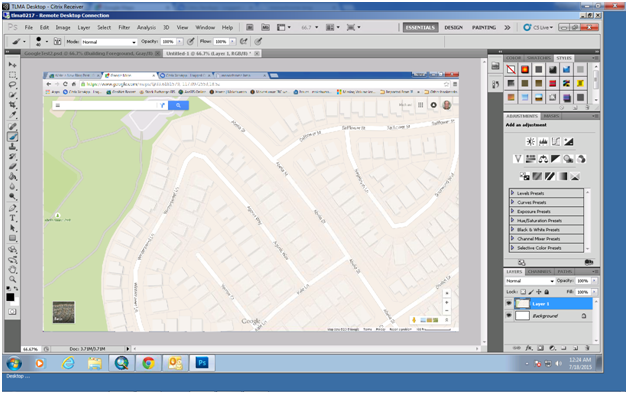
4. Paste the screenshot into the Photoshop project (on the menu use Edit -> Paste or Ctrl+V).
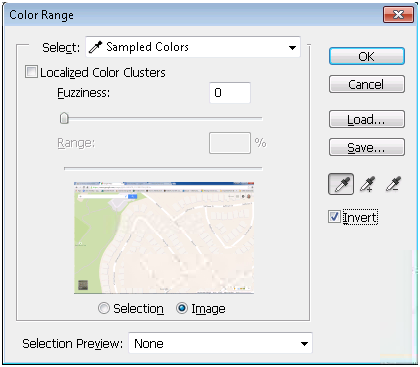
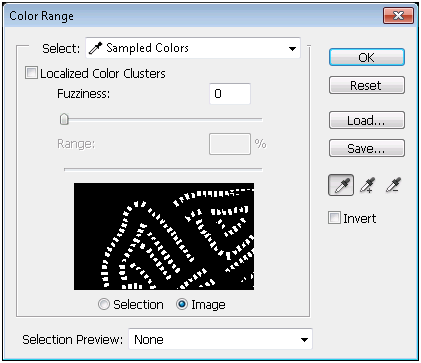
5. From the Menu choose Select -> Color Range… (I added a custom keyboard shortcut of Alt+Shift+Ctrl+R)
6. With the Select option set to Sampled Color click the eyedropper cursor on the center of a building. Check the inverse option. Press the OK button.
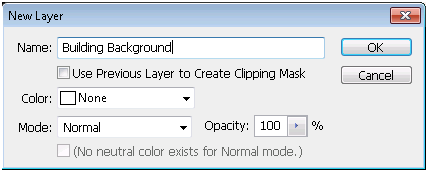
7. With the selection still active create a new layer (on the menu use Layer -> New -> Layer… or press Shift+Ctrl+N). Name the layer Building Background and press the OK button.
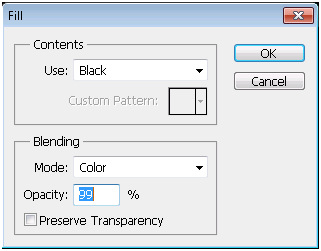
8. Add a fill to the layer (from the menu use Edit -> Fill… or press Shift+F5). Choose the Mode “Black” and press the OK button.
9. Deselect everything by pressing Ctrl+D. From the menu choose Select -> Color Range... (I added a custom keyboard shortcut of Alt+Shift+Ctrl+R). With the Select option set to Sampled Color click the eyedropper cursor on the center of a building. Press the OK button.
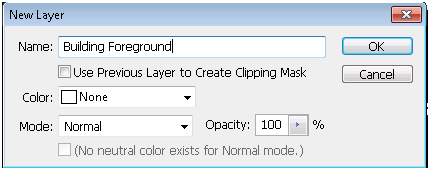
10. With the selection still active create a new layer (on the menu use Layer -> New -> Layer… or press Shift+Ctrl+N). Name the layer Building Foreground and press the OK button.
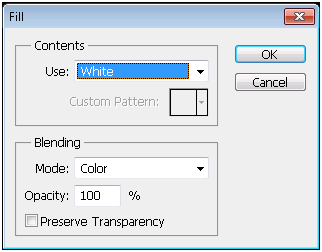
11. Add a fill to the layer (from the menu use Edit -> Fill… or press Shift+F5). Choose the Mode “White” and press the OK button.
12. You should now have a Black and White image. The outlines of the roads will have areas with white pixels that need to be painted out. Set the palette color to Black. Right click on the map and choose a paint brush size that fits comfortably within the roadway (about 40 pixels). Paint out the small white pixels. Also paint out partial buildings on the edges of the map.
13. On the menu choose Image -> Mode -> Grayscale… (I added a custom keyboard shortcut to the Grayscale option of Alt+Shift+Ctrl+G) and then choose to not Flatten the image and to Discard the Color information.
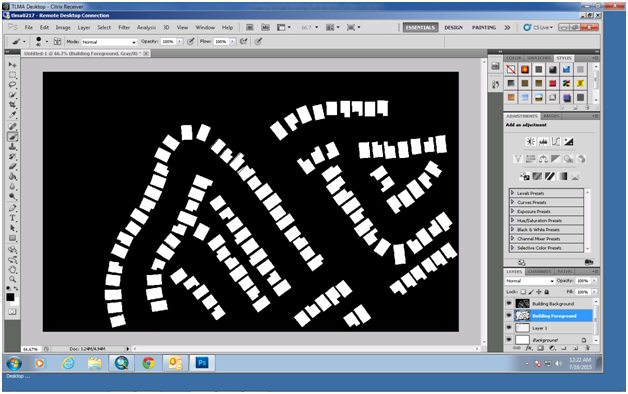
14. Save the photoshop project as a BMP. Use 8 Bit depth (if it says higher depths you have a problem).
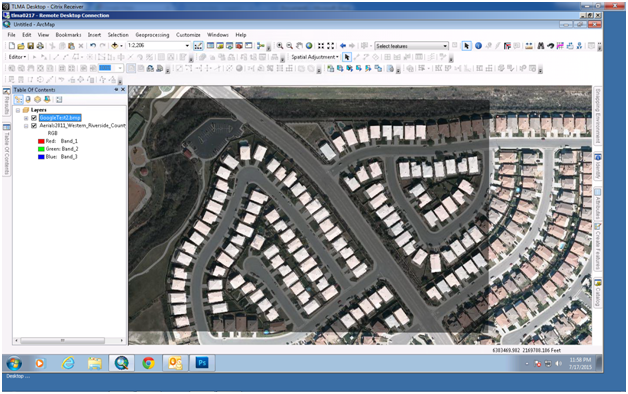
15. Open a new ArcMap session and just add aerials or a satellite basemap.
16. Right click the Date Frame and chose Date Frame Properties. On the Freme tab choose the background to be black.
17. Locate the same set of buildings on the aerial.
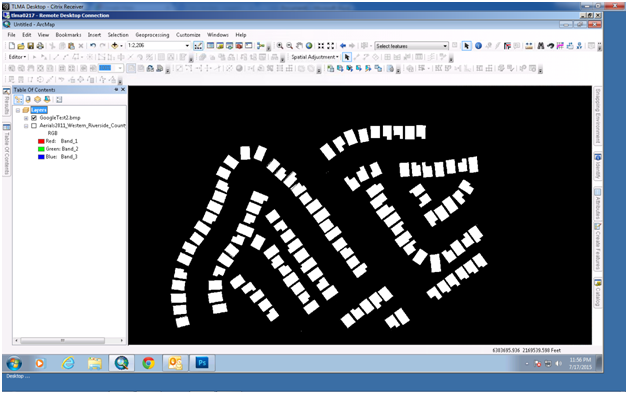
18. Add the BMP you saved in step 14. Say OK to the warning about the image not being spatially referenced.
19. Change the BMP layer transparency to 50%.
20. Right click the BMP layer and Zoom to Layer.
21. Open the Georeferencing toolbar.

22. Press the Add Control Points button and choose a corner of a building that you can match to the aerial.

23. Press the Back button to return to the aerial and set the control point at the corner of the same building on the aerial.
24. Set another control point that is vertical or horizontal to the previous point, not diagonal.
25. Set additional control points if necessary, but not more than 4 total points.
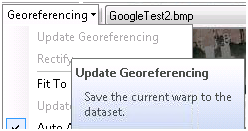
26. When you are satisfied with the georeferencing position on the toolbar choose Georeferencing -> Update Georeferencing.
27. Set the BMP transparency to 0% and turn off the aerials.
28. Open the Toolboxes -> System Toolboxes -> Conversion Tools Toolbox -> From Raster Toolset -> Raster to Polygon tool.
29. Choose the bmp as the input and set the output location and name to a geodatabase feature class and press OK.
30. Start an editor session on the polygon layer you just created and delete the background polygon.
31. Open the Table View for the new polygon feature class and sort by shape area. Choose any very small polygons that are not buildings that you did not paint out and delete them.
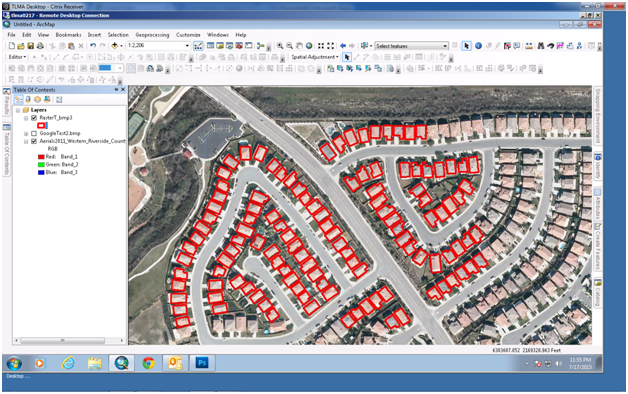
32. Set up a permanent feature class that you will append all new buildings to or append this set of buildings to the feature class you set up previously. The result shown below created 115 building outline polygons (the polygons are set to hollow with a red outline that is 3 points thick).
You must be a registered user to add a comment. If you've already registered, sign in. Otherwise, register and sign in.